

Creating an origami face cat is a delightful way to explore the ancient Japanese art of paper folding. Perfect for beginners and experienced folders alike, this simple yet adorable design brings joy to crafters of all ages. In this comprehensive guide, we’ll walk through each fold and crease to help you create the perfect feline friend from a single sheet of paper. Whether you’re crafting with children, looking for a mindful activity, or simply enjoying a creative break, these detailed instructions will lead you to origami success.
What You’ll Need
Before diving into the folding process, gather these basic supplies:
- One square sheet of origami paper (white side recommended for beginners)
- A flat surface for folding
- Your fingers (the best tools for precise creasing!)
- Optional: A bone folder or ruler edge for crisp creases
- Markers or colored pencils for the final details
Step 1/2: Begin with the Foundation Fold
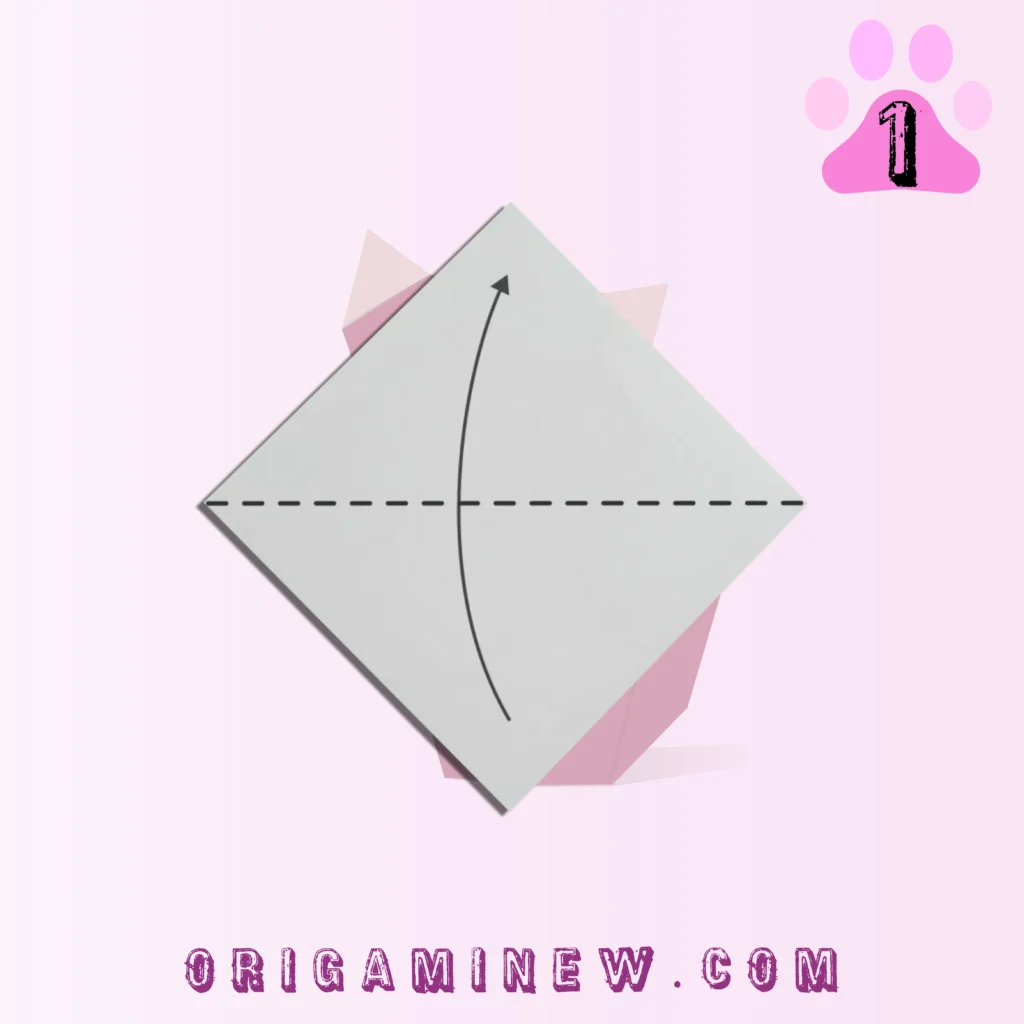

Start with the white side of the paper facing up and fold it in half diagonally. This initial fold creates the foundation for your cat’s face structure. Make sure to align the corners precisely for a perfect triangle. Press firmly along the crease to establish a sharp fold that will serve as your reference point for subsequent steps.
This diagonal fold is crucial as it determines the symmetry of your finished cat face. Take your time with this step, as a properly aligned first fold makes all the difference in your final result.
Step 3/4: Find the Center Point
Take the bottom point of your triangle and bring it over to the opposite side, making a small crease along the bottom edge. This small fold marks the middle of your paper—a critical reference point for the following steps. After creating this marker crease, unfold the paper back to its triangular shape.
Finding the middle is essential for balance in your design. This center mark will guide the placement of your cat’s features and ensure both sides of the face develop symmetrically as you continue folding.
Step 5/6: Form the Ears

Now for the distinctive cat ears! Take the right point of your triangle and bring it up and to the right at an angle, creating a fold that points away from the top. The precise angle determines how your cat’s ears will look—steeper angles create more pointed ears, while gentler angles make rounder ears.
Repeat this folding process with the left point, ensuring both sides match for symmetry. You can adjust these angles to personalize your cat’s appearance—experiment with different ear positions to create cats with unique personalities! Some folders prefer alert, perky ears while others enjoy a more relaxed ear position.
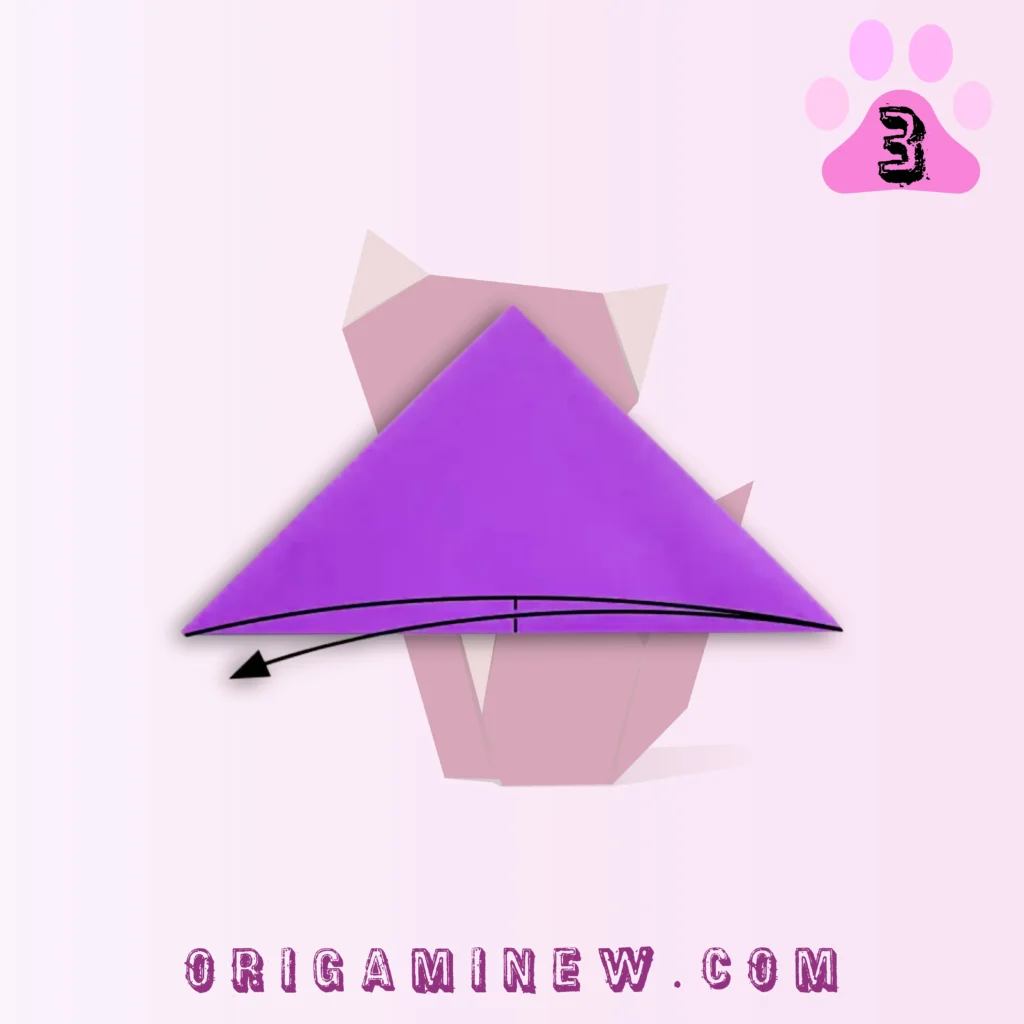
Step 7/8: Create the Chin
Fold the bottom point of your triangle upward to form your cat’s chin. The amount you fold up will determine the length and shape of your cat’s face—just a small fold creates a pointed chin, while folding further up gives your cat a rounder, more compact face.
This step allows for considerable artistic freedom. Based on your preference, you can create a delicate pointed chin for an elegant Siamese-inspired look, or a shorter, rounder chin for a more playful kitty appearance.
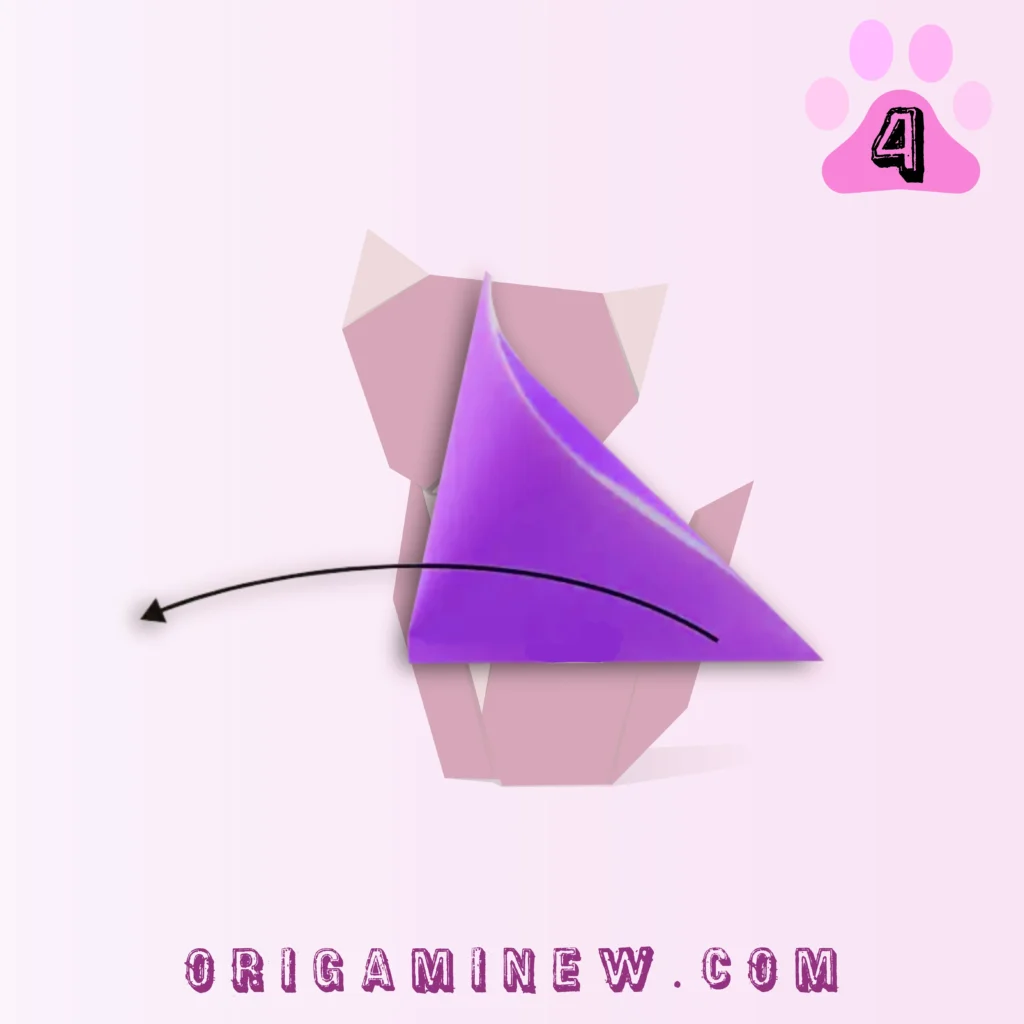
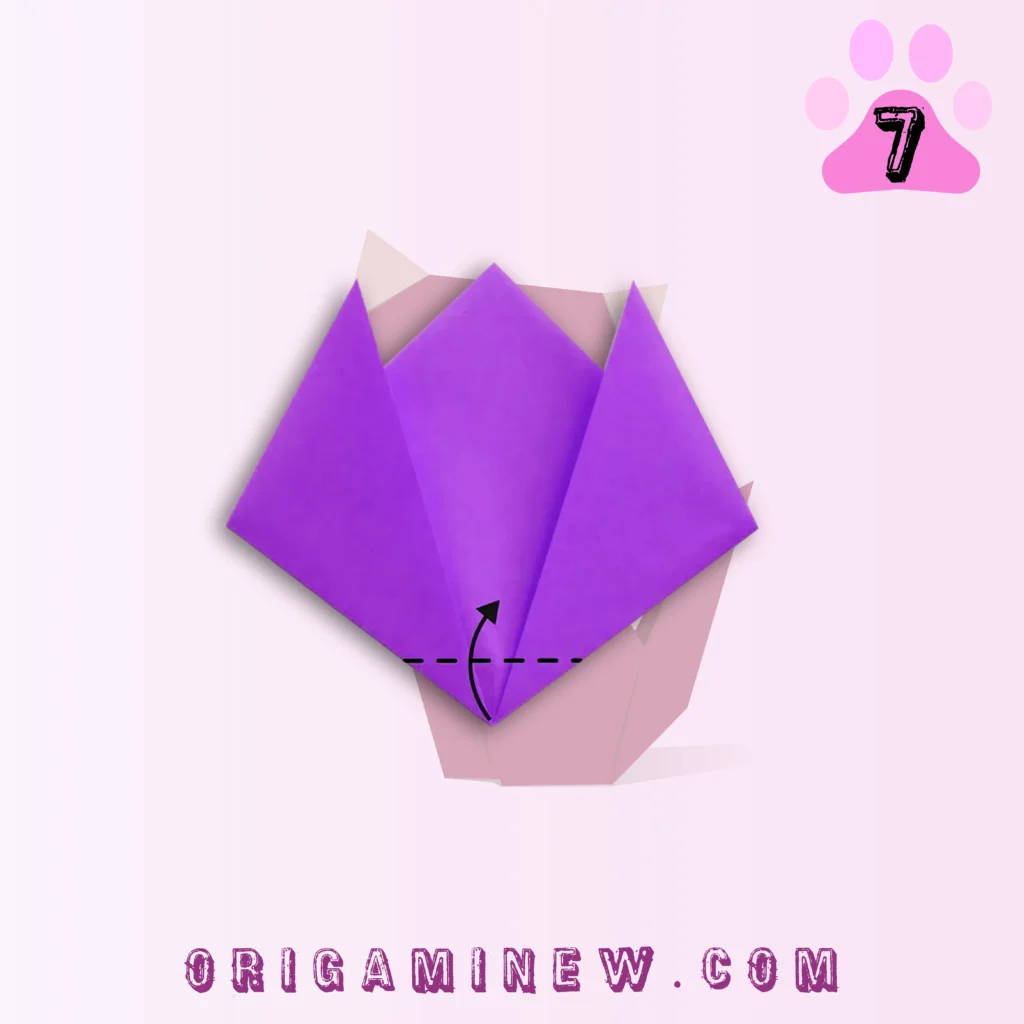
Step 9/10: Define the Forehead


Carefully lift the newly formed ears slightly, then fold the top point of the face (located under the two ears) downward. This fold creates your cat’s forehead and helps establish the proper face proportions.
Alternatively, you can flip the paper over and make this fold from the reverse side if you find it easier. The video reference shows both techniques. This fold determines how much “forehead” your cat will have, affecting its overall expression.
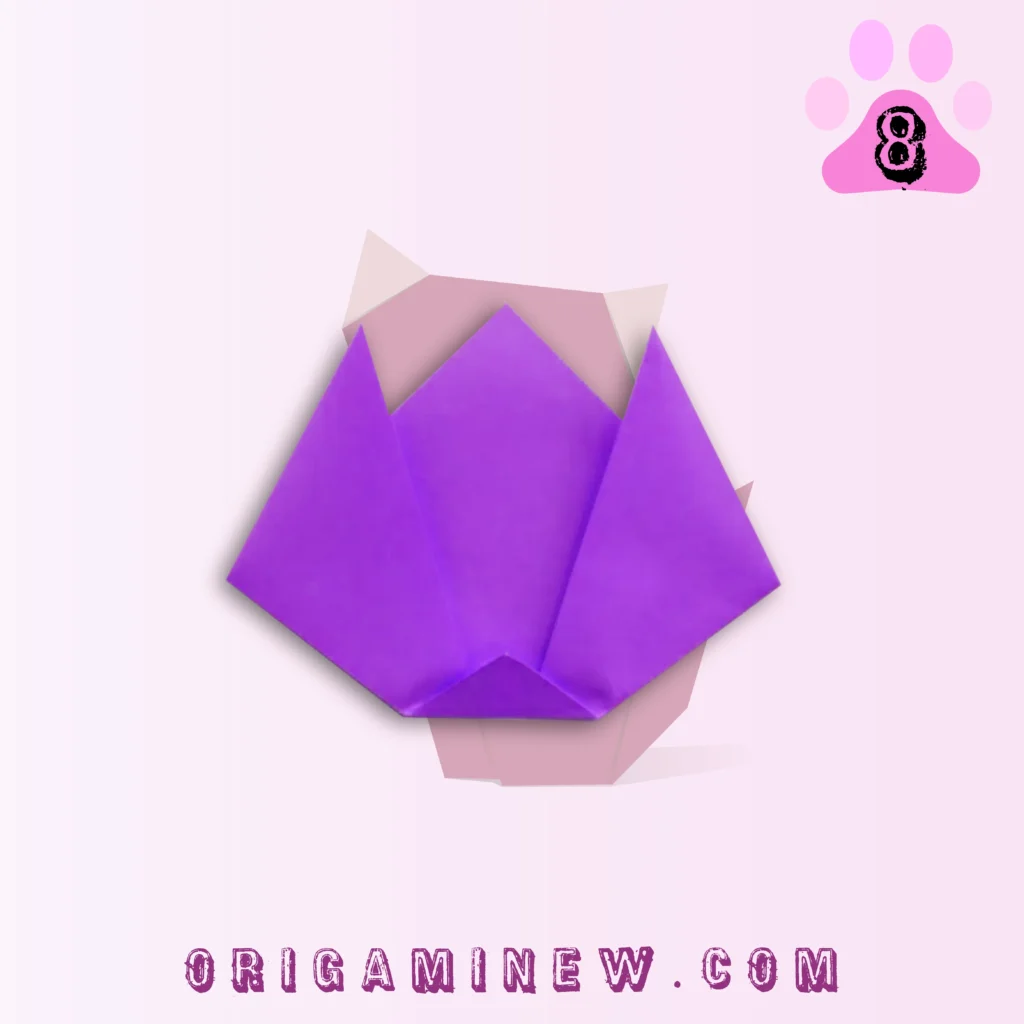
Step 11/12: Shape the Cheeks

To give your cat character and dimension, fold both the right and left corners inward slightly. These small folds adjust the “cheekbones” of your cat, creating a more three-dimensional look to the face.
The amount you fold inward is entirely up to you—subtle folds create a sleeker cat, while more pronounced folds give your cat chubby, adorable cheeks. This step allows for significant customization, so feel free to experiment until you achieve your desired look.
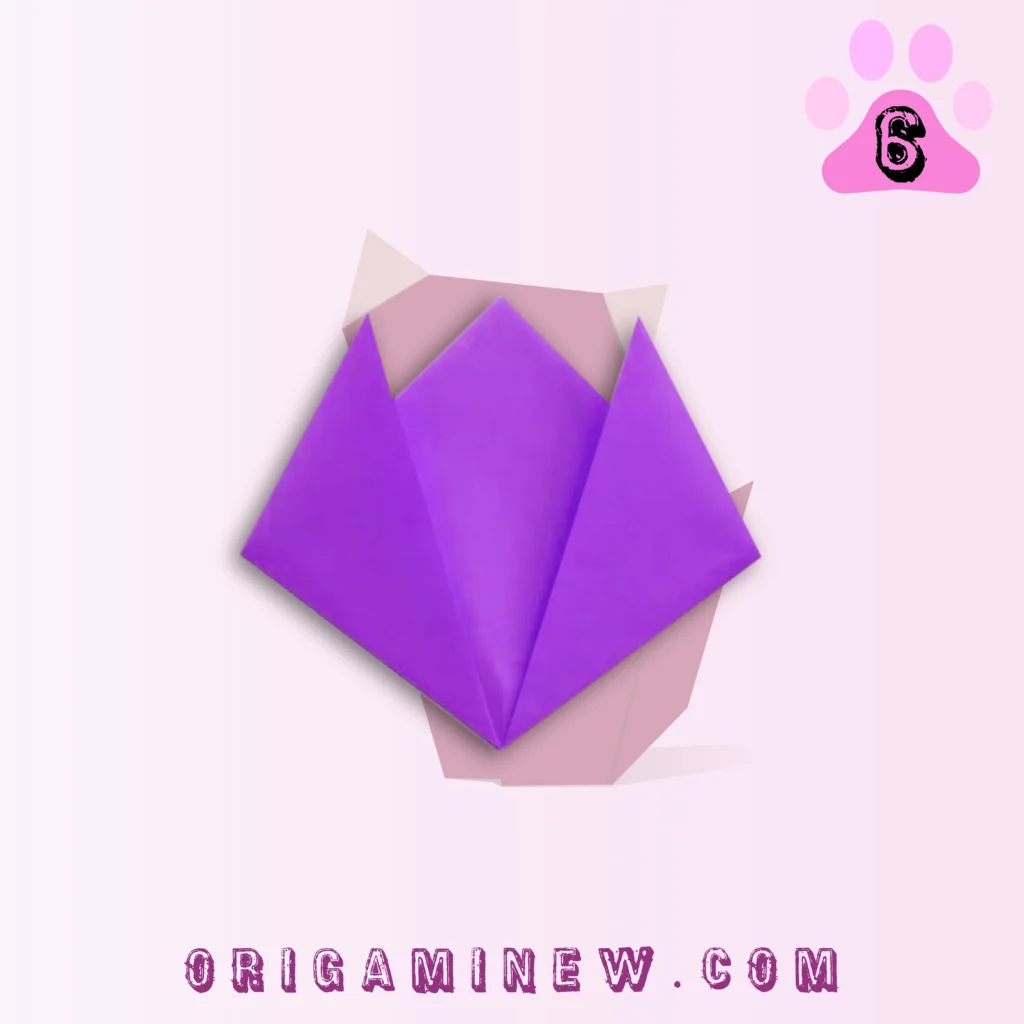
Step 13: Complete the Base Design
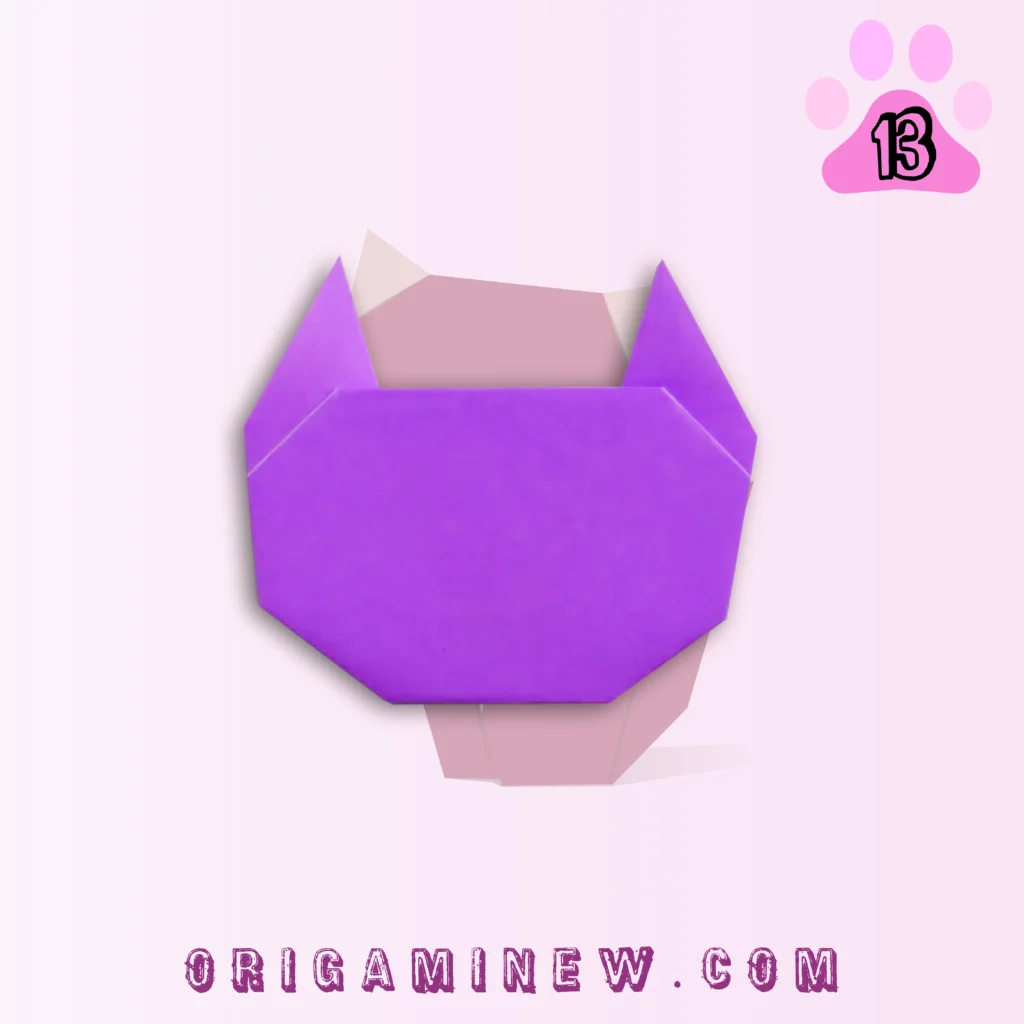
Flip your creation over to reveal your completed origami cat face! Take a moment to make any final adjustments to the ears, cheeks, or chin to perfect your design. The basic structure is now complete.
Some crafters enjoy leaving their designs in this clean, minimalist state, appreciating the simple geometric beauty of the folded paper. Others prefer to add details in the next step for a more expressive cat.
Step 14: Add Personality with Details

Now for the fun part! Use markers, colored pencils, or fine-tip pens to draw your cat’s facial features. Add eyes (almond-shaped for a traditional cat look), a small triangular nose, a mouth (perhaps a simple curved line), and of course, those lovely whiskers that make cats so distinctive.
You can keep the details simple or go elaborate—draw long eyelashes, freckles, or even a pattern resembling fur. This step transforms your origami from a simple folded paper into a character with personality and charm.
Tips for Origami Success
- Crease with Purpose: Each fold should be firmly creased. Run your fingernail or bone folder along each fold to ensure it stays in place.
- Symmetry Matters: For a balanced cat face, pay attention to matching angles on both sides.
- Paper Choice: While white paper with color on the reverse is traditional, don’t be afraid to experiment with patterned papers for unique cats.
- Size Considerations: Larger paper is easier for beginners, while experienced folders might enjoy the challenge of smaller sheets.
- Be Patient: If a fold doesn’t look right, simply unfold and try again. Origami is about the process as much as the result.
Why Origami Cats Make Perfect Crafts
Origami cats are more than just paper creations—they’re small achievements that bring satisfaction and joy. These modest feline friends can decorate your workspace, serve as bookmarks, or become greeting card embellishments. Children particularly enjoy creating these cats, as the relatively simple design offers quick rewards while teaching focus and following instructions.
Regular origami practice has been shown to improve fine motor skills, concentration, and spatial reasoning. It’s a mindful activity that connects us to a centuries-old tradition while providing a brief escape from digital distractions.
Variations to Try
Once you’ve mastered the basic origami cat face, consider these creative variations:
- Use different colors of paper for diverse cat breeds
- Try larger or smaller folds for the ears to create different cat “personalities”
- Experiment with colored paper to represent specific cat breeds
- Create a family of cats in various sizes
Conclusion
Congratulations! You’ve successfully created an adorable origami cat face by following these eight essential steps. What begins as a simple square of paper transforms through your careful folding into a charming feline friend with personality and character.
The beauty of origami lies in its simplicity and infinite variation—no two cat faces will be exactly alike, making each of your creations unique. As you continue practicing, you’ll develop your own style and preferences for how your origami cats should look.
We’d love to see your creations! Share photos of your origami cats in the comments below or tag us on social media. Happy folding!
Resources for Origami Enthusiasts
- Origami USA – The American origami organization with resources for folders of all levels
- Japan Origami Museum – For historical context and inspiration
- International Origami Center – Offering workshops and advanced techniques
Remember, the joy of origami comes from the process as much as the finished creation. Take your time, enjoy each fold, and soon you’ll have a delightful paper cat smiling back at you!