
Introduction:
Welcome to the foundational world of origami petal folds! This comprehensive tutorial will guide you through mastering one of the most essential techniques in paper folding—the petal fold. This fundamental method forms the building blocks for countless Origami Petal creations, from elegant lotus flowers and graceful lilies to decorative kusudama balls and modular designs. Whether you’re just beginning your Origami Petal journey or looking to refine your skills, understanding the petal fold will dramatically expand your paper folding capabilities. The beauty of this technique lies in its versatility and the elegant dimensional quality it brings to flat paper. In this step-by-step guide, we’ll break down the petal fold into manageable stages, with clear visuals and detailed instructions to ensure success. Once mastered, this essential Origami Petal technique will become second nature, opening the door to creating increasingly complex and beautiful paper art. Grab a square sheet of Origami Petal paper—we’re using green in this tutorial for clarity—and let’s begin developing this crucial skill that will transform your origami practice!
Detailed Step Descriptions:
STEP 1: POSITIONING THE SQUARE DIAGONALLY
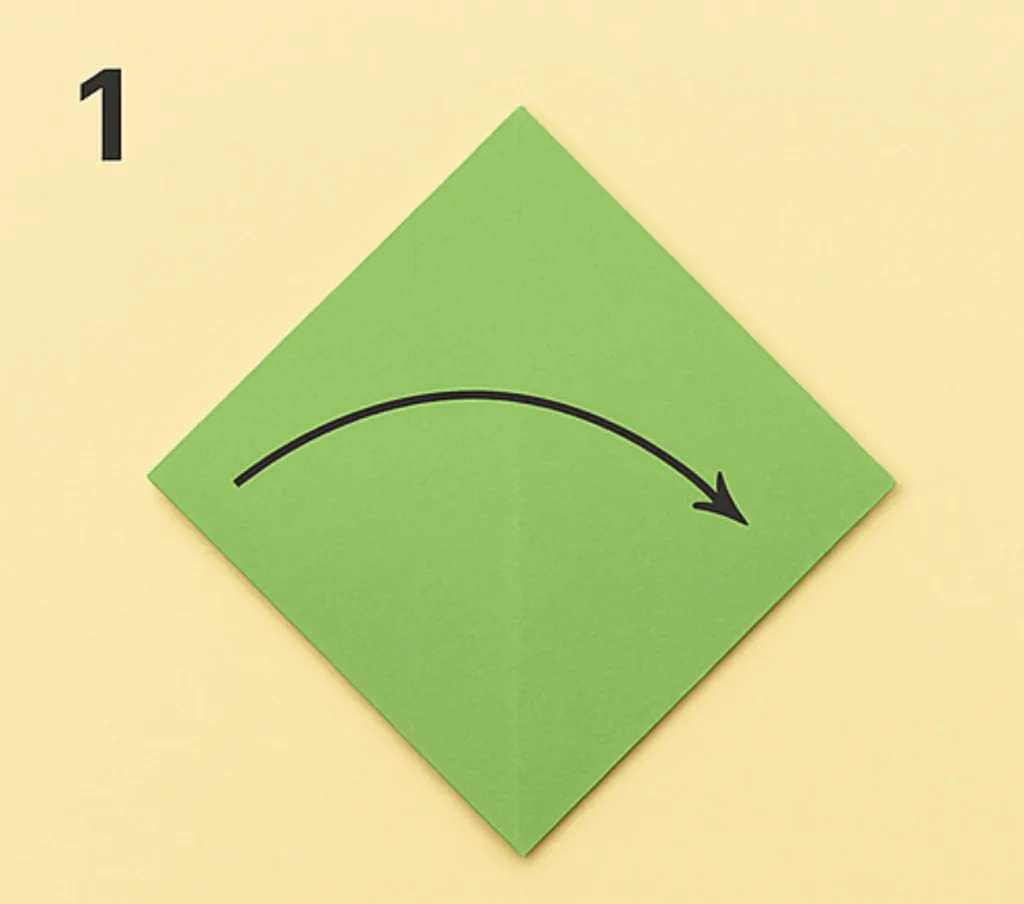
Begin with your Origami Petal paper positioned as a diamond, with corners pointing up, down, left, and right. This diagonal orientation is the standard starting position for creating effective petal folds in origami flower designs. Professional Origami Petal artists recommend using solid-colored paper when learning this technique for better fold visibility. The arrow indicates the first folding direction, which will establish the foundation for your petal fold technique.
STEP 2: CREATING THE REFERENCE CREASES

Fold the paper along both the vertical and horizontal center lines, then unfold to create guiding creases. These reference lines form a crucial road map for precise petal fold creation and proper paper alignment. Japanese origami masters emphasize the importance of these preliminary creases for achieving symmetrical petal forms. After making these folds, your paper should have clear horizontal and vertical crease lines forming a cross pattern through the center.
STEP 3: INITIATING THE PETAL FOLD
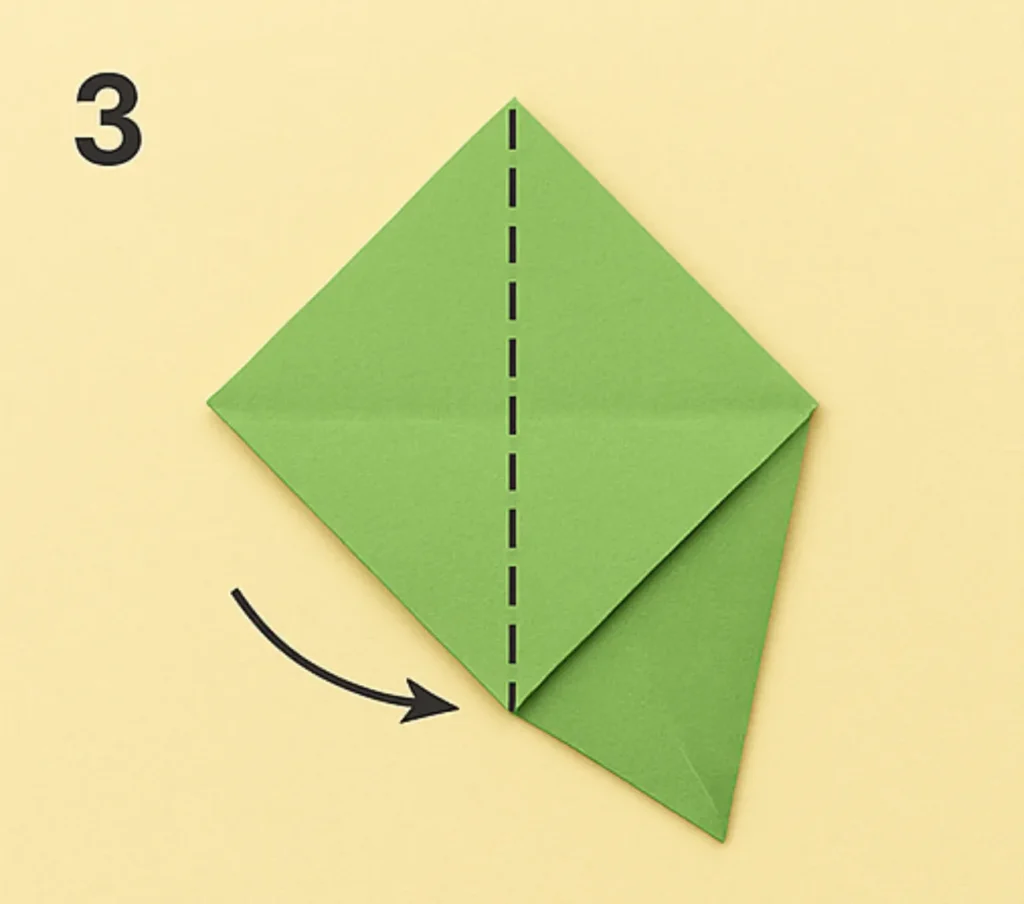
Begin the actual petal fold by bringing the bottom corner up along the vertical centerline. This pivotal fold starts transforming the flat paper into the three-dimensional form that characterizes petal structures. Popular origami flower tutorials build upon this basic technique to create diverse botanical designs. As you fold, maintain alignment with the vertical crease to ensure a symmetrical and clean petal formation.
STEP 4: FOLDING BOTH SIDES INWARD
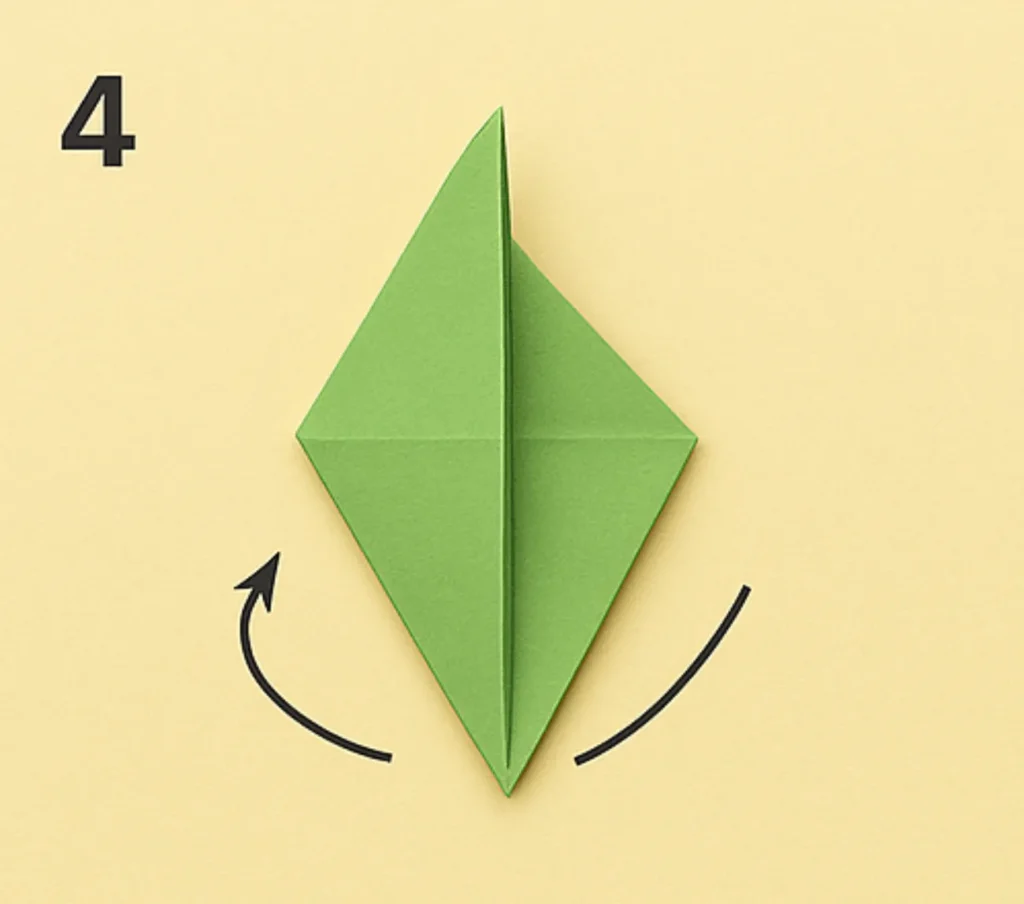
Fold both side corners inward toward the center line as indicated by the directional arrows. This dual-fold technique creates the narrow, pointed shape that mimics natural flower petals in origami designs. Expert paper folders consider this step the defining movement that creates the distinctive petal fold structure. Apply even pressure on both sides to ensure your petal maintains perfect symmetry and balanced proportions.
STEP 5: REINFORCING THE PETAL SHAPE

Strengthen the petal structure by folding the side flaps more firmly toward the center. This refinement step enhances the three-dimensional quality that makes petal folds so effective in flower origami. Traditional origami petal techniques emphasize these reinforcing folds for creating stable, well-defined flower elements. The arrows indicate the inward folding direction that consolidates the petal’s distinctive tapered shape.
STEP 6: COMPLETING THE BASIC PETAL FOLD

Finalize your petal fold by ensuring all creases are sharp and the structure maintains its elongated diamond shape. The completed petal fold should now display the characteristic pointed top with a clean vertical center line. This finished basic unit serves as the building block for countless origami flowers, from simple designs to complex blooms. To create complete flowers, you would typically repeat this technique multiple times and arrange the petals in circular patterns.
Conclusion:
Congratulations on mastering the essential origami petal fold! This fundamental technique is truly the gateway to creating countless beautiful paper flowers and decorative models. By understanding how to transform a flat square into a dimensional petal structure, you’ve acquired a skill that forms the foundation of origami floral design. The petal fold’s versatility allows it to be adapted for various flower types—from simple four-petal blooms to complex multi-layered creations like roses, lilies, and chrysanthemums. As you continue your origami journey, you’ll discover how combining multiple petal folds in different arrangements creates increasingly sophisticated designs. Practice this technique regularly to develop muscle memory and precision, experimenting with papers of different sizes, weights, and colors to see how they affect your finished creations. We hope this tutorial has provided a solid foundation for your paper folding adventures and inspires you to explore the beautiful world of origami flowers!
- Explore our complete origami flower techniques collection → Discover more essential folding methods beyond the petal fold, including calyx formations, leaf structures, and stem techniques.
- Create beautiful origami lotus flowers using petal folds → Apply your new petal fold skills to craft elegant lotus blossoms using this traditional Japanese paper folding design.
- Best papers for origami petal techniques → Learn which paper types, weights, and sizes work best for creating crisp, well-defined petal folds in your origami flowers.
- Advanced petal fold variations → Ready for more challenges? Discover complex petal fold variations including curved petals, multi-layered forms, and textured designs.
- Create a complete origami flower bouquet → Combine your petal fold skills with other techniques to craft stunning paper flower arrangements that last forever.
