
Introduction:
Welcome to the fascinating world of three-dimensional origami! This comprehensive tutorial will guide you through creating a classic origami cube, one of the most popular 3D paper folding projects. The origami cube is perfect for beginners looking to explore dimensional paper art beyond flat designs. This versatile creation serves multiple purposes: as a decorative element, an educational tool for teaching geometry, a stress-relief toy, or even as gift boxes for small items. What makes this origami cube special is its inflation technique—you’ll literally breathe life into your creation by blowing air into it! Using just a single square sheet of paper, you’ll transform a flat surface into a perfect three-dimensional cube through strategic folding and clever engineering. Whether you’re crafting with children, teaching mathematics concepts, or simply enjoying the meditative process of paper folding, this origami cube project offers both satisfaction and practical applications. Let’s begin this exciting journey into 3D origami!
STEP 1: CREATING THE X CREASE PATTERN
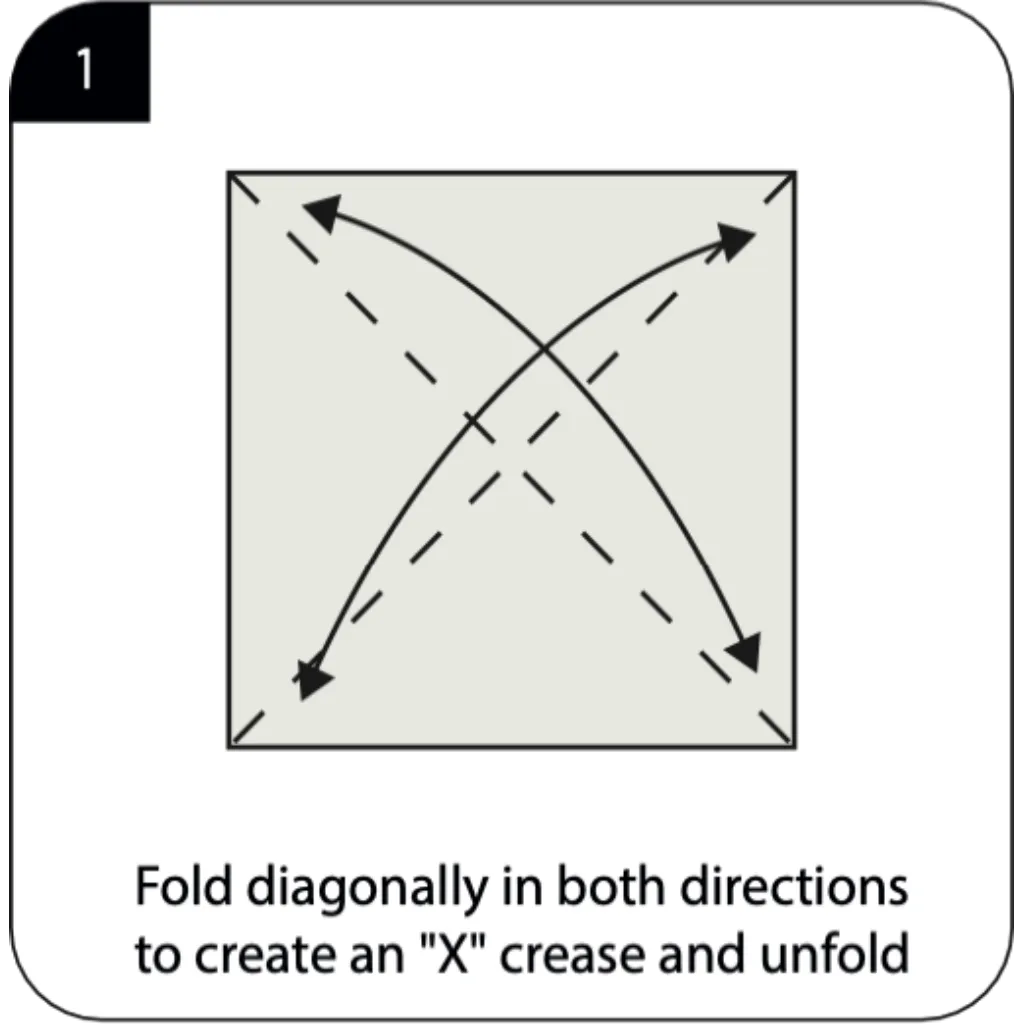
Begin your origami cube by folding the square paper diagonally in both directions to create an “X” crease pattern. These foundational diagonal folds establish the geometric framework essential for creating a perfect 3D cube structure. Professional origami artists emphasize the importance of precise creasing for achieving symmetrical three-dimensional forms. After completing both diagonal folds, unfold the paper completely to reveal the X-shaped guidelines for subsequent steps.
STEP 2: FOLDING HORIZONTALLY
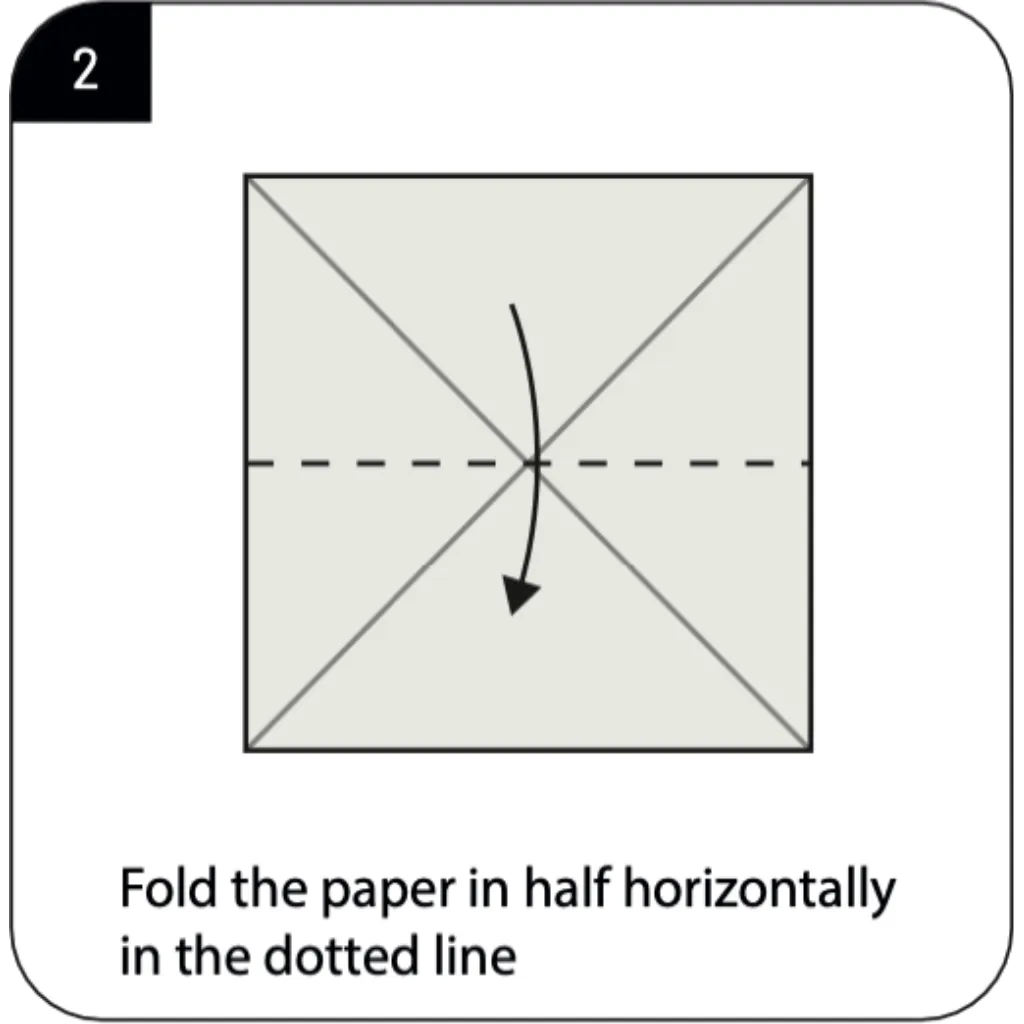
Fold the paper in half horizontally along the dotted line shown in the diagram. This horizontal fold bisects your paper and works in conjunction with the diagonal creases to create the cube’s framework. Popular origami cube tutorials highlight this step as crucial for establishing the proper proportions of your 3D model. The combination of diagonal and horizontal creases creates the mathematical precision needed for a well-formed cube.
STEP 3: CREATING THE SIDE CORNERS
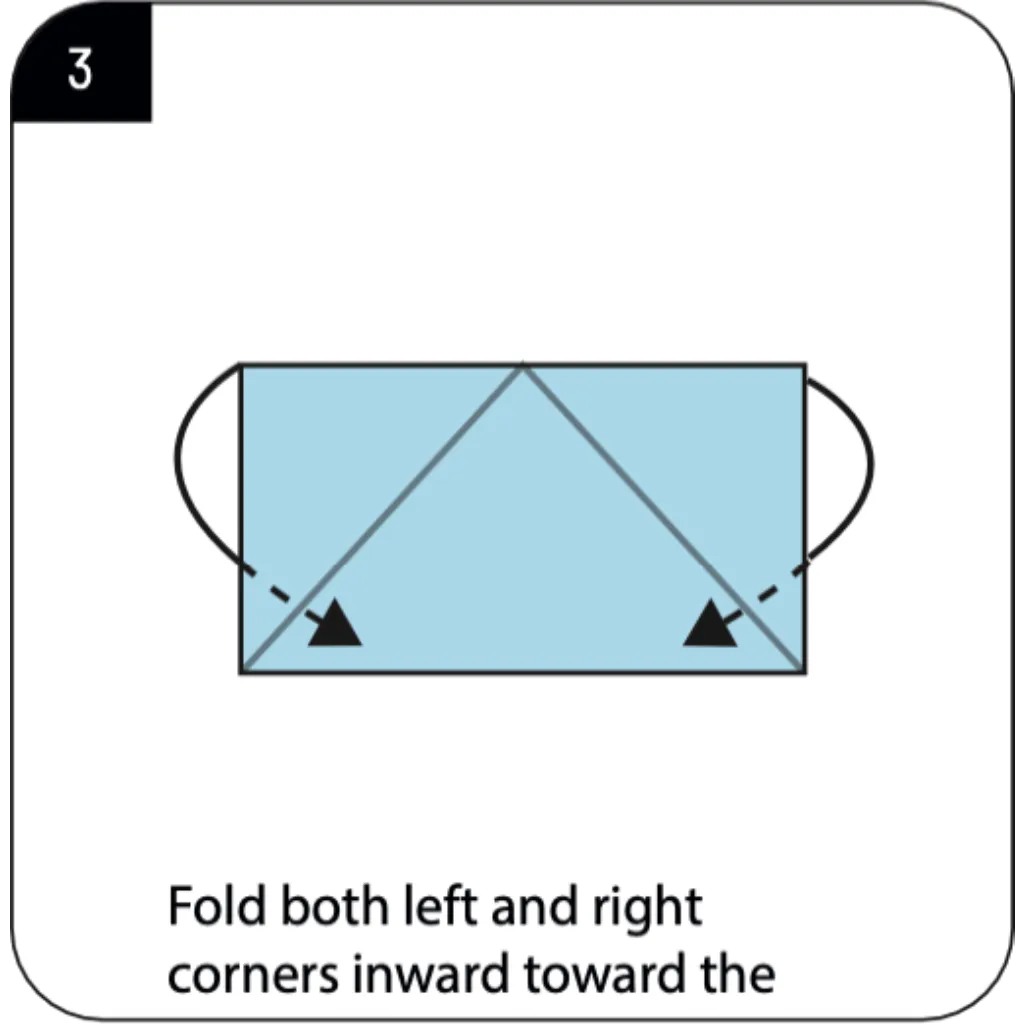
Fold both the left and right corners inward toward the center of your paper model. This step begins transforming the flat paper into the dimensional structure that will become your origami cube. The blue shading in the diagram indicates where your paper will overlap, creating the layered structure necessary for stability. Precise alignment of these corner folds ensures your finished cube will have clean edges and proper dimensions.
STEP 4: FOLDING THE TOP FLAP
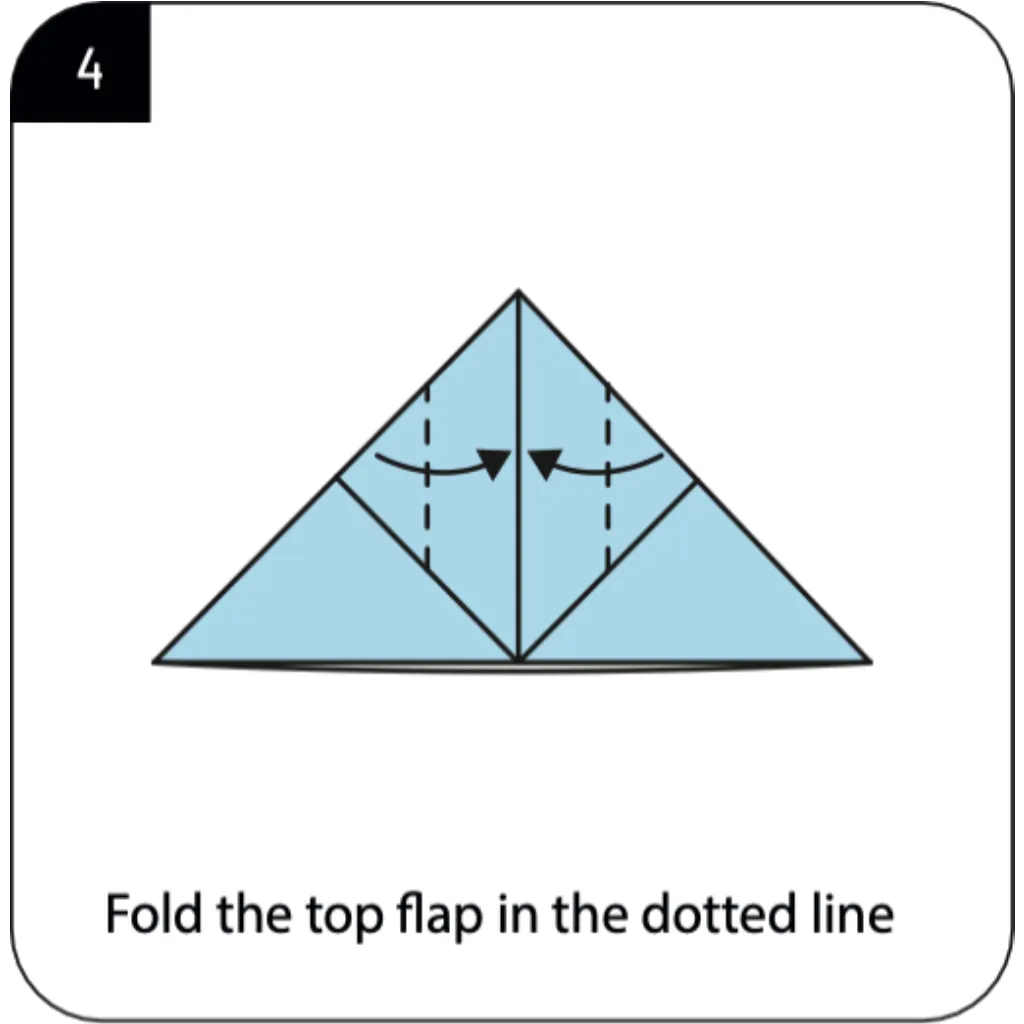
Fold the top triangular flap downward along the dotted line as indicated in the diagram. This fold creates one of the faces of your future cube while establishing the pocket mechanism for the final assembly. 3D origami projects rely on these strategic folds to create both structure and the means for final construction. The downward fold should be crisp and aligned perfectly with the underlying layers for best results.
STEP 5: CREATING THE CENTER STRUCTURE
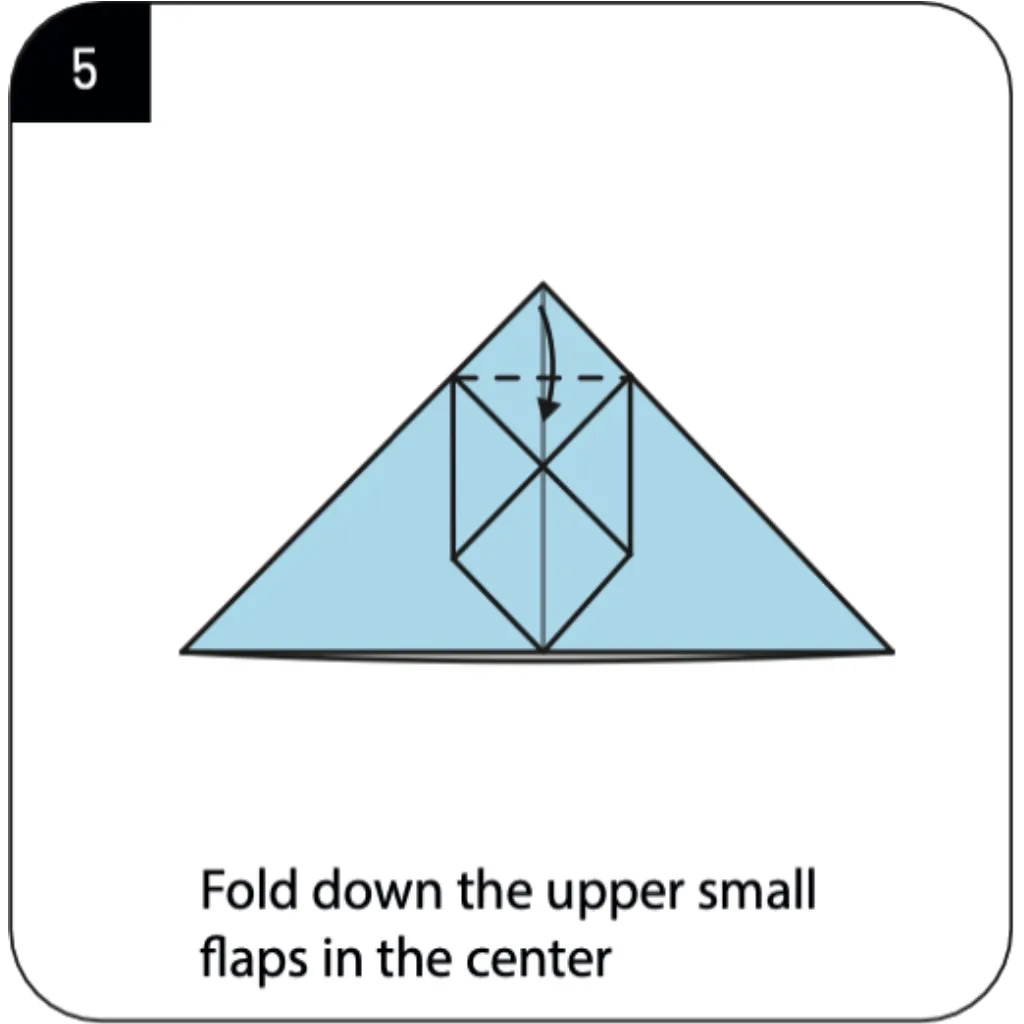
Fold down the upper small flaps in the center of your model as shown by the directional arrows. These smaller folds create the intricate locking mechanism that will hold your origami cube together when inflated. Paper cube tutorials emphasize the importance of these detail folds for maintaining structural integrity. The precision of these center folds directly impacts how well your cube will hold its shape once completed.
STEP 6: INSERTING AND TURNING
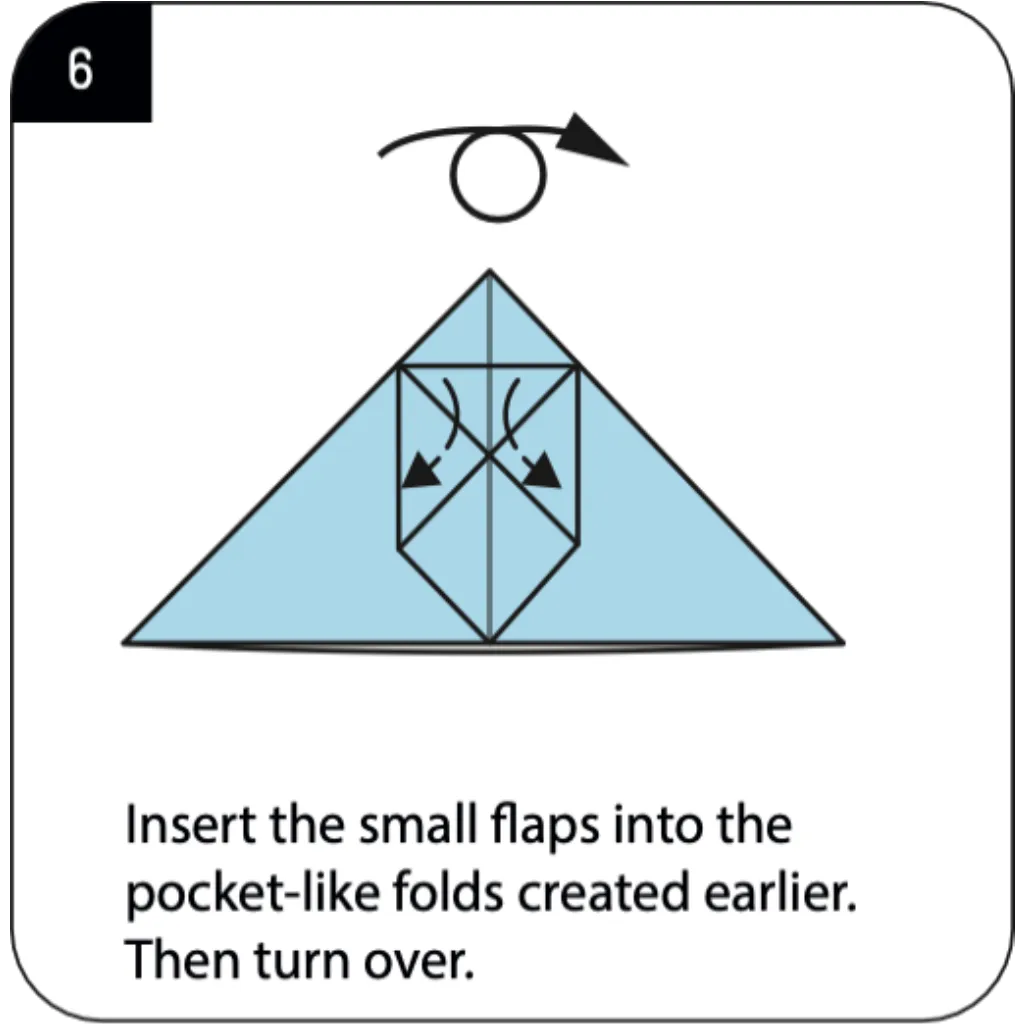
Insert the small flaps into the pocket-like folds created in earlier steps, then turn the model over. This crucial assembly step locks the various elements together, preparing your origami for its transformation into a cube. The insertion technique is common in 3D origami designs, creating secure connections without glue or tape. After turning over, you’ll work on the opposite side to complete the symmetrical structure of your cube.
STEP 7: FOLDING BOTTOM CORNERS

Fold the bottom corners upward again on this newly exposed side of your origami model. This mirrors the corner folding from step 3, ensuring your cube has symmetrical construction on all sides. Origami box and cube designs often require repetitive folding patterns to achieve dimensional stability. The upward corner folds create additional structural support for the three-dimensional form you’re building.
STEP 8: CREATING INWARD FOLDS
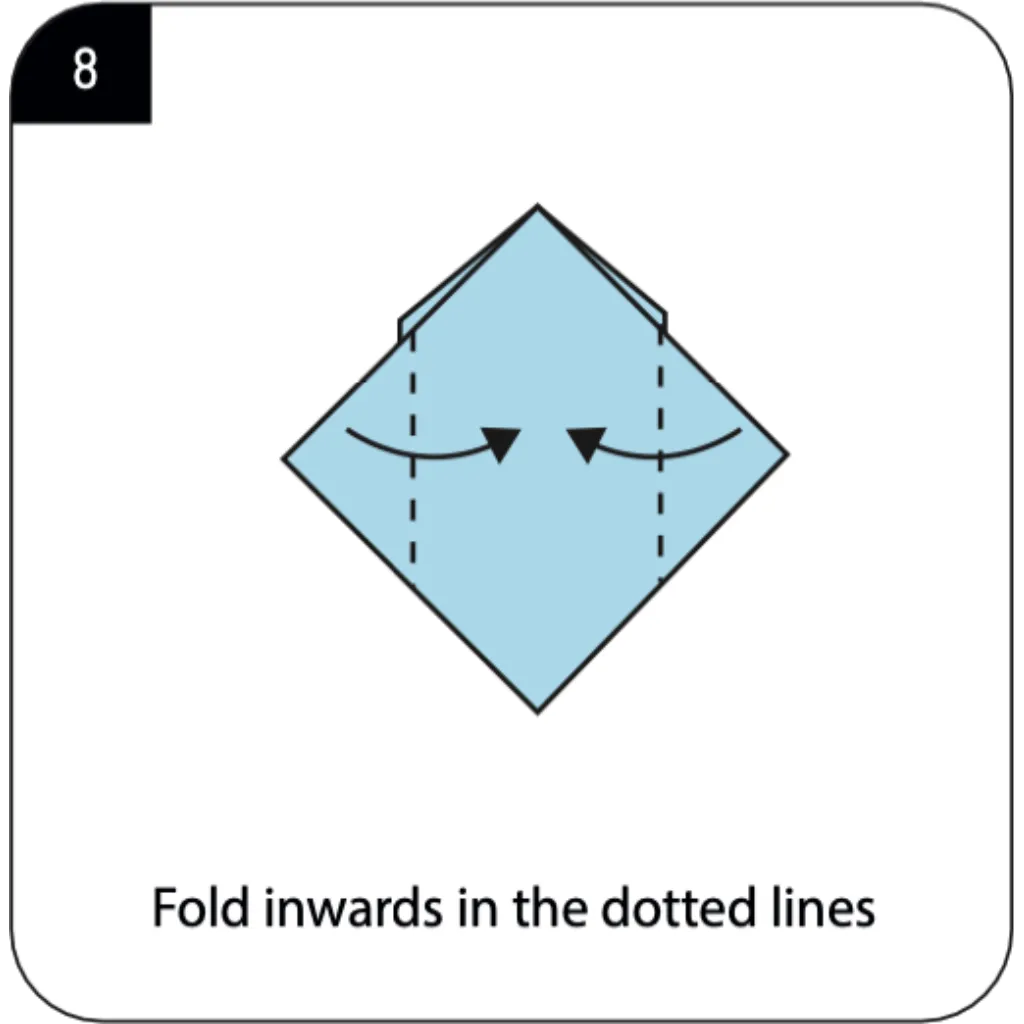
Fold inward along the dotted lines as indicated by the arrows in the diagram. These inward folds continue building the complex internal structure that allows the cube to maintain its shape. 3D paper folding techniques rely on these precise directional folds to create self-supporting structures. The blue shading shows where paper layers will overlap, contributing to the cube’s rigidity once inflated.
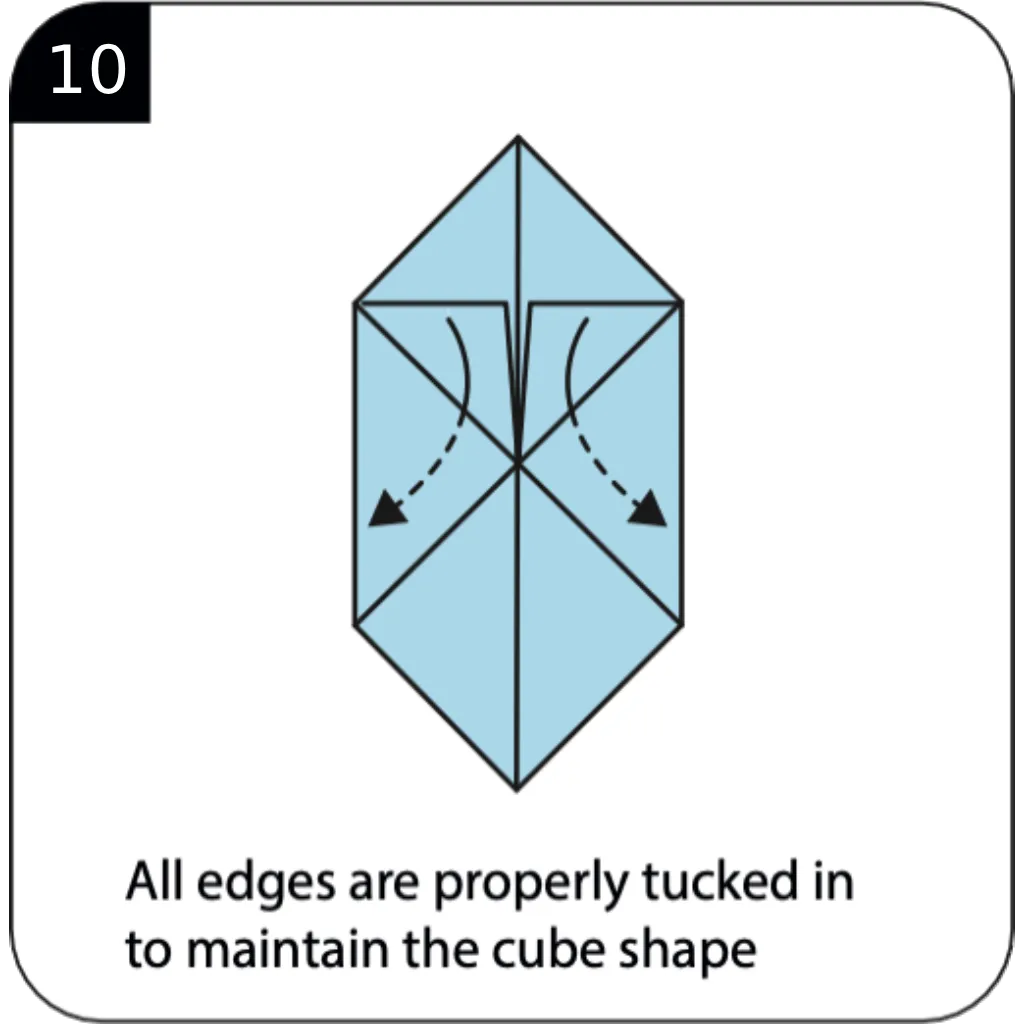
STEP 9: FOLDING TOP CORNERS DOWN
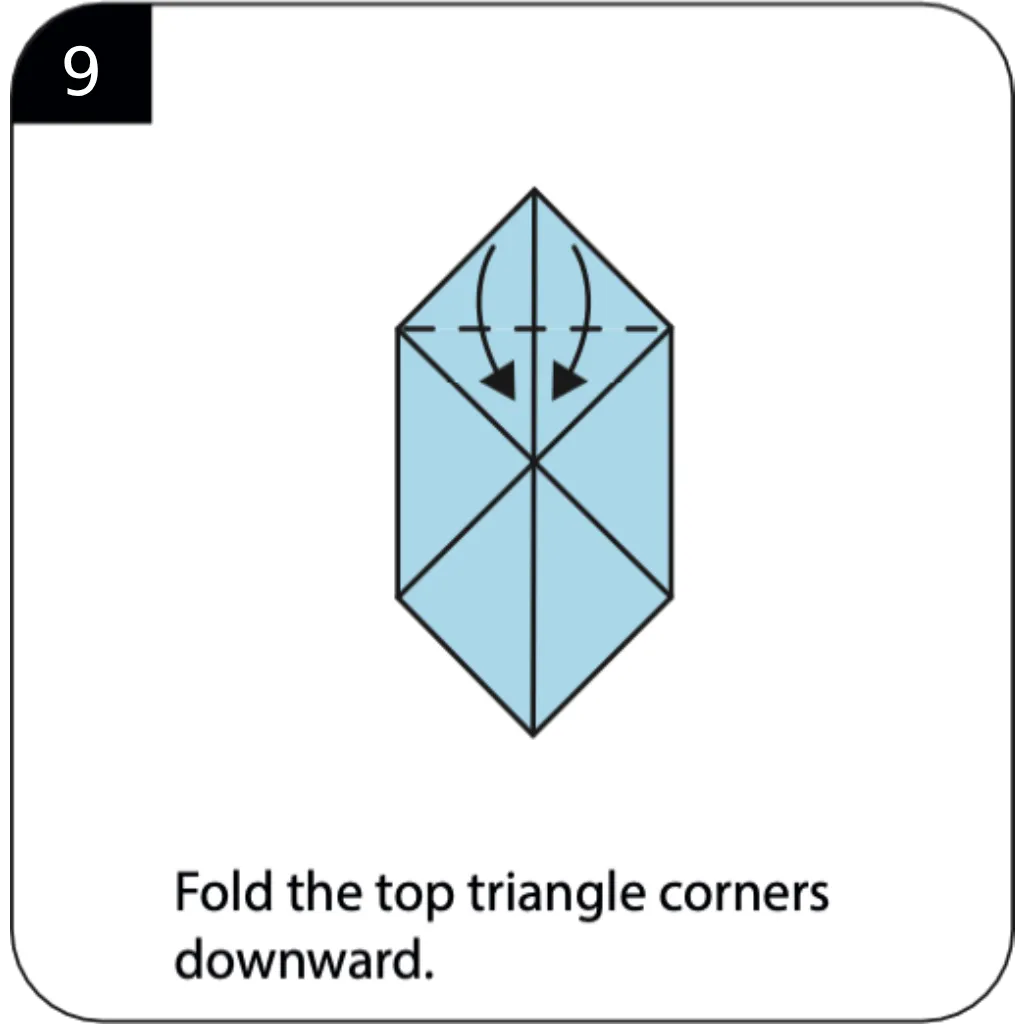
Fold the top triangle corners downward to complete the locking mechanism of your origami cube. This step finalizes the structural elements needed before the inflation process can begin. All edges should be properly tucked in to maintain the cube shape and ensure clean, defined corners. Paper craft enthusiasts appreciate these finishing touches that distinguish well-made origami from rushed projects.
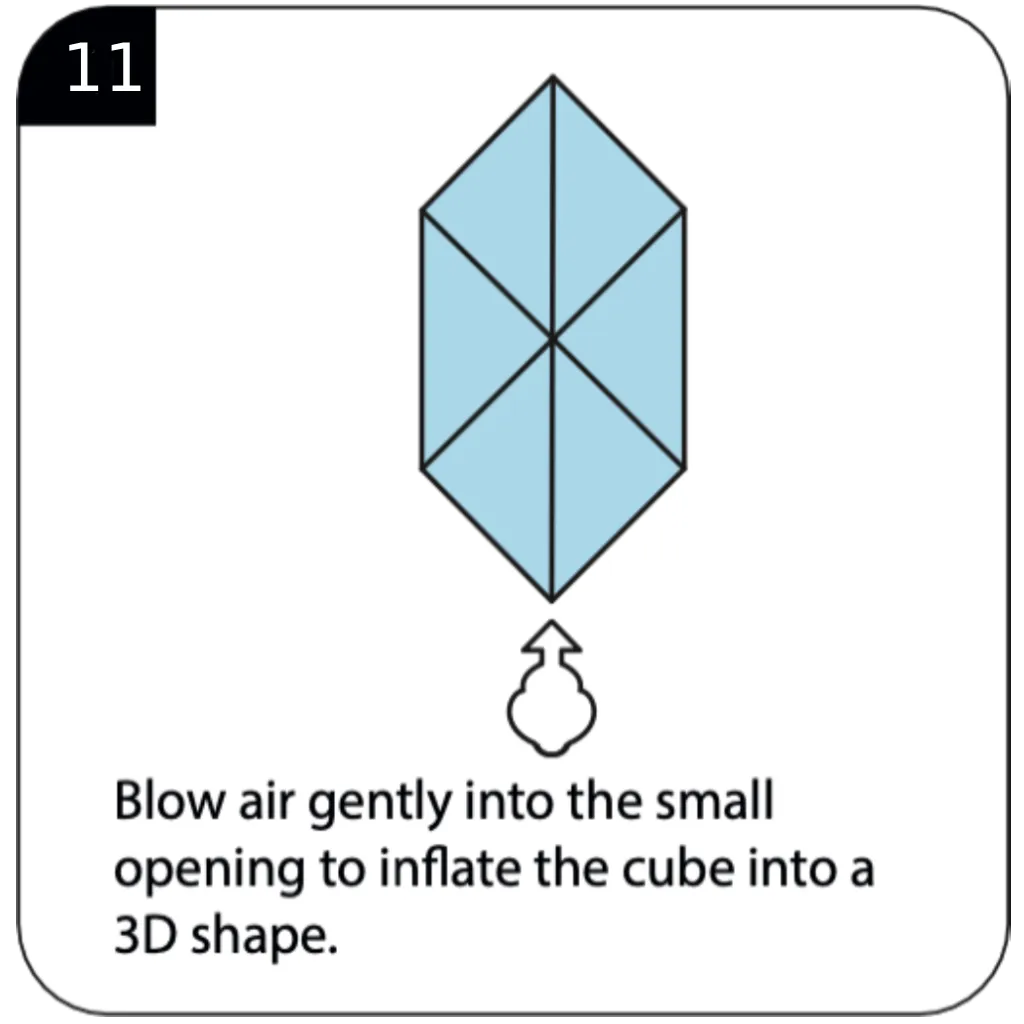
STEP 10: INFLATING THE CUBE
Blow air gently into the small opening to inflate the cube into its final 3D shape. This magical transformation moment turns your flat folded paper into a perfect three-dimensional cube. The inflation technique is a signature feature of certain origami models, creating volume through air pressure. Your completed origami cube showcases the remarkable engineering possible with simple paper folding techniques.
Conclusion:
Congratulations on creating your perfect origami cube! This three-dimensional masterpiece demonstrates how simple paper folding techniques can create complex geometric forms. Through ten carefully designed steps, you’ve transformed a flat square into a fully inflated 3D cube—a testament to the mathematical precision and creative engineering behind origami art. Your paper cube can serve many purposes: as a decorative object, a geometry teaching tool, a unique gift box, or simply as a satisfying desk toy. The skills you’ve learned—including diagonal folding, pocket creation, and the inflation technique—provide a foundation for exploring more advanced 3D origami projects. Whether you’re using these cubes for educational purposes, party decorations, or personal enjoyment, each one represents the perfect harmony between art and mathematics. We hope this tutorial has inspired you to continue exploring the dimensional possibilities of paper folding. Share your creations and discover how these simple cubes can bring joy and wonder to both children and adults alike!
- Explore more 3D origami projects → Discover advanced three-dimensional models including pyramids, spheres, and complex geometric shapes.
- Origami boxes and containers collection → Learn to create functional origami boxes perfect for gifts, storage, and decorative purposes.
- Master essential origami techniques → Understand the fundamental folds and methods used in this cube tutorial and other dimensional projects.
- Best papers for 3D origami → Find out which papers work best for three-dimensional origami projects that require structure and durability.
- Educational origami for classrooms → Explore paper folding projects perfect for teaching geometry, mathematics, and spatial reasoning skills.
