
Introduction:
Welcome to the advanced section of our Origami Basket Cont tutorial! This continuation guide completes the creation of a beautiful Origami Basket Cont
with a functional handle, perfect for Easter egg hunts, gift presentations, or decorative displays. Building upon the basic basket structure, these final 11 steps transform your paper creation into a fully functional container with an elegant handle. What makes this origami basket Cont special is its practical design—the sturdy base can hold small items while the integrated handle allows for easy carrying. This advanced project showcases sophisticated folding techniques including step folds, inside-out transformations, and strategic handle placement. Whether you’re creating Easter baskets, party favors, or unique gift containers, this origami design offers both beauty and functionality without requiring any glue or additional materials. The blue and white color scheme shown creates an attractive contrast, though any paper color will produce stunning results. Let’s complete your origami basket Cont and add that essential handle that elevates it from decoration to practical container!
Detailed Step Descriptions:
STEP 1: OPENING AND FLATTENING
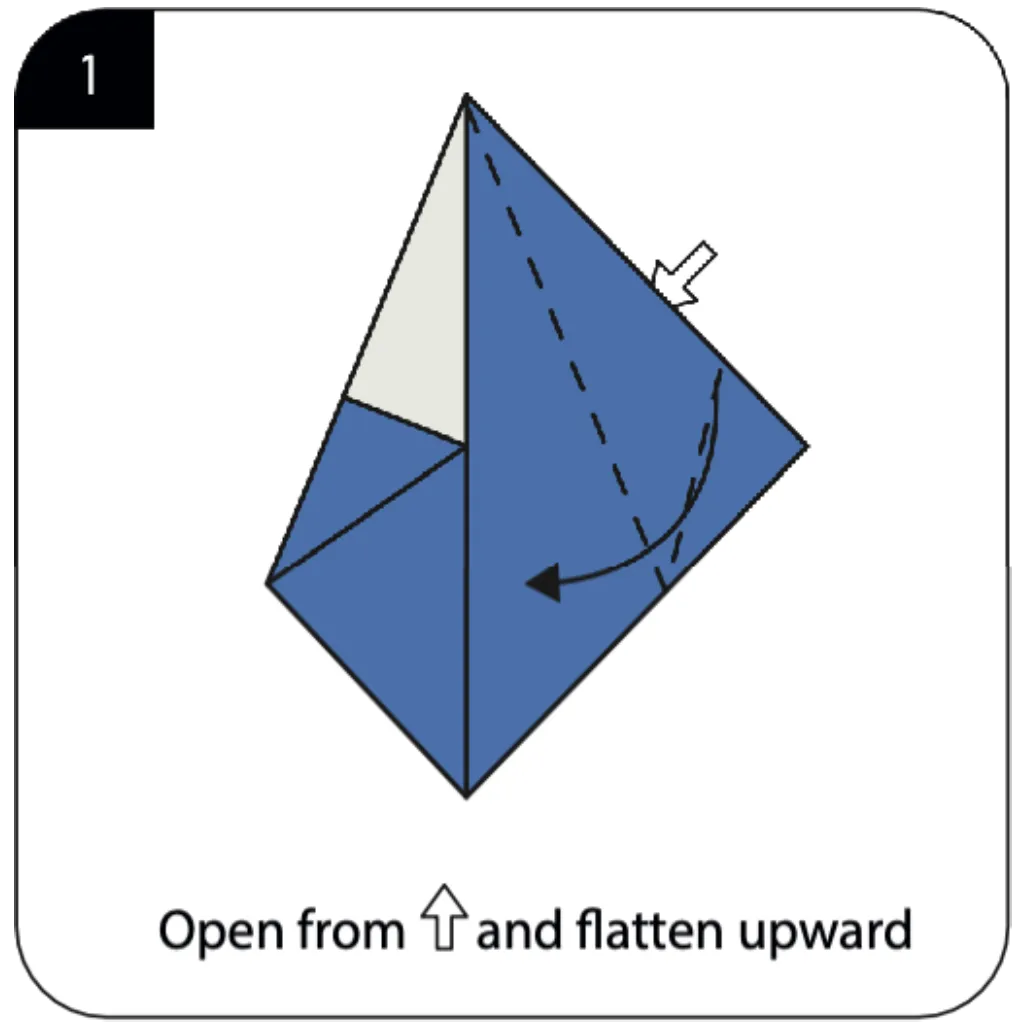
Begin this continuation by opening the model from the indicated point and flattening it upward. This transformative step changes the three-dimensional structure into a workable flat form for handle creation. Advanced origami basket Cont tutorials emphasize this opening technique as crucial for accessing interior layers. The blue exterior sections will separate to reveal the white interior that forms the basket’s structure.
STEP 2: CREATING SIDE DEFINITION
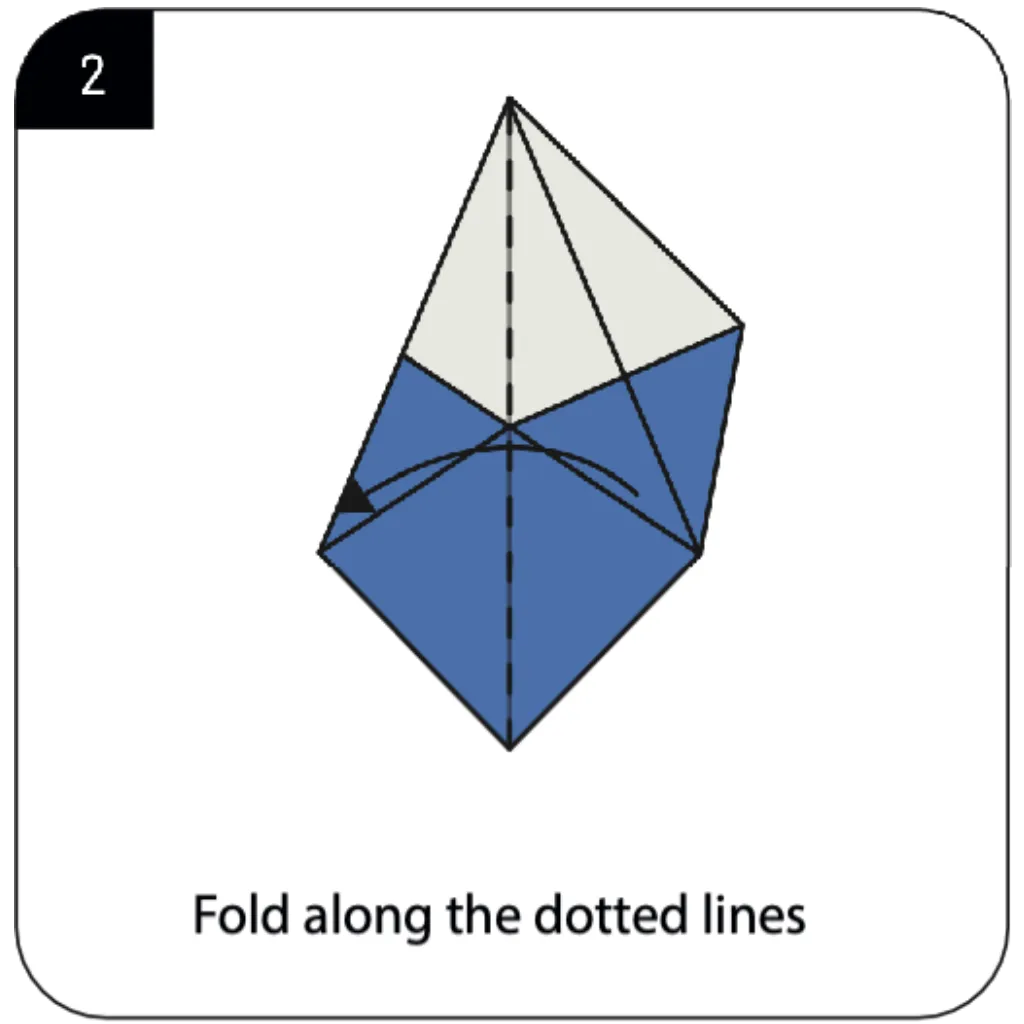
Fold along the dotted lines to establish the side panels of your origami basket Cont. These strategic folds define the basket’s walls and create the foundation for the handle attachment points. Paper basket crafting relies on these precise side folds to ensure structural integrity and proper proportions. The symmetrical folding pattern maintains balance throughout your basket’s construction.
STEP 3: REINFORCING THE STRUCTURE
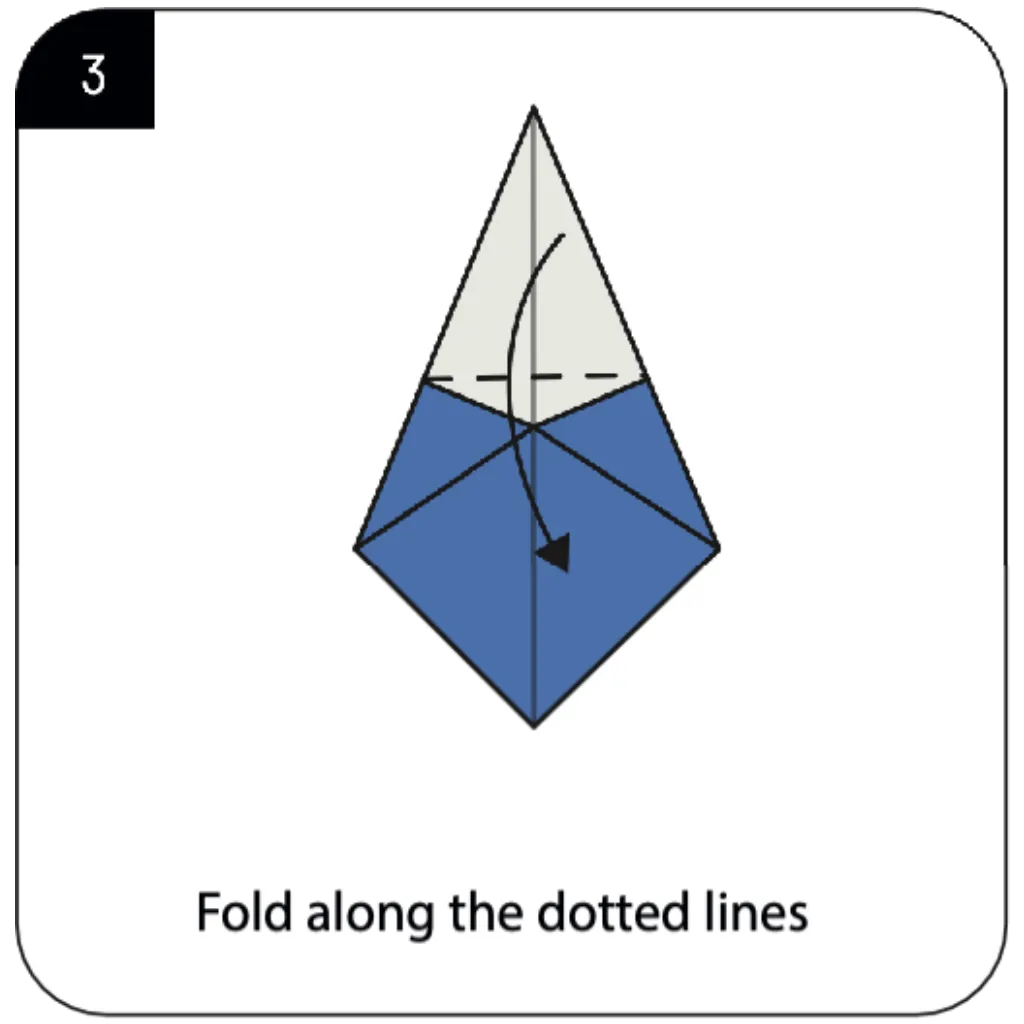
Continue folding along the indicated dotted lines to reinforce the basket’s framework. This step adds stability to the walls while preparing the upper section for handle integration. Origami Easter basket designs often feature these reinforcement folds for durability during use. The white sections begin forming the distinctive rim that characterizes traditional basket designs.
STEP 4: ESTABLISHING THE BASE

Fold along the dotted lines to create the foundation structure for your basket’s base. These folds ensure your origami basket Cont will stand upright and maintain its shape when filled. Functional origami tutorials highlight the importance of a stable base for practical containers. The precision of these folds directly affects how well your finished basket will hold items.
STEP 5: CONTINUING BASE CONSTRUCTION
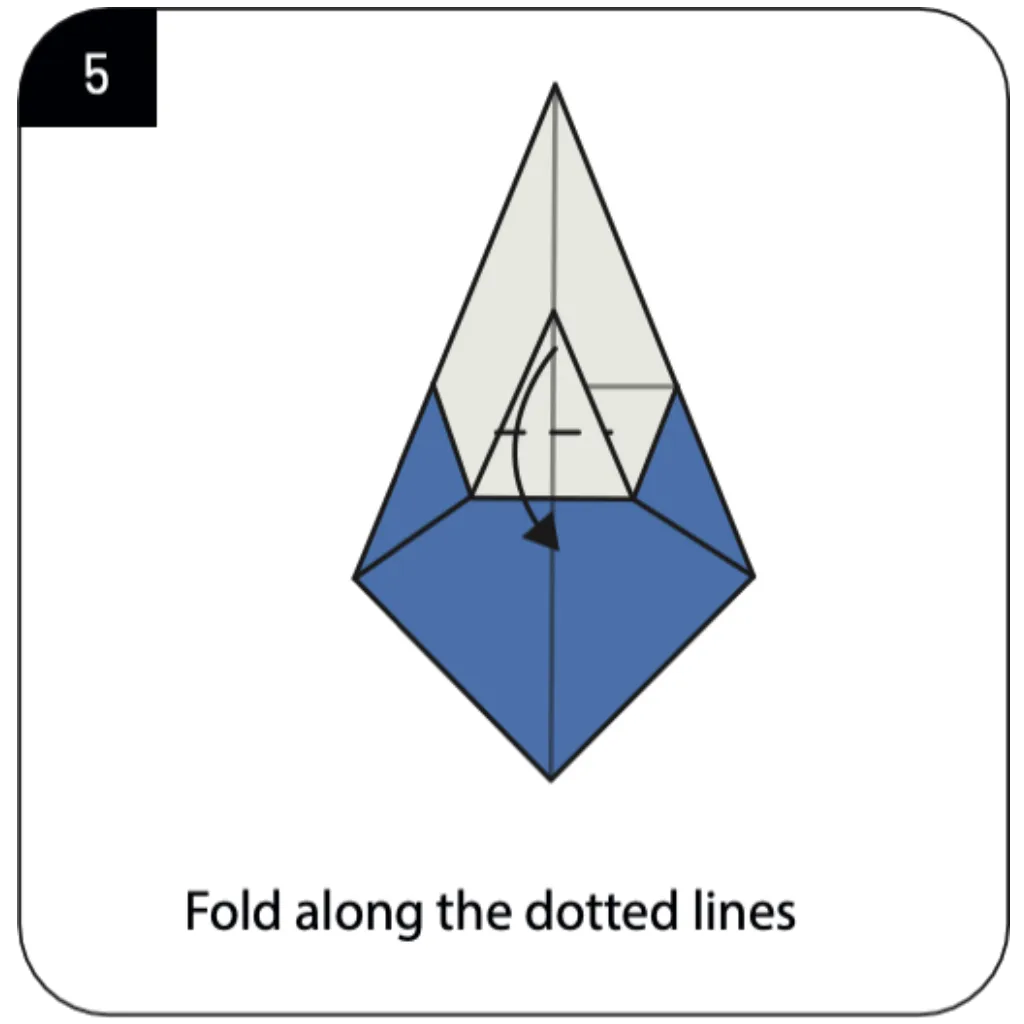
Execute additional folds along the dotted lines to further develop the basket’s bottom structure. This systematic folding creates multiple layers that provide strength to the base area. Gift basket origami patterns utilize these overlapping folds for enhanced weight-bearing capacity. The blue exterior continues to contrast beautifully with the emerging white interior sections.
STEP 6: UNFOLDING PREPARATION
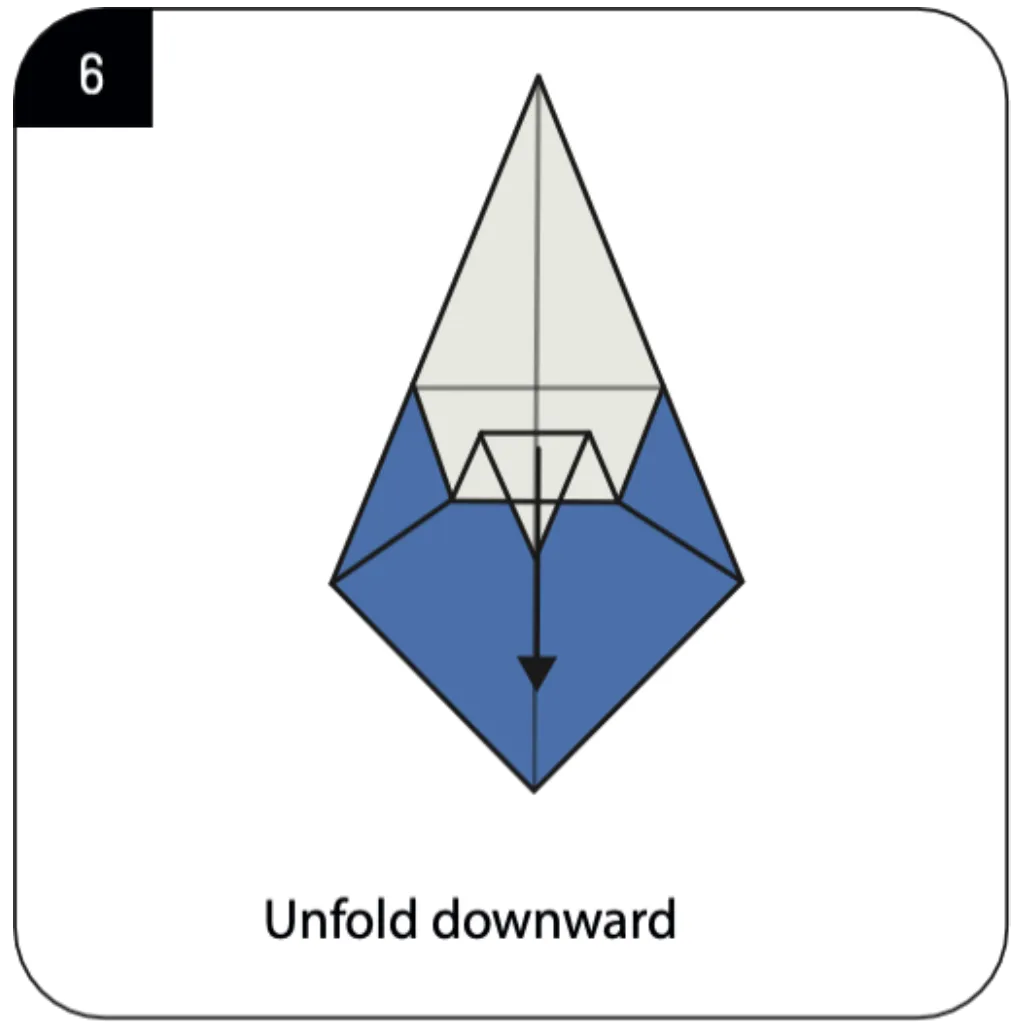
Unfold the previous section downward to prepare for the handle creation process. This strategic unfolding reveals hidden layers necessary for the basket’s final transformation. Advanced paper folding techniques often require temporary unfolding to access specific areas. The model now displays increased complexity as multiple layers become visible and workable.
STEP 7: CREATING STEP FOLDS
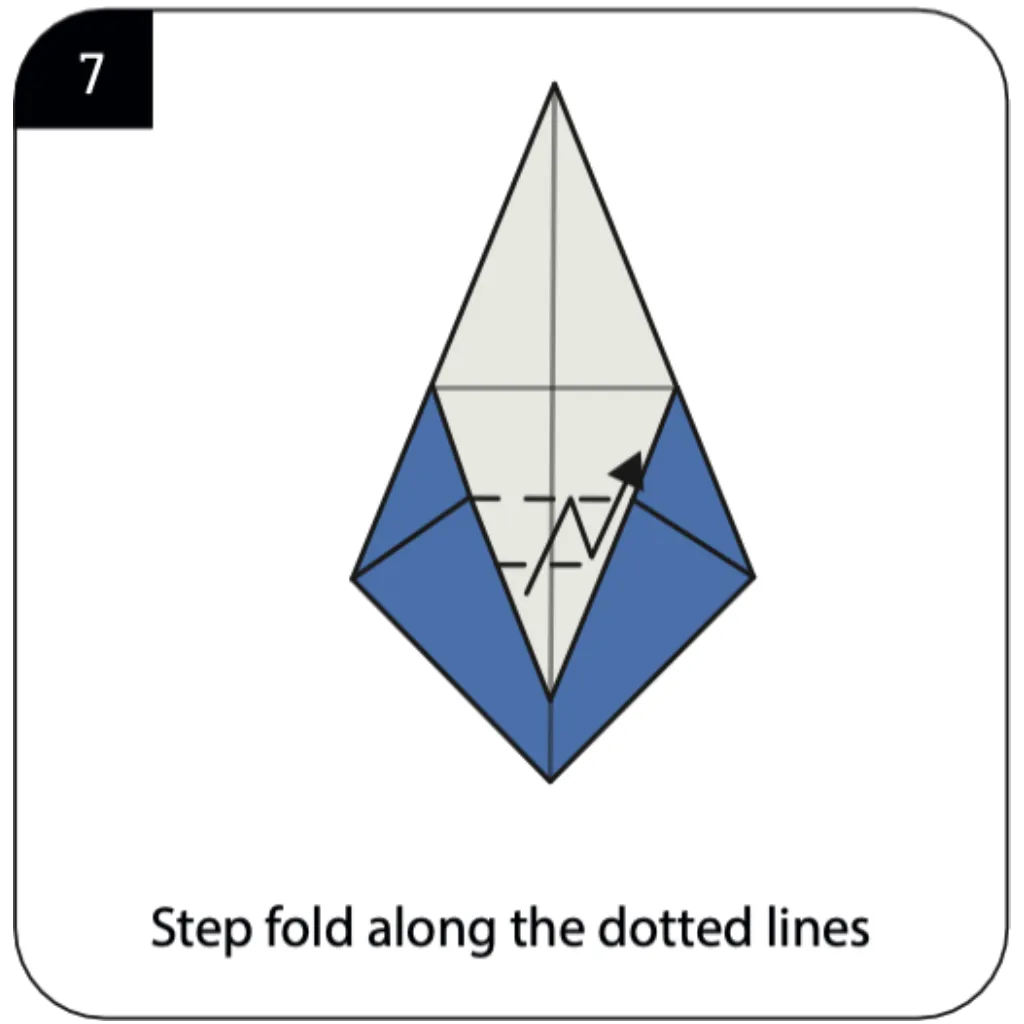
Execute step folds along the dotted lines to create the dimensional elements of your basket. Step folding adds texture and structural integrity while forming the handle attachment mechanism. Origami basket Cont with handle tutorials consider this technique essential for professional-looking results. These accordion-style folds create the flexibility needed for the basket’s final shaping.
STEP 8: TURNING THE MODEL
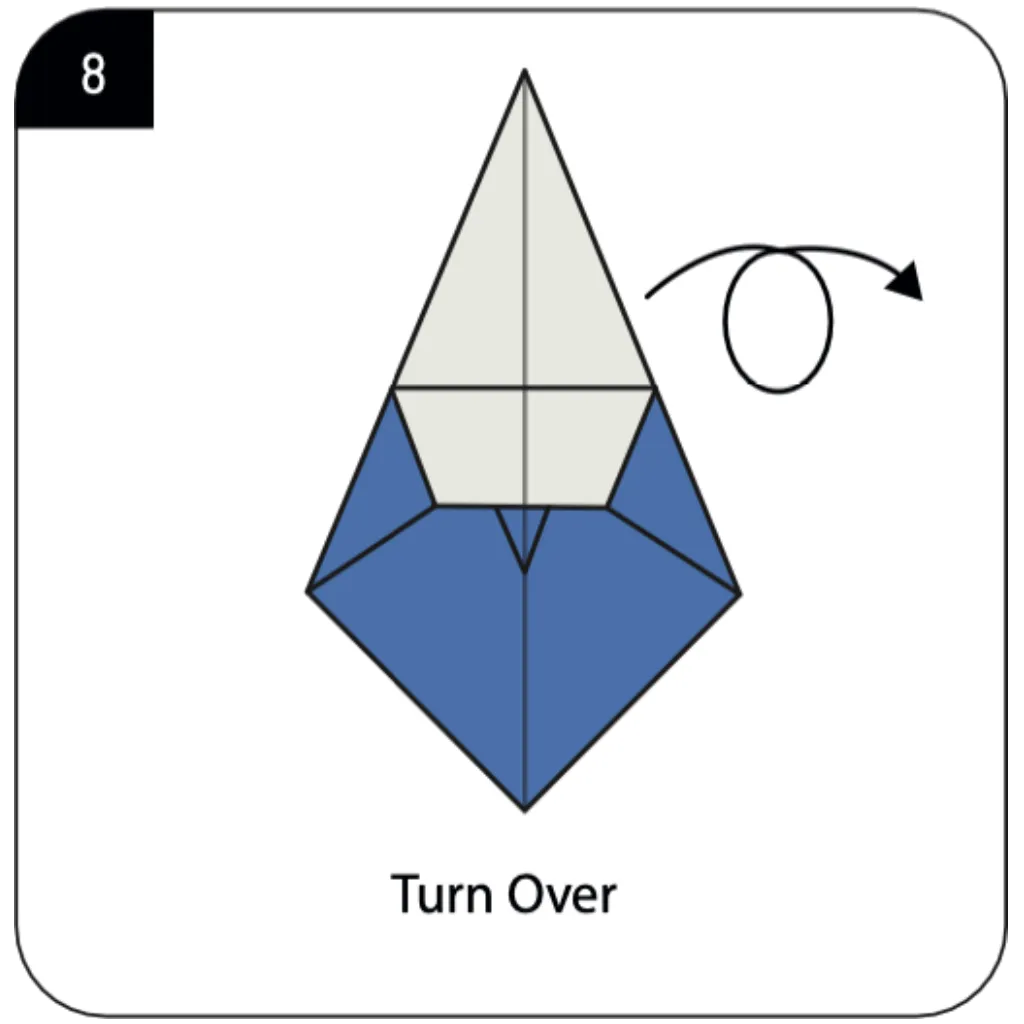
Turn the entire model over to access the opposite side for continued construction. This reorientation allows you to work on the basket’s exterior while maintaining interior structure. Complex origami projects often require multiple perspective changes for complete construction. The turn reveals how previous folds have created a symmetrical pattern on both sides.
STEP 9: FOLDING THE UPPER LAYER
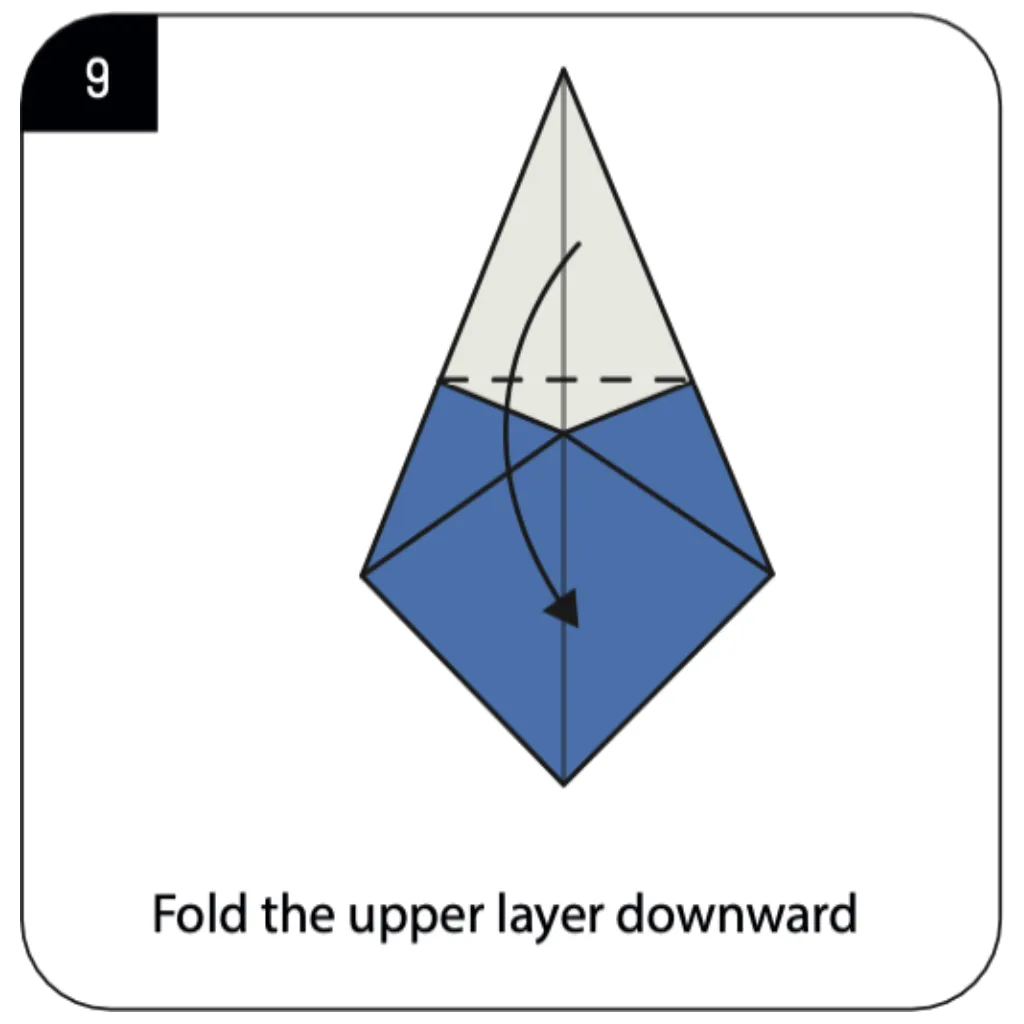
Fold the upper layer downward as indicated to begin finalizing the basket’s rim structure. This fold creates the clean edge that gives your origami basket Cont a polished, finished appearance. Paper craft basket tutorials emphasize the importance of crisp rim folds for aesthetic appeal. The downward fold also prepares the attachment points where the handle will be inserted.
STEP 10: FINAL STRUCTURAL FOLD
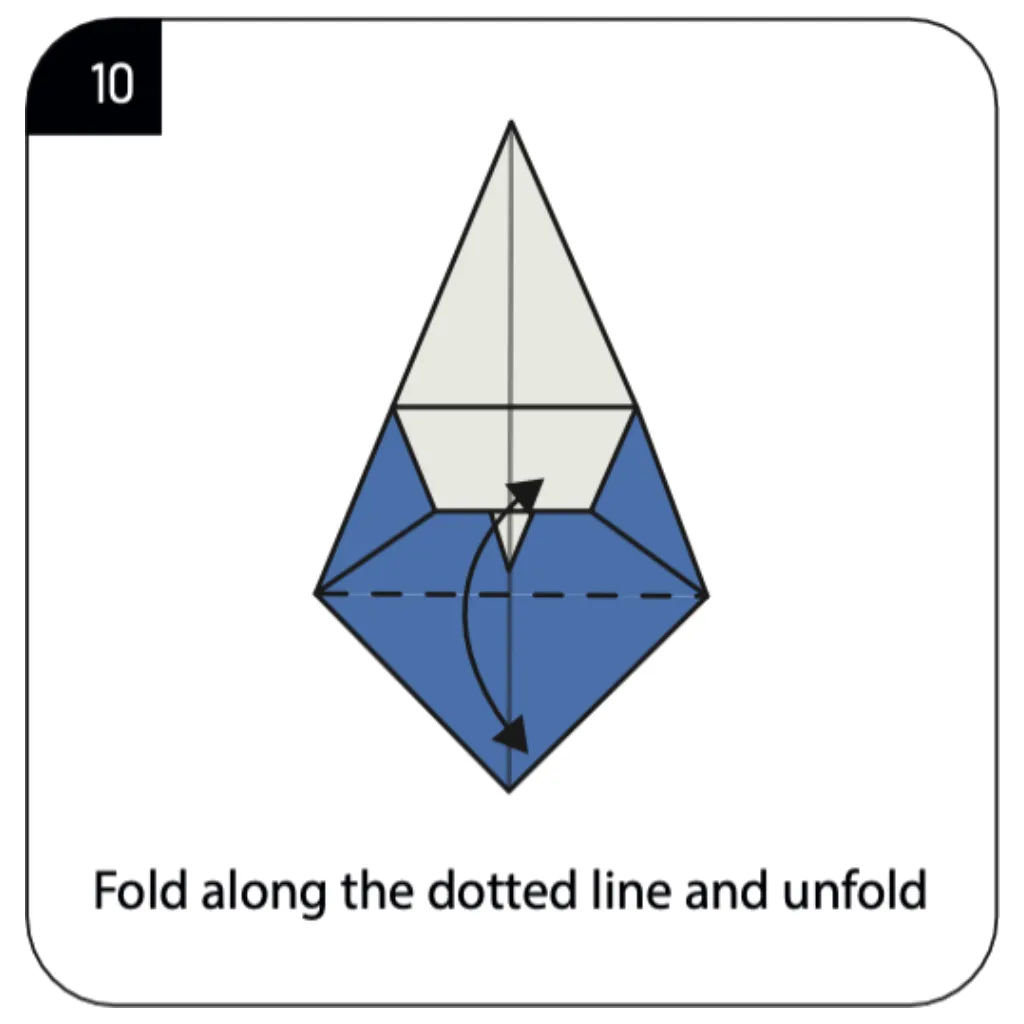
Fold along the dotted line and then unfold to create the final crease needed for assembly. This preparatory fold establishes the exact placement for the handle attachment mechanism. Origami handle techniques rely on these precise reference creases for proper positioning. The fold-unfold sequence creates a subtle valley that guides the handle insertion process.
STEP 11: INSERTING THE HANDLE
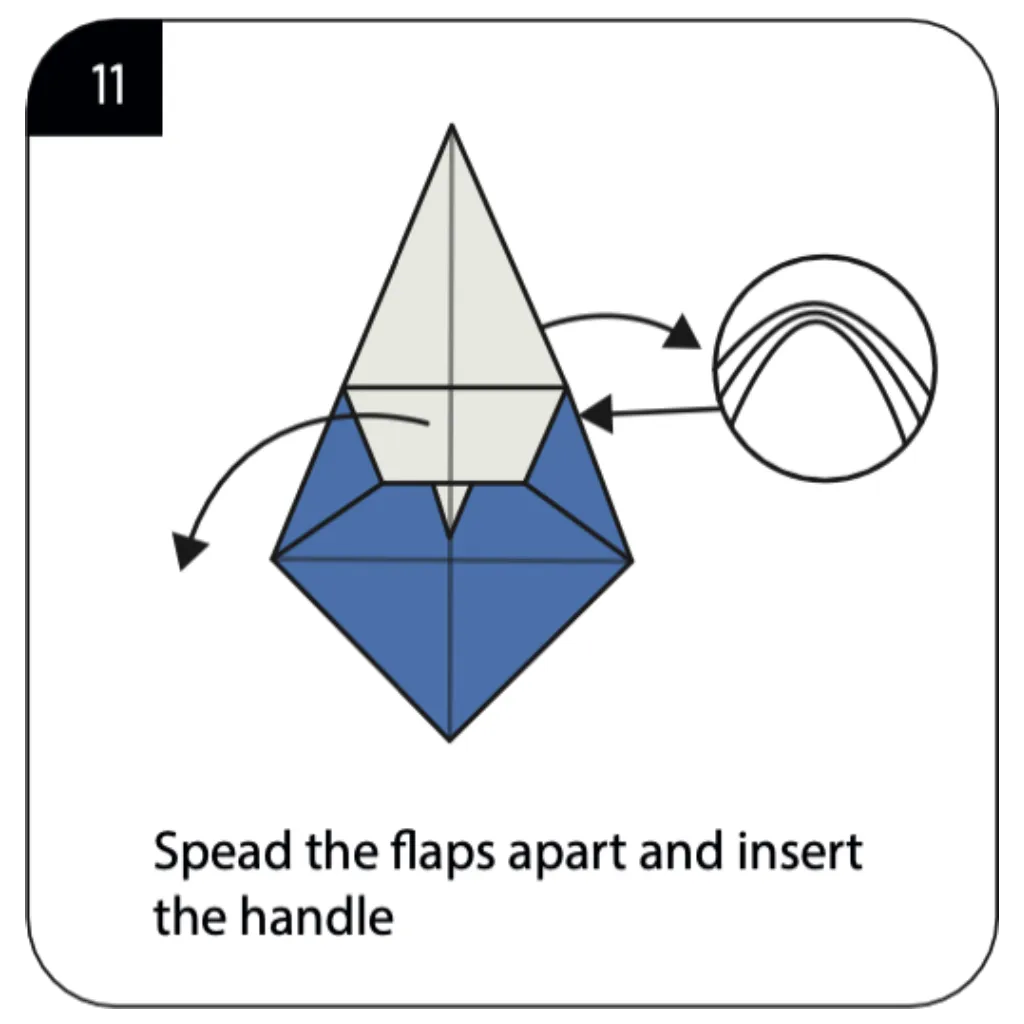
Spread the flaps apart and carefully insert the handle into the designated attachment points. This final assembly step transforms your origami creation into a fully functional basket with handle. The handle slides securely into the prepared pockets created by earlier folding sequences. Your completed origami basket Cont now features both decorative appeal and practical functionality.
Conclusion:
Congratulations on completing your advanced origami basket Cont with handle! This sophisticated paper creation represents mastery of complex folding techniques and demonstrates how origami can produce truly functional objects. Through these 11 continuation steps, you’ve transformed a basic basket form into an elegant container complete with an integrated handle—perfect for gifts, decorations, or practical use. Your finished basket showcases advanced techniques including step folds, strategic unfolding, and precision handle attachment, all achieved without glue or additional materials. Whether used for Easter egg hunts, party favors, wedding decorations, or unique gift presentation, this origami basket Cont combines traditional paper folding artistry with modern functionality. The skills you’ve developed—patience, precision, and spatial visualization—prepare you for even more challenging origami projects. We hope this tutorial has inspired you to continue exploring functional origami designs and to share your beautiful creations with others. Display your basket proudly or fill it with treats to surprise someone special!
- Complete origami basket Cont collection → Explore various basket styles including woven patterns, decorative variations, and seasonal themes.
- Easter origami projects → Discover paper folding crafts perfect for Easter including baskets, eggs, bunnies, and spring decorations.
- Advanced origami techniques → Master complex folding methods used in this basket tutorial including step folds and handle attachments.
- Functional origami containers → Learn to create practical paper items including boxes, baskets, and holders for everyday use.
- Party decoration origami → Find paper folding projects perfect for celebrations including favor baskets, centerpieces, and table decorations.
