
Introduction:
Welcome to the delightful world of origami funny cats! This charming tutorial guides you through creating an adorable paper cat that’s perfect for children, beginners, and anyone who loves feline friends. Our easy 11-step process transforms a simple square of paper into a cute cat face complete with pointed ears and an expressive personality. What makes this origami funny cat special is its accessibility—even young children can master these basic folds with minimal assistance. The design focuses on the cat’s face, allowing for creative expression when adding facial features with stickers or drawings. Whether you’re teaching origami to kids, decorating a child’s room, creating party favors, or simply enjoying a relaxing paper craft session, this funny cat project offers both entertainment and satisfaction. The blue and white color scheme shown creates a striking contrast, but any paper color works wonderfully—try orange for a ginger cat or black for a Halloween theme. Let’s begin creating your own Origami Funny Cat that’s sure to bring smiles to faces young and old!
Detailed Step Descriptions:
STEP 1: CREATING THE INITIAL TRIANGLE ORIGAMI CAT
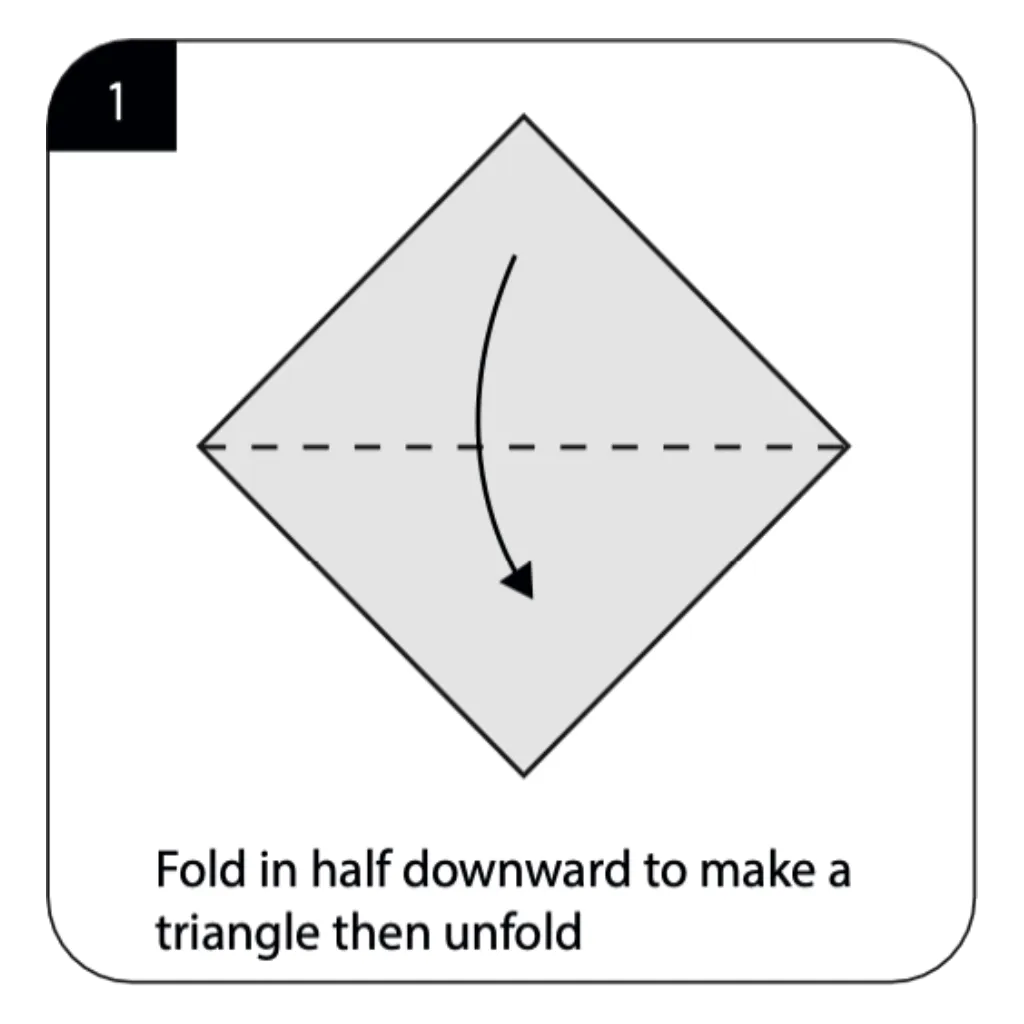
Begin your origami funny cat by folding the square paper in half downward to form a triangle, then unfold. This foundational crease establishes the central guideline that will help create your cat’s symmetrical face. Simple Origami Funny Cat tutorials always start with basic geometric shapes, making them perfect for beginners. The clear diagonal line serves as a reference point for all subsequent folds in your funny cat creation.
STEP 2: MAKING A SMALLER TRIANGLE ORIGAMI CAT

Fold the paper in half sideways to create a smaller triangle, then unfold to reveal the perpendicular crease. This second fold creates a cross pattern that helps position the cat’s features with perfect symmetry. Origami animals for kids often use these simple folding patterns to build confidence in young crafters. The intersecting creases form the framework for your cat’s distinctive pointed ears and facial structure.
STEP 3: FORMING THE EARS ORIGAMI CAT
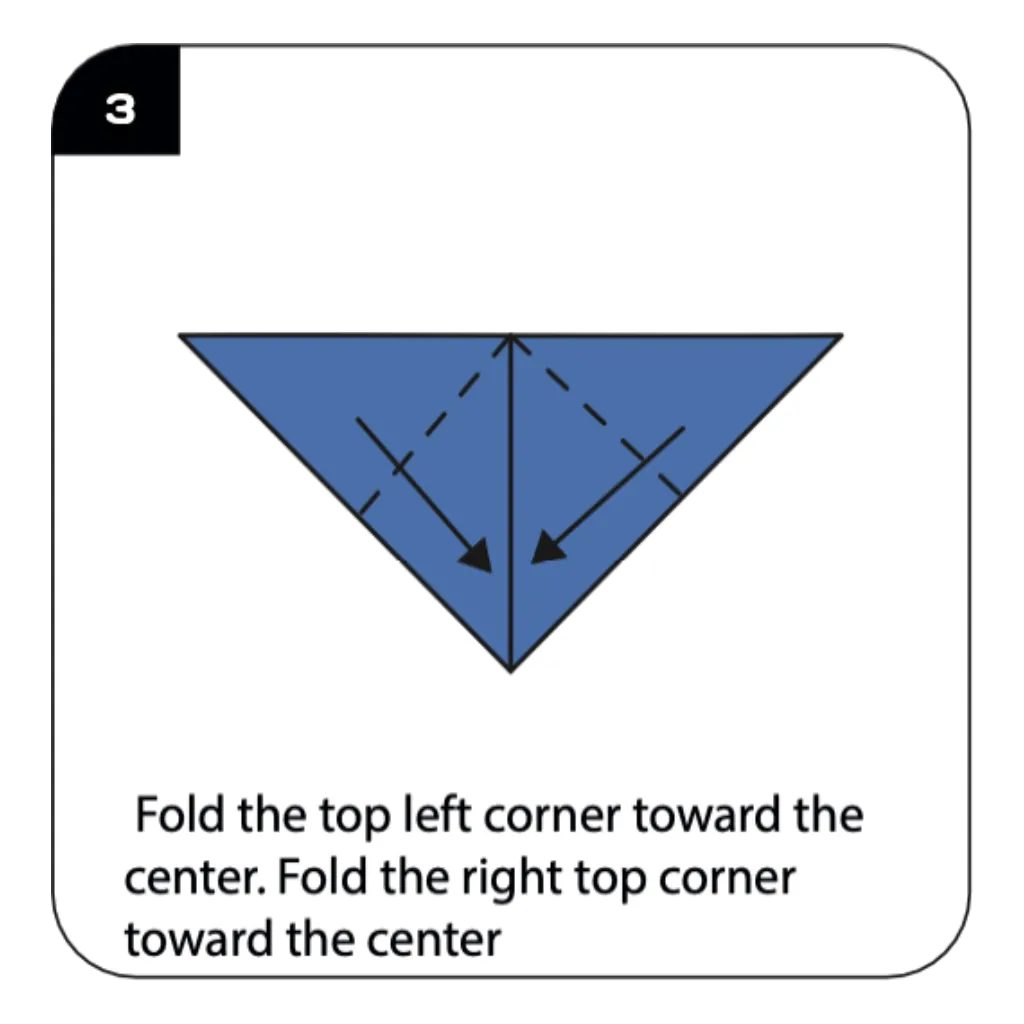
Fold the top left corner toward the center, then fold the right top corner toward the center as well. These strategic folds begin creating the characteristic triangular ears that make cats instantly recognizable. Easy Origami Funny Cat patterns emphasize these ear folds as they define the feline silhouette children love. The precision of these corner folds determines how perky and expressive your cat’s ears will appear.
STEP 4: CREATING THE EAR FLAPS ORIGAMI CAT
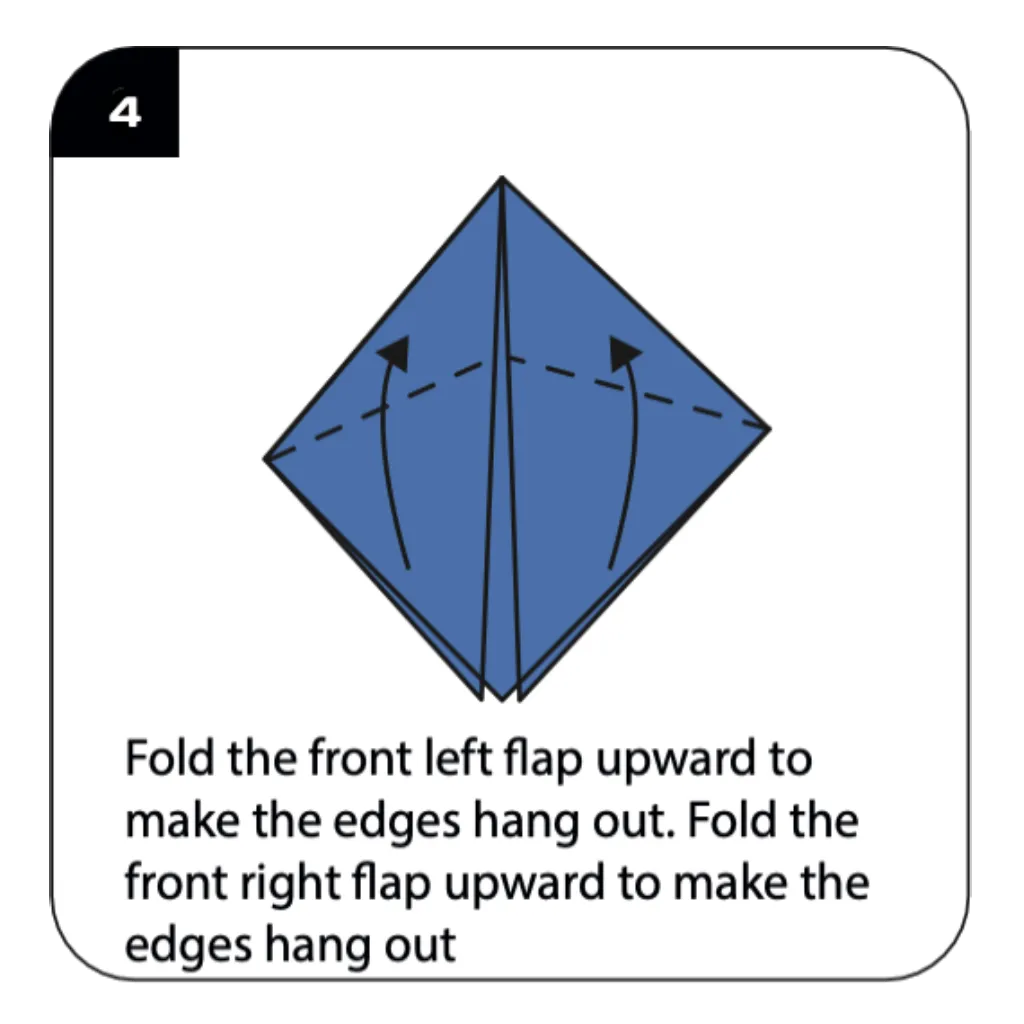
Fold the front left flap upward to make the edges hang out, creating the first cat ear. Repeat this process with the front right flap to form the second ear with matching proportions. Origami pet tutorials highlight this step as crucial for giving your cat personality and charm. The outward-facing edges create the distinctive pointed ear shape that characterizes cartoon-style cats.
STEP 5: SHAPING THE FACE Origami Funny Cat
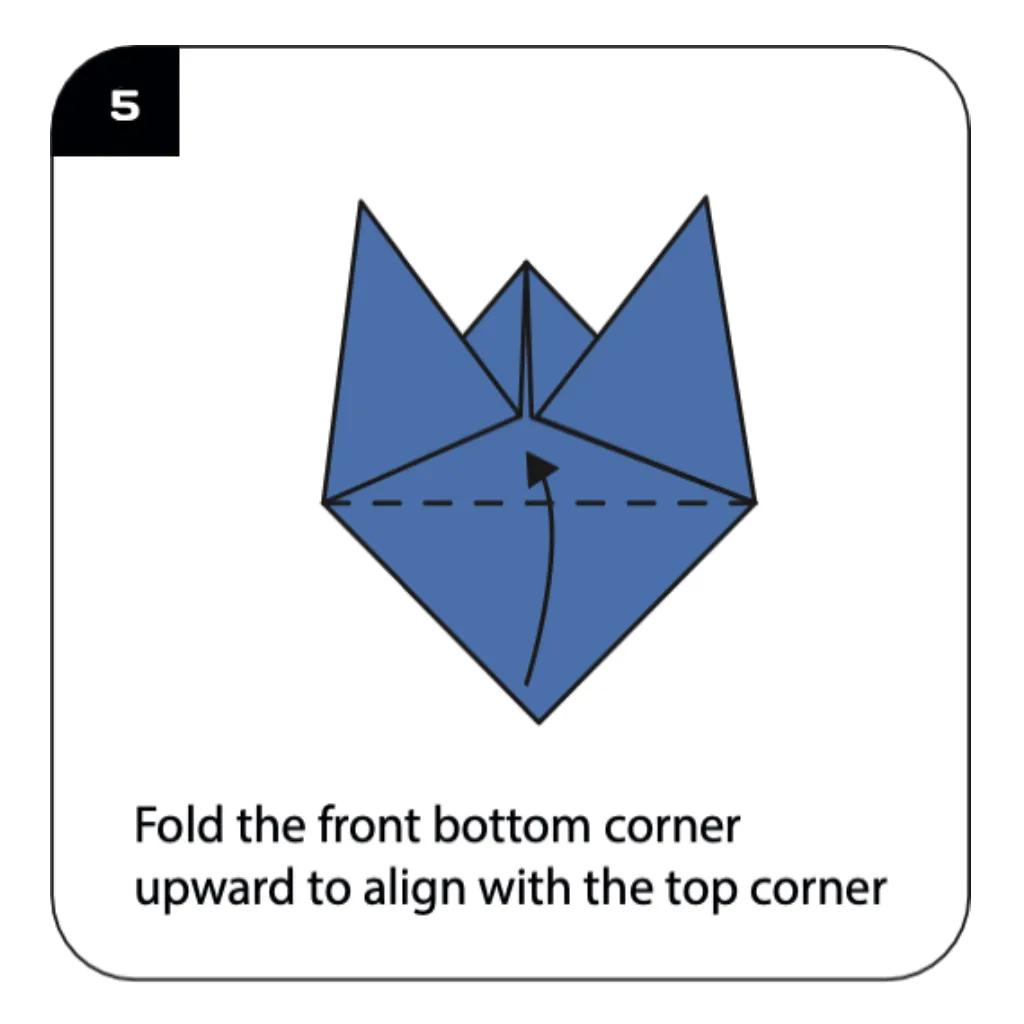
Fold the front bottom corner upward to align with the top corner of your model. This fold establishes the lower portion of the cat’s face and creates the foundation for its chin. Cute origami animals often feature these simple geometric transformations that children find easy to follow. The upward fold reduces the triangle’s size while maintaining the proportions needed for a cat face.
STEP 6: TURNING THE MODEL ORIGAMI CAT
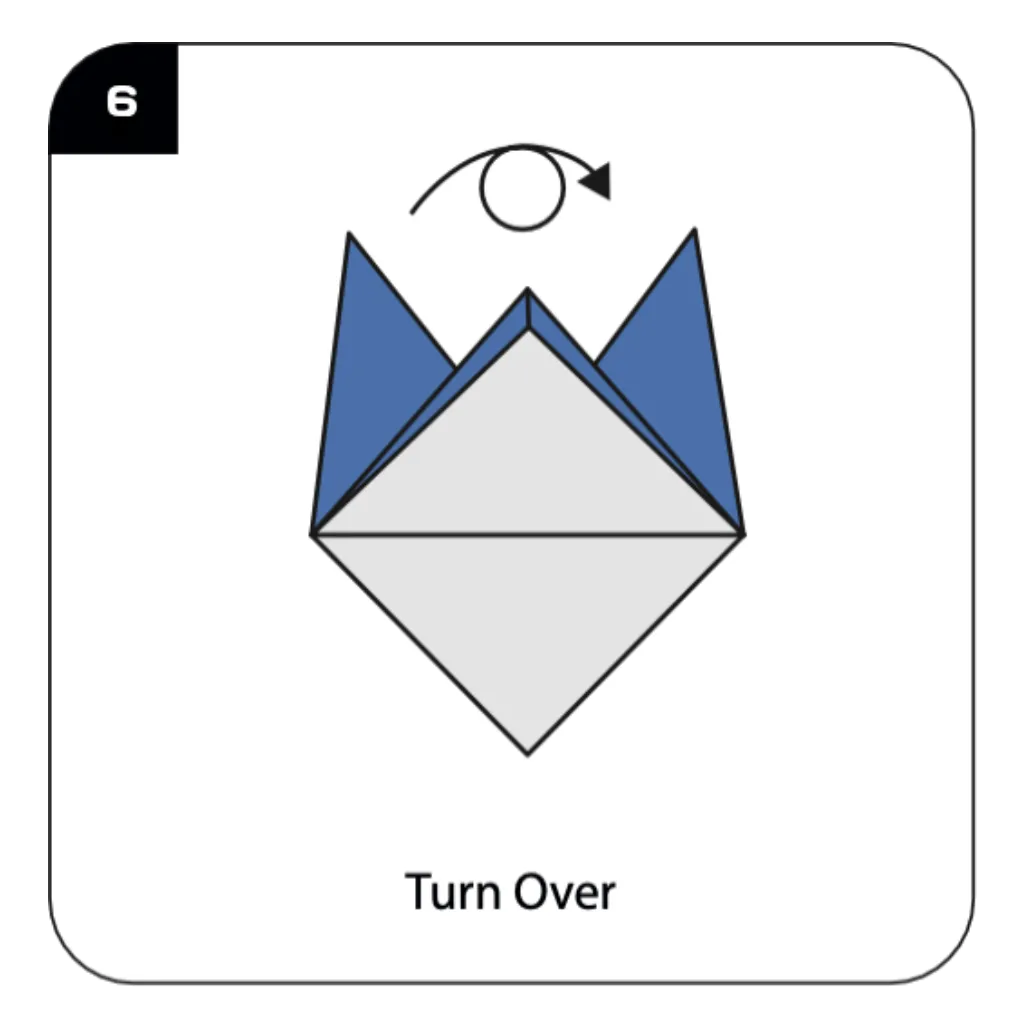
Turn the entire model over to work on the reverse side of your Origami Funny Cat. This flip allows you to add depth and dimension to your cat’s face through additional folding. Kids’ origami projects benefit from these perspective changes that help visualize three-dimensional forms. The turn reveals how previous folds have created a structured foundation for your funny cat’s features.
STEP 7: ADJUSTING THE EARS
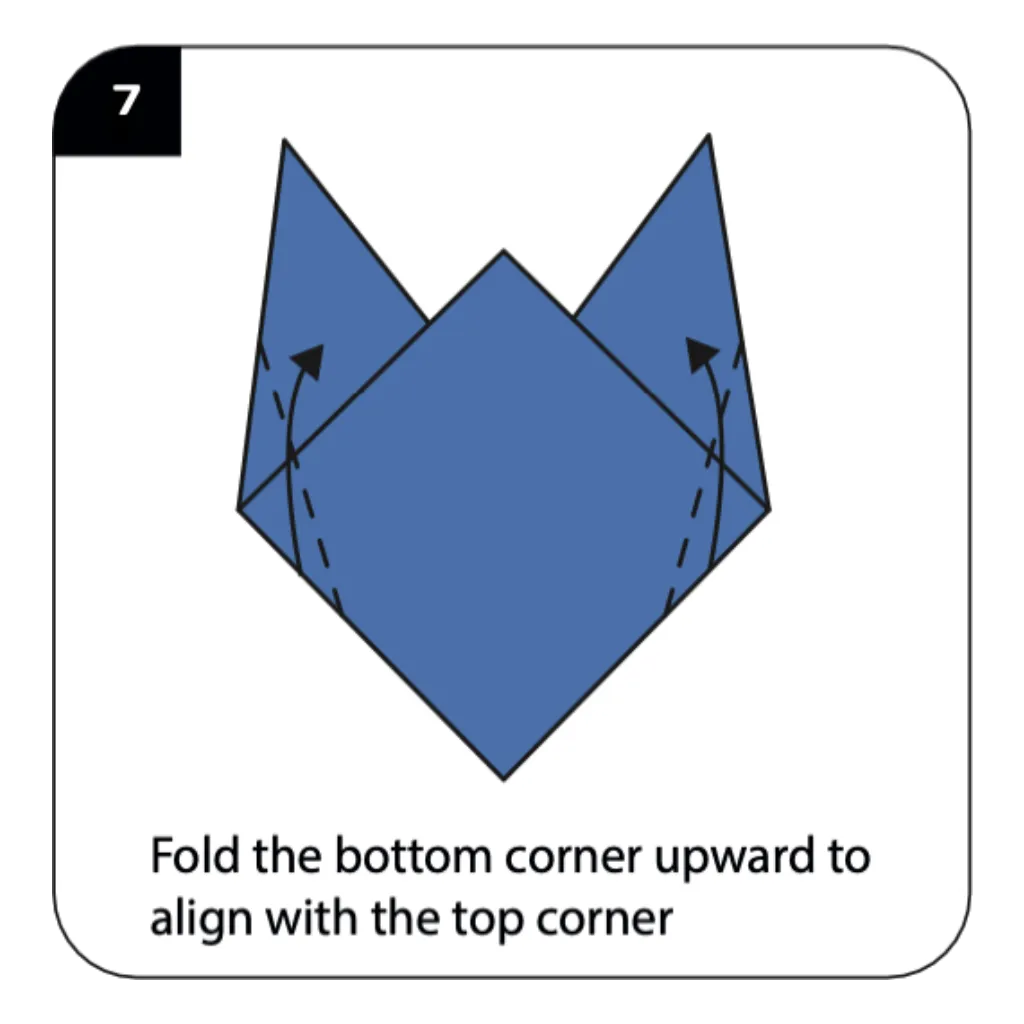
Fold the bottom corner upward to align with the top corner, refining the cat’s facial proportions. This adjustment ensures your cat’s ears remain prominent while the face maintains proper dimensions. Paper cat crafts for children often include these refinement steps that perfect the overall appearance. The fold creates the clean lines that give your Origami Funny Cat its appealing cartoon-like quality.
STEP 8: FINAL FACE FOLD
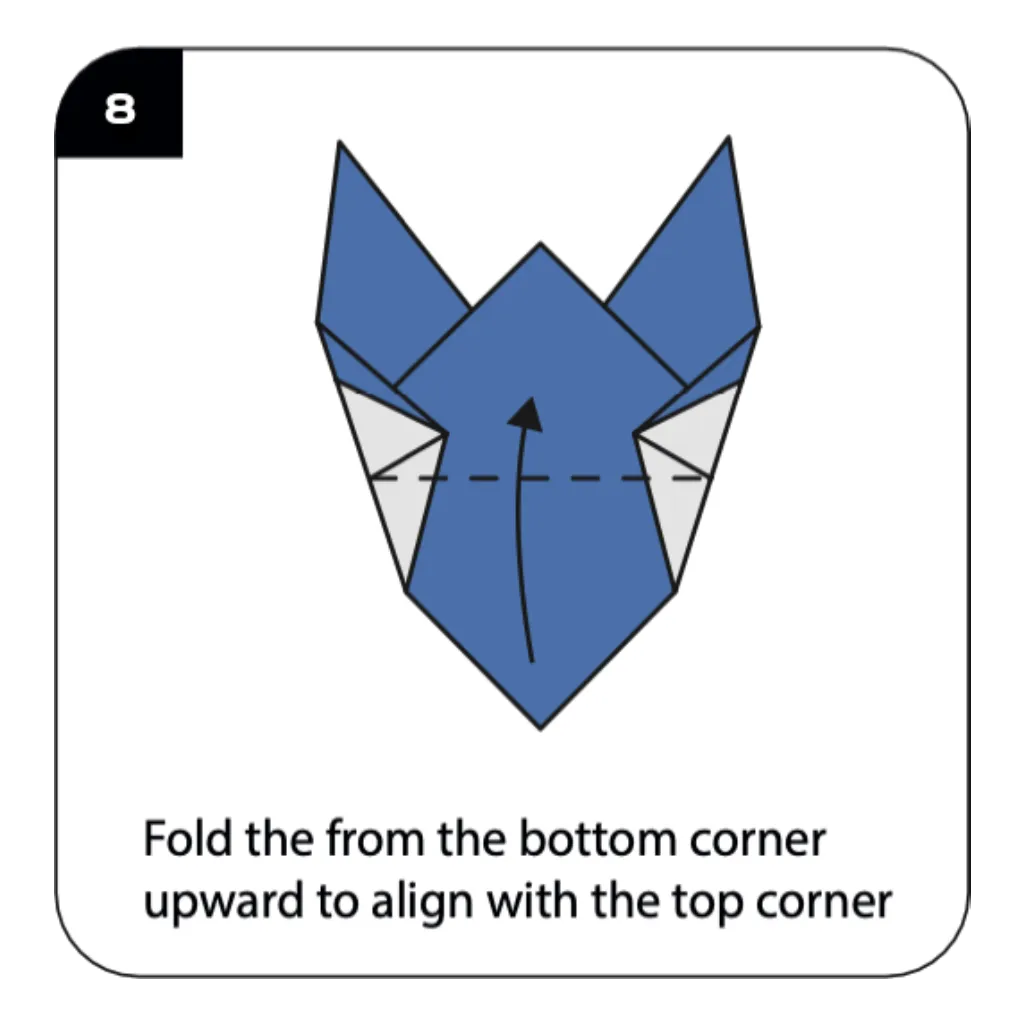
Fold from the bottom corner upward to align with the top corner, completing the facial structure. This fold finalizes the proportions between the cat’s ears and face for an adorable appearance. Origami animal faces require these precise adjustments to achieve the right balance of features. The completed fold creates the flat surface where you’ll later add the cat’s expressive facial features.
STEP 9: CHIN FORMATION
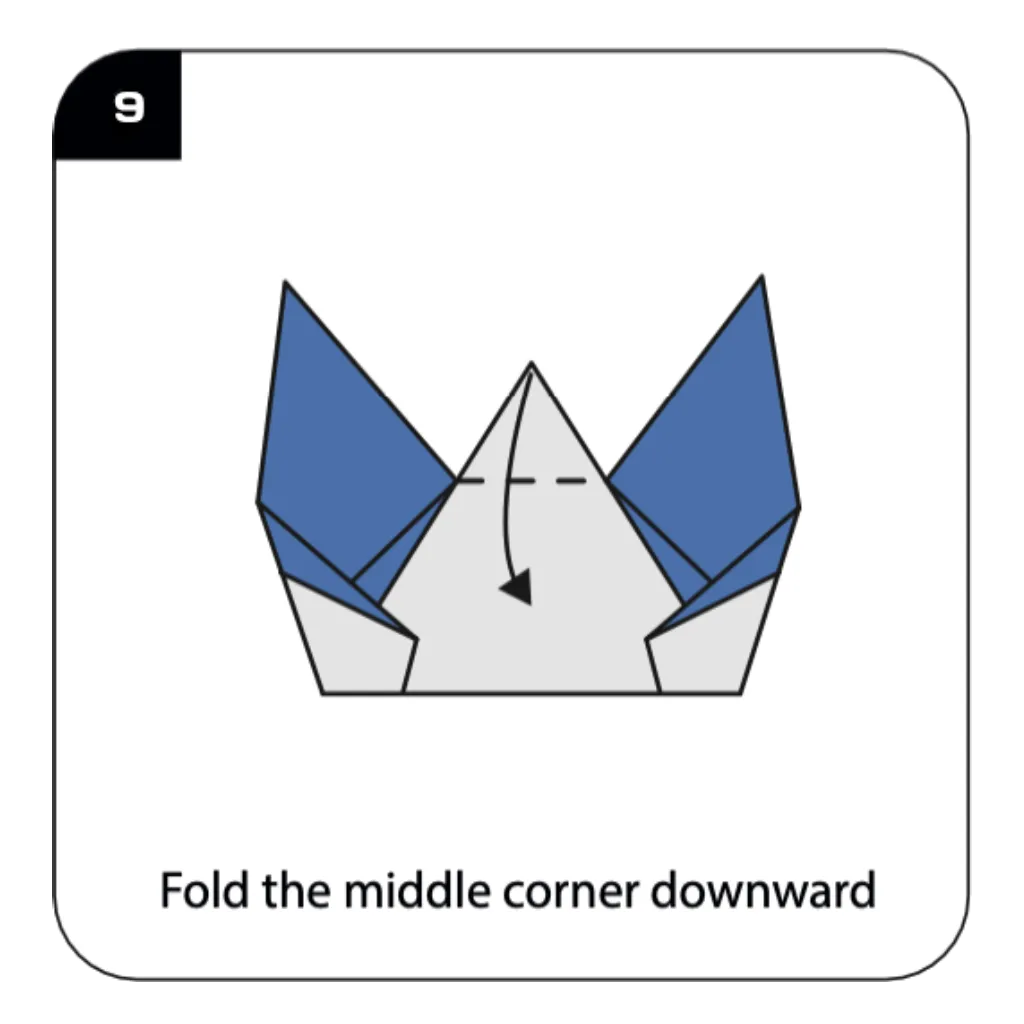
Fold the middle corner downward to create the cat’s chin and define the lower face boundary. This strategic fold adds dimension to your cat’s face and creates a more realistic profile. Simple origami pets benefit from these small details that transform basic shapes into recognizable animals. The downward fold also provides stability to the model, allowing it to stand or be displayed easily.
STEP 10: FINAL TURN
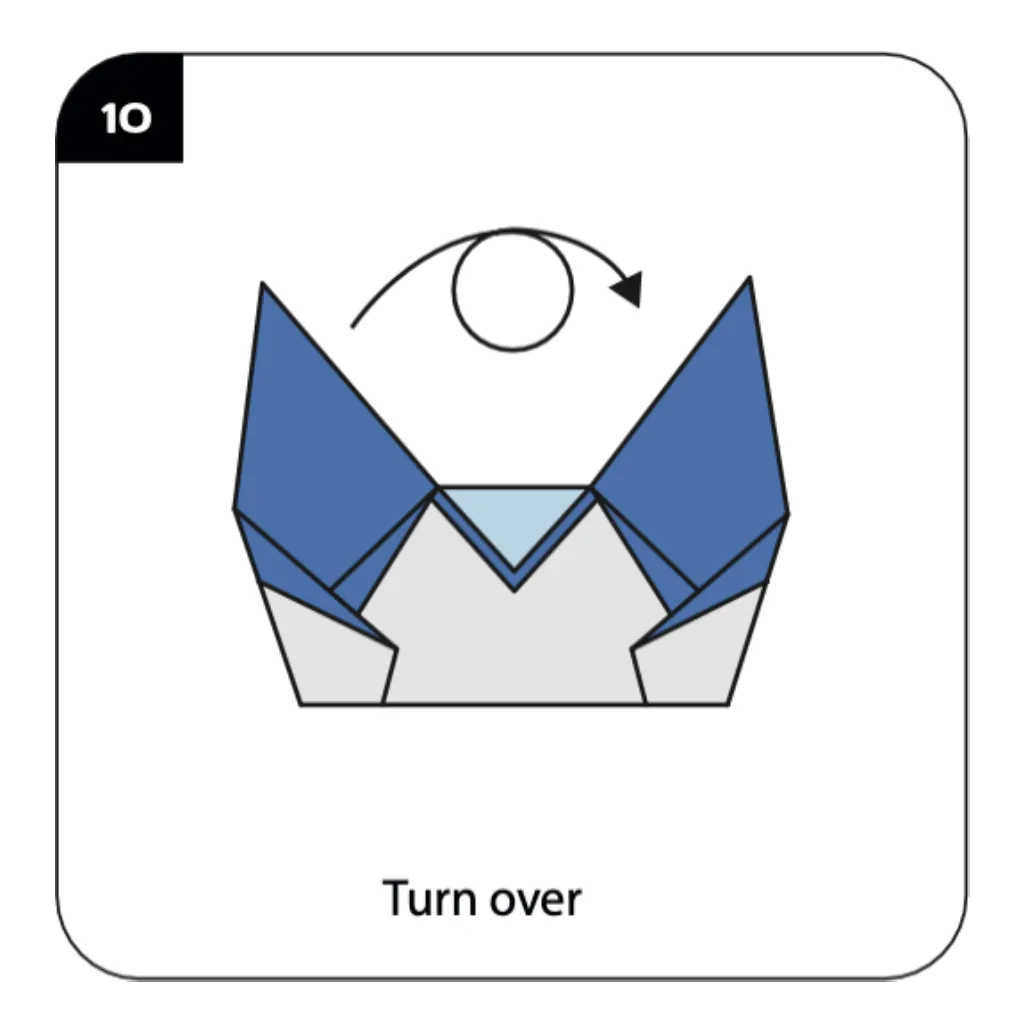
Turn the model over once more to reveal the completed cat face structure. This final orientation shows the clean, symmetrical design ready for decoration and personalization. Origami projects for beginners often conclude with this satisfying reveal of the finished form. The front view displays the perfect canvas for adding your cat’s unique personality through facial features.
STEP 11: ADDING CHARACTER
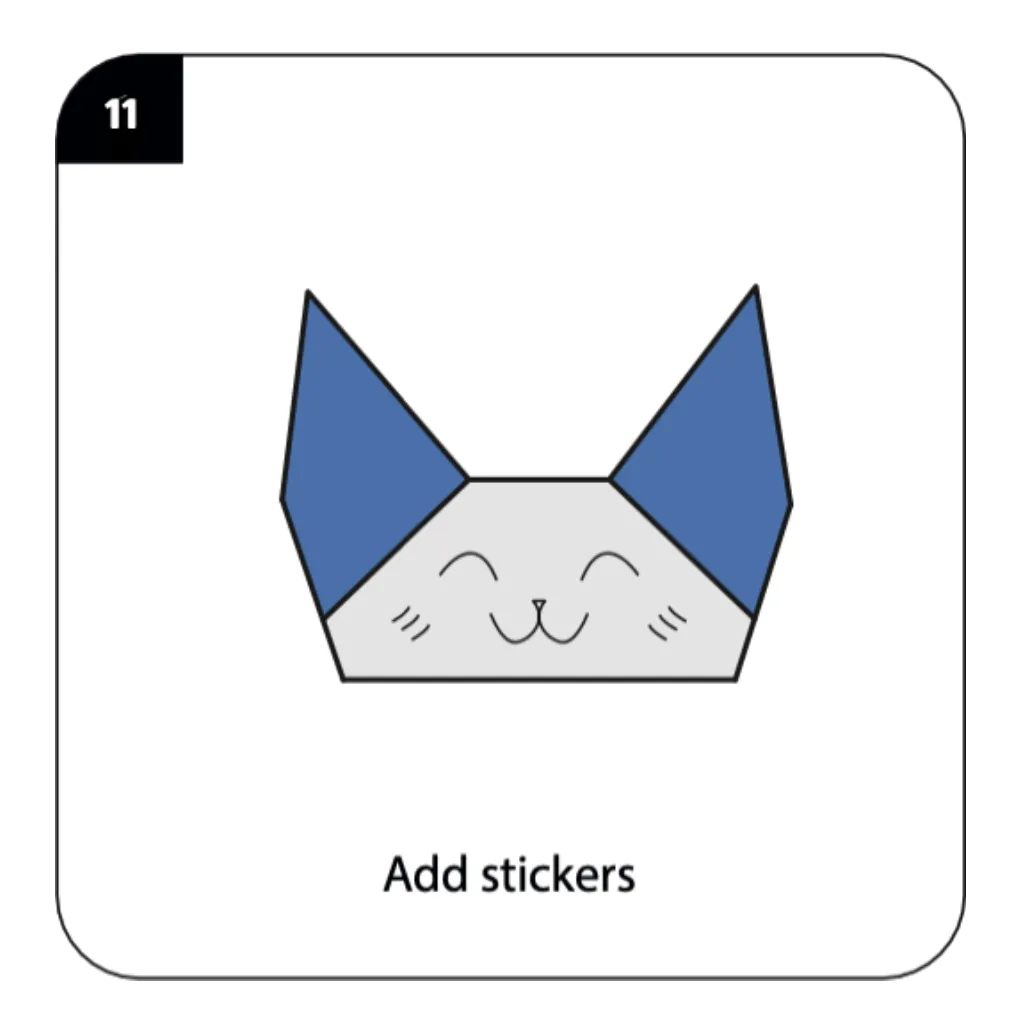
Add stickers, draw features, or use markers to create your cat’s funny facial expression. This creative step allows personalization, making each Origami Funny Cat unique and full of character. Children especially enjoy this phase where they can give their paper pet its own personality. Consider adding whiskers, a pink nose, wide eyes, or a silly smile to complete your funny cat creation.
Conclusion:
Congratulations on creating your adorable origami funny cat! Through just 11 simple steps, you’ve transformed a plain square of paper into a charming feline friend that’s sure to delight both children and adults. This easy project demonstrates how basic origami techniques can create recognizable, expressive characters perfect for various occasions. Your completed cat can serve as a bookmark, party decoration, gift tag, or simply a fun desk companion. The skills you’ve learned—basic folds, symmetrical construction, and creative finishing touches—provide an excellent foundation for exploring more origami animals. We encourage you to experiment with different paper colors and facial expressions to create a whole family of funny cats, each with its own unique personality. Whether you’re teaching children, decorating for a cat-themed party, or simply enjoying a relaxing craft session, these Origami Funny Cats bring joy and creativity to any setting. Happy folding, and don’t forget to share your funny feline creations!
- Explore more easy origami animals → Discover simple animal designs perfect for kids including dogs, birds, butterflies, and more friendly creatures.
- Origami projects for children → Find age-appropriate paper folding activities that develop fine motor skills and creativity in young learners.
- Pet-themed origami collection → Create paper versions of favorite pets including cats, dogs, rabbits, and hamsters with easy tutorials.
- Basic origami techniques for beginners → Master fundamental folding methods used in this cat tutorial and apply them to other simple projects.
- Party craft origami ideas → Discover paper folding projects perfect for birthday parties, including decorations, favors, and activities.
