
Introduction:
Welcome to our delightful origami crab tutorial! This charming sea creature project brings the magic of the ocean to your fingertips through the ancient art of paper folding. Perfect for summer crafts, beach-themed parties, or marine biology lessons, this origami crab captures the distinctive sideways-walking crustacean in a simple yet recognizable form. What makes this design special is its approachable difficulty level—suitable for beginners while still producing an impressive result that clearly resembles a crab with its characteristic claws and compact body. The blue-gray paper shown creates a realistic ocean feel, but you can use red for a cooked crab appearance or any color that sparks creativity. Whether you’re teaching children about sea life, decorating for a nautical theme, or simply enjoying a relaxing craft session, this origami crab offers both educational value and artistic satisfaction. With just eight straightforward steps using basic folding techniques like reverse folds, you’ll transform a simple square into a charming paper crab that’s sure to scuttle its way into everyone’s hearts!
Detailed Step Descriptions:
STEP 1: CREATING THE INITIAL FOLD ORIGAMI CRAB
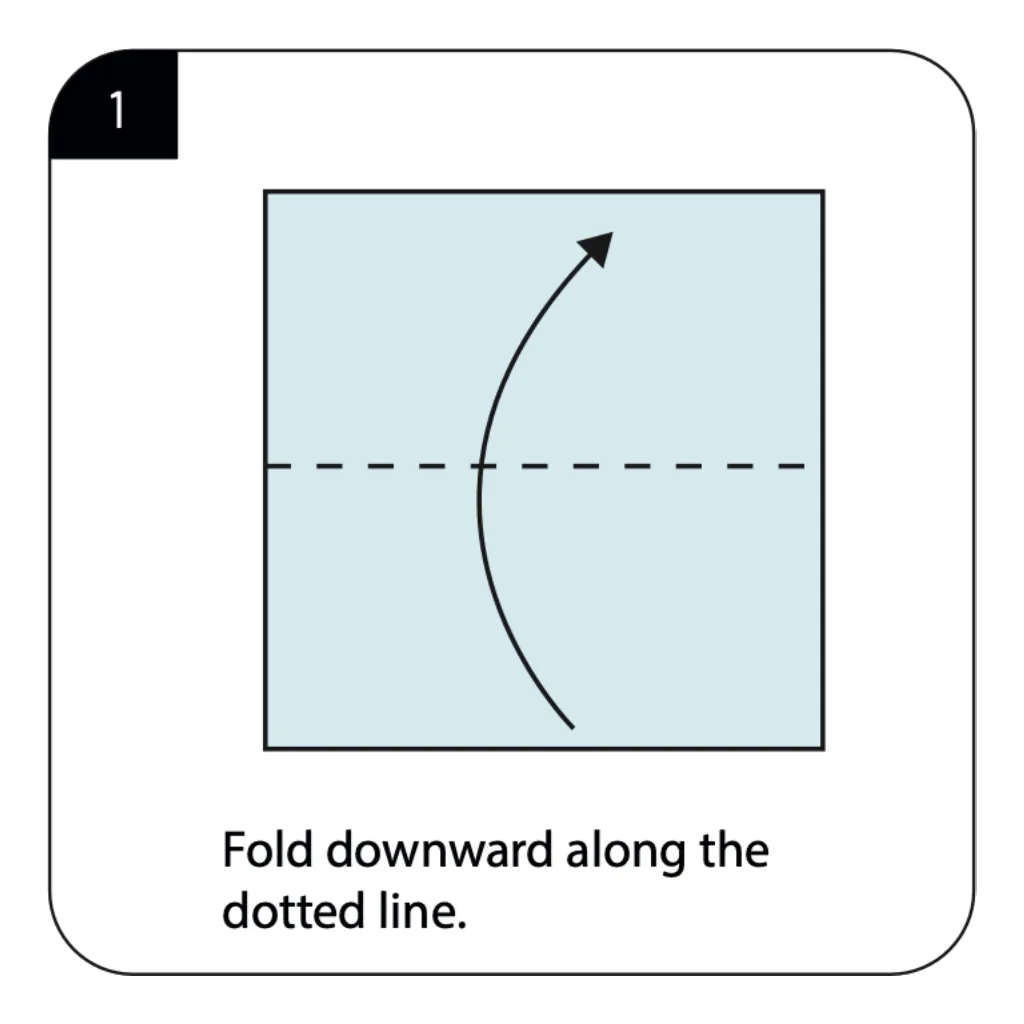
Begin your origami crab by folding the square paper downward along the dotted line shown in the diagram. This foundational fold establishes the rectangular base that will form your crab’s body structure. Simple origami sea creatures often start with basic geometric shapes, making them accessible for beginners. The clean, straight fold creates the framework for all subsequent transformations in your paper crab.
STEP 2: CONTINUING THE DOWNWARD FOLD ORIGAMI CRAB

Fold downward again along the dotted line to create a narrower rectangular shape. This second fold reduces the paper’s height while maintaining the width needed for the crab’s characteristic broad body. Origami ocean animals frequently use these progressive folding sequences to achieve proper proportions. The layered structure created by this fold adds stability to your developing crab model.
STEP 3: OPENING AND FLATTENING
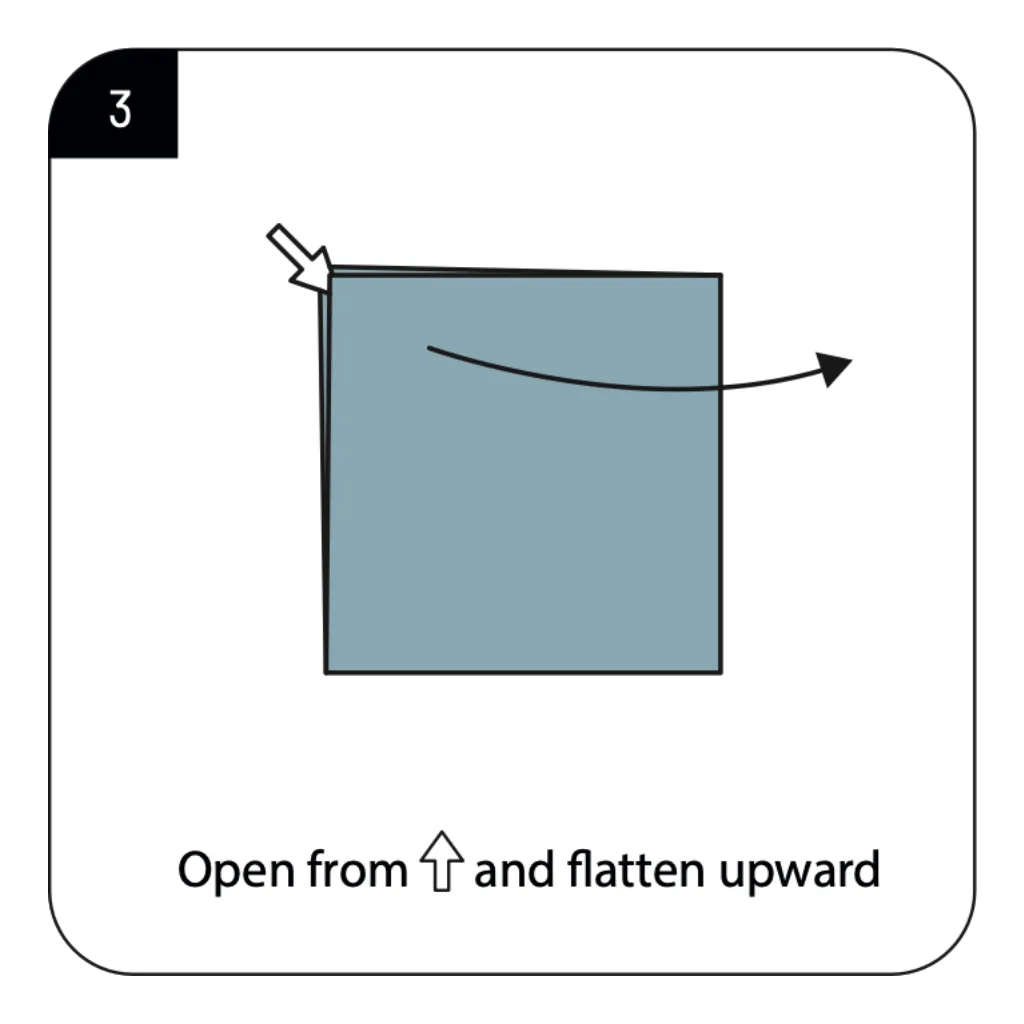
Open the paper from the indicated corner and flatten it upward to create a triangular section. This transformative step begins converting the flat rectangle into the dimensional form of a crab. Beach-themed origami projects often feature these opening techniques that add three-dimensional elements. The flattening process requires gentle pressure to maintain clean edges while creating new angles.
STEP 4: TURNING THE MODEL
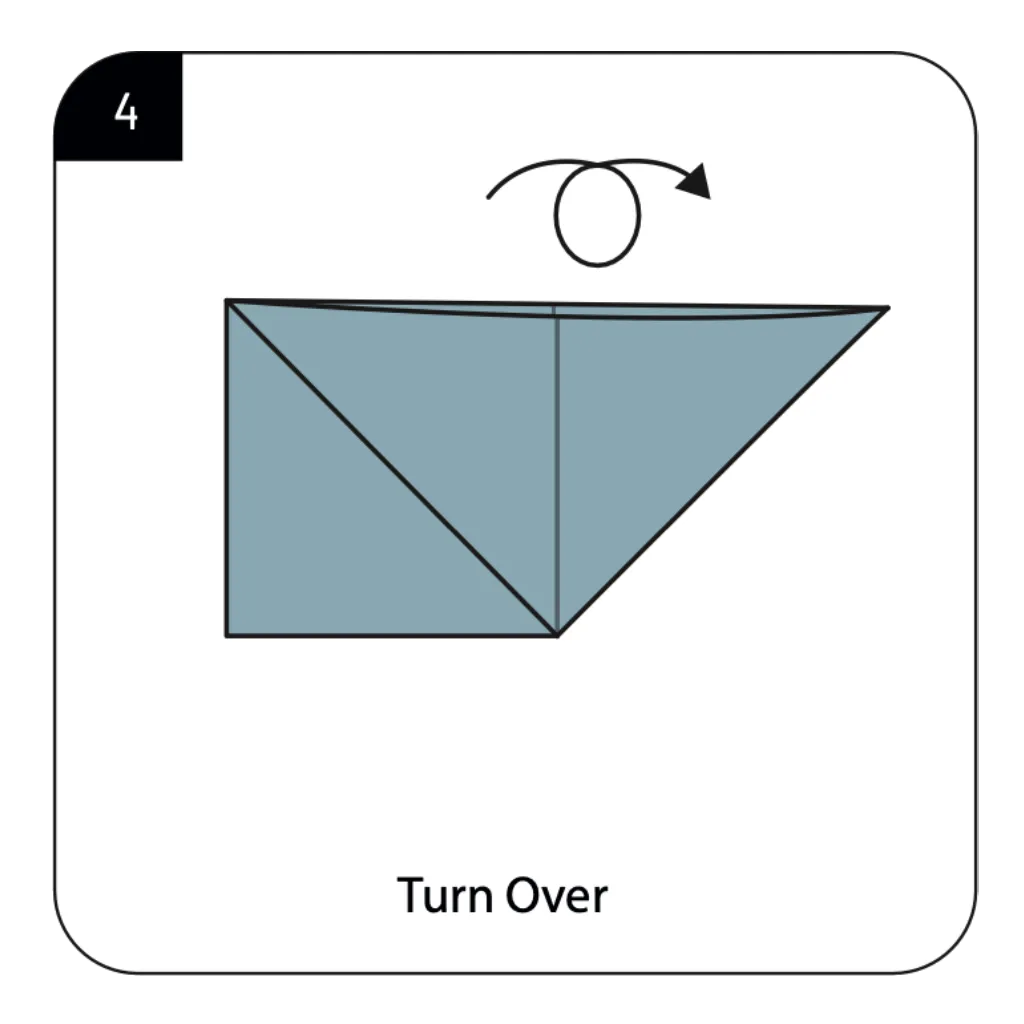
Turn the entire model over to access the opposite side for continued folding. This rotation allows you to work on both sides of the paper, essential for creating symmetrical features. Origami crab tutorials emphasize the importance of these turns for achieving balanced proportions. The flip reveals how previous folds have prepared the foundation for the crab’s distinctive shape.
STEP 5: SECOND OPENING AND FLATTENING
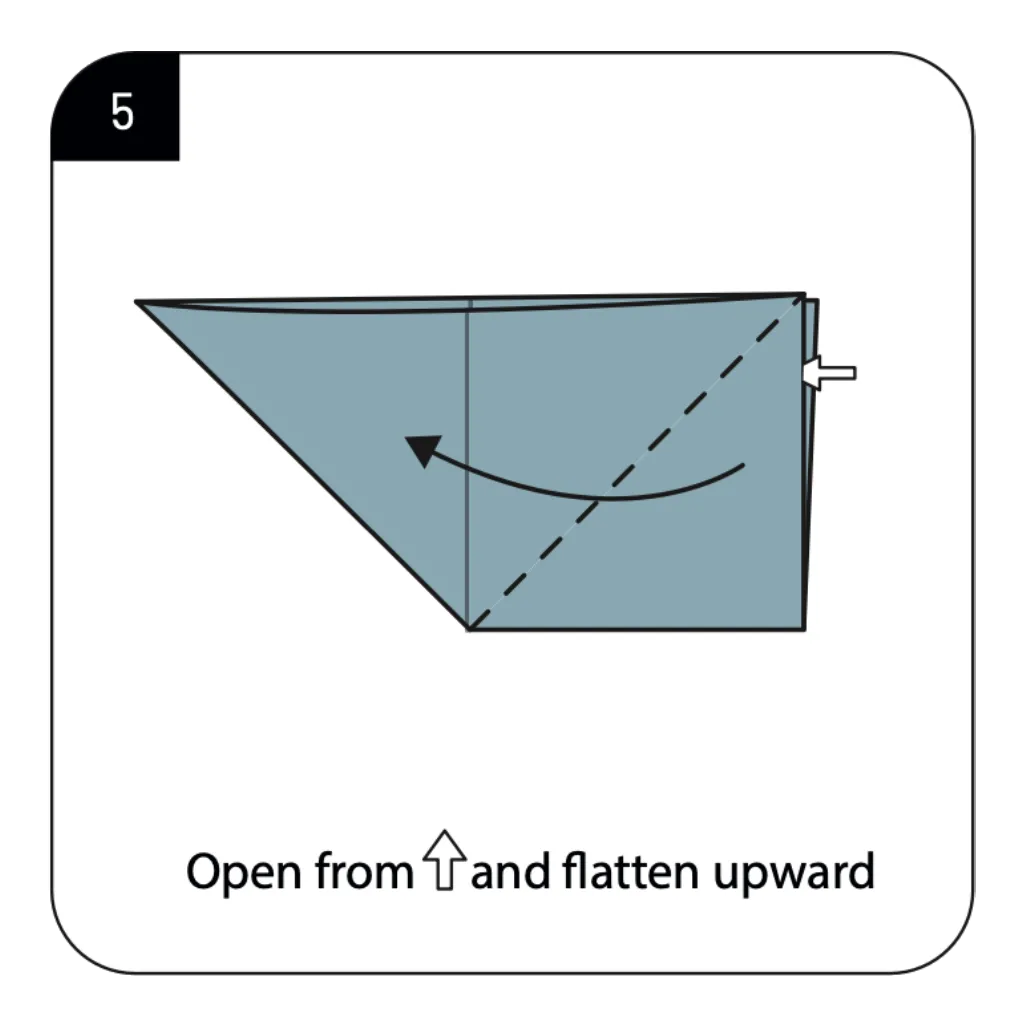
Open from the indicated point and flatten upward, mirroring the action from step 3 on this side. This creates symmetry in your crab model, ensuring both sides develop identical features. Paper sea animal crafts rely on these mirrored actions to create realistic bilateral symmetry. The second flattening completes the basic triangular structure that will become your crab’s body.
STEP 6: CREATING THE CLAWS
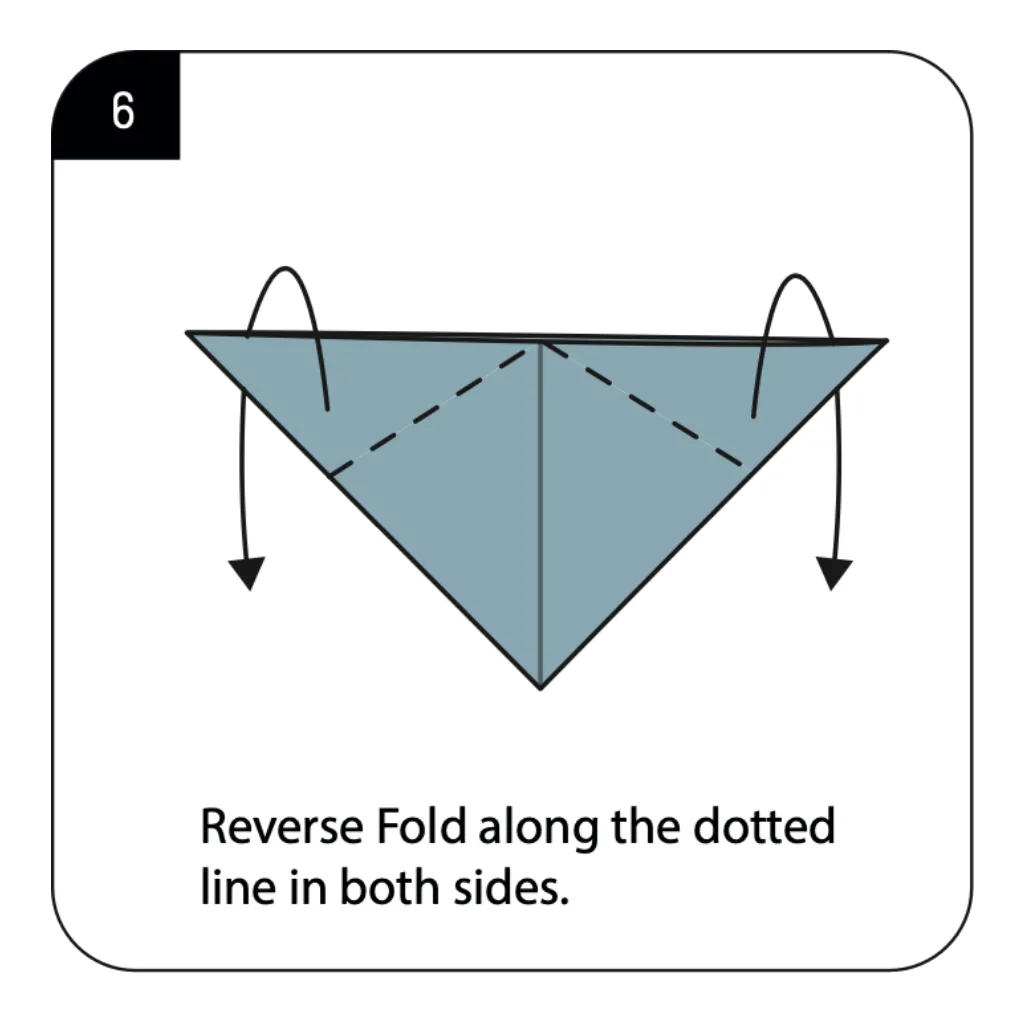
Execute reverse folds along the dotted lines on both sides to form the crab’s distinctive claws. Reverse folding is a crucial origami technique that creates dimension and allows paper to project outward. Marine origami creatures often feature these specialized folds to create appendages like claws or fins. The precision of these reverse folds determines how realistic your crab’s pincers will appear.
STEP 7: REFINING THE CLAW STRUCTURE
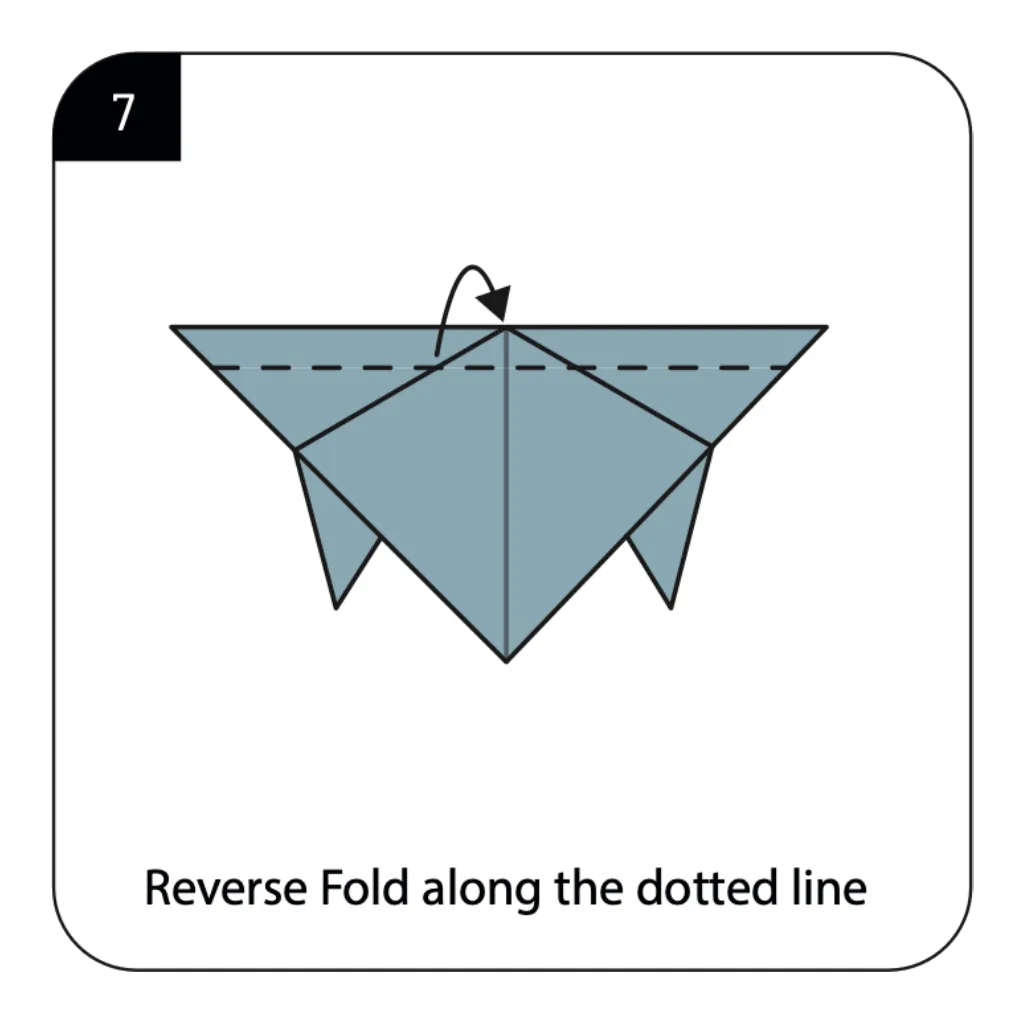
Perform another reverse fold along the dotted line to further define the crab’s claw shape. This secondary fold creates the jointed appearance characteristic of real crab claws. Origami crustacean designs utilize multiple reverse folds to achieve anatomically recognizable features. The careful execution of this step ensures your crab’s claws have the proper angular positioning.
STEP 8: TURNING AND FINALIZING
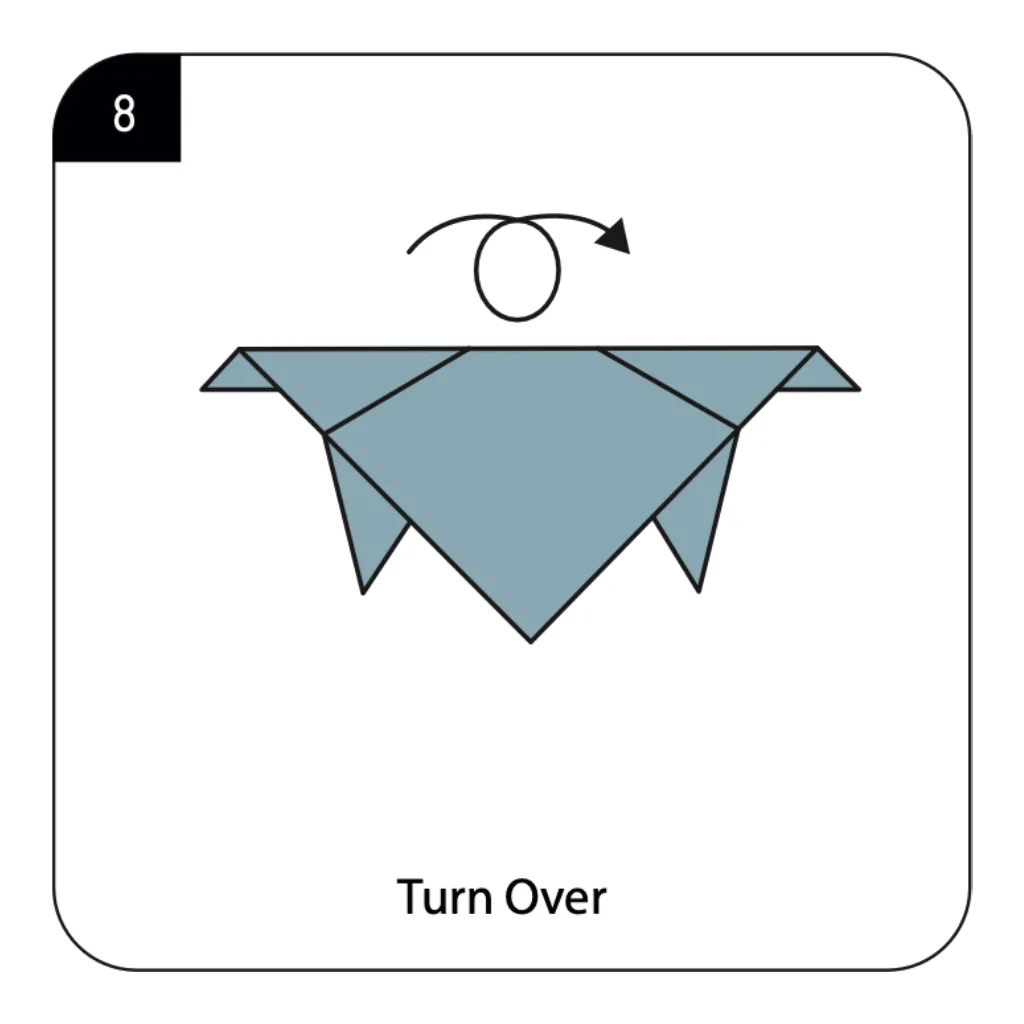
Turn the model over one final time to reveal the completed origami crab. This last turn shows the finished design with all elements properly positioned and visible. Summer craft origami projects often conclude with this satisfying reveal of the completed form. The final view displays your crab with its broad body, distinctive claws, and charming character.
STEP 9: COMPLETING THE LEGS
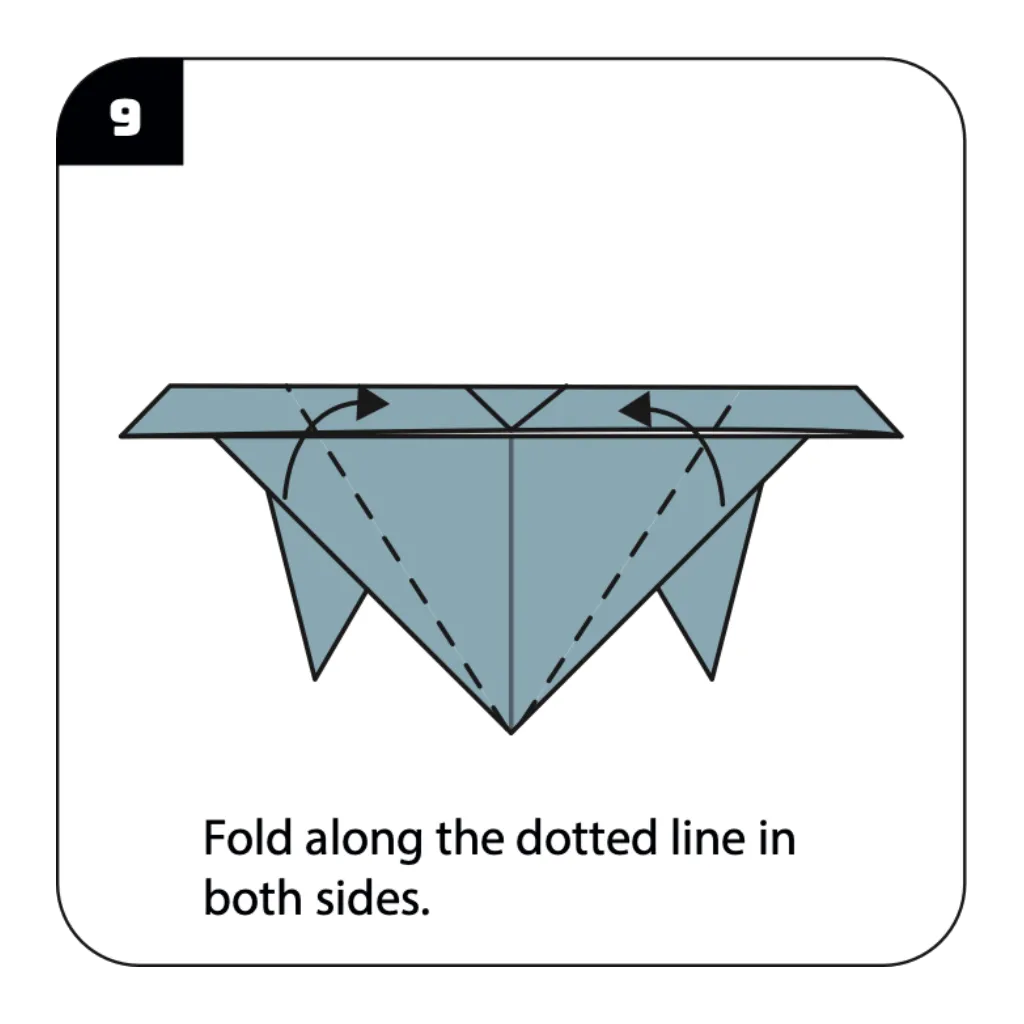
Fold along the dotted lines on both sides to create the crab’s walking legs. These final folds add the multiple legs that make crabs instantly recognizable sea creatures. Origami beach animals benefit from these detail elements that enhance realism and visual appeal. The completed legs give your paper crab stability and complete its characteristic silhouette.
STEP 10: FINAL CLAW REFINEMENT ORIGAMI CRAB
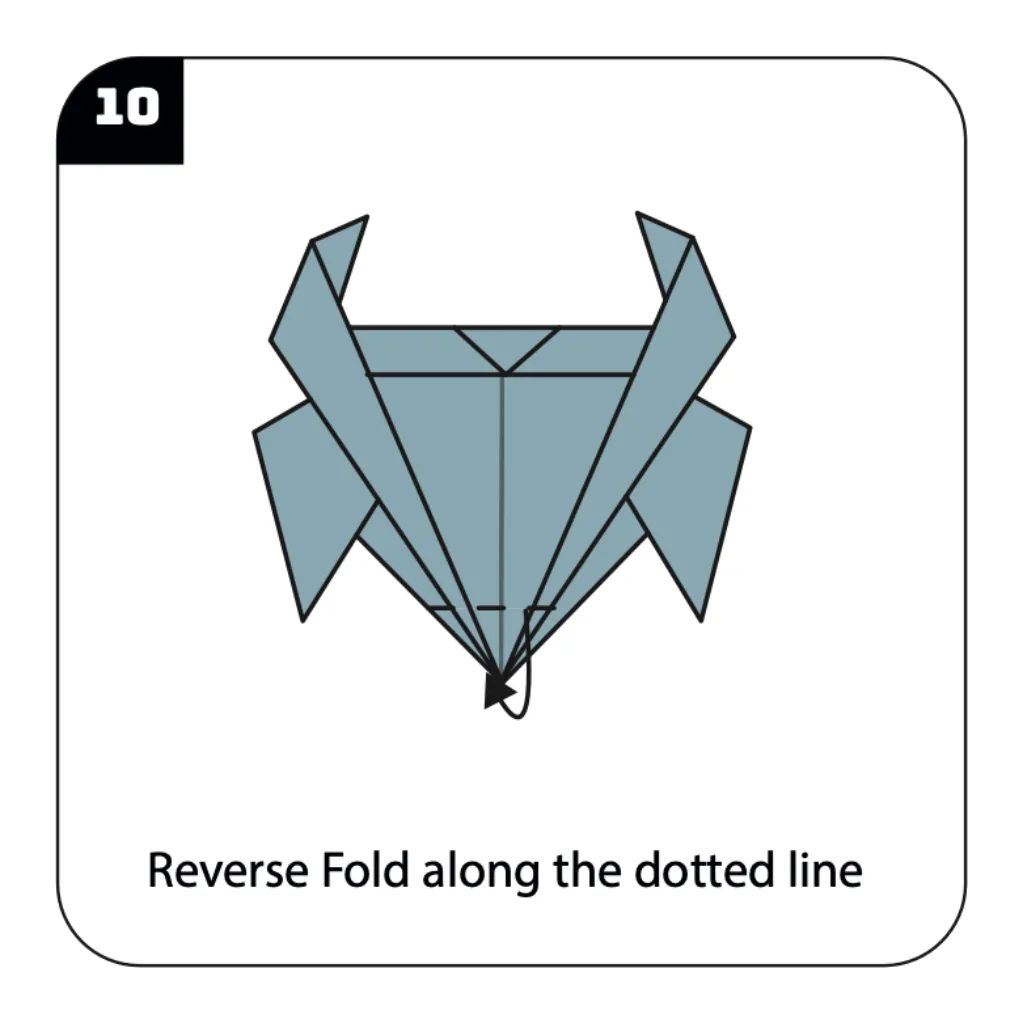
Execute another reverse fold along the dotted line to perfect the crab’s claw structure. This advanced reverse fold creates the distinctive pincer shape that makes crab claws so recognizable. Origami sea creature tutorials often save these intricate details for the final steps to ensure clean execution. The careful positioning of this fold gives your crab’s claws their characteristic curved, grasping appearance.
STEP 11: COMPLETING YOUR CRAB
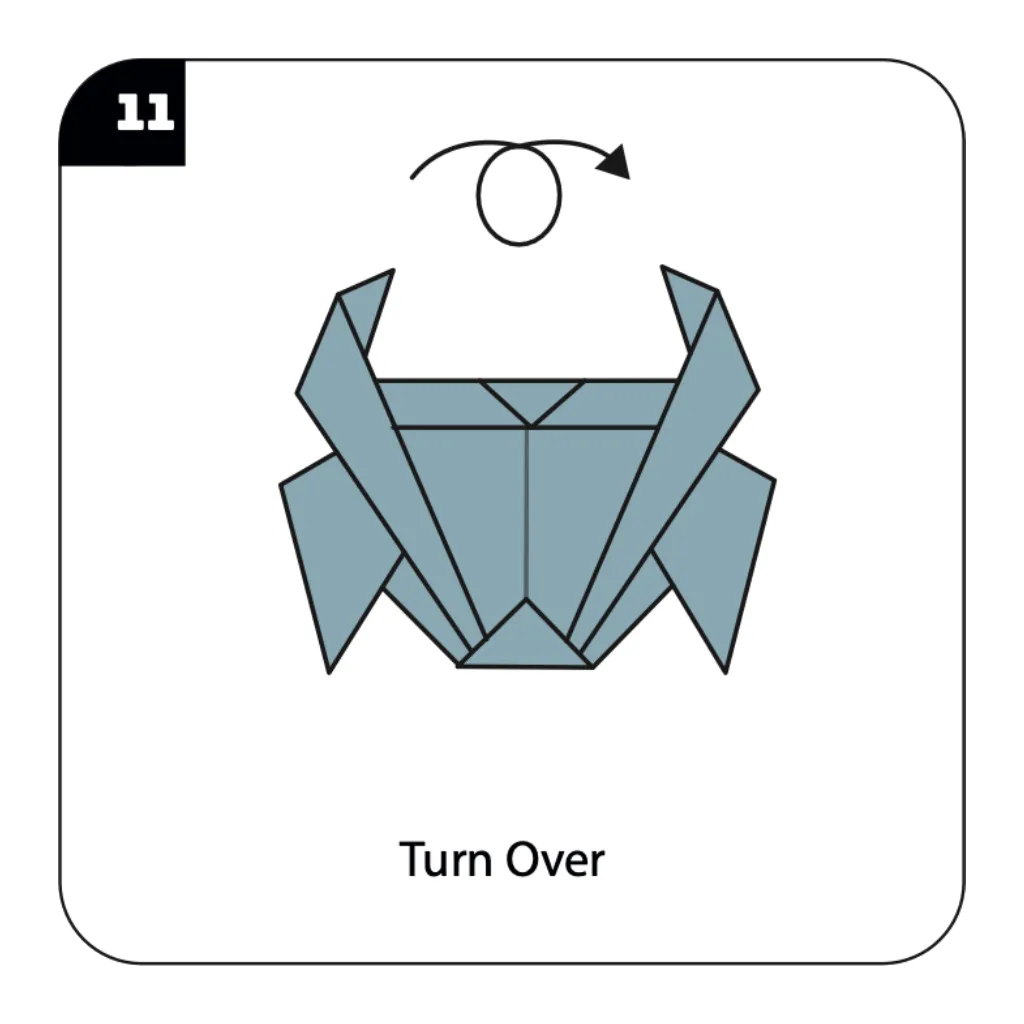
Turn the model over for the final time to reveal your completed origami crab in all its glory. This last turn displays the finished design with perfectly positioned claws and realistic proportions. Beach craft origami projects often conclude with this satisfying moment of revealing the completed creation. Your paper crab now showcases all its features: broad body, jointed legs, and impressive claws ready to pinch!
Conclusion:
Congratulations on creating your adorable origami crab! Through just eight carefully designed steps, you’ve transformed a simple square of paper into a recognizable sea creature that captures the essence of these fascinating crustaceans. Your completed crab showcases essential origami techniques including basic folds, reverse folds, and strategic turning—skills that form the foundation for more complex marine origami projects. This charming paper crab serves multiple purposes: as a summer decoration, an educational tool for teaching about ocean life, a component in beach-themed crafts, or simply as a fun desk companion. The techniques you’ve mastered open doors to creating entire underwater scenes with various sea creatures. We encourage you to experiment with different paper colors and sizes to create a whole family of crabs, perhaps even adding googly eyes or drawing patterns on their shells for extra personality. Whether displayed individually or as part of a larger ocean diorama, these origami crabs bring a touch of seaside charm to any setting!
- Explore our ocean origami collection → Discover more sea creatures including fish, whales, octopuses, and seahorses with easy-to-follow tutorials.
- Summer craft origami projects → Find beach-themed paper folding ideas perfect for vacation activities, including shells, boats, and marine life.
- Origami techniques: Reverse folds → Master the reverse fold technique used in this crab tutorial and apply it to other complex origami models.
- Kids’ marine biology origami → Create educational paper models of sea creatures to teach children about ocean ecosystems and marine life.
- Party decoration origami ideas → Learn to make beach and ocean-themed decorations including crabs, fish, and nautical elements for parties.
