

Introduction:
Welcome to our simple origami cup tutorial! This classic paper folding project is one of the easiest and most practical origami designs you can master. Perfect for complete beginners, children, and anyone looking for a quick craft project, this origami cup takes just minutes to create and actually functions as a real cup. What makes this design special is its simplicity—using only six straightforward folds, you’ll transform a square piece of paper into a useful container that can hold water, snacks, or small objects. This traditional origami model has been taught to generations of children worldwide, making it an excellent starting point for anyone new to paper folding. Whether you’re at a picnic needing a quick cup, teaching kids basic origami skills, or creating party favors, this versatile paper cup delivers both form and function. The green paper shown creates an eco-friendly appearance, but any paper color works perfectly. Let’s dive into creating your own origami cup that combines practicality with the timeless art of Japanese paper folding!
Detailed Step Descriptions:
STEP 1: CREATING THE INITIAL FOLD
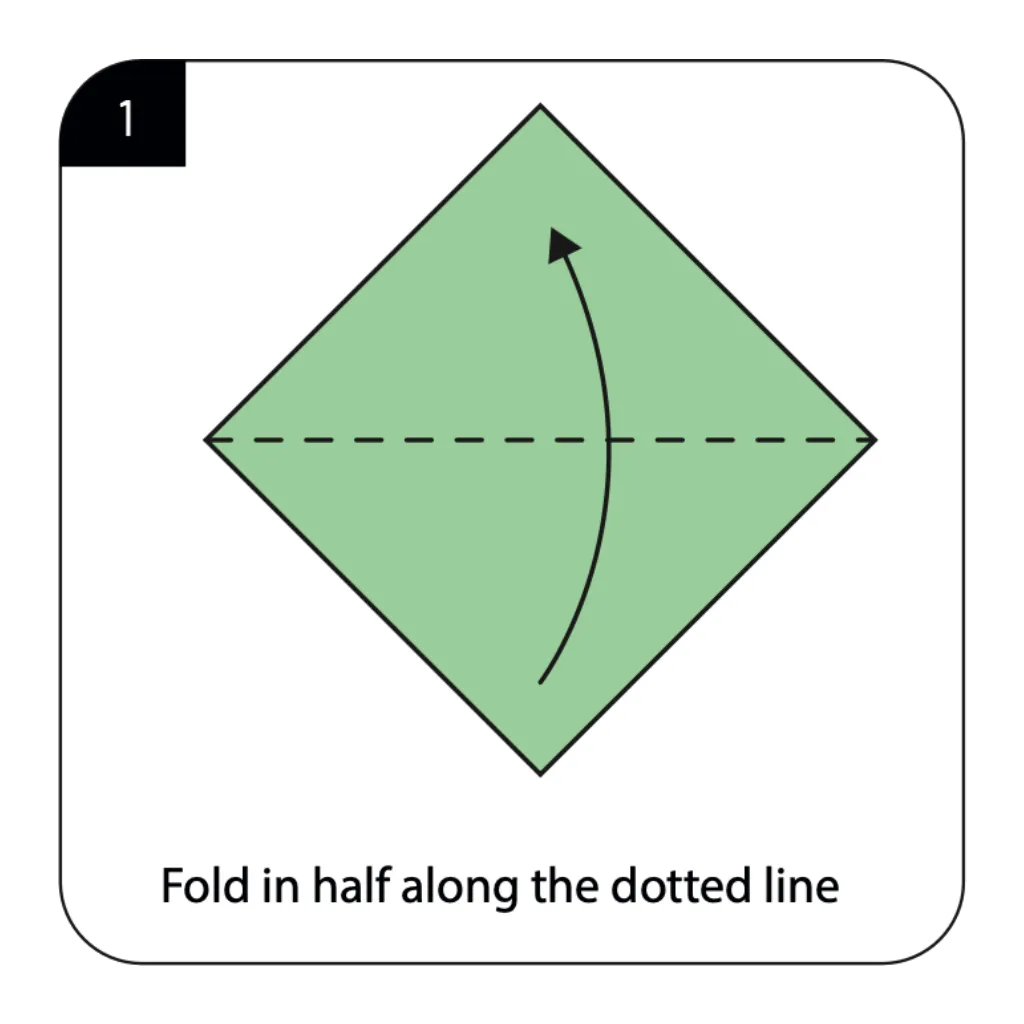
Begin your origami cup by folding the square paper in half along the dotted line to form a triangle. This foundational diagonal fold creates the basic triangular shape that will transform into your functional cup. Simple origami projects for beginners always start with these fundamental geometric folds. Ensure your corners align perfectly to create a crisp, clean crease that will guide all subsequent folds.
STEP 2: FOLDING THE FIRST CORNER
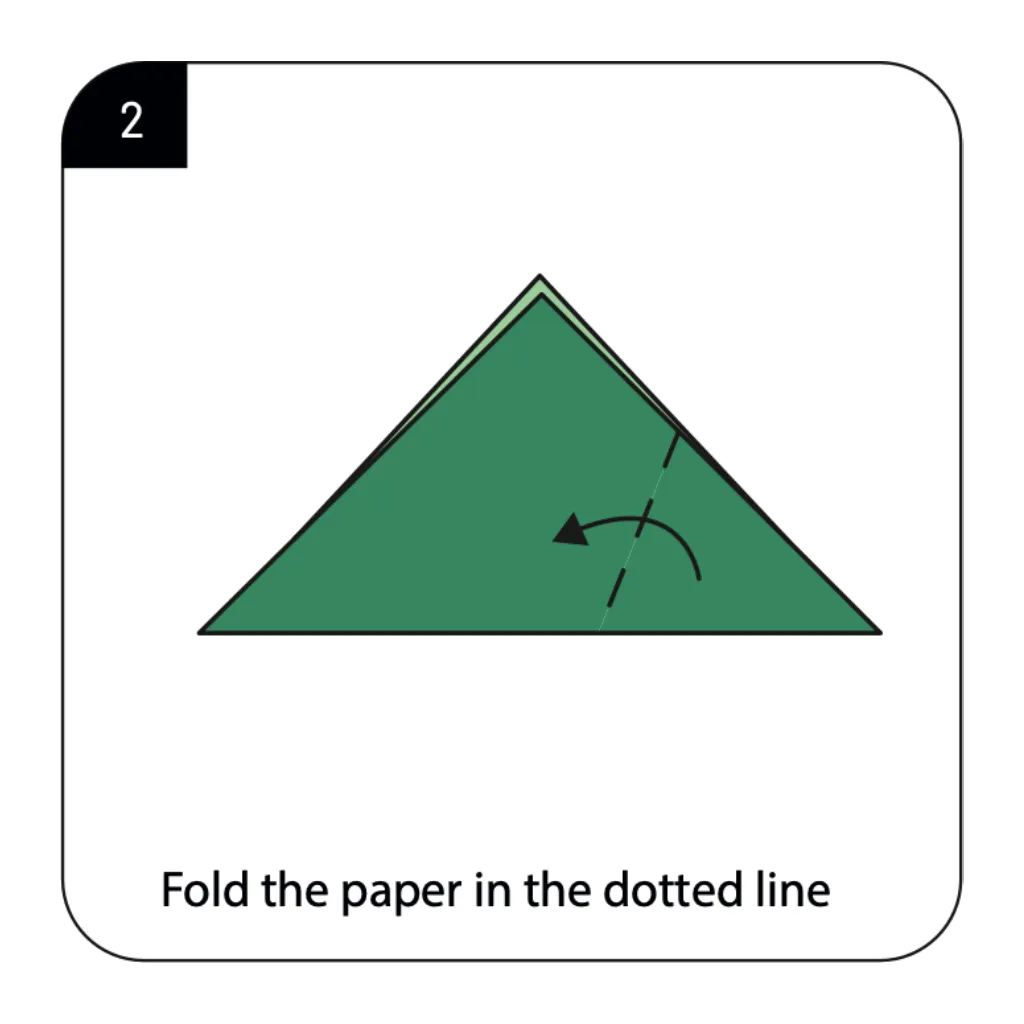
Fold the bottom right corner of the triangle upward along the dotted line as indicated by the arrow. This strategic fold begins creating the side wall of your origami cup while maintaining structural integrity. Easy paper cup tutorials emphasize the importance of precise angle folds for proper cup formation. The fold should bring the corner approximately two-thirds of the way up the triangle’s height.
STEP 3: FOLDING THE OPPOSITE CORNER
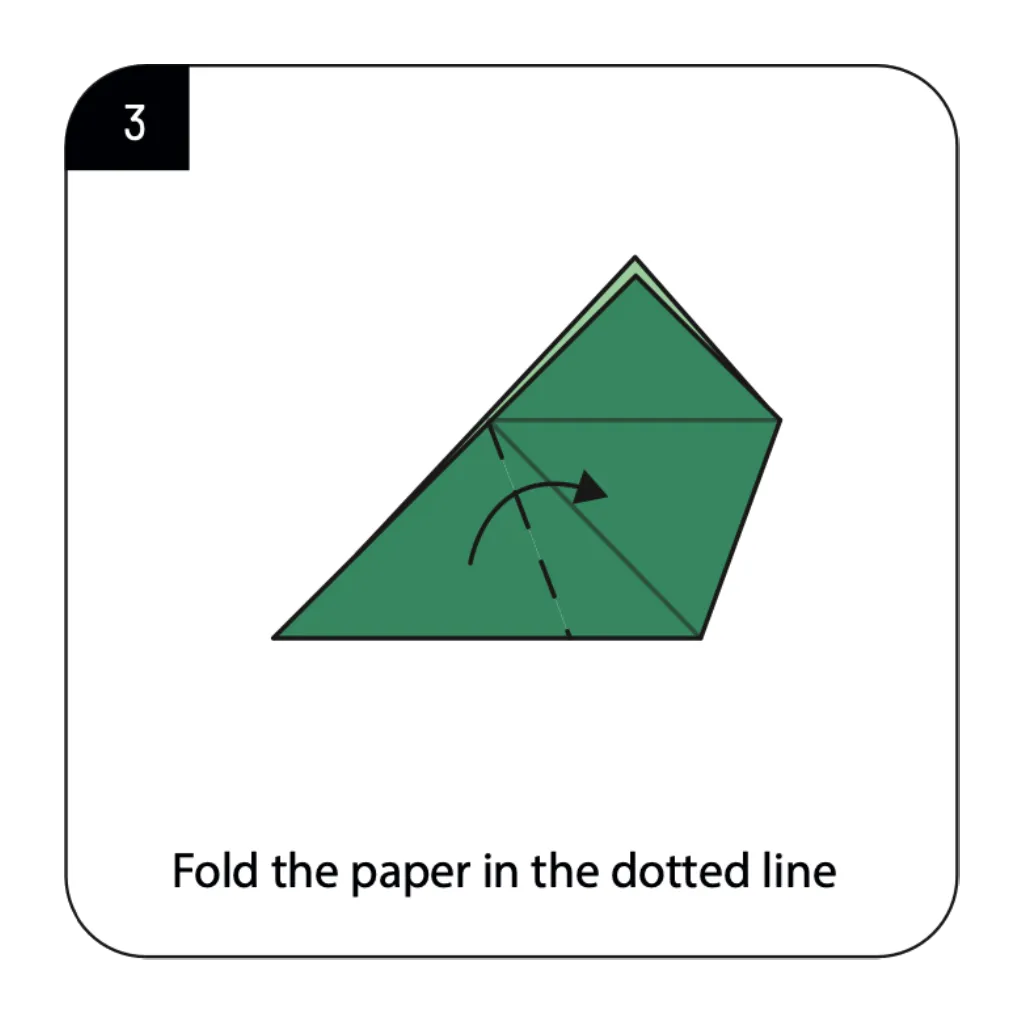
Fold the bottom left corner upward along the dotted line, mirroring the previous fold on the opposite side. This creates symmetry in your origami cup design, ensuring both sides have equal wall height. Kids’ origami projects benefit from these mirrored folds that are easy to understand and execute. The two folded corners now form the distinctive pointed sides that characterize this traditional cup design.
STEP 4: FOLDING THE FRONT FLAP
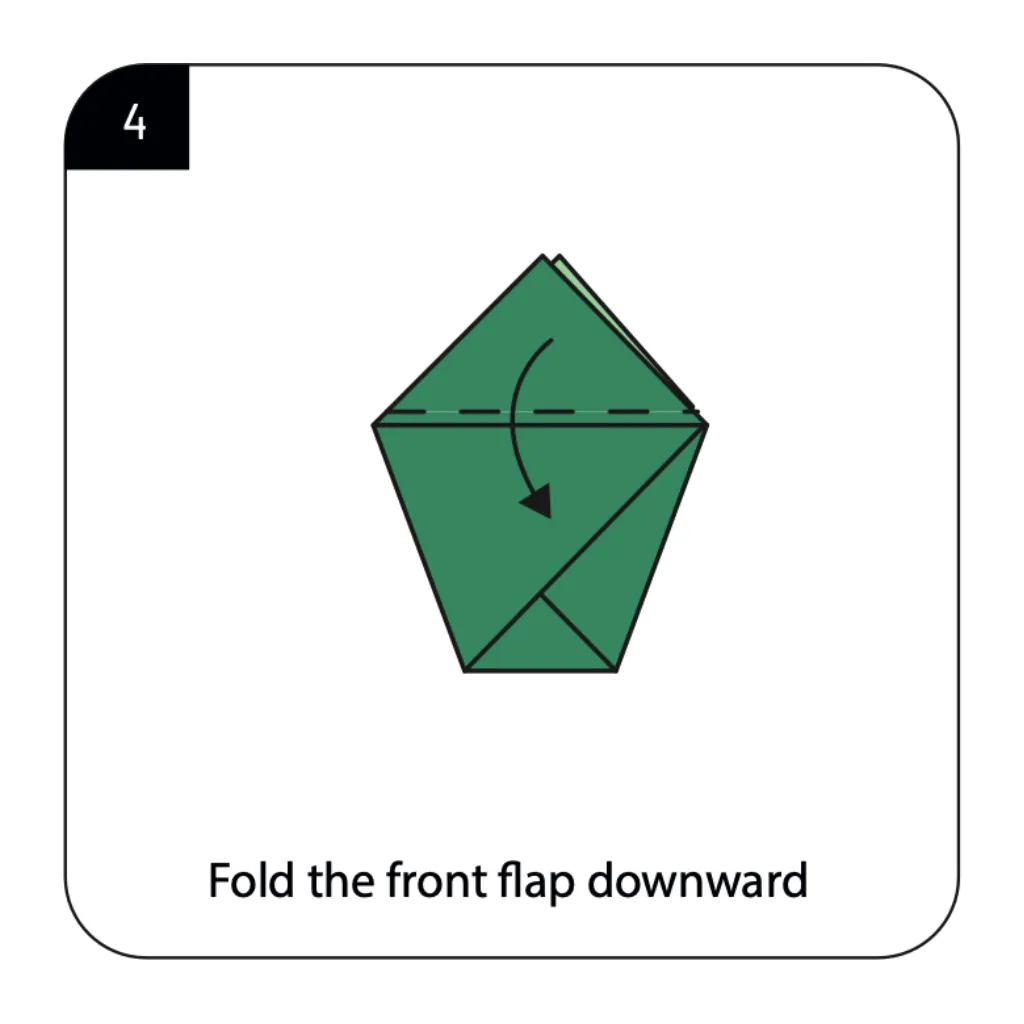
Fold the front triangular flap downward along the indicated line to create the cup’s rim. This fold secures the previously folded corners in place while forming a clean edge for drinking. Functional origami designs rely on these locking folds to maintain their shape during use. The downward fold creates the first layer of the rim that will make your paper cup practical.
STEP 5: CREATING THE REVERSE FOLD
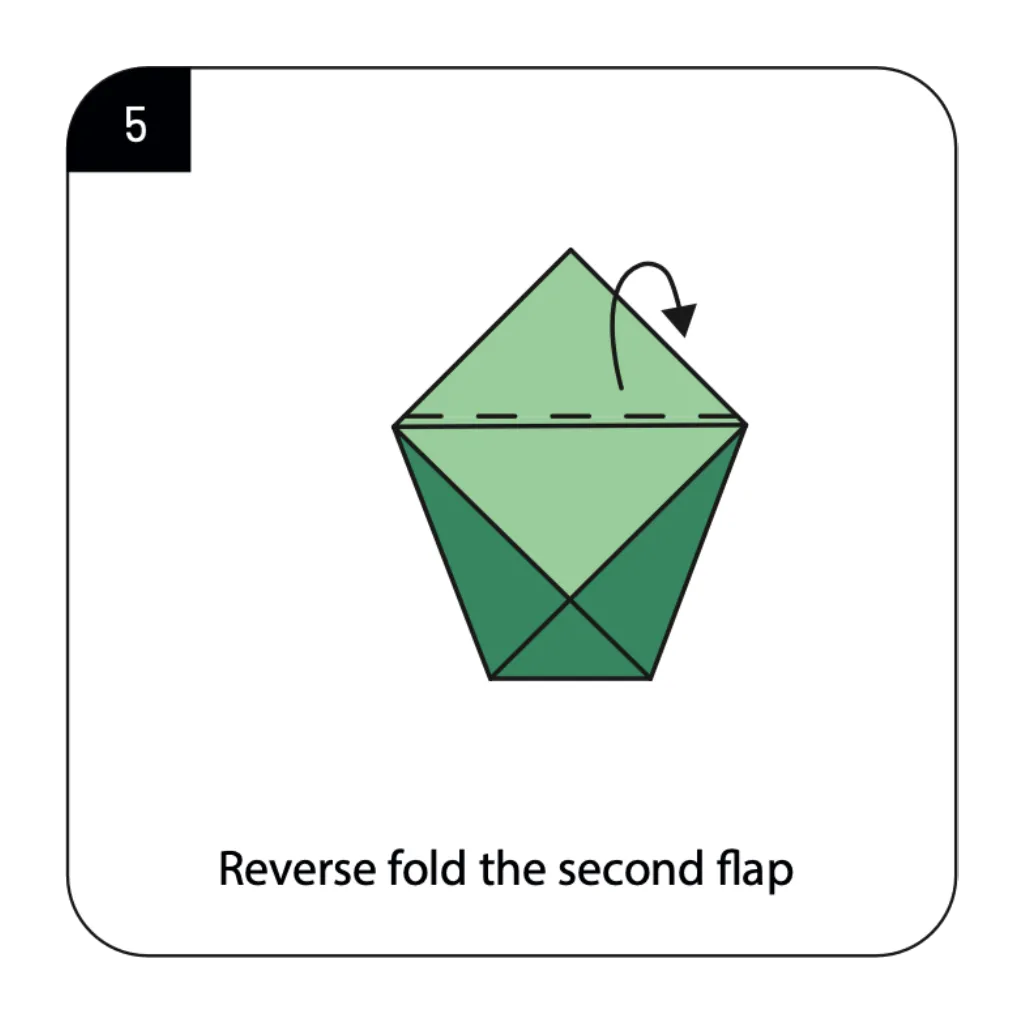
Execute a reverse fold on the second flap by tucking it behind the cup structure. This crucial step completes the rim formation and locks all the folds securely in place. Quick origami projects often use reverse folds to create clean finishes and structural stability. The reverse fold ensures your cup can hold liquid without the folds coming apart during use.
STEP 6: COMPLETING YOUR ORIGAMI CUP
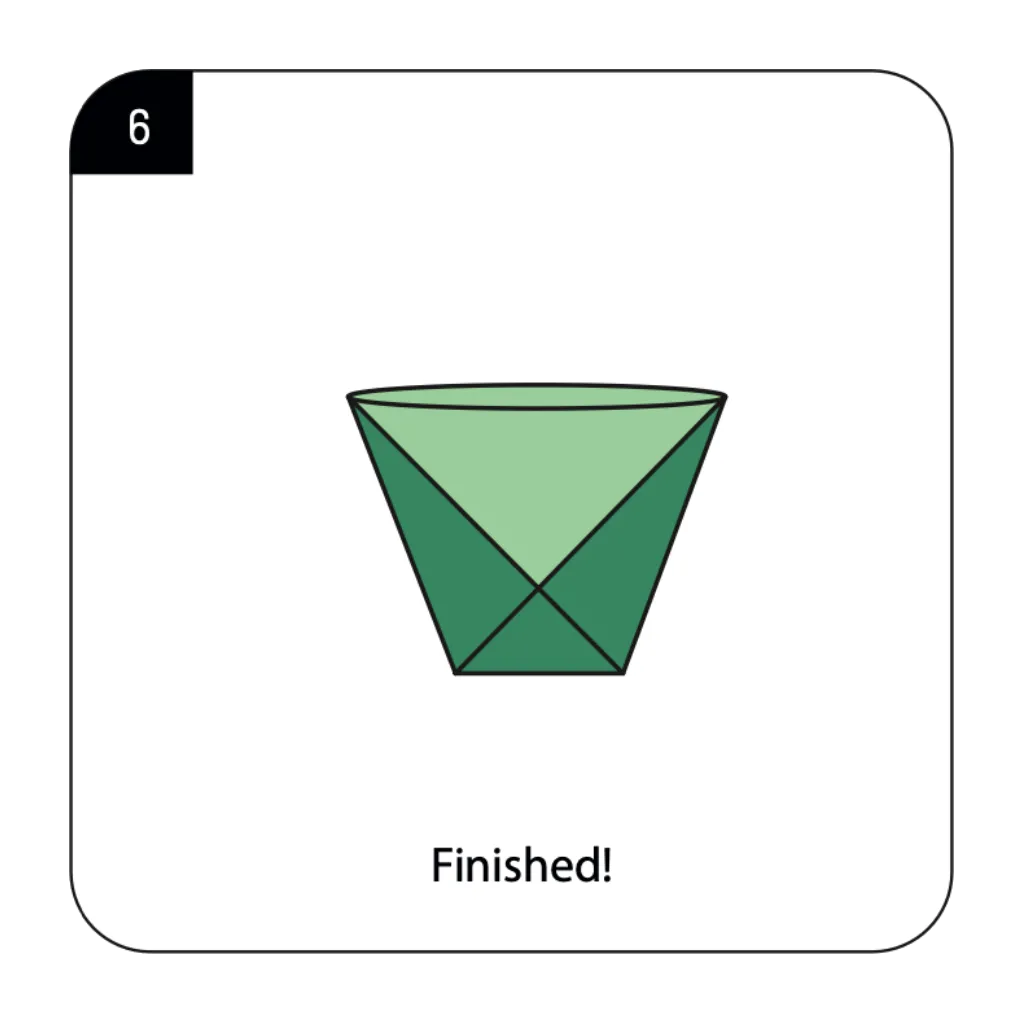
Your origami cup is now finished and ready for use as a functional paper container! Open the top gently by pressing the sides to create the cup’s opening for holding items. This completed paper cup demonstrates how simple folding techniques can create practical objects. The finished product can hold water for a short time or serve as a container for dry snacks and small items.
Conclusion:
Congratulations on creating your functional origami cup! In just six simple steps, you’ve transformed a flat square of paper into a practical container that showcases the magic of origami. This timeless design proves that paper folding isn’t just about creating decorative objects—it can produce genuinely useful items. Your completed cup can serve various purposes: as an emergency water holder, a snack container at parties, a teaching tool for geometry lessons, or a fun craft activity for children. The skills you’ve learned—basic folds, reverse folds, and structural thinking—provide an excellent foundation for exploring more complex origami projects. We encourage you to practice this design until you can fold it from memory, as it’s a handy skill for camping trips, picnics, or any situation where you need a quick container. Share this practical origami with friends and family, and enjoy the satisfaction of creating something both beautiful and functional!
- Explore more functional origami projects → Discover practical paper creations including boxes, bowls, envelopes, and other useful everyday items.
- Easy origami for beginners → Find simple projects perfect for those just starting their origami journey, with clear step-by-step instructions.
- Kids’ origami activities → Browse child-friendly paper folding projects that develop fine motor skills and creativity.
- Party craft origami ideas → Learn to make decorative and functional items for parties, including cups, boxes, and favor containers.
- Traditional origami models → Explore classic Japanese paper folding designs that have been passed down through generations.
