
Introduction:
Welcome to the thrilling world of origami fighter planes! This comprehensive tutorial will guide you through creating a sleek, aerodynamic paper jet that combines impressive looks with excellent flying performance. Unlike basic paper airplanes, this fighter jet model features distinctive wing shapes, a cockpit area, and stabilizing elements that mimic real military aircraft. What makes this design special is its balance between simplicity and authentic appearance—while accessible to beginners, the finished result looks impressively like a fighter jet. Whether you’re planning activities for a children’s party, looking for screen-free entertainment, or competing in paper airplane flying contests, this origami fighter plane delivers both style and function. The cool blue paper shown creates a sleek, modern jet appearance, though any paper color works wonderfully—try camouflage-patterned paper for an extra military touch! Perfect for classrooms, rainy day activities, or outdoor flying competitions, this paper fighter jet combines the precision of origami with the fun of aerodynamic experimentation. Let’s dive into creating a paper aircraft that’s sure to soar above the competition!
Detailed Step Descriptions:
STEP 1: CREATING THE INITIAL FOLD ORIGAMI FIGHTER
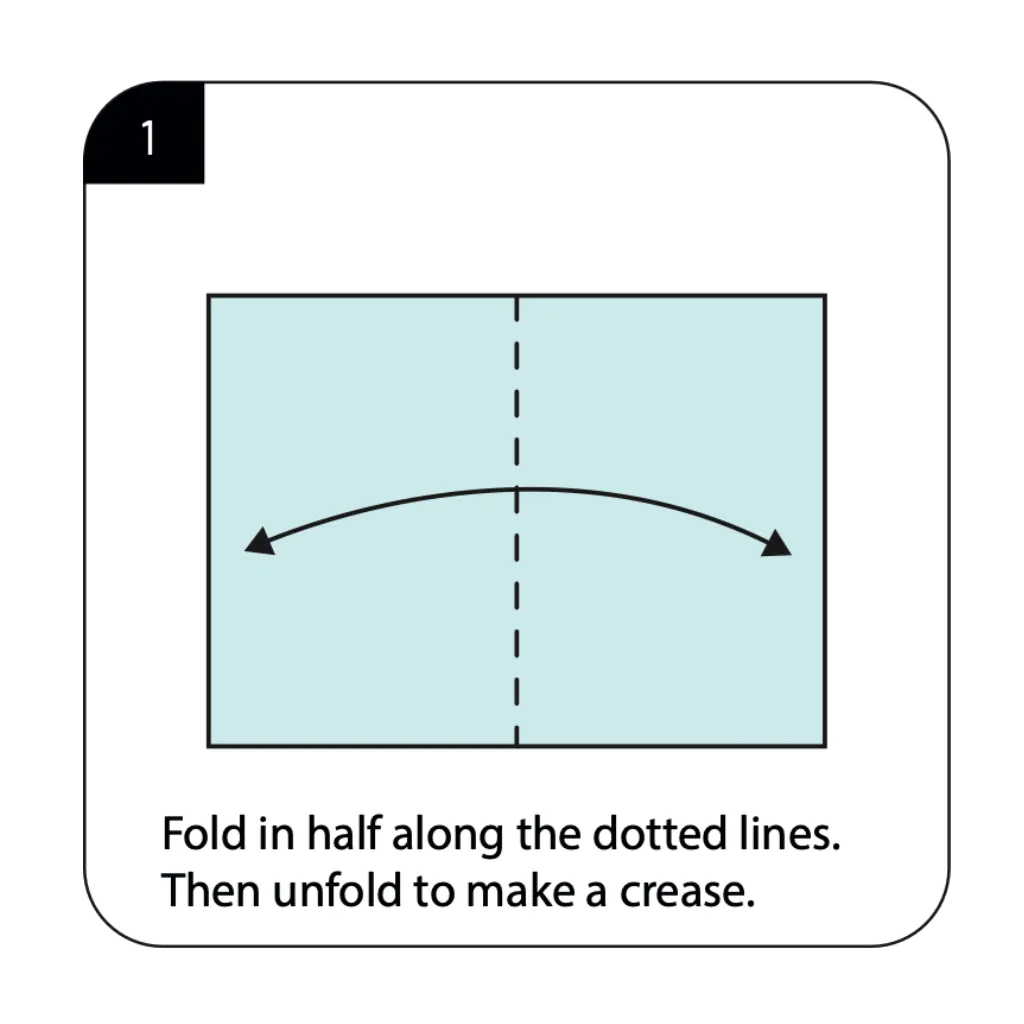
Begin your origami fighter plane by folding the rectangular paper in half along the dotted lines, then unfold to create a crease. This foundational fold establishes the central axis that will define the symmetry of your fighter jet. Paper airplane tutorials emphasize the importance of this precise center line for achieving balanced flight. After unfolding, the visible crease serves as a critical reference guide for all subsequent folding steps.
STEP 2: ESTABLISHING DIAGONAL CREASES
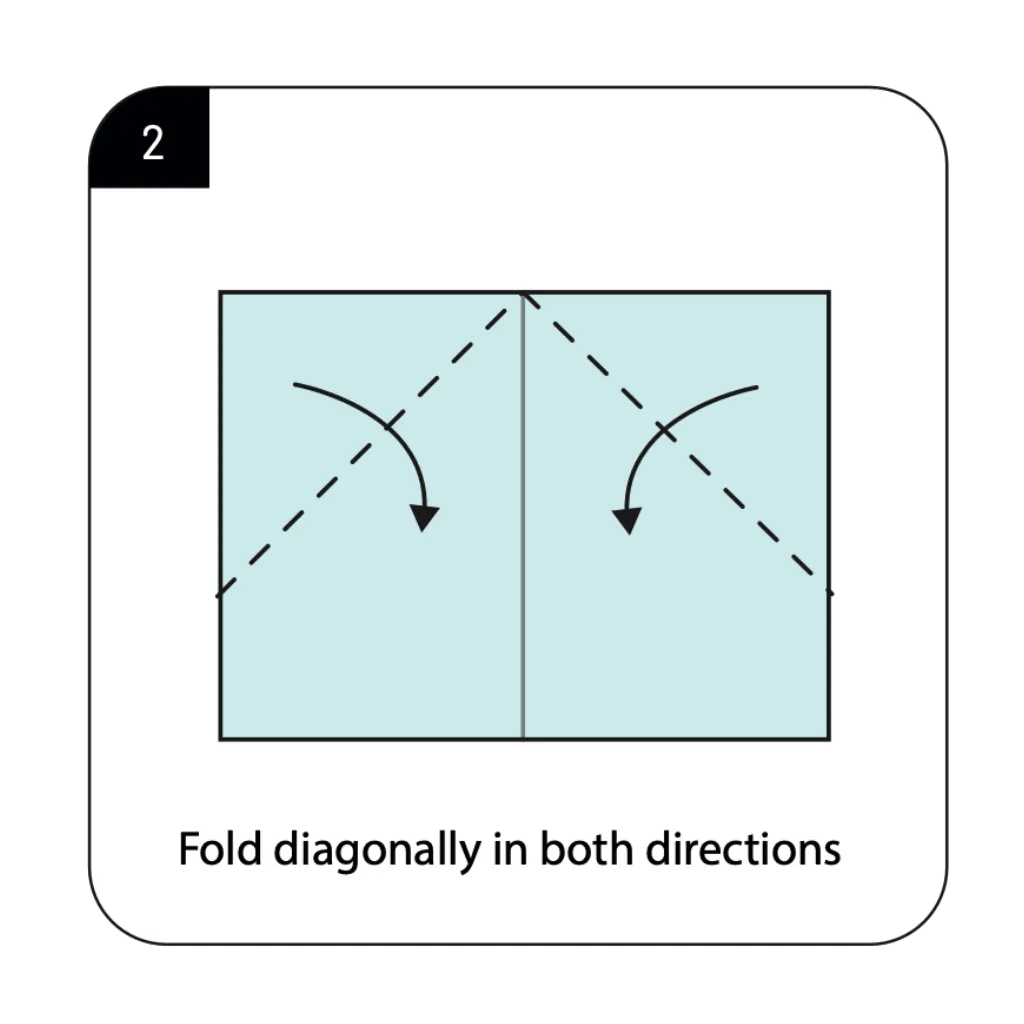
Fold the paper diagonally in both directions as indicated by the arrows to create an X pattern of creases. These diagonal folds establish a geometric framework that helps define the fighter jet’s aerodynamic form. Flying origami plane designs rely on these intersecting creases to create stability during flight. After making firm creases, unfold the paper completely to reveal the comprehensive folding roadmap.
STEP 3: FOLDING THE TOP SECTION ORIGAMI FIGHTER
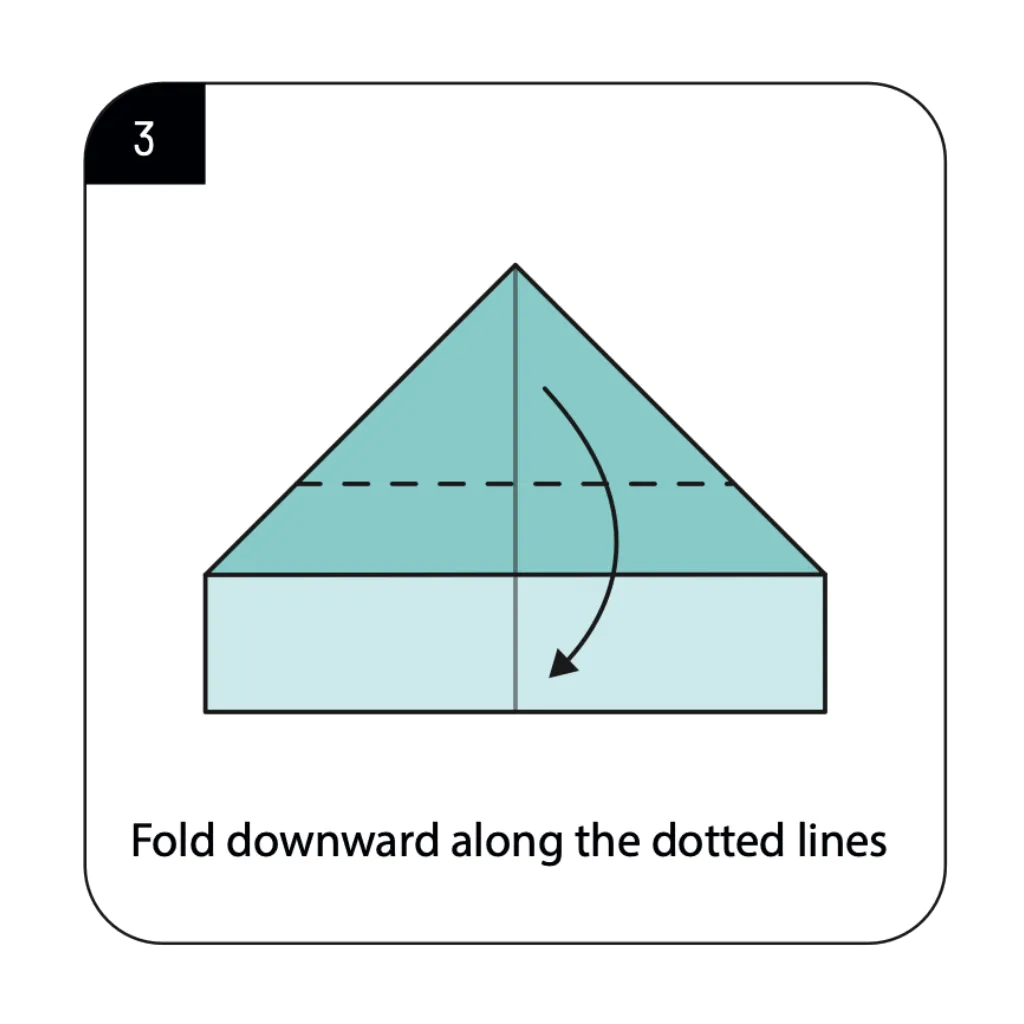
Fold the top portion downward along the dotted lines to create the first major structural element. This fold begins narrowing the paper into the characteristic pointed nose of your fighter jet. Cool paper airplanes for kids often feature this precision nose folding to maximize flight distance. The clean, straight fold should align perfectly with the center crease for optimal aerodynamic performance.
STEP 4: CREATING THE NOSE STRUCTURE FOR ORIGAMI FIGHTER
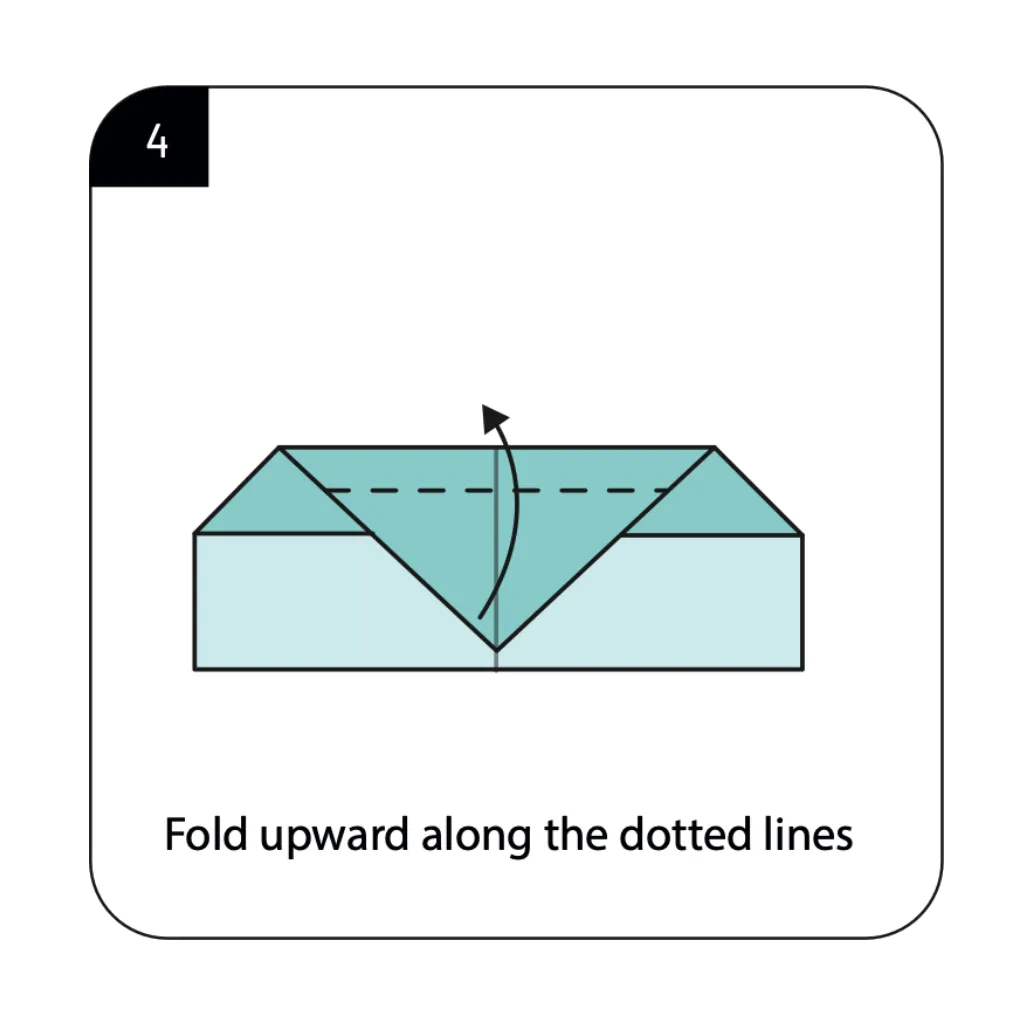
Fold the triangular section upward along the dotted lines to further define the aircraft’s nose. This strategic fold begins creating the three-dimensional structure that gives fighter jets their distinctive appearance. Best flying paper airplane tutorials highlight this step as crucial for creating proper weight distribution. The upward fold adds complexity to your model while initiating the characteristic fighter jet profile.
STEP 5: FOLDING IN HALF FOR ORIGAMI FIGHTER
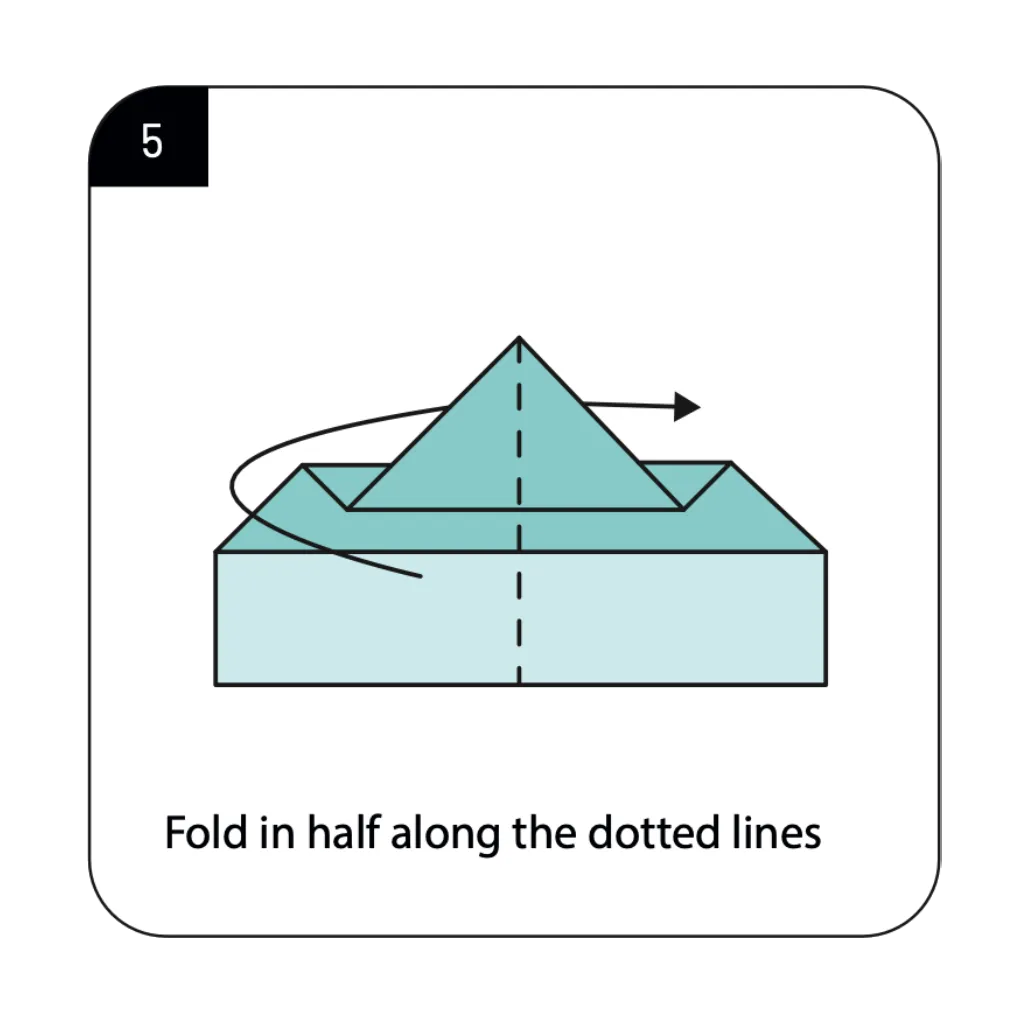
Fold the entire model in half along the center dotted line, bringing both sides together. This critical fold transforms your flat design into a three-dimensional aircraft with a defined fuselage. Origami jet fighter designs depend on this precise folding to create the airplane’s central body. Press firmly along the entire fold to ensure the two sides align perfectly for symmetrical flight performance.
STEP 6: ROTATING THE MODEL FOR ORIGAMI FIGHTER

Rotate the model 90 degrees as shown to reorient it for the wing-forming steps. This repositioning provides the proper angle for creating the fighter plane’s essential wing structures. Paper fighter jet tutorials include this rotation to facilitate easier access to critical folding areas. The new orientation prepares your model for the defining features that distinguish fighter planes from basic paper airplanes.
STEP 7: CREATING THE WING STRUCTURE FOR ORIGAMI FIGHTER
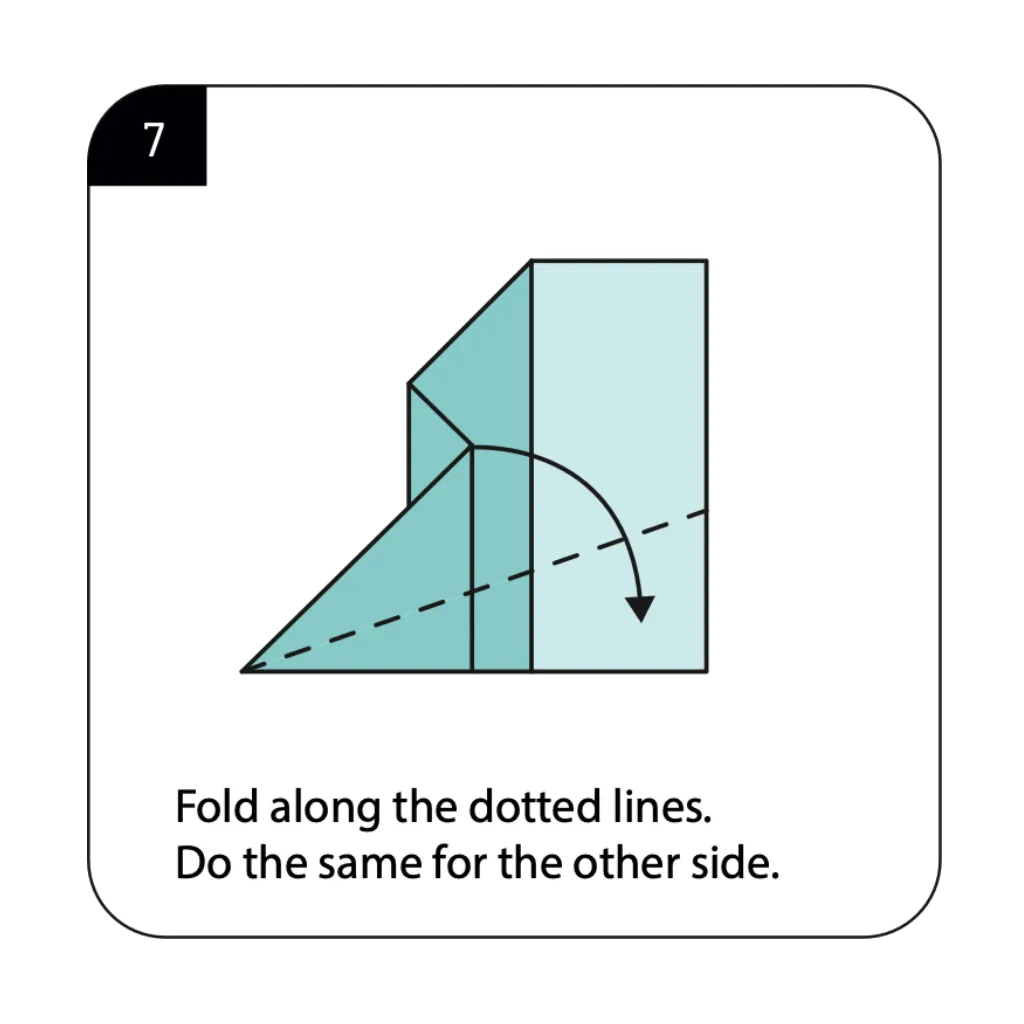
Fold along the dotted lines on both sides of the model to establish the main wing structure. This precise fold determines the width, angle, and shape of your fighter jet’s primary flying surfaces. Aerodynamic paper airplane designs rely on these wing folds for optimal lift and stability during flight. Ensure both sides are folded identically to maintain balanced flight characteristics in your finished jet.
STEP 8: LIFTING AND POSITIONING THE WINGS FOR ORIGAMI FIGHTER
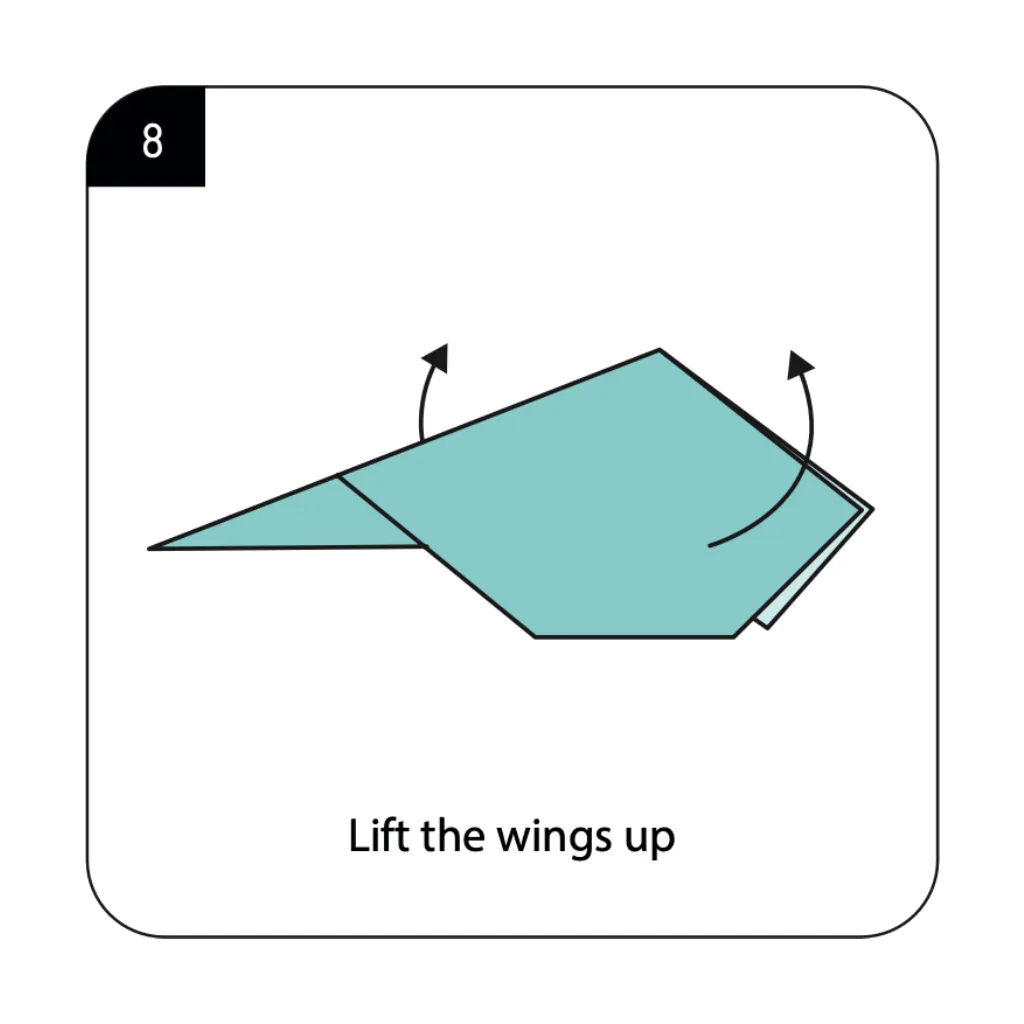
Gently lift the wings upward from the central body to create the three-dimensional wing position. This adjustment shifts your paper airplane from flat folds to a realistic fighter jet configuration. The best paper airplanes feature this wing positioning to create proper airflow channels during flight. The upward angle of the wings contributes significantly to your jet’s flight stability and performance.
STEP 9: FINALIZING THE WING TIPS FOR ORIGAMI FIGHTER
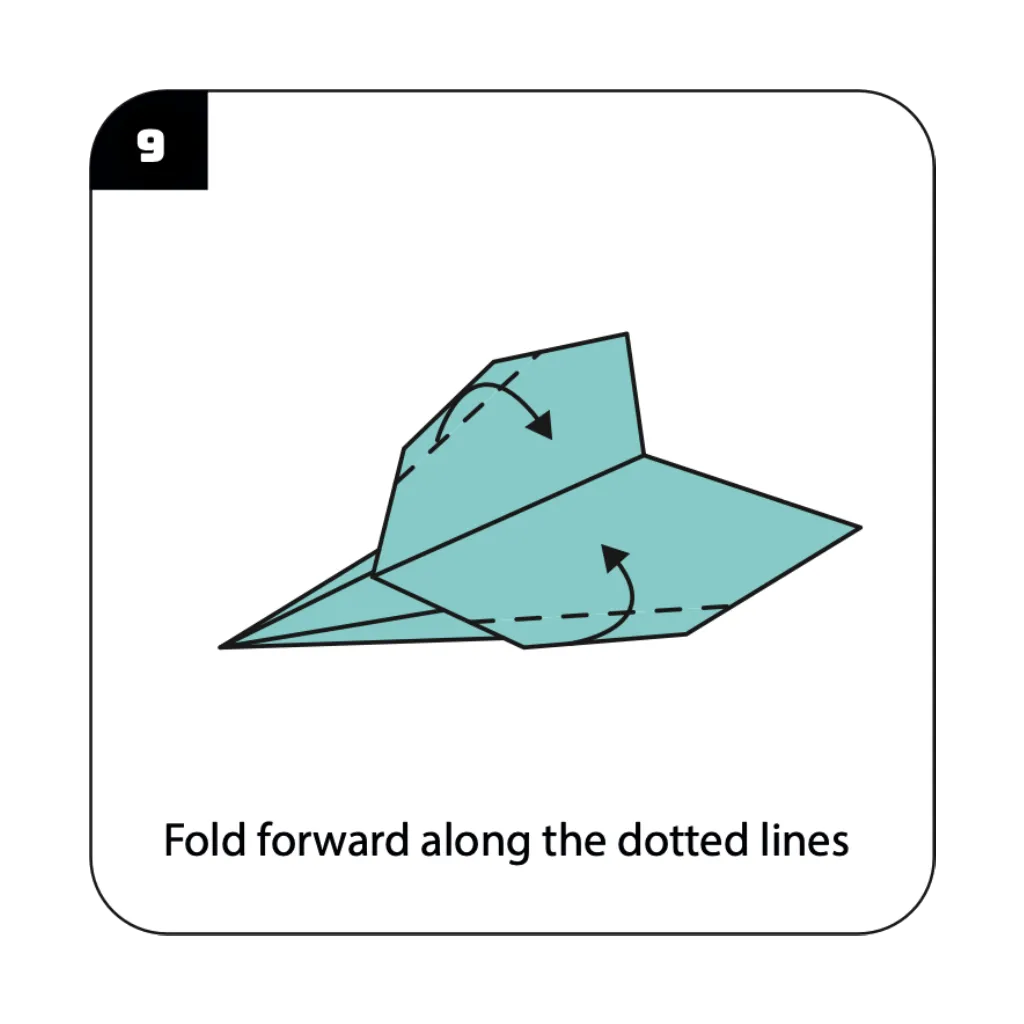
Fold the front edges of the wings forward along the dotted lines to create stabilizing wing tips. These small but crucial folds add aerodynamic refinement and visual authenticity to your fighter jet. Award-winning paper airplane designs often incorporate these wing tip details for improved flight characteristics. The forward-folded edges help prevent unwanted roll during flight while enhancing the military jet appearance.
STEP 10: COMPLETING YOUR FIGHTER JET
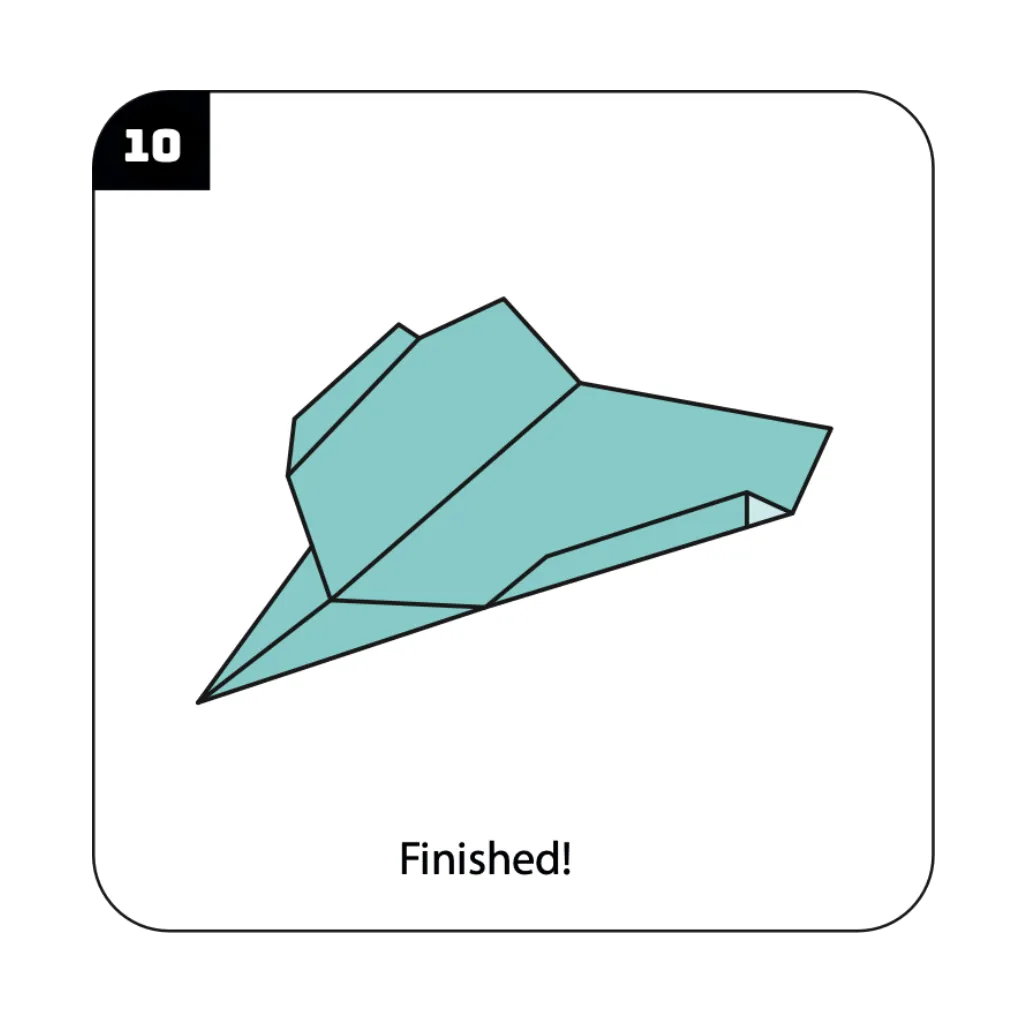
Your origami fighter plane is now complete and ready for test flights and aerial competitions! The finished model displays all the key features of a fighter jet: pointed nose, angled wings, and streamlined fuselage. Easy paper airplane models like this combine impressive appearance with excellent flying performance. Adjust the wings slightly up or down to fine-tune your jet’s flight pattern for distance, speed, or stunts.
Conclusion:
Congratulations on creating your origami fighter plane! Through ten strategic folding steps, you’ve transformed a simple sheet of paper into a sleek flying machine that looks as impressive as it performs. Your completed fighter jet features all the hallmarks of military aircraft design while maintaining the aerodynamic properties needed for excellent flight. This paper airplane balances simplicity with sophistication, making it perfect for beginners while still satisfying experienced folders looking for performance. Your fighter jet’s pointed nose, angled wings, and streamlined body work together to create a plane that can fly impressive distances with proper launching technique. We encourage you to experiment with different papers (lightweight printer paper works best for distance), launch methods, and small adjustments to wing positions to discover your jet’s optimal flight pattern. Whether you’re competing with friends, teaching aerodynamic principles, or simply enjoying the satisfaction of watching your creation soar, this fighter plane delivers hours of screen-free entertainment. Happy folding and flying!
- Explore our complete paper airplane collection → Discover various flying designs from simple gliders to complex stunt planes with different flight patterns and styles.
- Paper airplane flying techniques → Learn proper launching methods, aerodynamic principles, and adjustments for achieving maximum distance and flight time.
- Advanced fighter jet origami models → Ready for a challenge? Try these more complex military aircraft designs with additional details and features.
- Origami for kids: Flying models → Find child-friendly paper airplane projects perfect for developing folding skills while creating functional toys.
- Paper airplane competition ideas → Organize fun contests with rules, categories, and scoring systems for distance, accuracy, and stunt flying.
