
Introduction:
Welcome to our delightful origami goose tutorial! This charming paper bird project brings the elegant beauty of waterfowl to life through simple folding techniques. Perfect for beginners, children, and nature enthusiasts, this origami goose captures the graceful silhouette of these majestic birds in just nine straightforward steps. What makes this design special is its recognizable profile—your finished goose features the distinctive long neck and body shape that characterizes these beloved waterfowl. The pink paper shown creates a unique artistic interpretation, though white paper would create a classic swan-like appearance, or gray for a more realistic wild goose look. Whether you’re teaching children about birds, creating decorations for spring displays, or simply enjoying a relaxing craft session, this origami goose offers both simplicity and charm. Using basic folds and straightforward techniques, you’ll transform a simple square into a delightful paper bird that beautifully captures the essence of these graceful creatures. Let’s begin our paper folding journey to create this elegant waterfowl!
Detailed Step Descriptions:
STEP 1: CREATING THE INITIAL FOLD
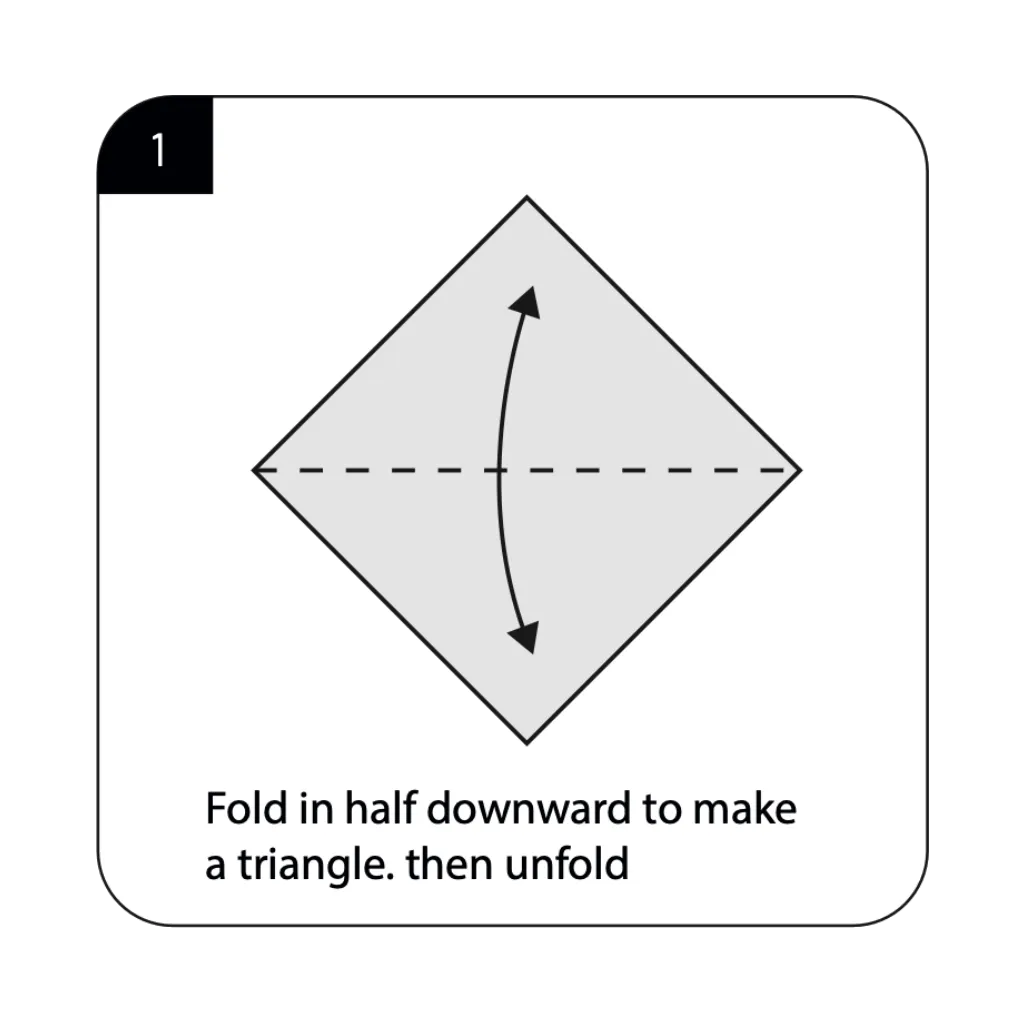
Begin your origami goose by folding the square paper in half downward to make a triangle, then unfold it. This foundational fold creates a crucial reference line that will guide the symmetry of your paper bird. Simple origami animals often start with these basic geometric folds to establish proper proportions. After unfolding, the visible diagonal crease serves as an important guideline for subsequent folding steps.
STEP 2: FOLDING THE FIRST FLAP
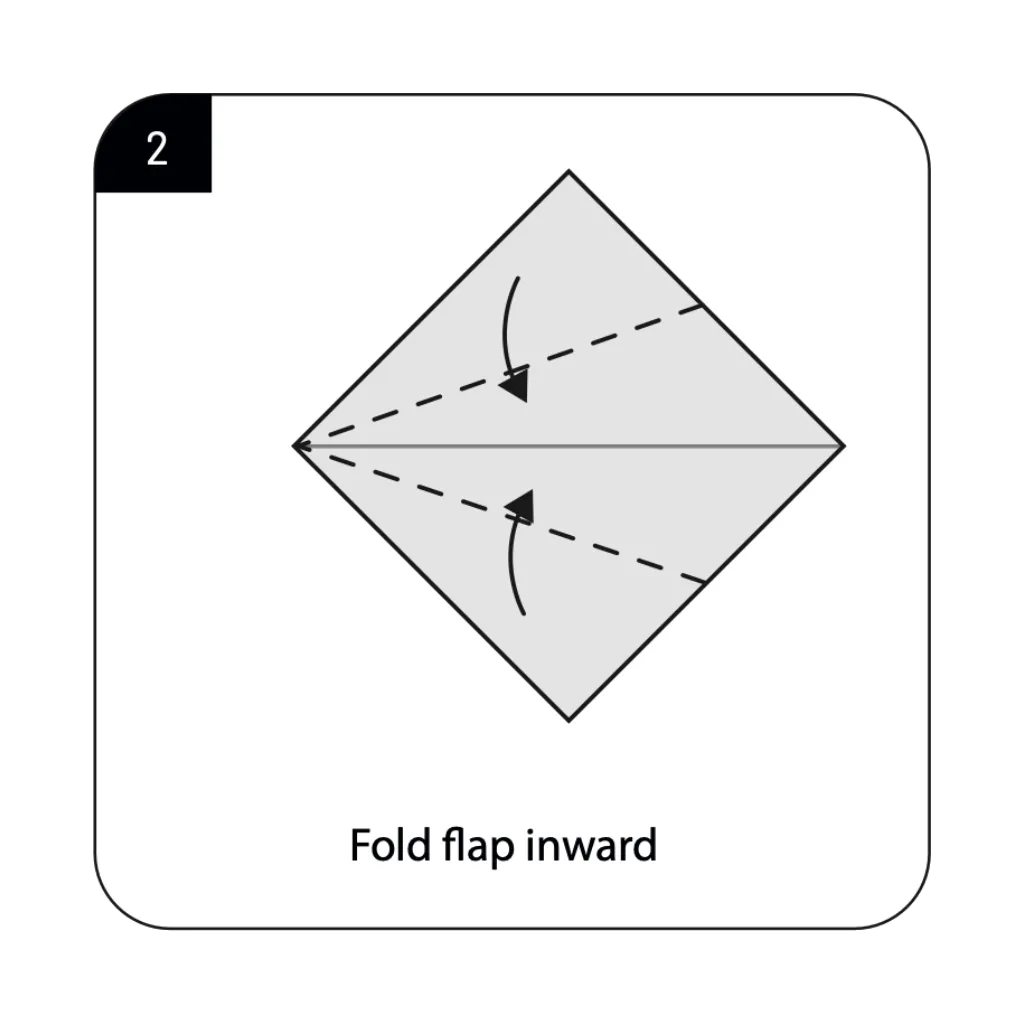
Fold one flap inward along the diagonal line as shown by the directional arrows in the diagram. This strategic fold begins the transformation from a flat square into the three-dimensional goose shape. Paper bird tutorials emphasize the importance of this precise fold for establishing the basic bird form. The inward fold reduces the paper’s width while maintaining the length needed for the goose’s body and neck.
STEP 3: TURNING THE MODEL
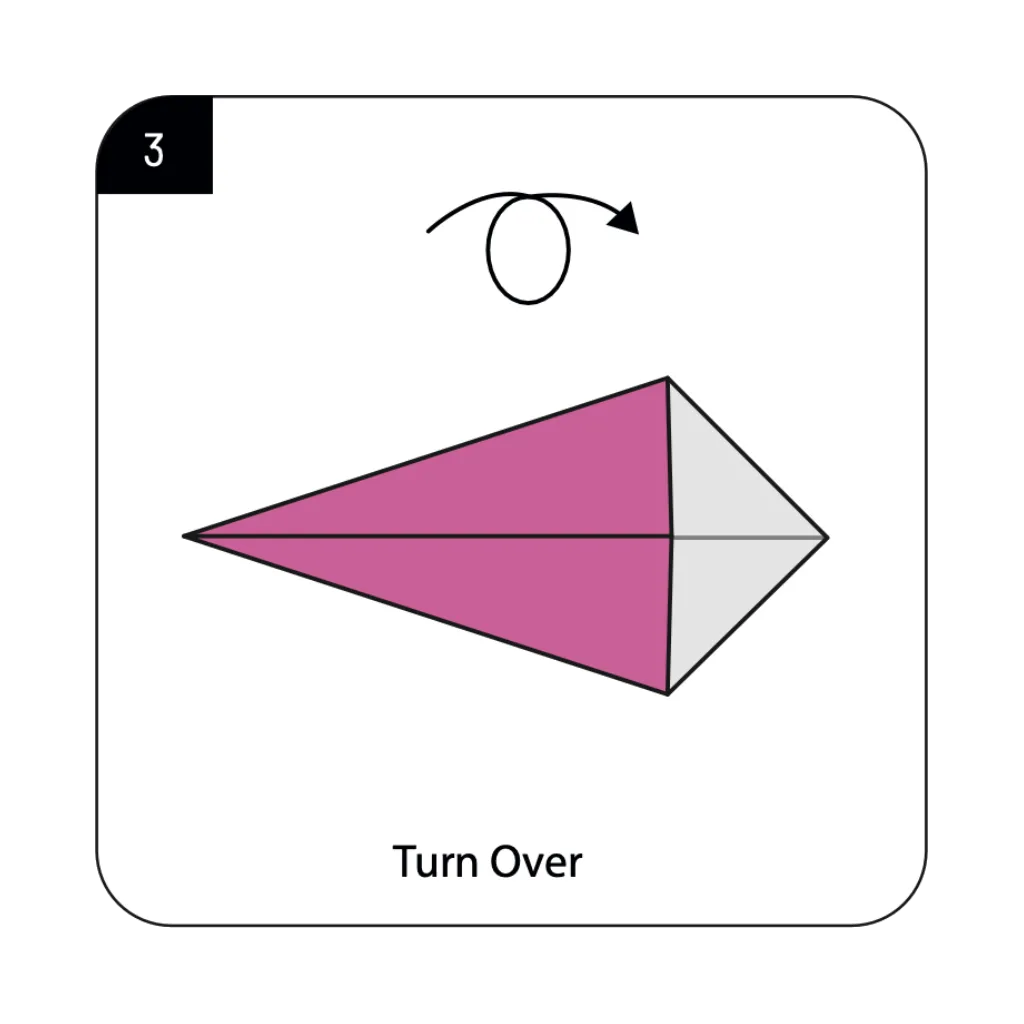
Turn the entire model over to access the opposite side for continued formation of your origami goose. This reorientation reveals the colored side of the paper that will become the exterior of your bird. Origami waterfowl projects often require working on both sides to achieve the proper shape and details. The model now shows an emerging triangular shape that will evolve into your goose’s distinctive profile.
STEP 4: CREATING THE SECOND FLAP
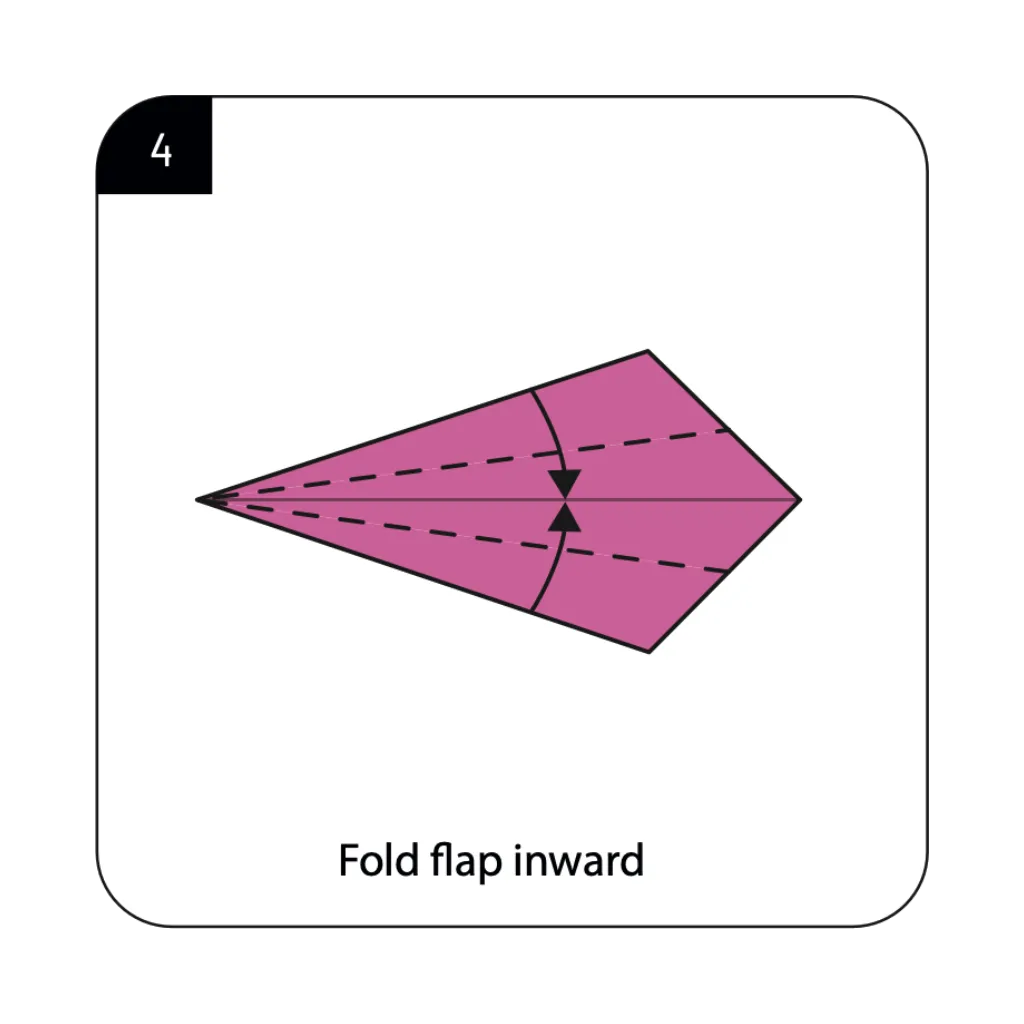
Fold another flap inward along the dotted lines to further develop the structure of your paper goose. This fold continues shaping the body proportions while preparing for the distinctive neck formation. Bird origami designs rely on these strategic folds to create recognizable anatomical features. The precision of this fold directly influences how graceful your finished goose’s silhouette will appear.
STEP 5: FORMING THE TAIL
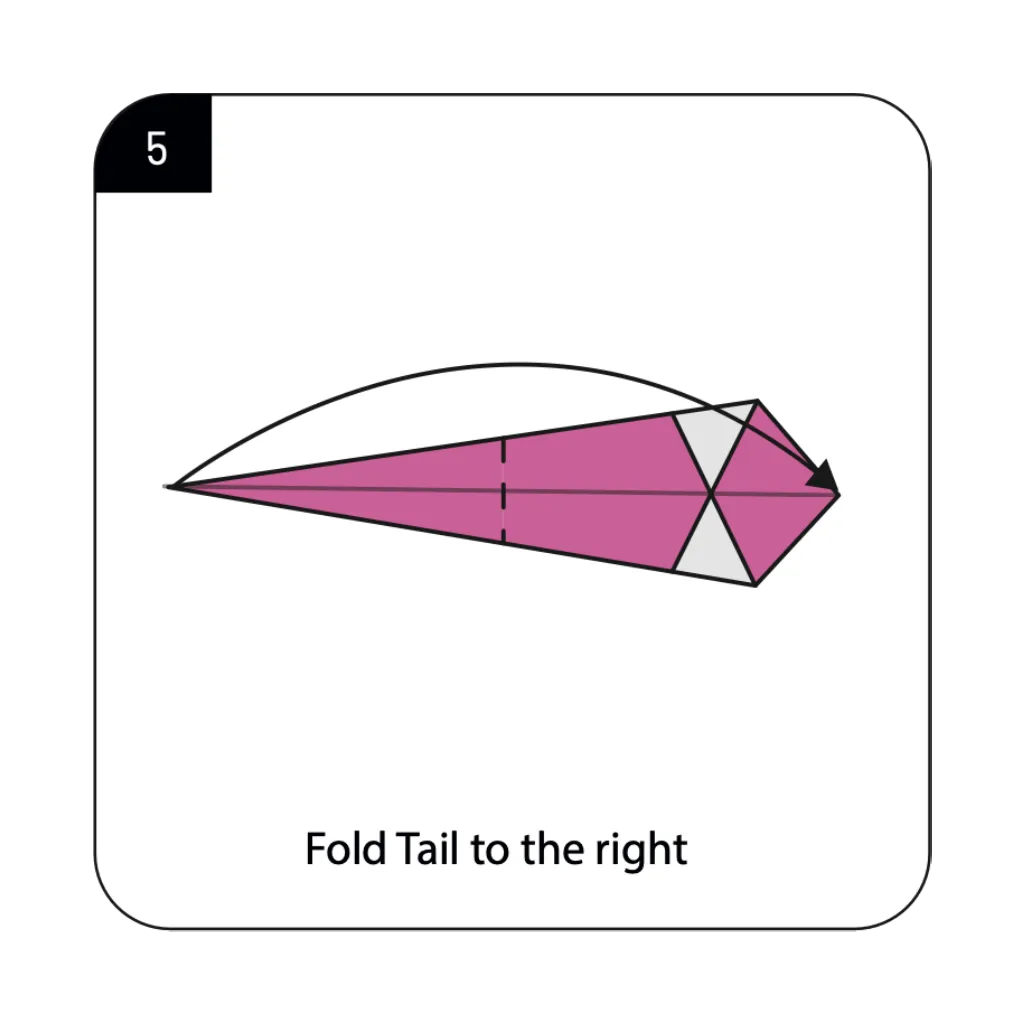
Fold the tail section to the right as indicated to create the characteristic back portion of your goose. This clever fold establishes the proper proportion between the goose’s body and tail for realistic appearance. Origami bird crafts often feature these defining tail folds that differentiate various species of birds. The clean fold creates a distinct angle that mimics the way geese hold their tails when swimming or resting.
STEP 6: CREATING THE BODY DETAIL
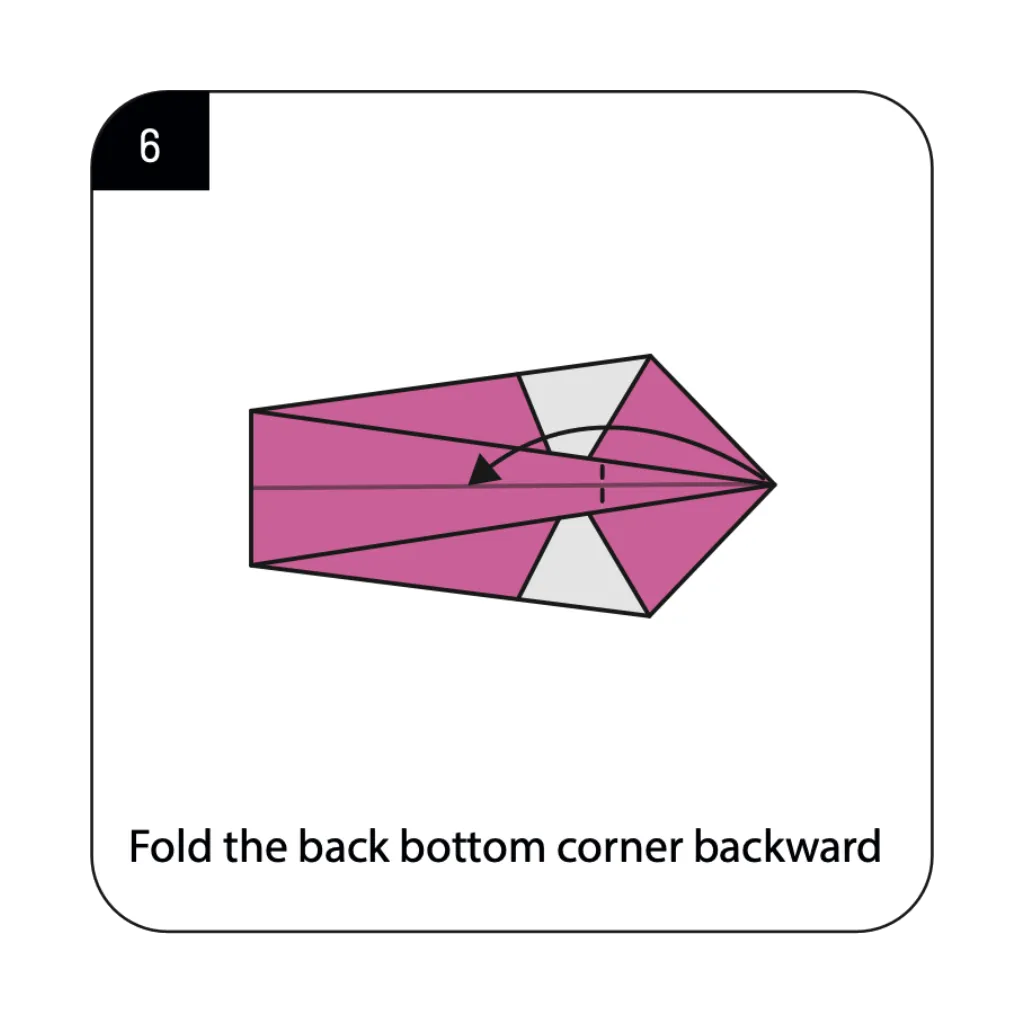
Fold the back bottom corner backward to add dimensional detail to your origami goose’s body. This subtle fold creates the subtle wing definition that gives your goose a more lifelike appearance. Nature-inspired origami designs utilize these refined folds to add realistic anatomical features. The backward direction of the fold adds depth to your model while maintaining the goose’s clean profile.
STEP 7: ESTABLISHING THE CENTER LINE
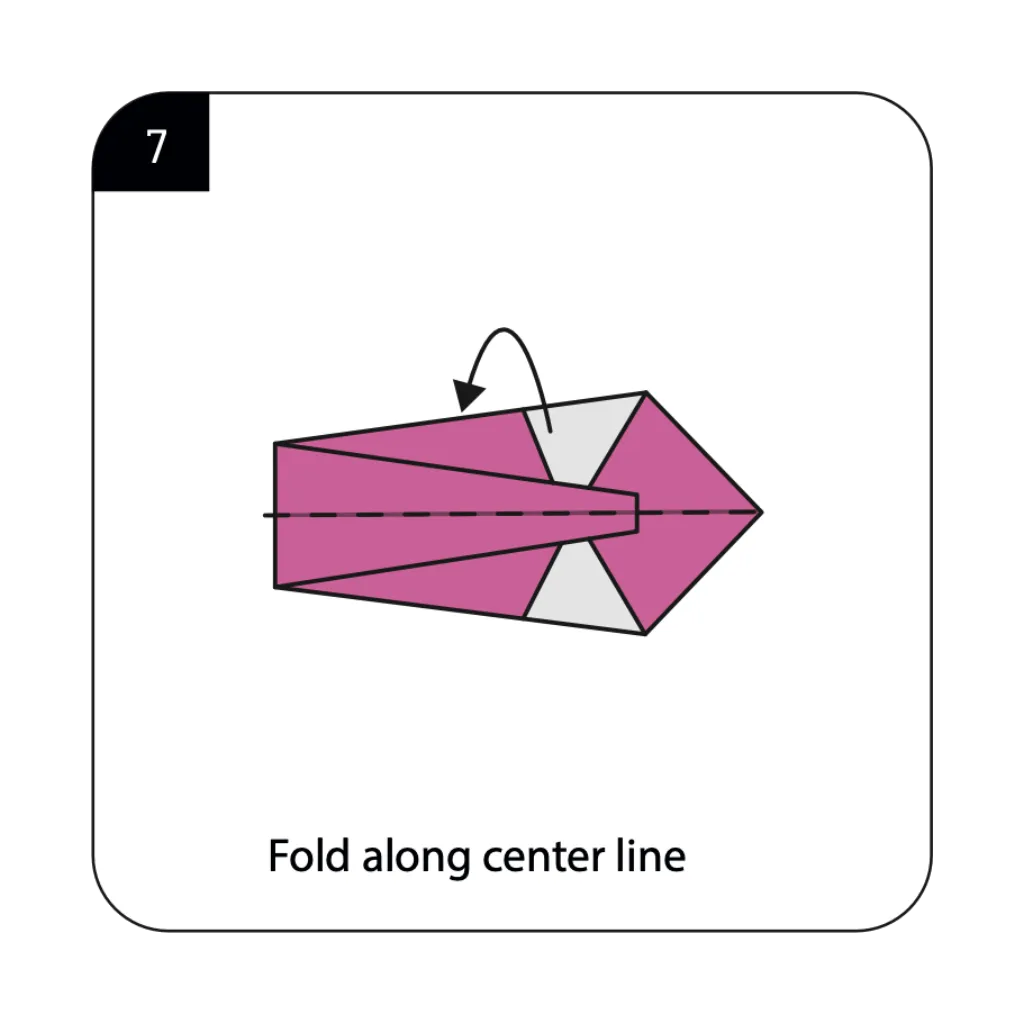
Fold along the center line to create the final body structure of your paper goose. This critical fold brings all previous elements together into a cohesive bird form with proper proportions. Waterfowl origami patterns emphasize this alignment fold for achieving the characteristic goose silhouette. The center fold creates the distinctive body shape while positioning the neck for the final transformative steps.
STEP 8: SEPARATING THE FLAPS
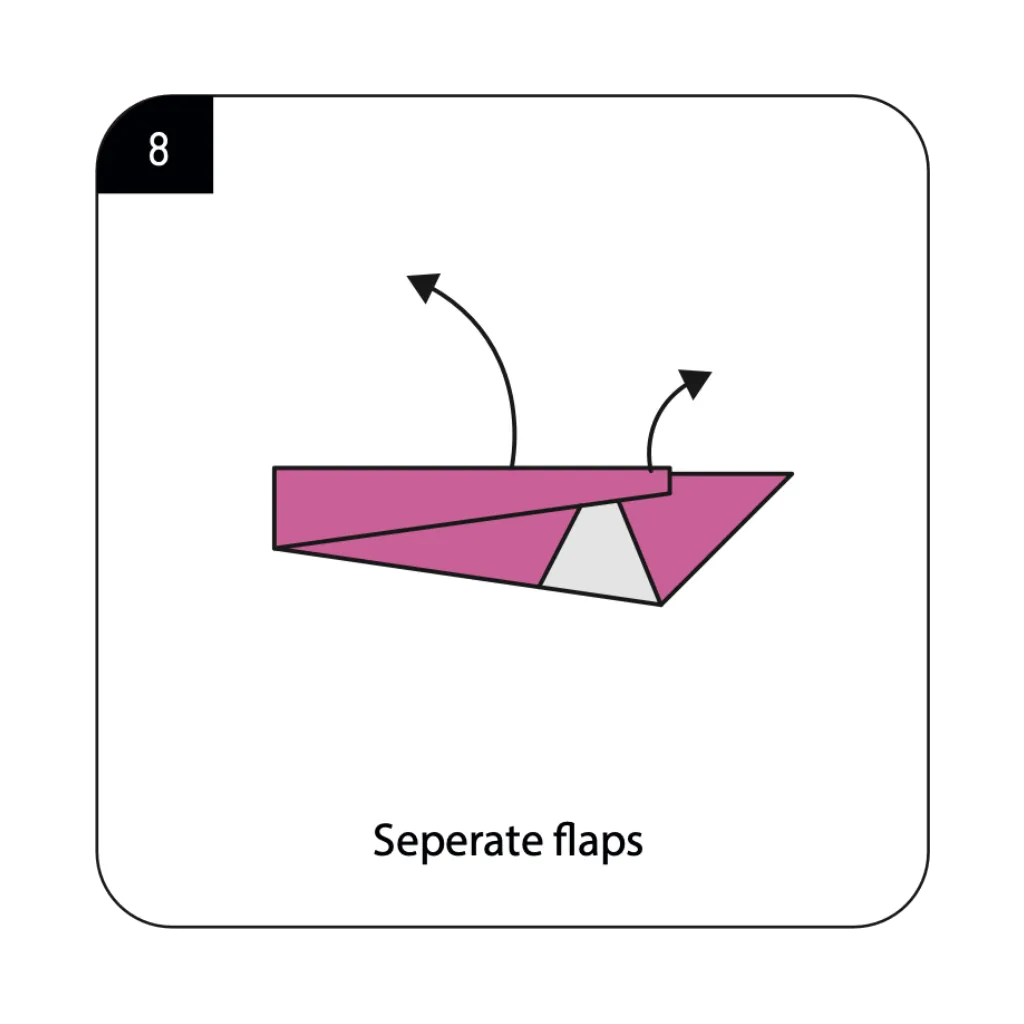
Carefully separate the flaps as indicated by the arrows to create dimension in your origami goose. This technique transforms flat elements into the three-dimensional qualities that make your goose recognizable. Spring craft origami projects often feature these finishing touches that bring paper creations to life. The separated flaps create the distinctive neck structure that characterizes geese and other long-necked birds.
STEP 9: COMPLETING YOUR ORIGAMI GOOSE
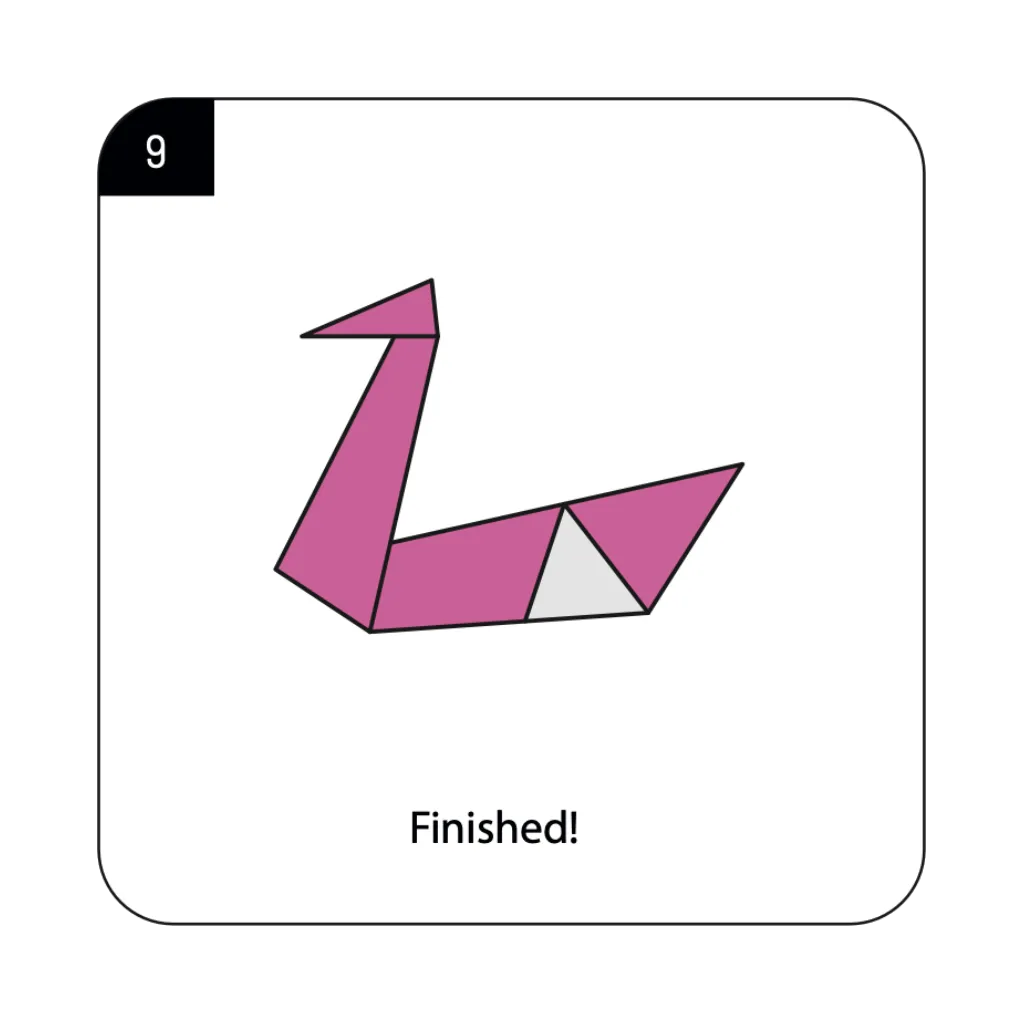
Your origami goose is now finished, displaying the elegant neck and distinctive body shape of these beautiful birds. The completed model beautifully captures the graceful silhouette that makes geese so recognizable in nature. Simple paper bird projects like this goose demonstrate how basic folding techniques can create expressive animal forms. Your finished origami goose can be displayed alone or as part of a collection of paper birds and wildlife models.
Conclusion:
Congratulations on creating your elegant origami goose! Through nine thoughtfully designed steps, you’ve transformed a simple square of paper into a recognizable waterfowl that captures the charm and grace of these beautiful birds. Your completed goose showcases the distinctive long neck and graceful body shape that characterizes these majestic creatures in nature. This origami model demonstrates how simple folding techniques can effectively represent wildlife in artistic paper form. Your paper goose serves multiple purposes: as a spring decoration, a teaching tool for bird enthusiasts, or simply as a delightful desk companion. The skills you’ve practiced—precision folding, spatial visualization, and following sequential instructions—provide an excellent foundation for exploring more complex bird origami designs. We encourage you to experiment with different paper colors and sizes to create various waterfowl species, from white swans to colorful mandarin ducks. Whether displayed individually or as part of a flock, these origami geese bring a touch of natural elegance to any setting!
- Explore our complete origami birds collection → Discover more avian designs including cranes, swans, ducks, and other feathered friends with step-by-step tutorials.
- Origami waterfowl crafts → Create a diverse flock of paper water birds including ducks, swans, and other pond and lake dwellers.
- Spring origami projects → Find seasonal paper folding ideas perfect for spring decorations, including flowers, butterflies, and birds.
- Easy origami for children → Browse child-friendly projects that develop fine motor skills while creating fun animal and nature designs.
- Origami wildlife collection → Create paper versions of various animals from around the world, from woodland creatures to exotic wildlife.
