
Introduction:
Welcome to our fun origami frog tutorial! This classic paper folding project is a favorite among beginners and children because it creates not just a cute frog figure but one that actually jumps when you press its back. What makes this origami model special is its perfect combination of simplicity and functionality—the finished frog can hop across tables and floors, providing hours of entertainment. Unlike many decorative origami projects, this jumping frog serves as both a craft and a toy, making it perfect for classroom activities, party games, or rainy day entertainment. The bright orange paper shown creates a vibrant tree frog appearance, though green is the traditional color choice for realistic frogs. Whether you’re teaching children about amphibians, looking for screen-free activities, or simply enjoying the satisfaction of creating something interactive, this origami frog delivers both creativity and playfulness. In just ten straightforward steps, you’ll transform a rectangular piece of paper into a jumping amphibian that’s sure to delight folders of all ages!
Detailed Step Descriptions:
STEP 1: CREATING THE INITIAL FOLD FOR ORIGAMI FROG
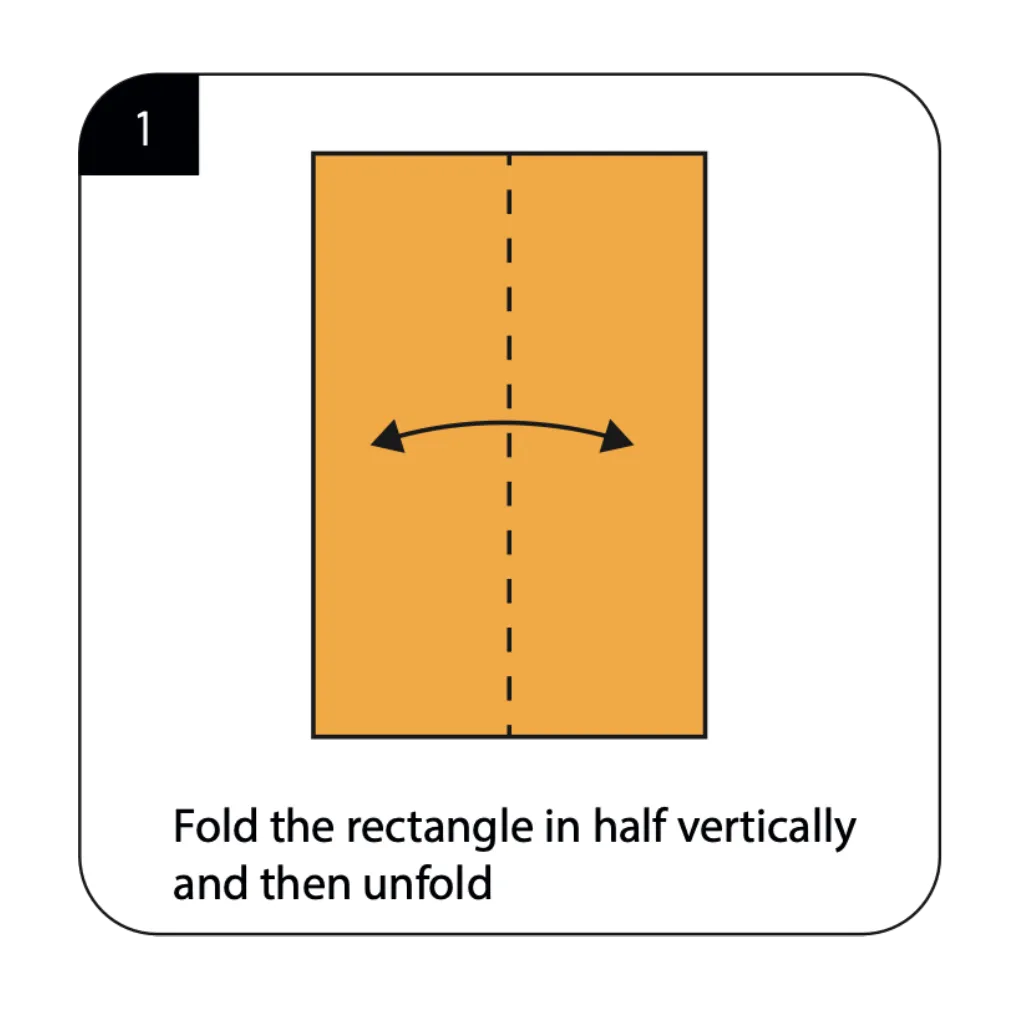
Begin your origami frog by folding the rectangular paper in half vertically along the center line, then unfold. This foundational crease establishes the symmetry axis that will ensure your jumping frog has balanced proportions. Simple origami animals for beginners always start with these basic reference lines for proper structure and function. After unfolding, the visible center crease will serve as an essential guideline for all subsequent folding steps.
STEP 2: ESTABLISHING THE DIAGONAL REFERENCE FOR ORIGAMI FROG
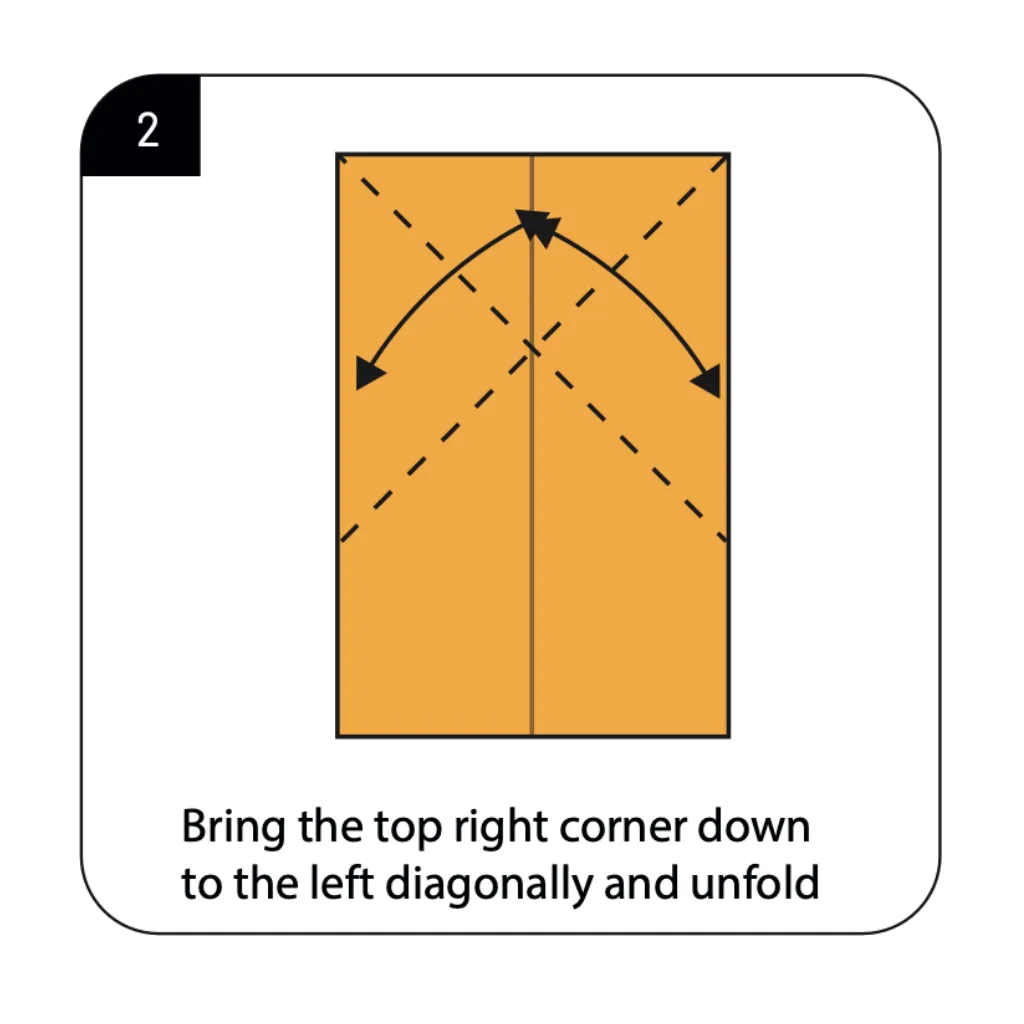
Bring the top right corner down to the left diagonally and unfold to create a reference crease. This diagonal fold helps establish the gridwork necessary for your frog’s jumping mechanism to function properly. Origami jumping animals rely on these preliminary creases to enable the spring-loaded action in the finished model. The precision of this diagonal fold directly impacts how well your paper frog will jump when completed.
STEP 3: CREATING THE TOP FOLD
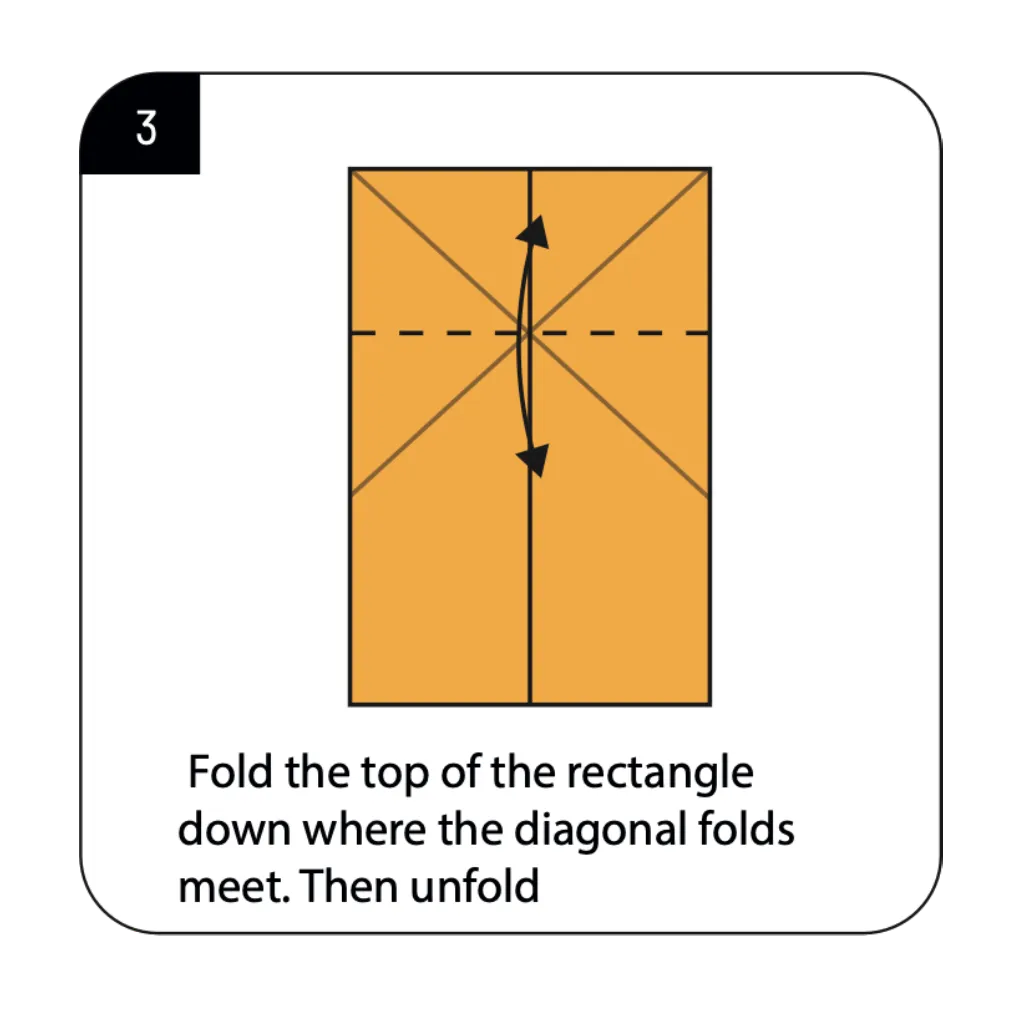
Fold the top of the rectangle down to where the diagonal folds meet, then unfold after making a firm crease. This strategic fold begins establishing the frog’s head structure while setting up the necessary layers for jumping ability. Paper frog tutorials emphasize the importance of this precise fold for creating both aesthetic and functional features. Make sure to crease firmly before unfolding, as this reference line will guide several critical future folds.
STEP 4: PERFORMING THE SQUASH FOLD FOR ORIGAMI FROG
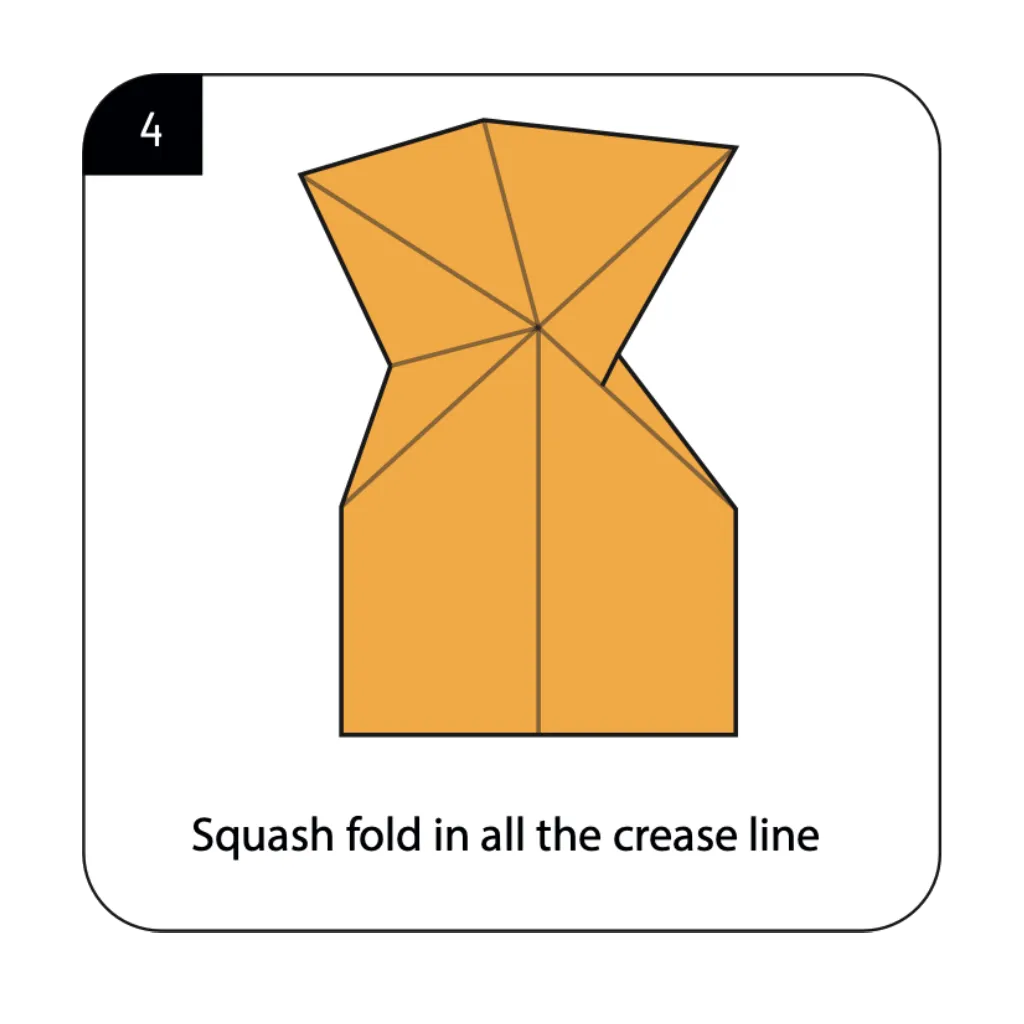
Execute a squash fold along all the crease lines, collapsing the paper along the established fold pattern. This transformative folding technique converts your flat paper into a three-dimensional structure with multiple layers. Jumping origami designs utilize squash folds to create the needed compression points for kinetic energy storage. The proper execution of this complex fold creates the foundation that allows your frog to hop when completed.
STEP 5: CREATING THE BODY STRUCTURE FOR ORIGAMI FROG
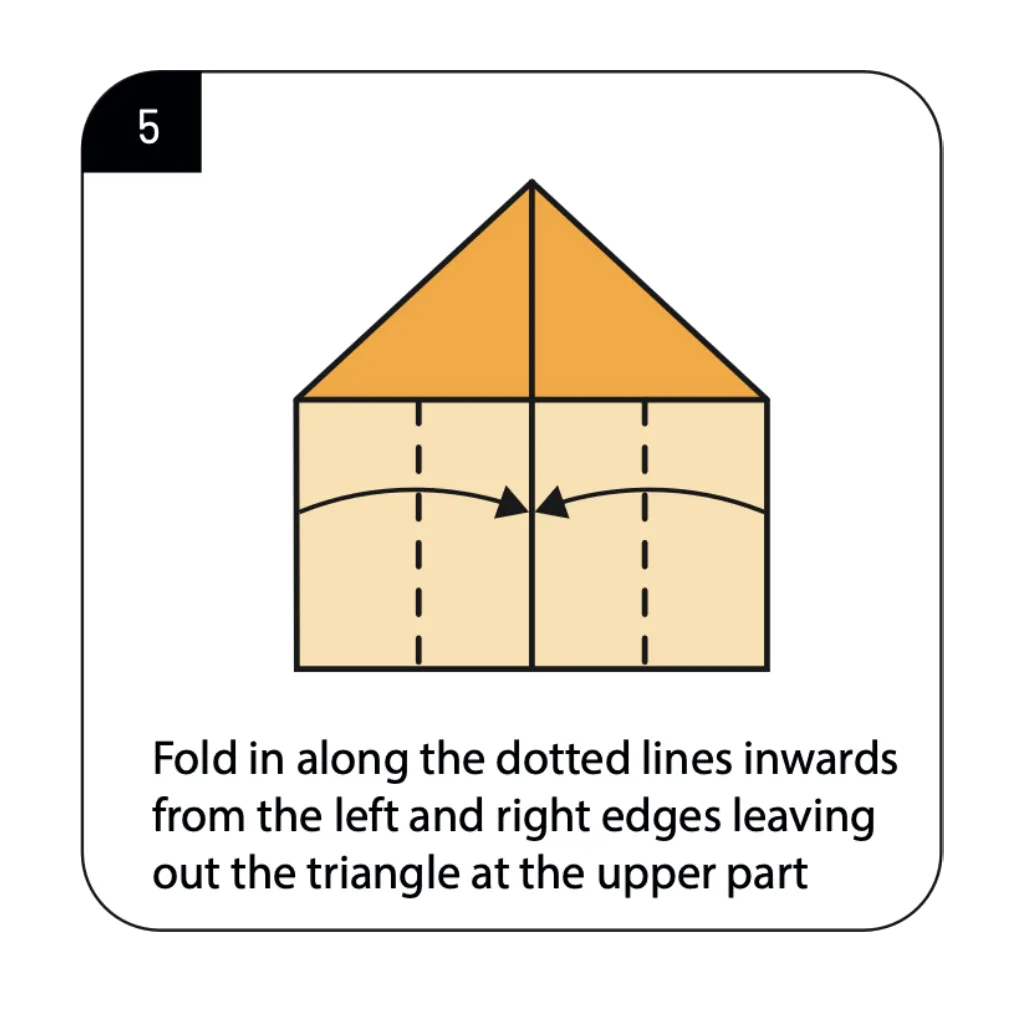
Fold in along the dotted lines from both left and right edges, leaving the triangle at the upper part exposed. This step begins defining the frog’s body while establishing the proportional relationship between head and torso. Easy frog origami tutorials highlight this stage as crucial for creating the characteristic amphibian silhouette. The inward folds create the rectangular body section that will serve as the base for your jumping mechanism.
STEP 6: REPEATING THE FOLDING PATTERN FOR ORIGAMI FROG
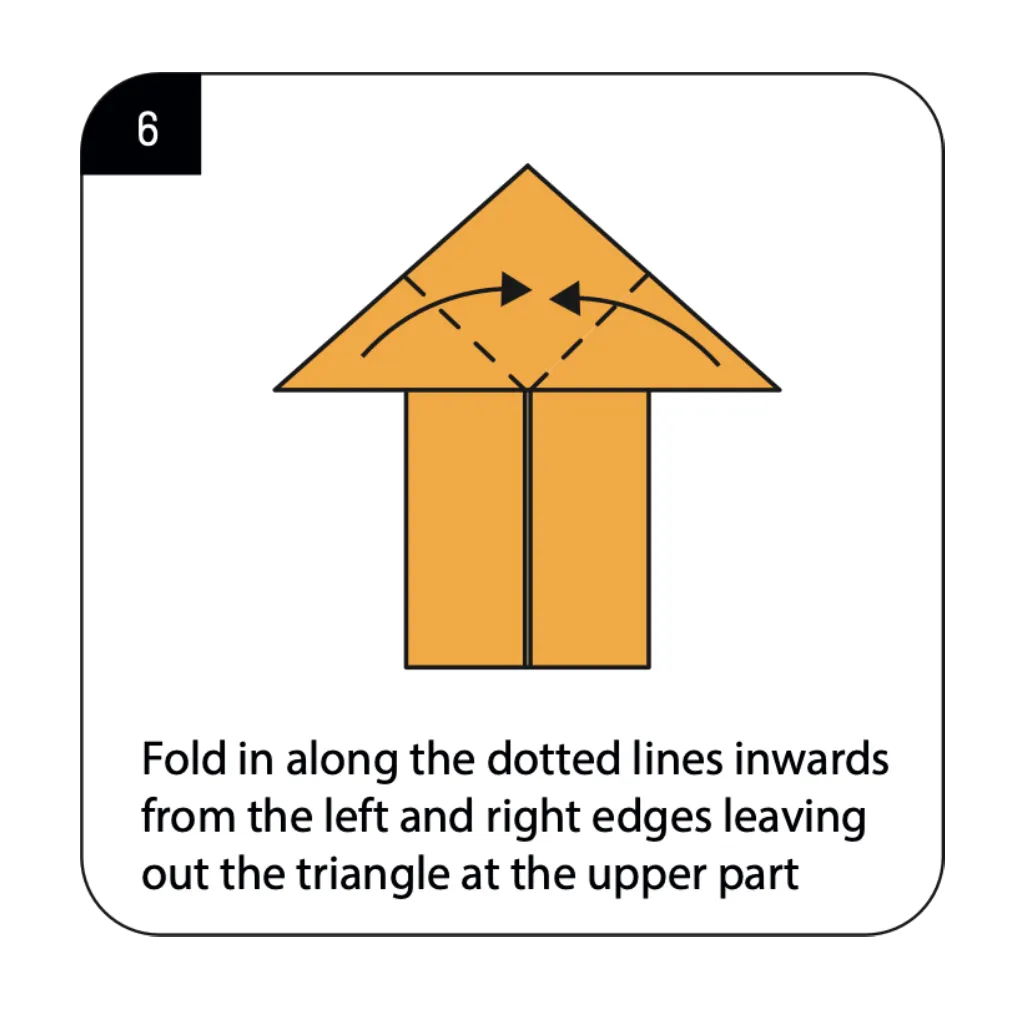
Fold in again along the dotted lines from the left and right edges, maintaining the triangle shape at the top. This repeated pattern reinforces the body structure while adding the layered thickness needed for successful jumps. origami frog projects for kids often feature these sequential similar folds that build muscle memory and folding skills. The precision of these parallel folds directly influences the stability and jumping distance of your finished frog.
STEP 7: FORMING THE FRONT LEGS FOR ORIGAMI FROG
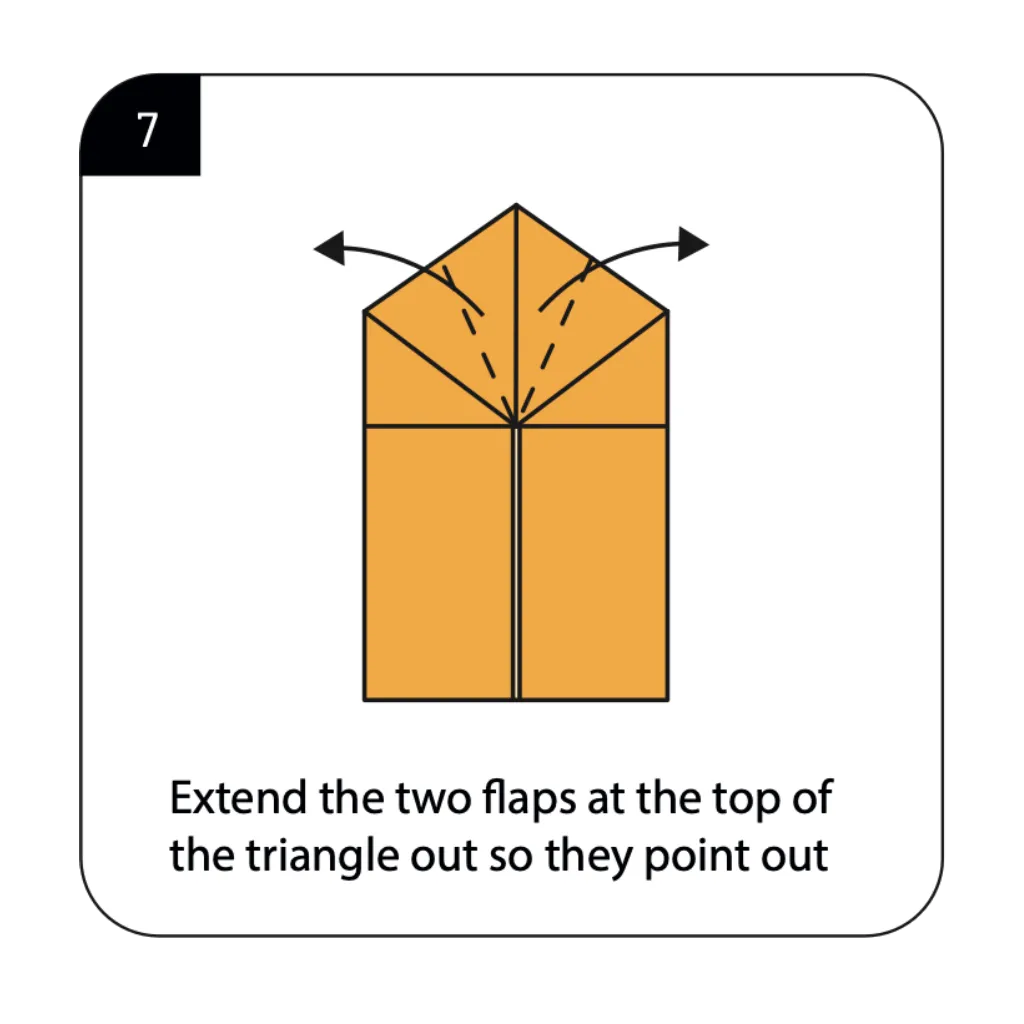
Extend the two flaps at the top of the triangle outward so they point out, creating the frog’s front legs. This step transforms abstract folded elements into recognizable anatomical features of your paper amphibian. Interactive origami frog models like jumping frogs benefit from these appendages that enhance both form and function. The angle and position of these legs affect both the appearance and the forward direction of your frog’s jumps.
STEP 8: CREATING THE JUMPING MECHANISM
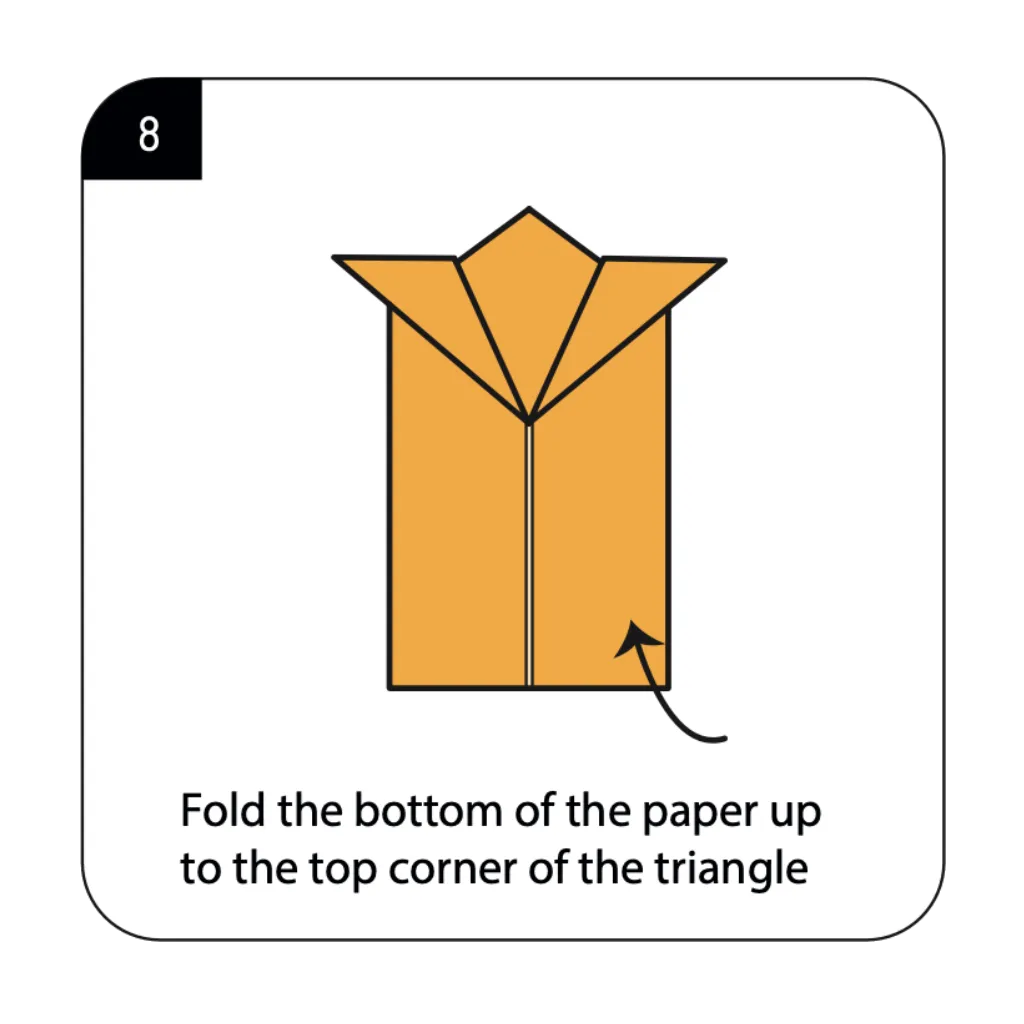
Fold the bottom section of the paper upward to meet the top corner of the triangle. This crucial fold establishes the spring-loaded mechanism that gives your origami frog its jumping ability. Paper jumping frog tutorials emphasize the importance of this precise fold for maximizing hopping distance. Apply firm pressure when creasing to ensure the fold maintains its tension for optimal jumping performance.
STEP 9: FORMING THE BACK LEGS

Fold the entire paper downward to create the back portion of your frog, which will serve as the pressure point. This strategic fold completes the mechanical structure that enables your paper frog to jump when pressed. Origami frog instructions highlight this step as the defining moment when your model gains its interactive function. The proportion and angle of this fold directly determine how high and far your frog will jump when activated.
STEP 10: ADDING FINAL DETAILS
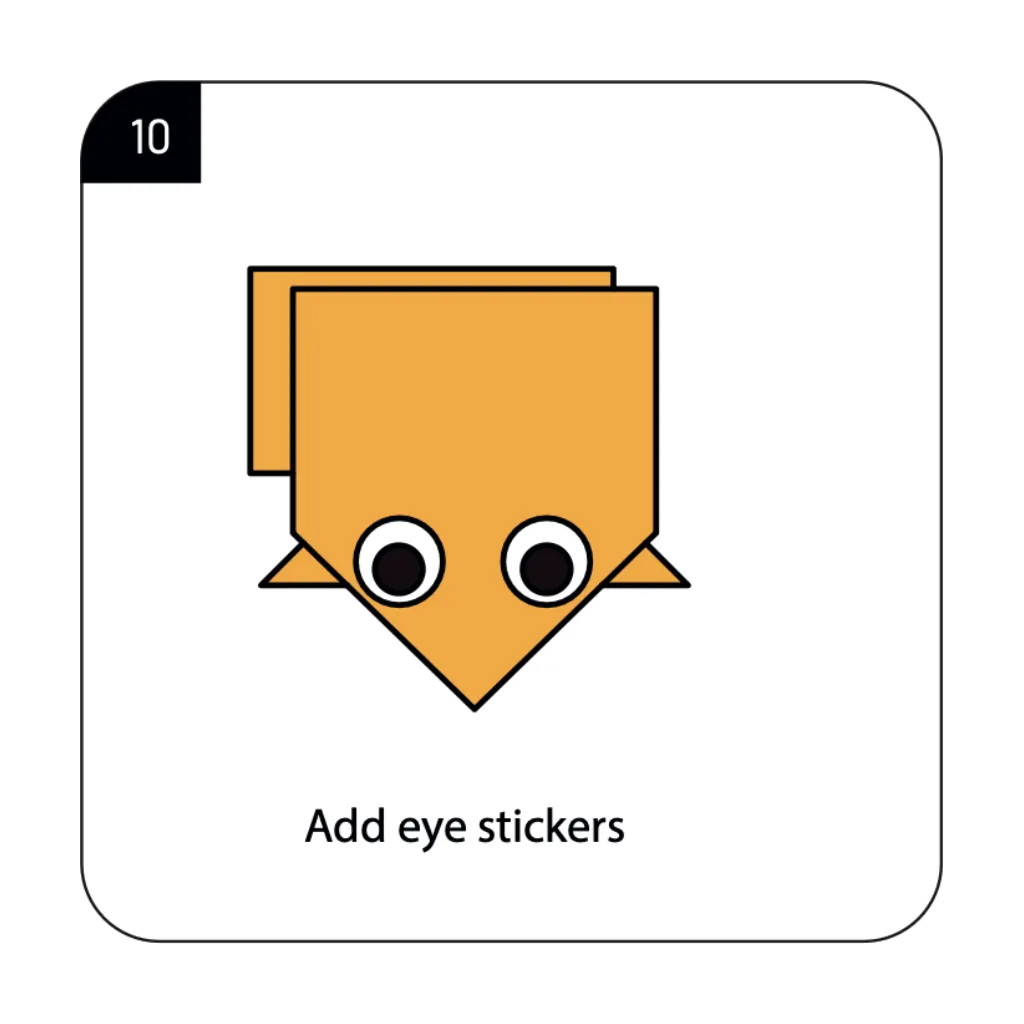
Complete your origami frog by adding eye stickers or drawing eyes to give it personality and character. This finishing touch transforms your functional paper creation into a recognizable amphibian with expressive features. Fun origami frog for kids often concludes with these decorative elements that bring the paper creation to life. Your jumping frog is now ready for action—simply press the back end down and release to watch it hop across surfaces!
Conclusion:
Congratulations on creating your origami frog! Through ten carefully designed steps, you’ve transformed a simple rectangular piece of paper into an interactive toy that captures both the appearance and the hopping action of a real frog. Your paper amphibian demonstrates the perfect blend of form and function that makes origami frog such a fascinating craft. To make your frog jump, simply press down on the back end and release—the stored energy will propel your creation forward in a satisfying hop. This project is perfect for frog-themed parties, classroom science activities, or simply as a screen-free entertainment option that combines crafting with play. The techniques you’ve learned—precise creasing, squash folding, and creating mechanical functions—provide valuable skills for exploring more complex origami models. We encourage you to experiment with different paper sizes and weights to see how they affect jumping distance, or try various colors to create a whole pond of diverse paper frogs. Happy folding, and enjoy watching your paper creation leap into action!
- Explore more jumping origami animals → Discover other interactive paper creatures that move, including hopping rabbits, flapping birds, and more.
- Origami for kids: Action models → Find child-friendly paper folding projects that move, fly, jump, or transform for hands-on entertainment.
- Pond life origami collection → Create a complete pond ecosystem with paper frogs, water lilies, fish, and other aquatic-themed origami.
- Master the squash fold technique → Learn the essential origami method used in this frog tutorial for creating three-dimensional models with movement.
- Classroom origami activities → Discover paper folding projects perfect for schools, with educational ties to science, geometry, and biology.
