
Introduction
The Origami Masu Box stands as one of the most practical and elegant creations in the world of paper folding. This traditional Japanese design dates back centuries, originally used to measure portions of rice in Japan (the word “masu” refers to a traditional wooden box used for measuring rice). Today, the origami Masu Box has become a favorite project for paper folding enthusiasts of all skill levels, offering both functionality and aesthetic appeal. Whether you’re looking to create a beautiful gift container, organize small items, or simply expand your Origami Masu Box repertoire, this square box provides the perfect combination of utility and artistic expression. Our comprehensive tutorial breaks down this classic design into 11 manageable steps, making it accessible even for beginners. With just a single square sheet of paper and some patience, you’ll create a sturdy, three-dimensional box that showcases the transformative power of origami. Follow along as we guide you through each precise fold to create your very own Masu Box!
Step-by-Step Instructions
Step 1: Create the Initial Horizontal and Vertical Creases for Origami Masu Box
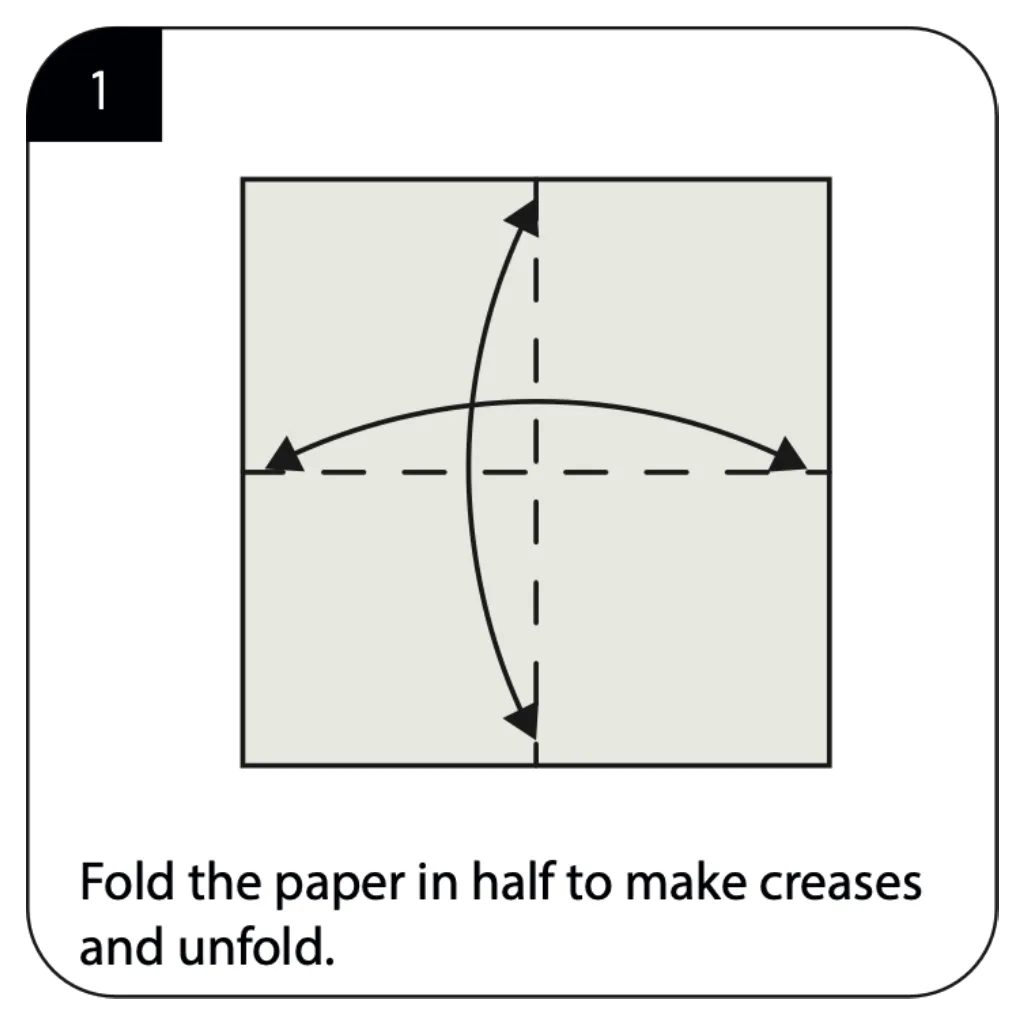
Begin with a square sheet of paper, color side down if using two-colored Origami Masu Box paper. Fold the paper in half horizontally, crease firmly, and unfold. Then fold in half vertically, crease firmly, and unfold again. These initial folds establish the fundamental structure for your Masu Box and create a clear center point where the creases intersect. Precision is crucial at this stage, as these guide lines will influence the symmetry and stability of your finished box.
Step 2: Form the Diagonal Creases for Origami Masu Box

Fold the paper diagonally from corner to corner to create an X-shaped crease pattern, then unfold completely. This step adds the diagonal reference lines that will guide later folds. Combined with the creases from Step 1, your paper should now have a clear center point with creases extending outward in eight directions. These diagonal folds are essential for the box structure and help distribute tension evenly throughout the paper when forming the three-dimensional shape.
Step 3: Rotate Your Model for Origami Masu Box
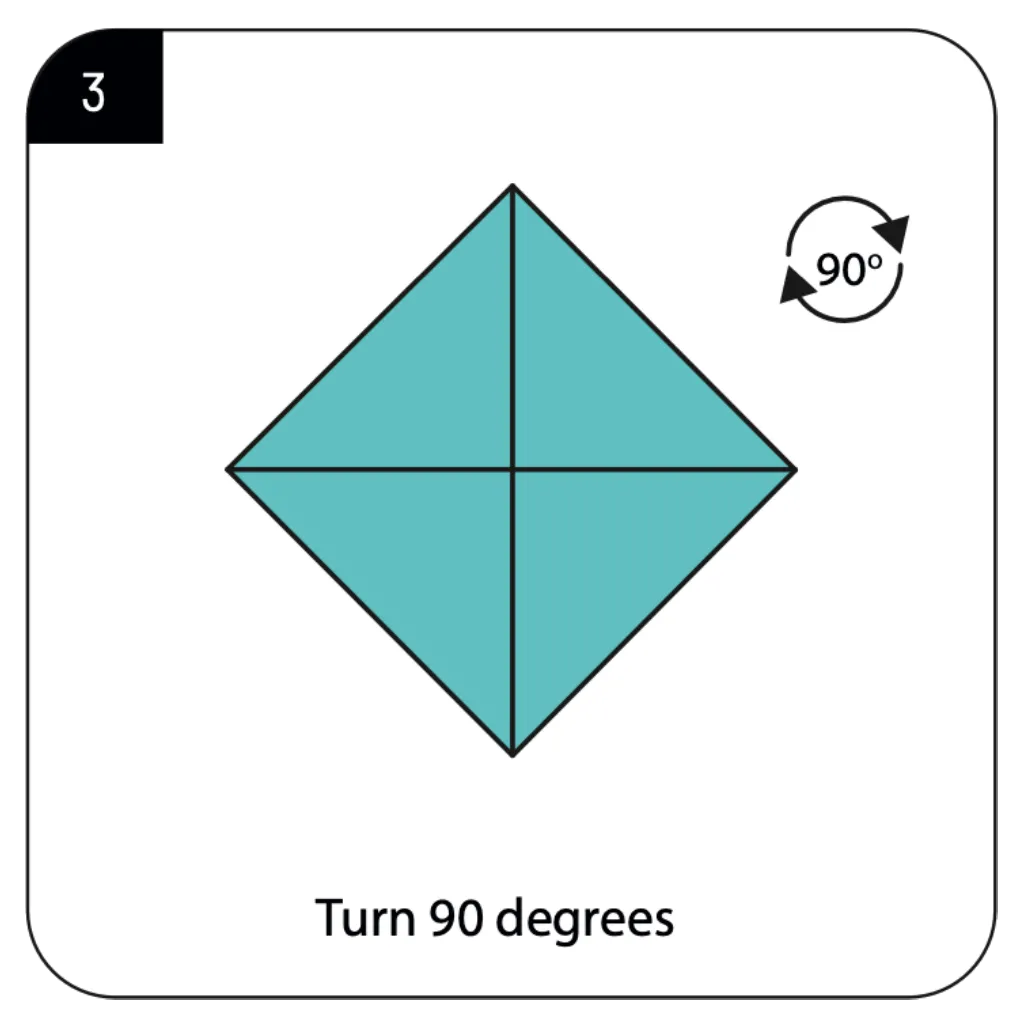
Turn your paper 45 degrees so it appears as a diamond shape in front of you. This reorientation prepares the model for the next series of folds and ensures proper alignment for the developing box structure. The diamond orientation is a common starting position for many Origami Masu Box models, as it allows for symmetrical folding from all four corners. This simple repositioning is crucial for maintaining the correct fold sequence in subsequent steps.
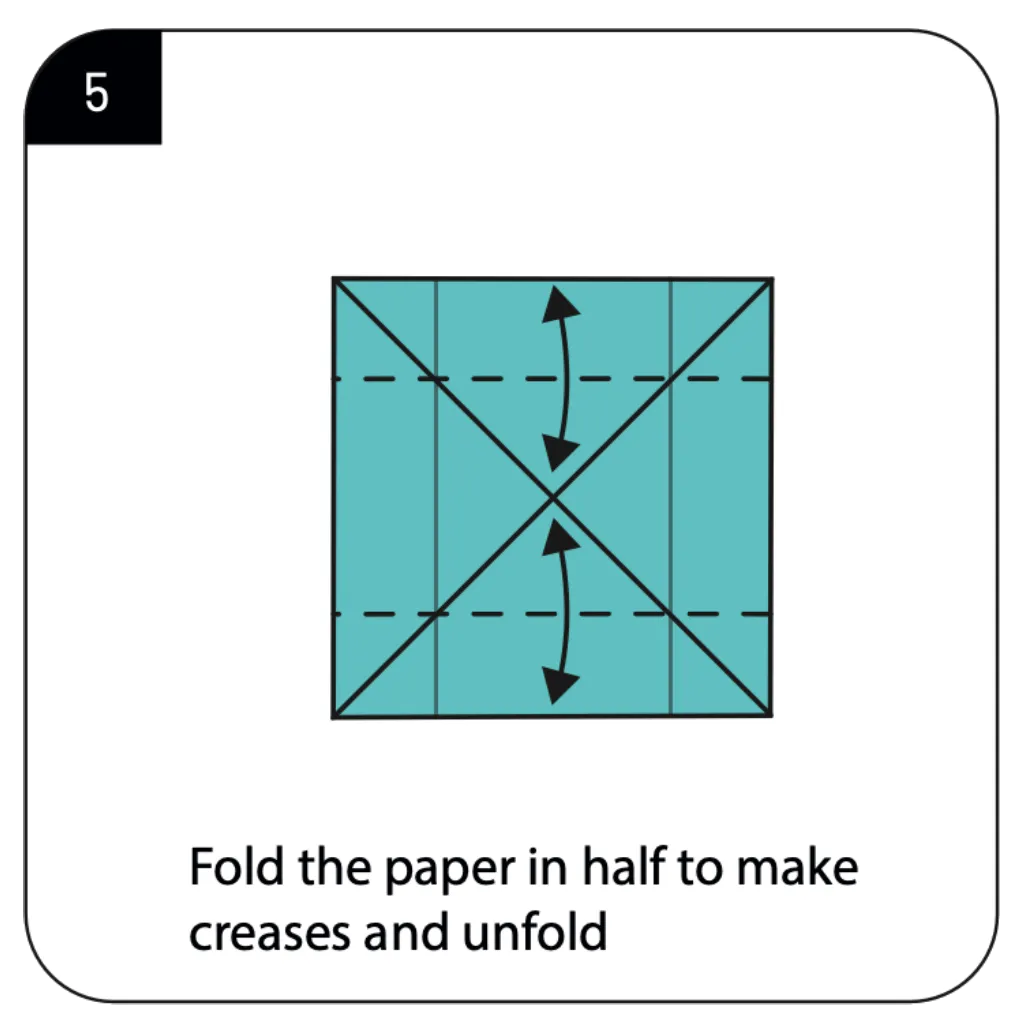
Step 4: Reinforce the Horizontal and Vertical Creases for Origami Masu Box
With the paper in diamond position, fold in half horizontally again (bringing the top point to the bottom point), crease firmly, and unfold. This reinforces the existing creases with the paper in its new orientation. Strong, clear crease lines are essential for clean folds throughout the Origami Masu Box process. Properly reinforced creases will make later structural folds easier to execute and result in a more precise finished box.
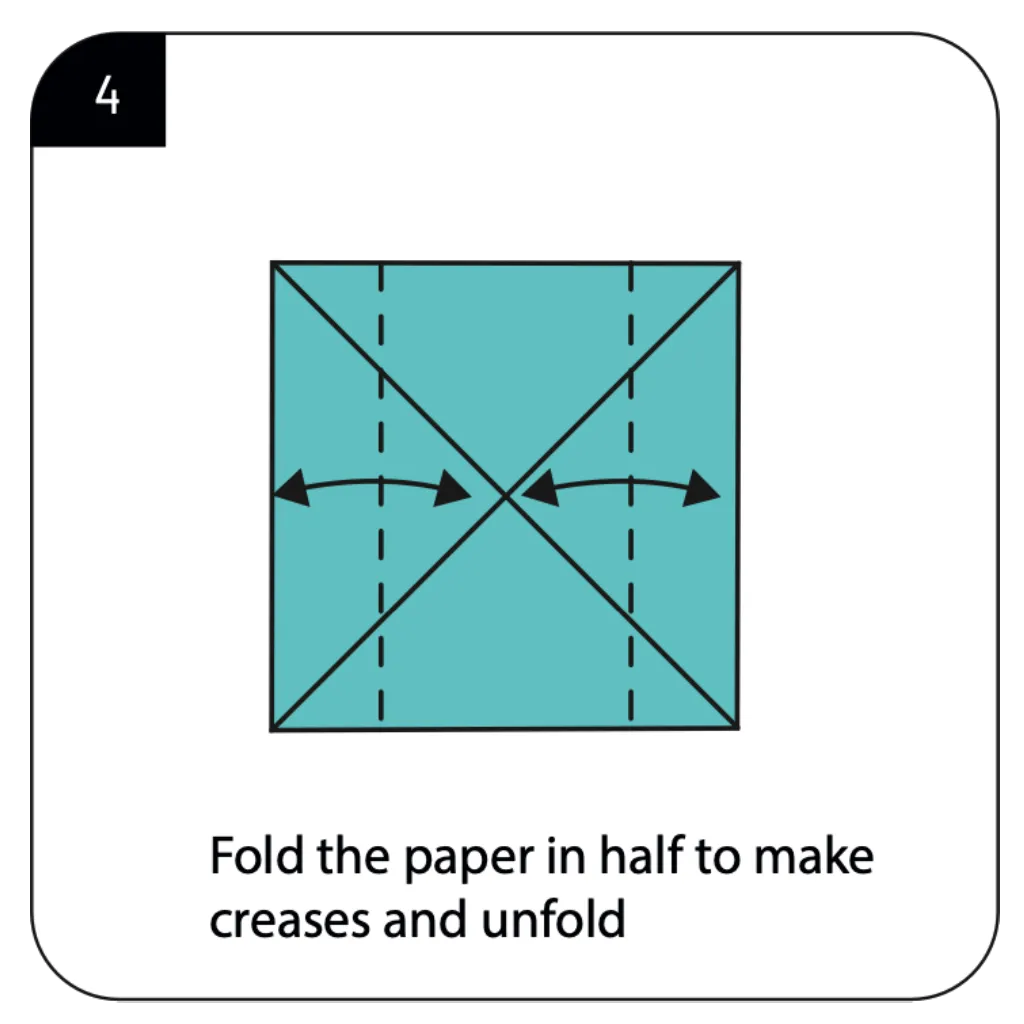
Step 5: Create Additional Horizontal and Vertical Creases for Origami Masu Box
Fold the paper in half vertically (bringing the left point to the right point), crease firmly, and unfold. These repeated creases in the diamond orientation create the complete grid pattern necessary for forming the box structure. The origami Masu Box relies on a precise grid of creases that must be well-defined for the model to take shape properly. This comprehensive network of fold lines provides the structural foundation for your three-dimensional box.
Step 6: Open Both Sides
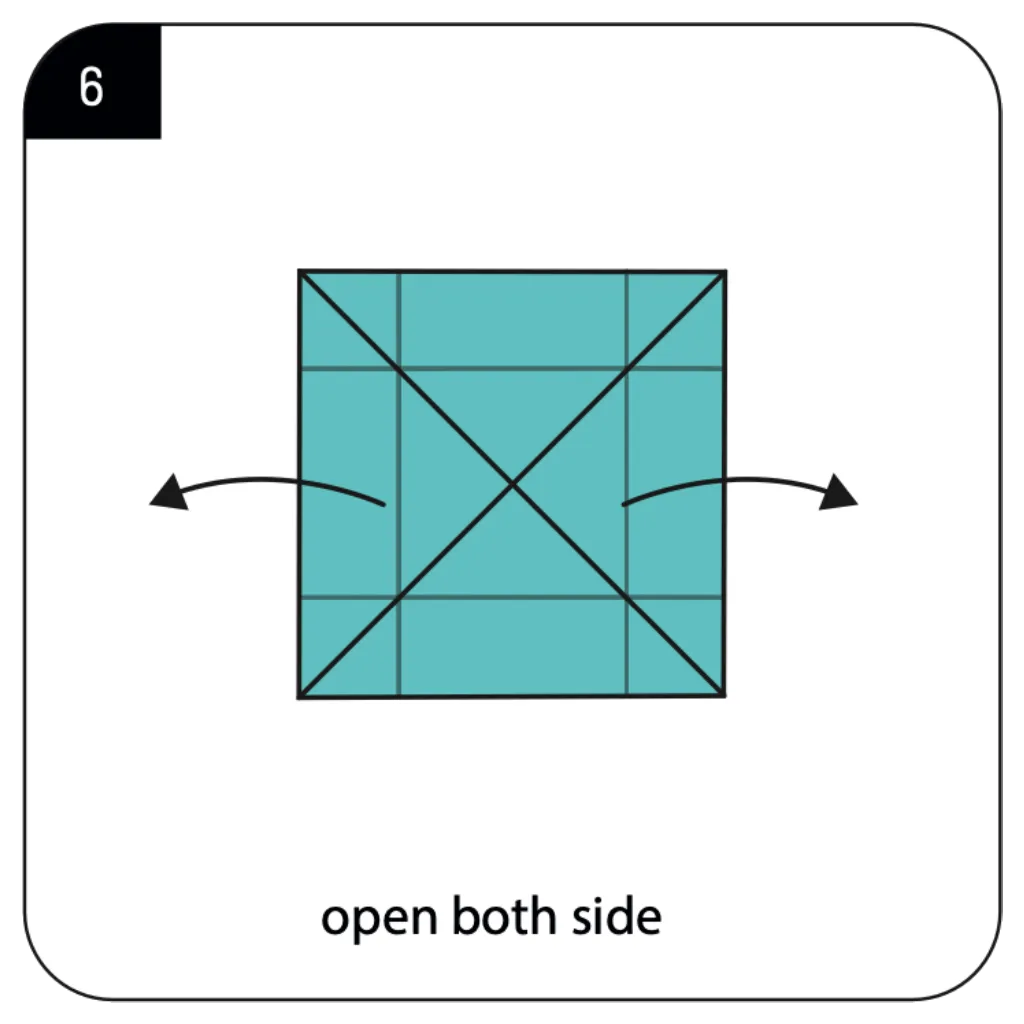
Gently pull the left and right sides of the paper outward as shown in the diagram. This begins the transformation from a flat sheet to a three-dimensional form. The motion should be smooth and controlled to avoid tearing the paper. This opening movement leverages the existing crease pattern to begin forming the characteristic square shape of the Masu Box, creating side walls that will later form the box container.
Step 7: Fold Toward the Center
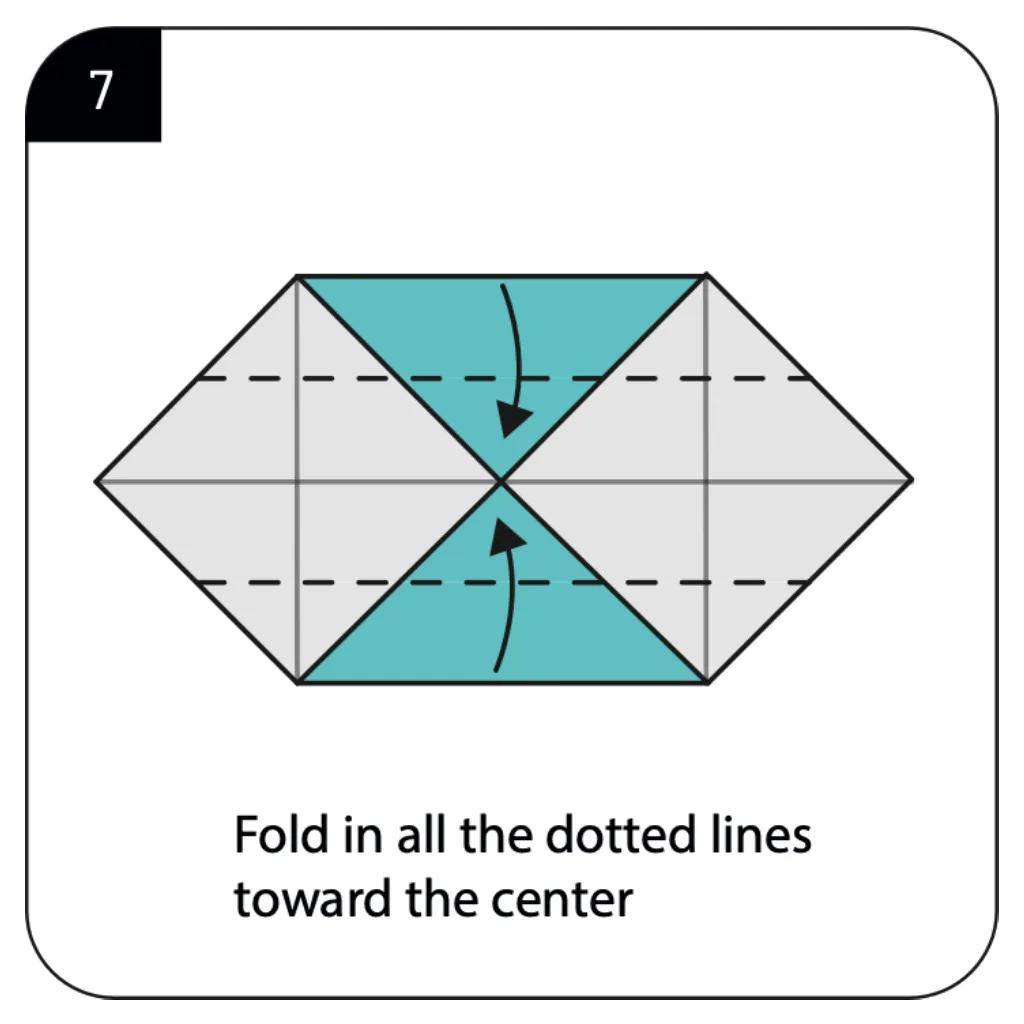
Fold all the indicated dotted lines inward toward the center point. This crucial step begins defining the walls of your Masu Box. The fold lines should follow the existing crease pattern created in earlier steps. Working systematically around all four sides ensures balanced tension and symmetrical structure. These folds utilize the comprehensive crease pattern you’ve established to begin transforming the flat paper into a three-dimensional container form.
Step 8: Create Structural Creases
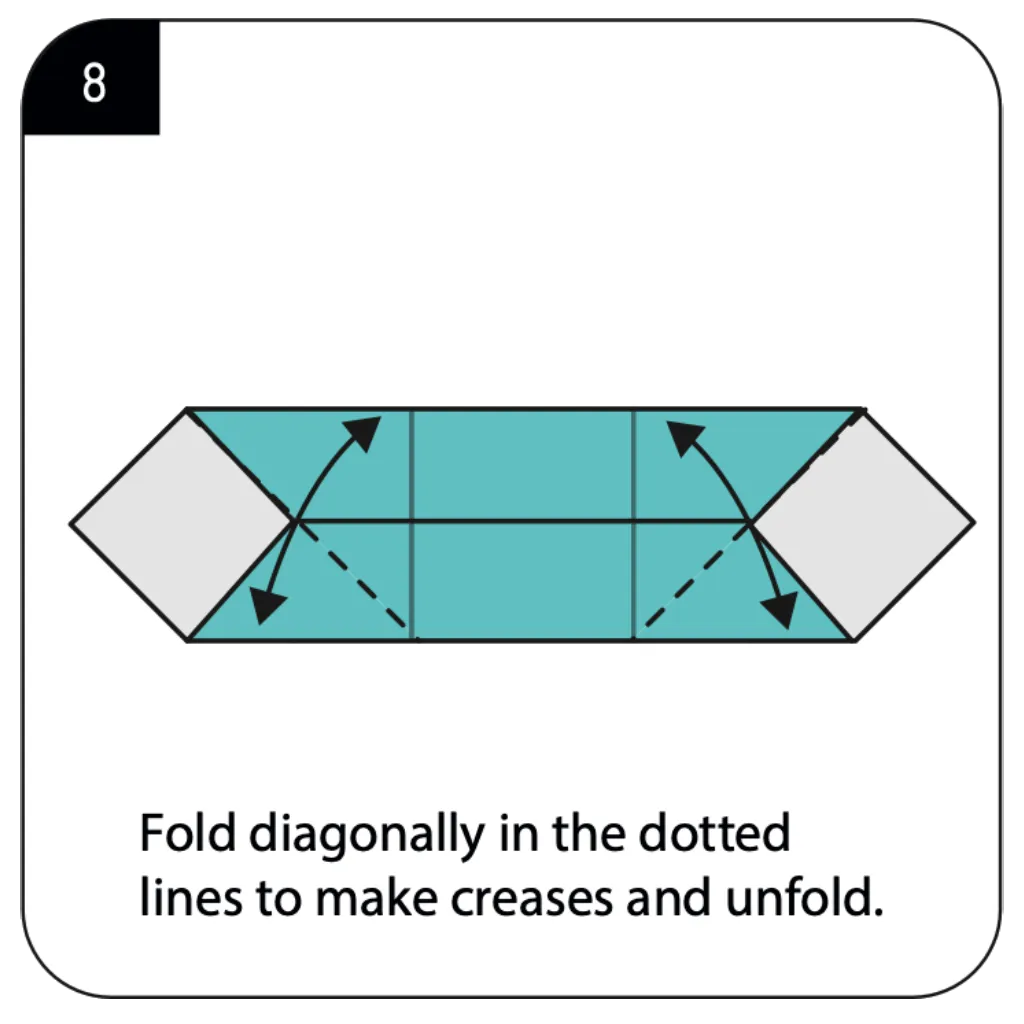
Fold diagonally along the dotted lines to create additional creases, then unfold. These diagonal folds prepare the paper for the final box structure and are essential for proper corner formation. Pay special attention to making these creases sharp and precise. These folds may require slightly more force to create clear crease lines, but avoid pressing so hard that you tear the paper at intersection points.
Step 9: Open the Pockets
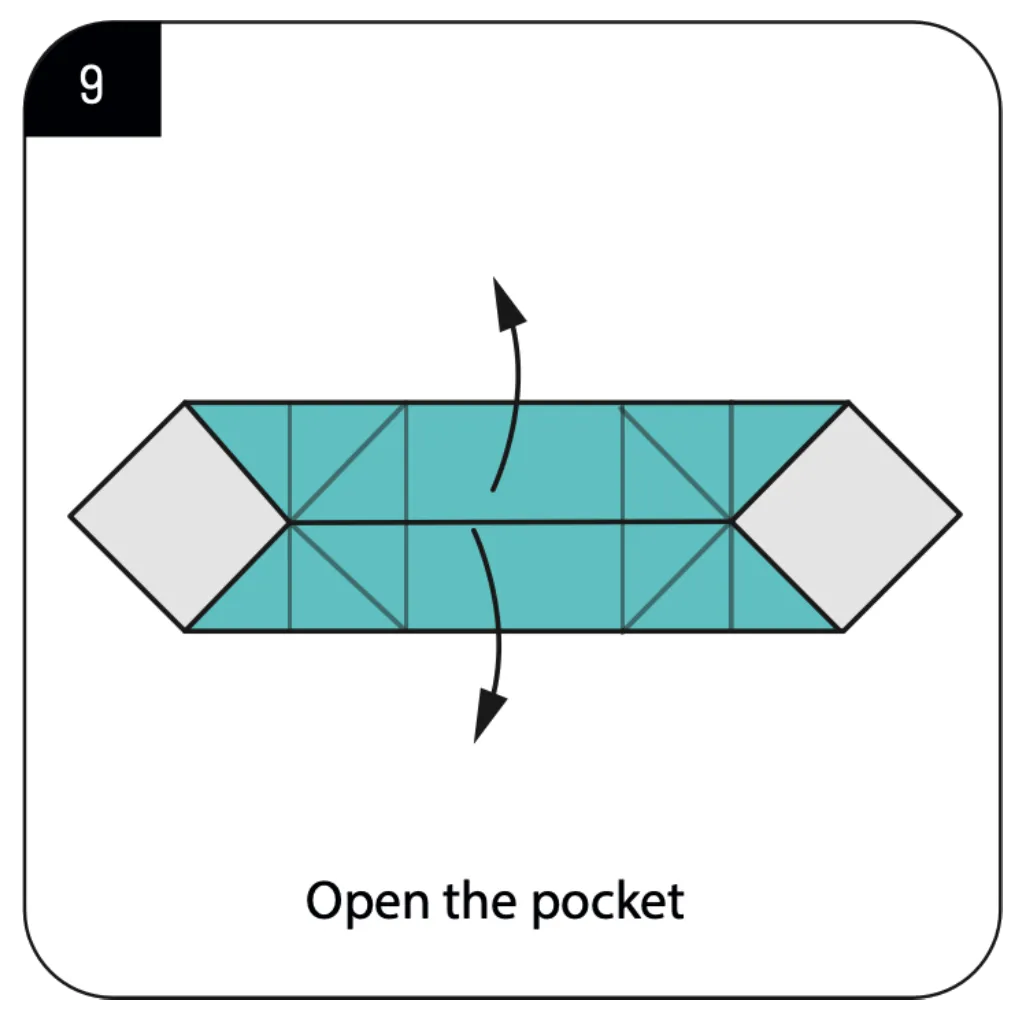
Carefully open the pockets formed by the previous folds. This step requires gentle manipulation to avoid tearing while establishing the three-dimensional structure of your Masu Box. The pockets will become the corner structures that give the box its stability and shape. This is one of the more delicate steps in the process, requiring patience and careful handling of the multiple layers of paper that have formed through previous folding steps.
Step 10: Complete the Box Structure
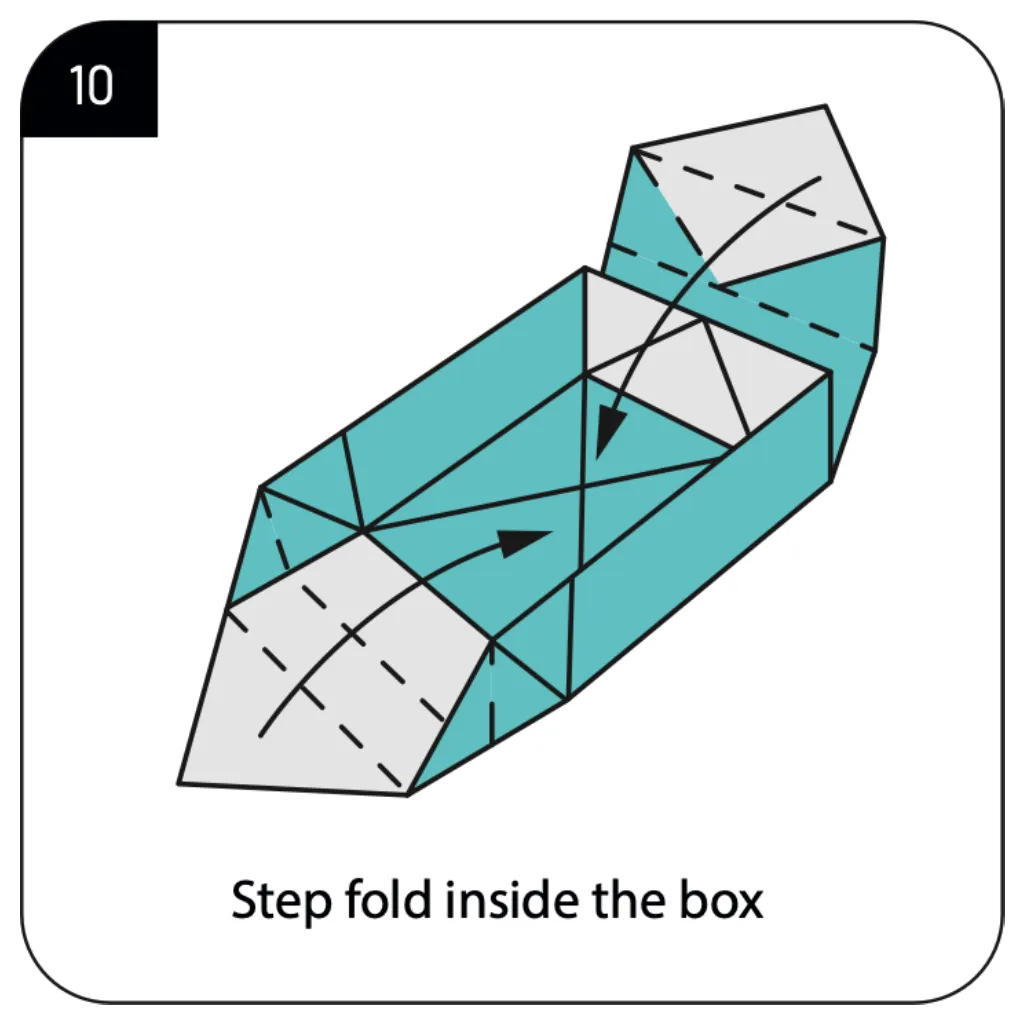
Perform step folds to bring the box walls inward and upright, creating the interior space of your Masu Box. This critical step transforms the flat structure into a functional container. Work systematically around all four sides of the box, ensuring each wall stands at a right angle to the base. The step folding technique uses the previously established creases to lock the box structure into its final three-dimensional form.
Step 11: Finalize Your Origami Masu Box
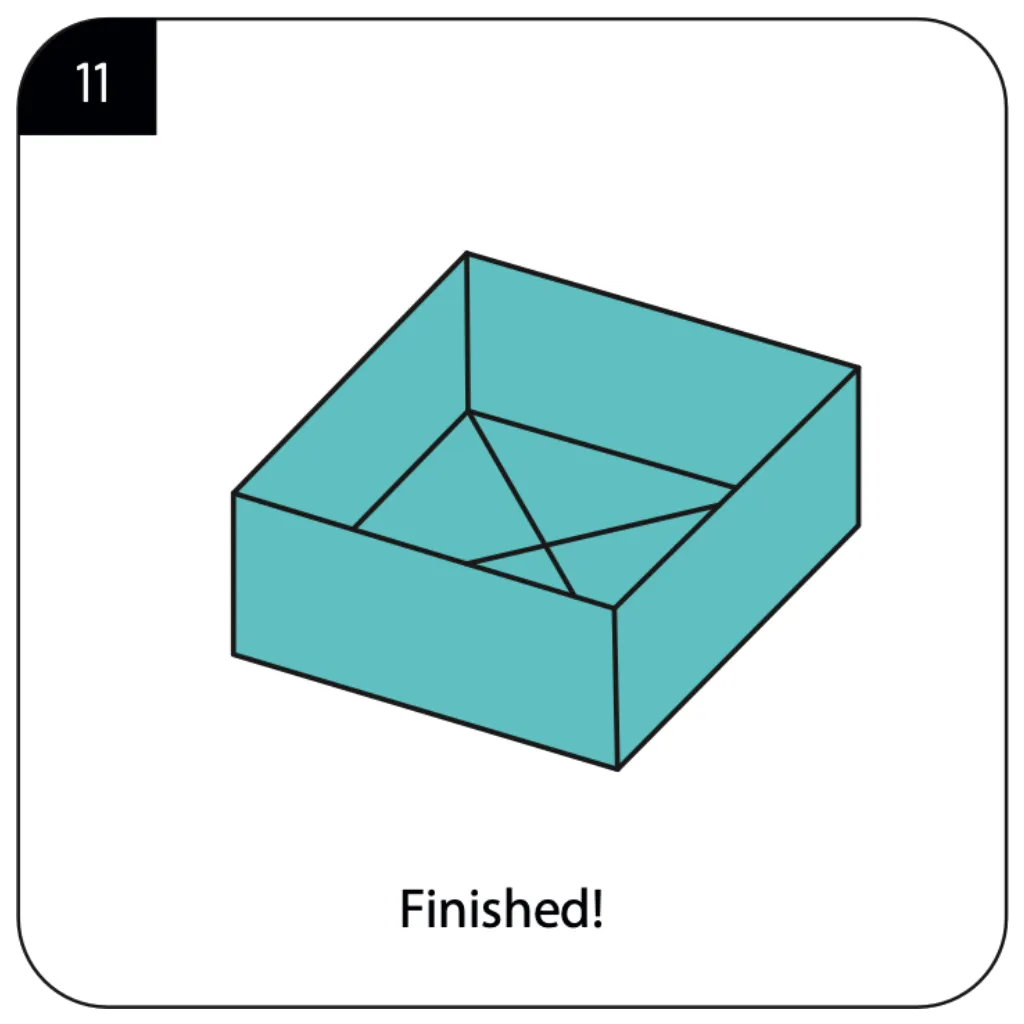
Make any final adjustments to ensure your box walls are even and properly aligned. The completed Masu Box should have a square base with four equal walls standing perpendicular to the base. Your traditional origami Masu Box is now finished and ready to use! This versatile container can hold small treasures, serve as gift packaging, or stand as a beautiful display of your Origami Masu Box skills. The beautiful simplicity of the Masu Box demonstrates how basic folding techniques can create functional three-dimensional structures.
Conclusion
Congratulations on creating your origami Masu Box! This elegant paper container represents the perfect marriage of form and function in the art of origami. What began as a simple square sheet has transformed, through your careful folding, into a useful three-dimensional box with a rich cultural history. The Masu Box showcases how origami can create not just decorative objects but practical items for everyday use. As you’ve discovered, this traditional design teaches fundamental origami techniques including precise creasing, three-dimensional transformation, and structural reinforcement—skills that transfer to countless other origami projects. Your completed box can serve as beautiful gift packaging, a desk organizer for small items, or the beginning of an Origami Masu Box container collection. We hope this tutorial has not only given you a useful paper box but also deepened your appreciation for the mathematical precision and artistic possibilities of origami. Keep practicing to perfect your technique, and consider exploring variations of the classic Masu Box design, including lidded versions and decorative adaptations!
Learn the essential folding techniques for all your origami projects in our Beginner’s to Origami.
