
Introduction
Origami, the ancient Japanese art of paper folding, offers delightful opportunities to create wearable art that combines creativity with playful functionality. The origami fox mask stands out as one of the most charming and accessible projects for both children and adults, transforming a simple square sheet of paper into an adorable animal face perfect for imaginative play. Unlike more complex origami fox mask models, this fox mask achieves an instantly recognizable animal character through just five straightforward steps, making it ideal for classroom activities, birthday parties, Halloween costumes, or simply creative playtime at home. What makes this origami fox mask particularly appealing is its dual nature—it serves both as an excellent introduction to basic paper folding techniques and as a functional mask that children can actually wear and enjoy. The completed model captures the distinctive triangular features of a fox’s face, including pointed ears and a narrow snout, while the simple folding pattern makes it accessible even to younger crafters with minimal origami experience. Whether you’re planning animal-themed activities, looking for quick craft projects, or introducing children to the wonderful world of paper folding, this fox mask tutorial provides the perfect balance of simplicity and creative satisfaction.
Step-by-Step Instructions
Step 1: Create the Initial Diagonal Crease For origami fox mask
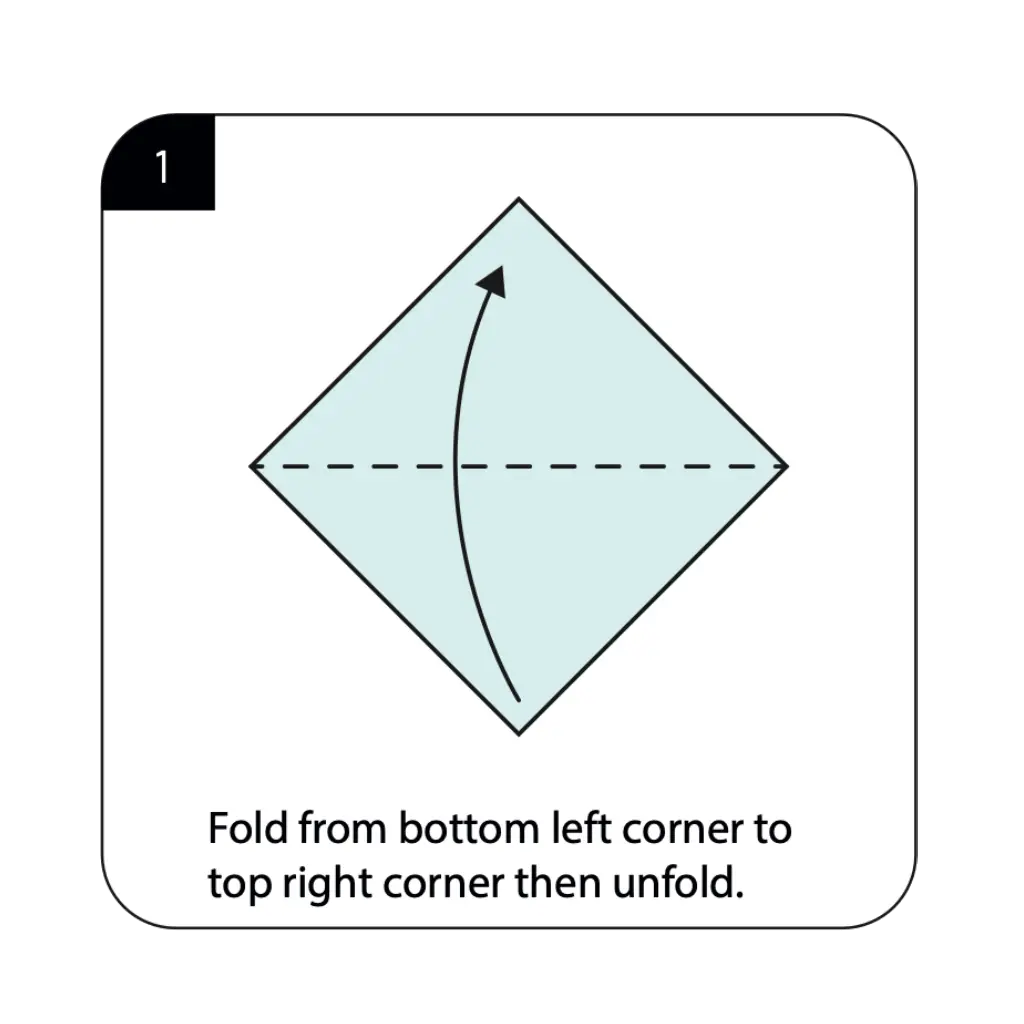
Begin with a square sheet of paper, preferably orange or reddish-brown on one side and white on the other for realistic fox coloring. Fold the paper diagonally from the bottom left corner to the top right corner, creating a strong crease, then carefully unfold. This initial fold establishes the primary reference line that will guide the symmetrical development of your fox mask. The precision of this diagonal crease is crucial for ensuring both ears of your fox mask are equal and properly positioned. Take care to align the corners perfectly and press firmly along the fold line to create a sharp, well-defined guide for subsequent folds.
Step 2: Form the Second Diagonal Reference For origami fox mask
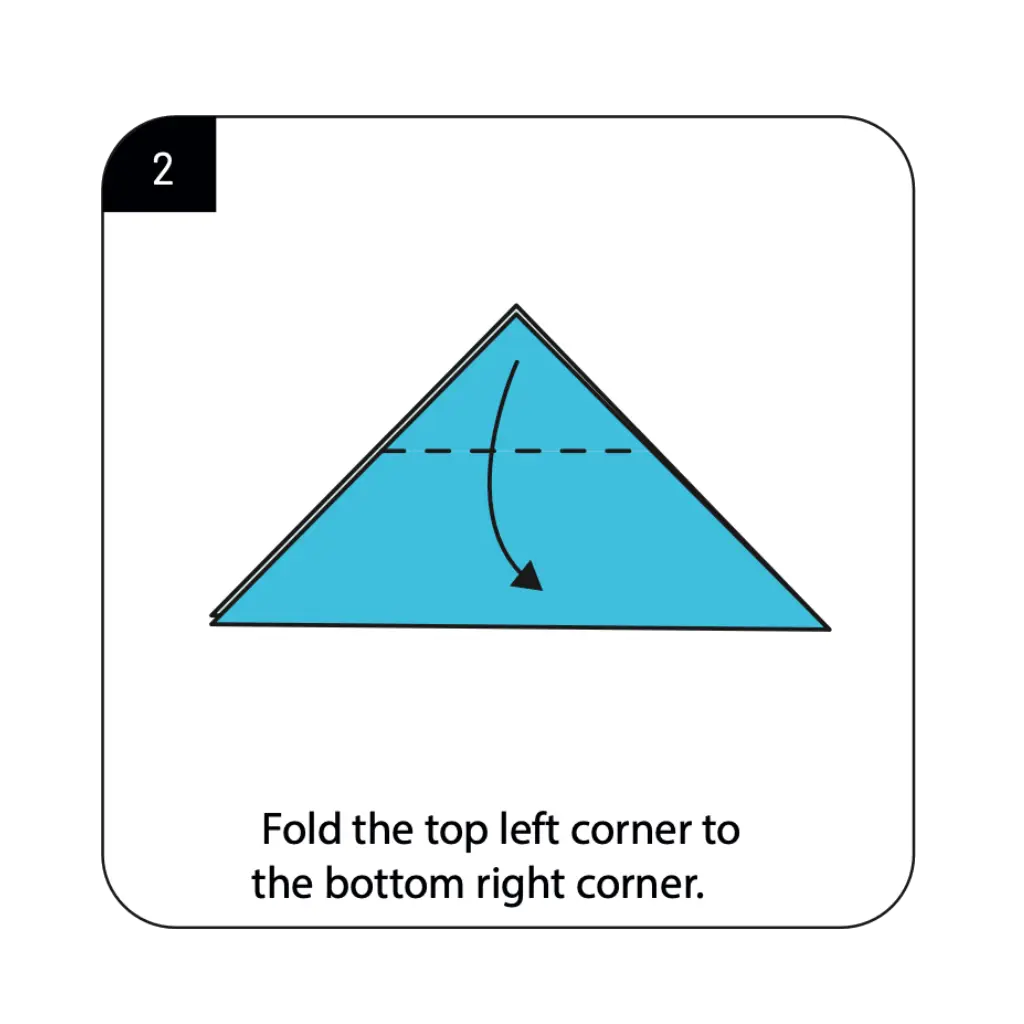
Fold the paper diagonally from the top left corner to the bottom right corner, creating the second diagonal crease, then unfold to return to the square. This crossing diagonal creates an X-pattern of creases that establishes the center point and framework for your fox mask structure. The intersection of these two diagonal lines marks the exact center of your paper and ensures perfect symmetry in your finished mask. These perpendicular diagonal creases are essential reference lines that will guide the positioning of the fox’s facial features and maintain proper proportions throughout the folding process.
Step 3: Position for Fox Features For origami fox mask

Rotate your paper 45 degrees so that it appears as a diamond shape with one point facing upward. This reorientation prepares your paper for the specific folds that will create the fox’s distinctive triangular face and pointed ears. The diamond orientation is crucial for achieving the proper proportions and angles that make the mask instantly recognizable as a fox. This positioning ensures that when you complete the subsequent folds, the fox’s ears will be properly positioned at the top corners and the snout will extend downward from the bottom point.
Step 4: Create the Fox Ear Structure For origami fox mask
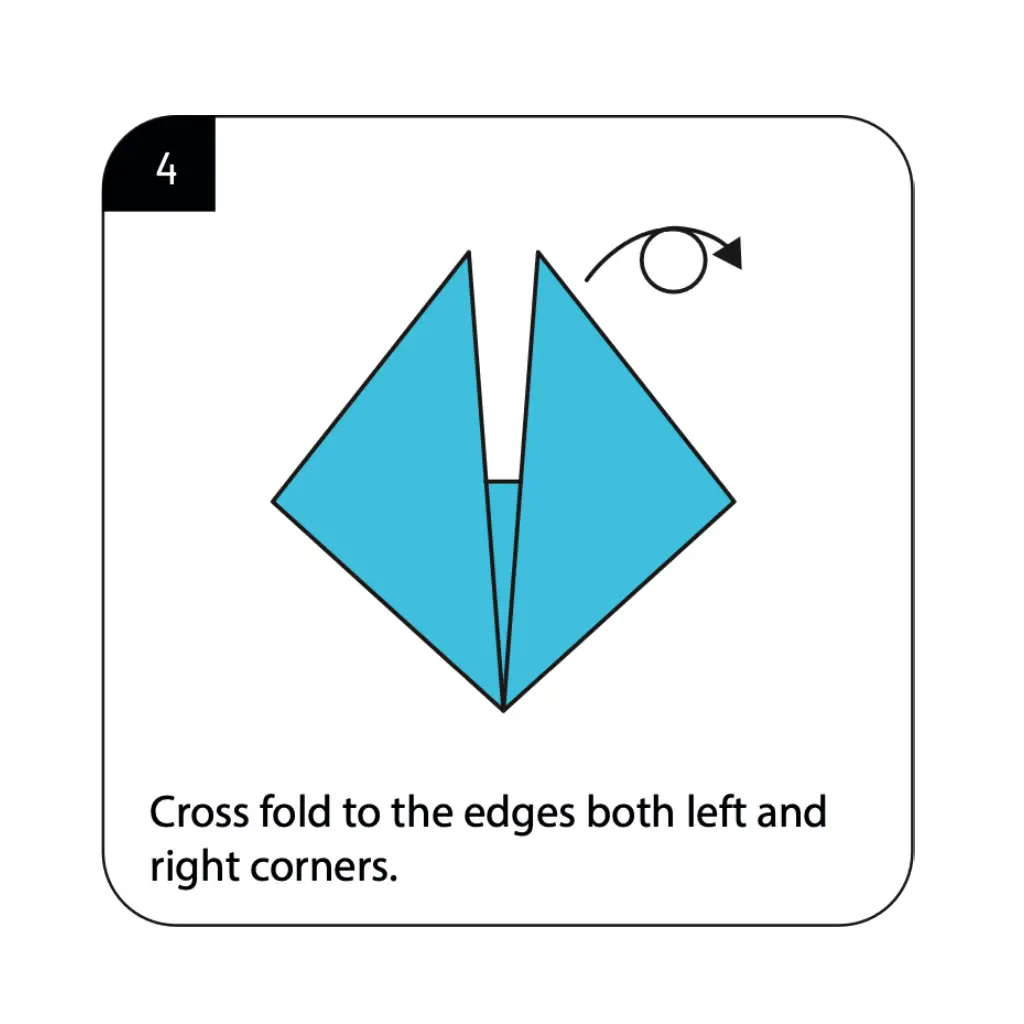
Cross fold to the edges, bringing both the left and right corners toward the center edges as shown in the diagram. These important folds begin defining the characteristic pointed ears of your fox mask. The angle and symmetry of these folds directly affect how recognizable your mask will be as a fox face. Work carefully to ensure both corner folds are identical in size and position, as any asymmetry will be immediately noticeable in the finished mask. These cross folds create the triangular ear shapes that are the most distinctive feature of the fox’s silhouette.
Step 5: Complete Your Origami Fox Mask
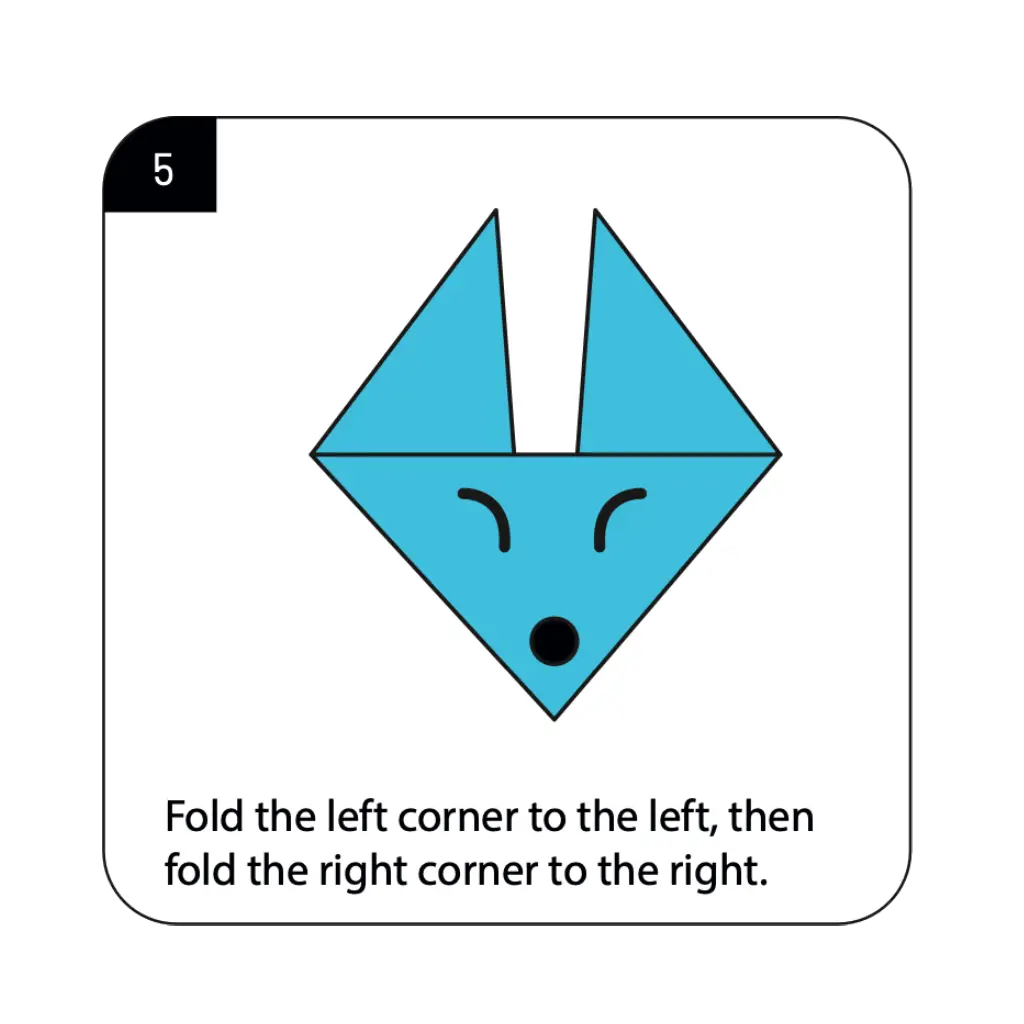
Fold the left corner to the left and the right corner to the right as indicated, finalizing the ear positions and completing your fox mask structure. These final adjustments perfect the positioning of the fox’s ears and create the finished triangular face shape. Your origami fox mask is now complete and ready for decoration with simple drawn features like eyes, nose, and whiskers to bring it to life! The finished mask displays the characteristic fox silhouette with pointed ears, triangular face, and narrow chin that captures the essence of this clever woodland creature through elegant paper folding geometry.
Conclusion
Congratulations on creating your origami fox mask! This charming paper creation demonstrates how simple folding techniques can transform an ordinary square sheet into a delightful wearable animal character. From basic diagonal creases to the final ear positioning, you’ve mastered the fundamental steps needed to create a recognizable fox face that captures the essence of this clever woodland creature. The origami fox mask showcases the perfect balance between simplicity and character that makes paper folding such an engaging craft for all ages. Your completed mask serves multiple purposes—as an introduction to origami basics, a fun craft project, and a functional costume piece for imaginative play. The techniques you’ve learned through this project, including precise creasing, symmetrical folding, and geometric transformation, build valuable foundation skills for more complex origami designs. We hope this tutorial has sparked your interest in both paper folding and animal-inspired crafts. Remember that each mask you create offers opportunities to practice precision and explore variations—try different colors, add drawn details, or experiment with slight modifications to create your own unique fox characters.
- “Before starting your fox mask, learn fundamental folding techniques in our Origami Basics for Beginnersguide.”
- “Explore more animal mask designs in our Origami Animals Collection, featuring cats, dogs, and forest creatures.”
- “Discover more mask-making projects and costume ideas in our Creative Origami Gallery section.”
- “Find beautiful ways to display and decorate your animal masks with our Decorative Origami Ideas guide.”
- “Create a complete forest scene by adding Origami Flowers as props for your fox mask adventures.”
- “Learn how to make multiple matching masks for group activities using techniques from our Modular Origami Projects collection.”
