
Introduction
Origami 3D Star, the ancient Japanese art of paper folding, reaches its most impressive heights with modular designs that combine multiple units into spectacular three-dimensional creations. The 3D modular star represents one of the most stunning achievements in advanced origami, transforming four individual square sheets into a complex, geometric masterpiece that appears to defy the limitations of paper. This intricate project challenges experienced folders while delivering breathtaking results that showcase the mathematical beauty inherent in Origami 3D Star design. Unlike simple single-sheet models, this modular star requires precision, patience, and advanced folding techniques to successfully integrate four separate units into one cohesive three-dimensional structure. The completed model features dramatic angular surfaces, impressive dimensional depth, and a sophisticated geometric pattern that makes it perfect for holiday decorations, gifts for Origami 3D Star enthusiasts, or as a centerpiece that demonstrates mastery of complex paper engineering. While this tutorial is marked as “advanced but worth the effort,” the step-by-step approach breaks down the seemingly impossible into manageable stages, guiding dedicated folders through each crucial phase of construction. Whether you’re looking to challenge your Origami 3D Star skills, create stunning home decorations, or explore the fascinating world of modular paper folding, this 3D star tutorial offers both technical challenge and extraordinary visual reward.
Step-by-Step Instructions
Step 1: Create the Foundation Diagonal Creases
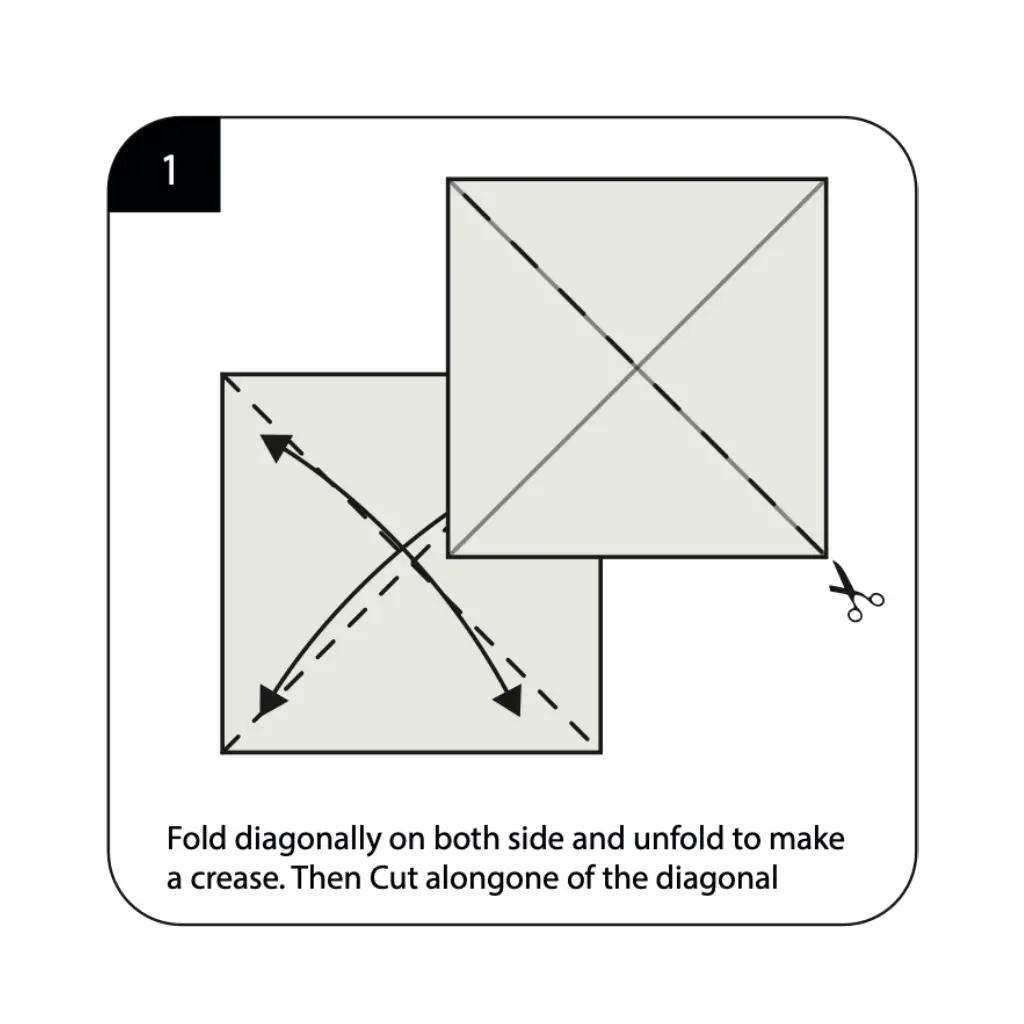
Begin with four identical square sheets of Origami 3D Star paper, preferably in coordinating colors for visual impact. For each sheet, fold diagonally on both sides and unfold to create permanent crease lines that will guide the subsequent folds. These diagonal creases are absolutely crucial for the structural integrity of your 3D modular star, as they establish the precise angles needed for proper unit assembly. The accuracy of these initial creases directly affects how well the four units will fit together in the final construction, so take extra care to ensure each diagonal fold is sharp and precisely positioned. Work methodically through all four sheets, creating identical crease patterns that will serve as the foundation for this complex modular design.
Step 2: Make the Critical Diagonal Cut
Cut along one of the diagonal creases on each sheet as indicated in the instructions. This cutting step transforms each square into the specific shape needed for the 3D star construction. The precision of this cut is essential—it must be straight and follow the crease line exactly to ensure proper assembly of the modular components. This modification creates the unique geometry required for the three-dimensional interlocking structure, differentiating this project from traditional Origami 3D Star that uses only folding techniques. Each cut piece will become one unit of your four-part modular star system.
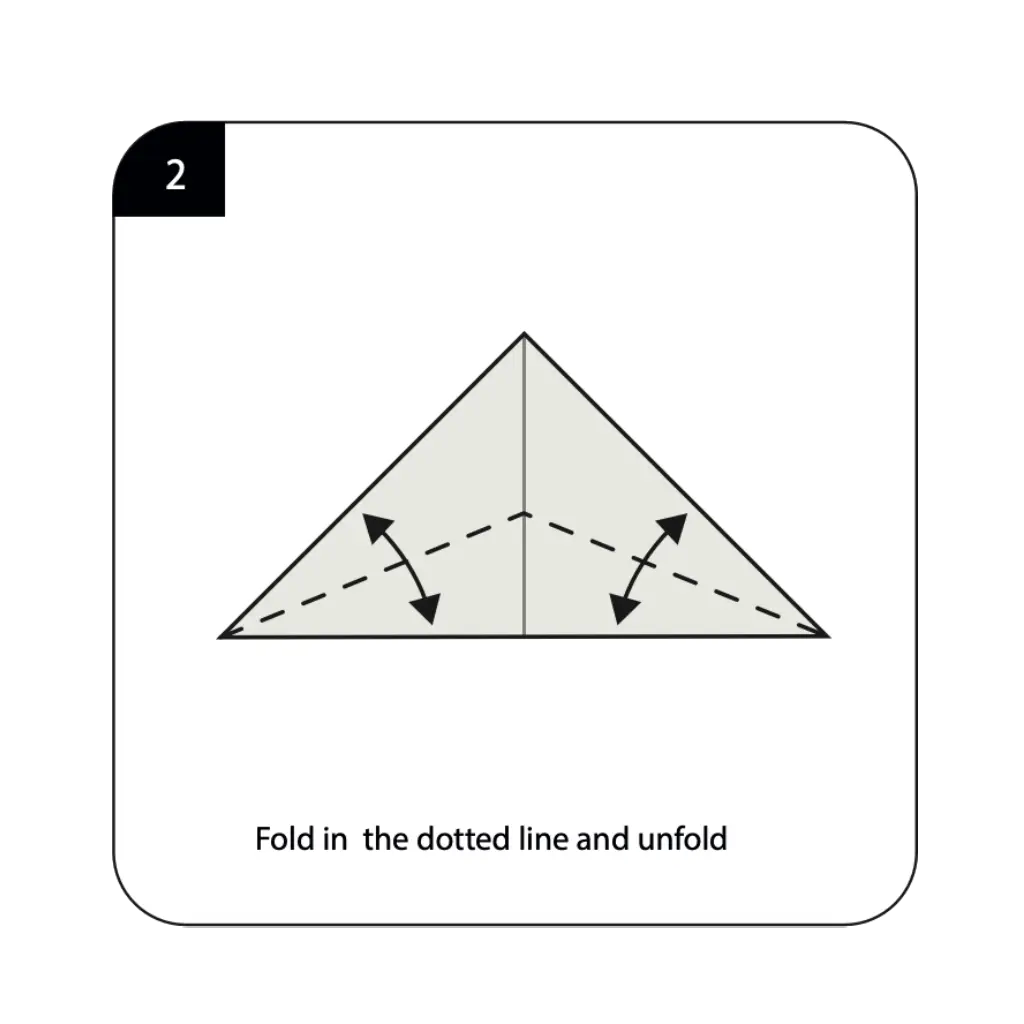
Step 3: Form the Individual Star Units
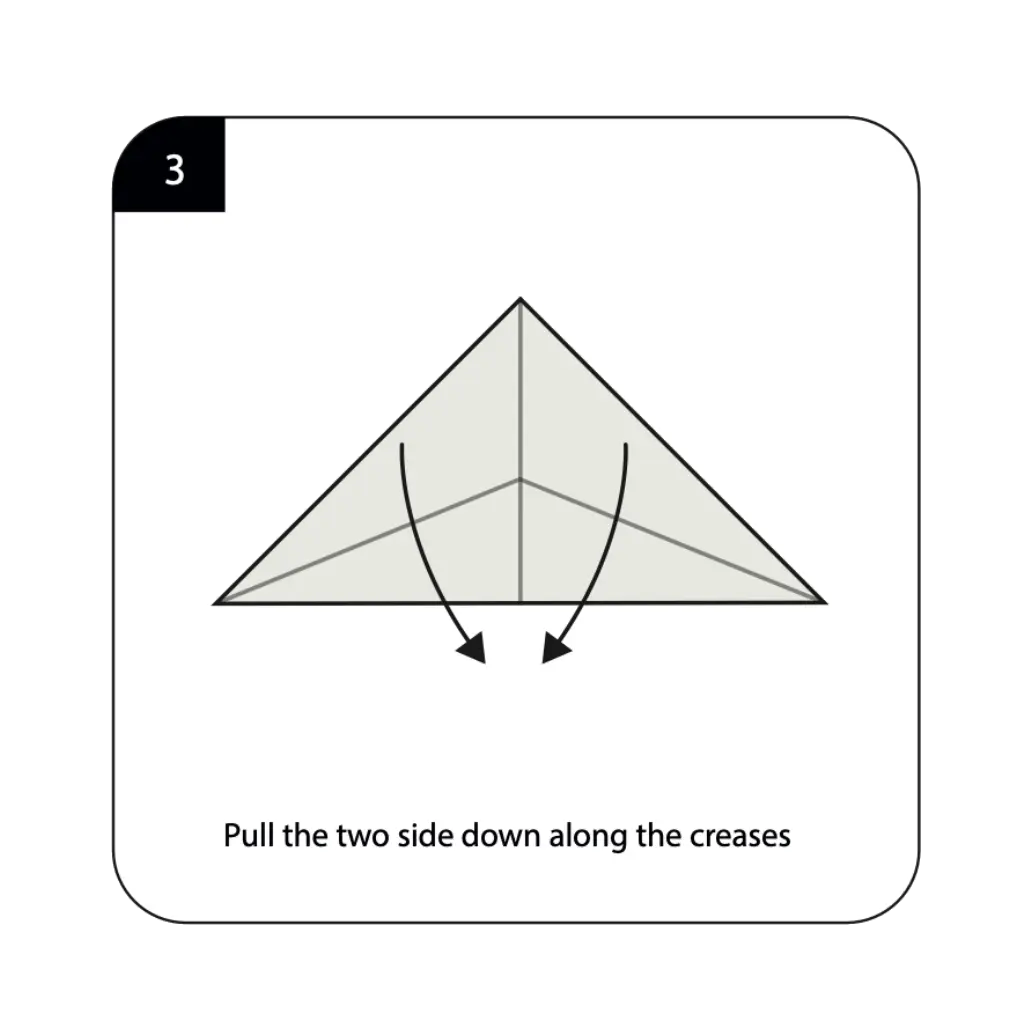
Fold along the dotted lines and unfold each prepared piece to create the basic unit structure. Pull the two sides down along the established creases to begin forming the three-dimensional shape of each star component. This step transforms the flat cut pieces into the angular, dimensional units that will eventually interlock to form your complete star. The proper execution of these folds creates the specific angles and surfaces needed for the modular assembly process. Work carefully to ensure all four units are folded identically, as consistency between units is crucial for successful final assembly.
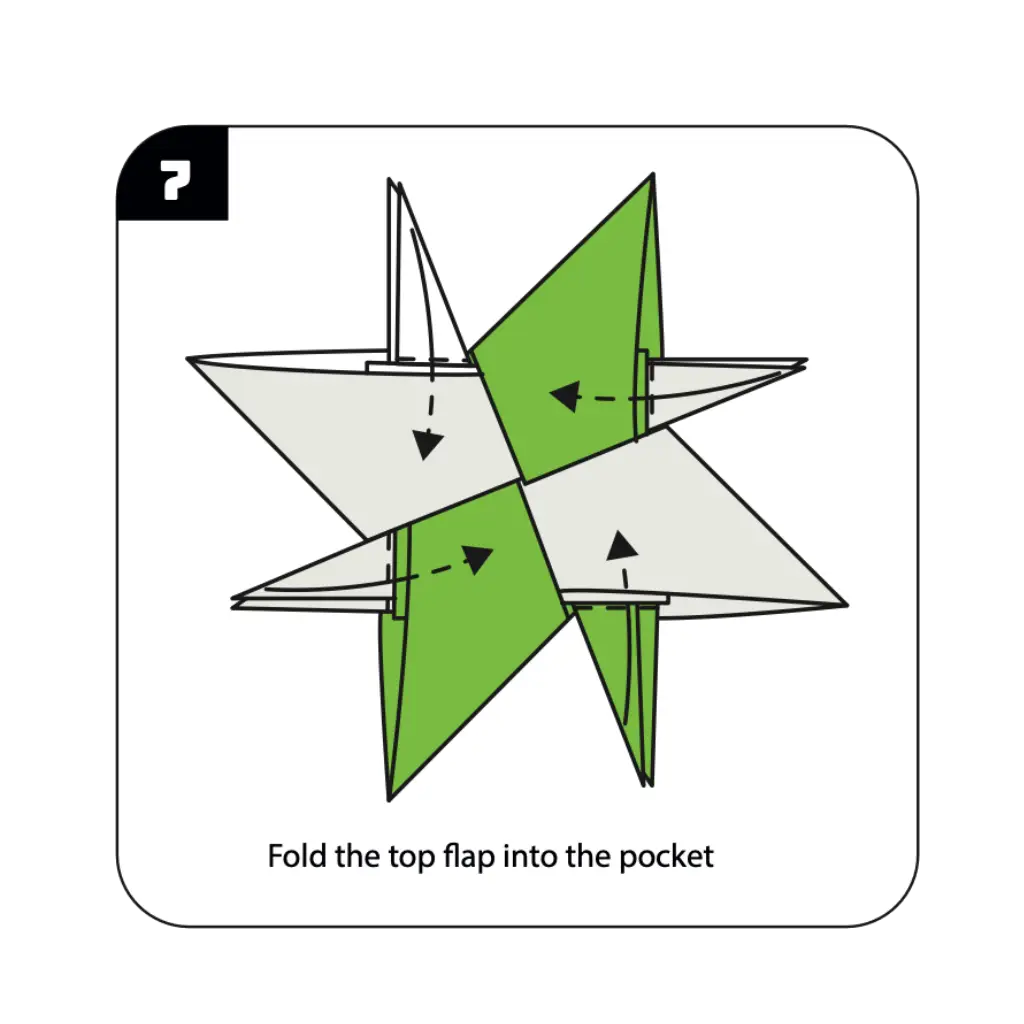
Step 4: Create the Interlocking Mechanism
Fold the top flap into the pocket as shown in the diagram for each of the four units. This fold creates the interlocking mechanism that allows the separate units to connect securely without glue or additional fasteners. The precision of this pocket fold determines how well the units will hold together in the finished star structure. This step requires careful attention to detail, as the pocket must be properly formed to accept the corresponding flap from adjacent units during assembly. Repeat this folding process for all four units, ensuring each pocket is identically formed for consistent interlocking capability.
Step 5: Begin the Modular Assembly Process
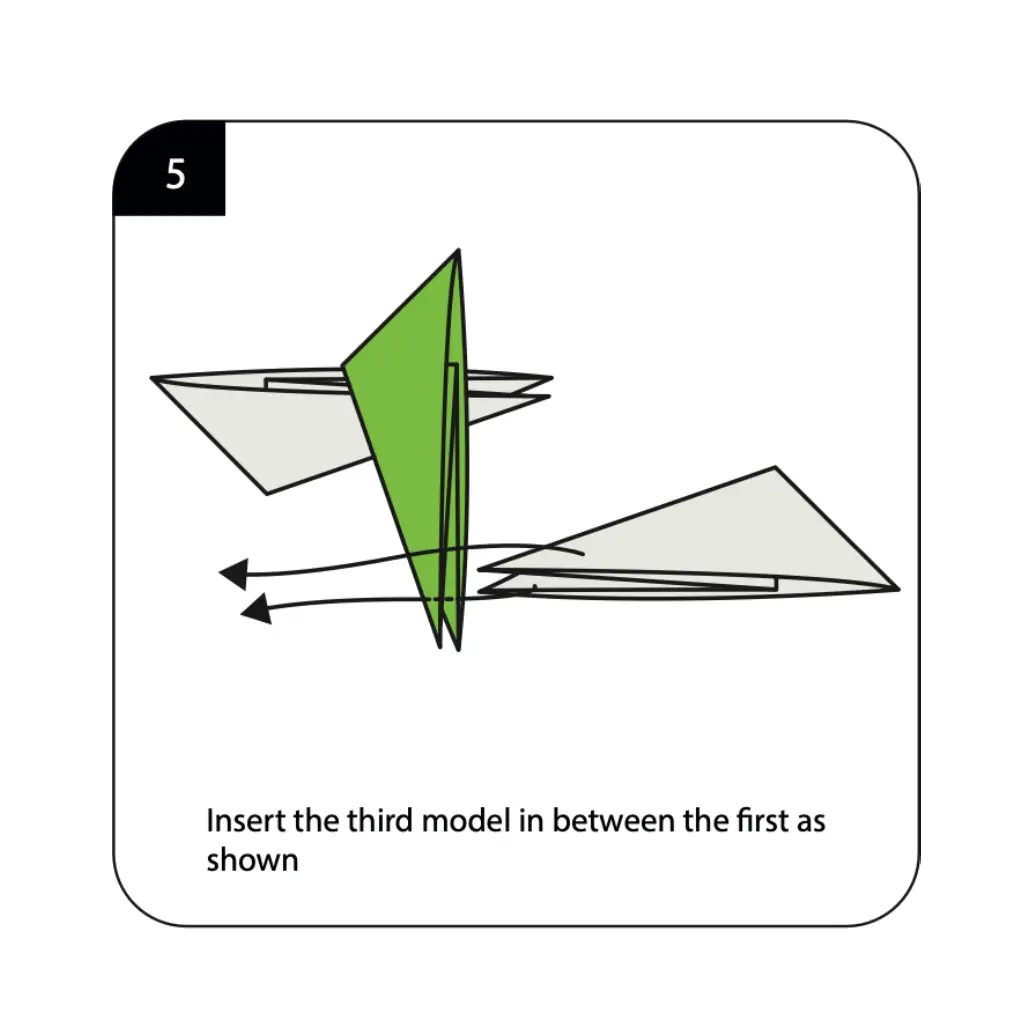
Insert the third model in between the first unit as shown in the detailed assembly diagram. This critical step begins the three-dimensional construction phase where individual units are combined into the complete star structure. The insertion must be done carefully to avoid tearing the paper while ensuring a secure connection between units. This assembly process requires patience and gentle manipulation, as the three-dimensional form begins to take shape through the precise interlocking of the prepared units. The success of this step determines the structural integrity of your finished 3D modular star.
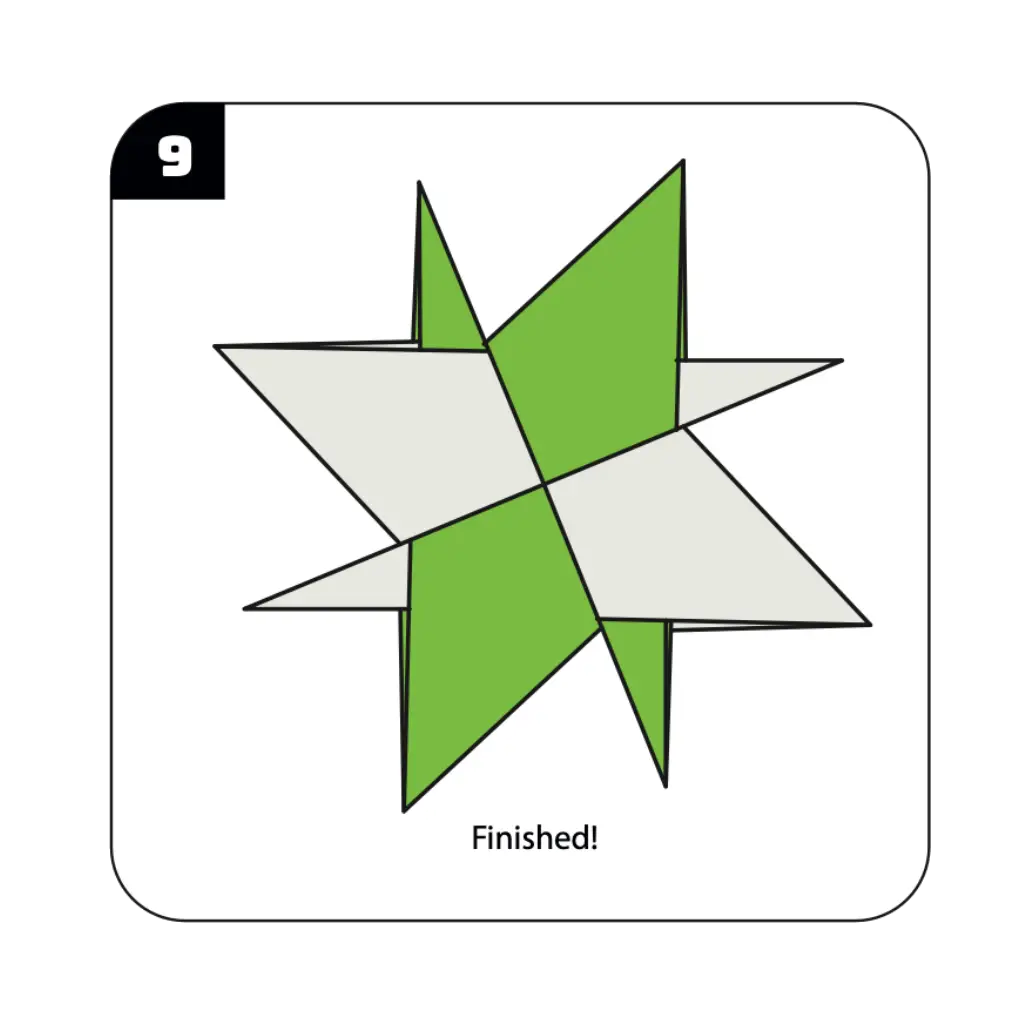
Step 6: Complete Your 3D Modular Star

Insert the fourth model in between the third unit as shown, completing the assembly of your spectacular 3D modular Origami 3D Star star. This final assembly step brings together all four units into the finished three-dimensional structure that showcases the mathematical beauty of modular Origami 3D Star design. Work carefully during this final insertion to ensure all connections are secure and the star maintains its proper geometric form. Your completed 3D modular star now displays impressive dimensional depth, sophisticated angular surfaces, and the complex geometric beauty that makes advanced Origami 3D Star such a rewarding art form, ready to serve as a stunning decoration or treasured gift.
Step 7: Continue the Assembly Process
Repeat the assembly process by inserting the fourth model in between the third unit as shown in the diagram. This step continues building the complete three-dimensional structure by adding the next unit to the growing modular assembly. Work carefully to maintain the proper geometric relationships between all connected units while ensuring each new connection is secure and properly aligned. The gradual assembly process allows you to see the three-dimensional star form taking shape as each additional unit contributes to the overall geometric complexity. This systematic approach ensures that each unit is properly positioned for the final assembly completion.
Step 8: Complete the Final Assembly
Insert the remaining units and complete all final connections to finish your spectacular 3D modular Origami 3D Star. This final assembly phase brings together all four prepared units into the finished three-dimensional structure that showcases the mathematical beauty and geometric precision of advanced modular Origami 3D Star design. Work carefully during these final connections to ensure all interlocking mechanisms are properly engaged and the star maintains its correct geometric form throughout. Your completed 3D modular star now displays the impressive dimensional depth, sophisticated angular surfaces, and complex geometric beauty that makes advanced origami such a rewarding and visually stunning art form, ready to serve as a magnificent decoration or treasured handcrafted gift.
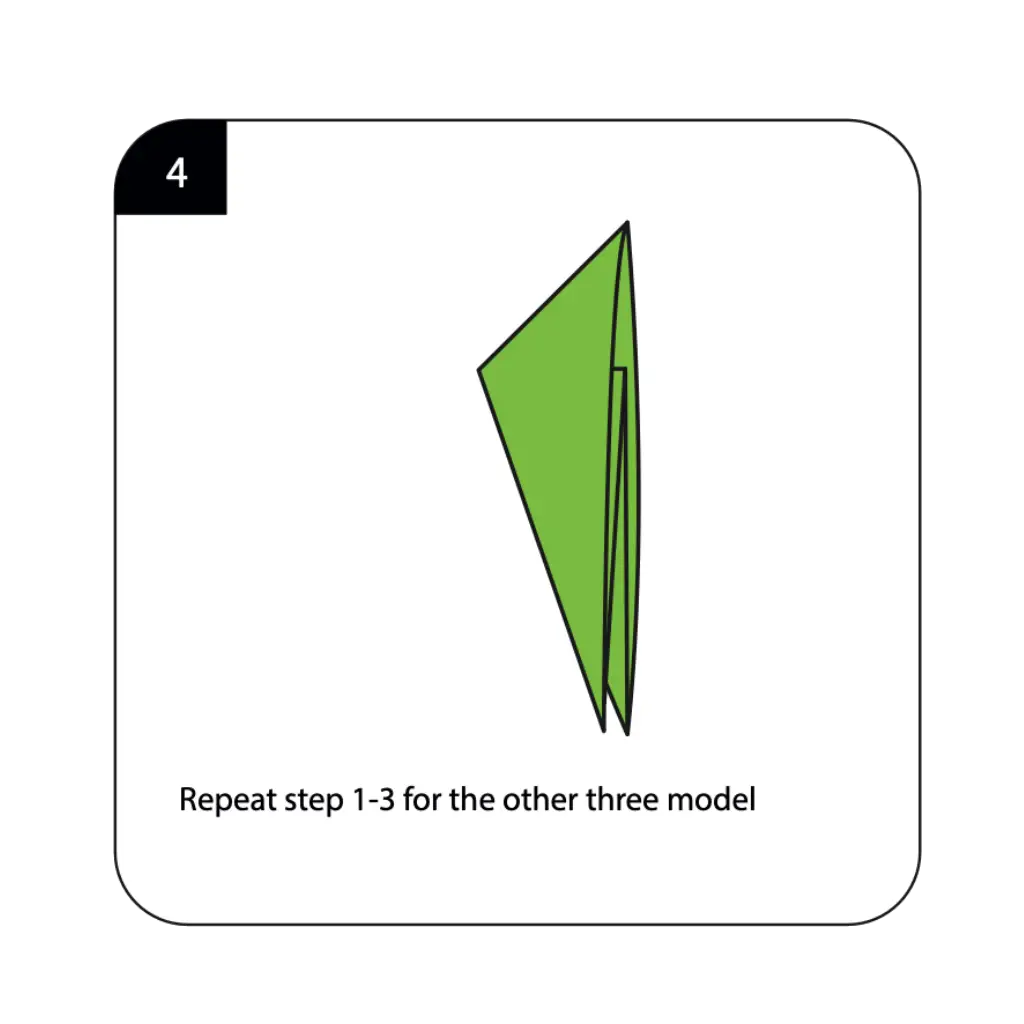
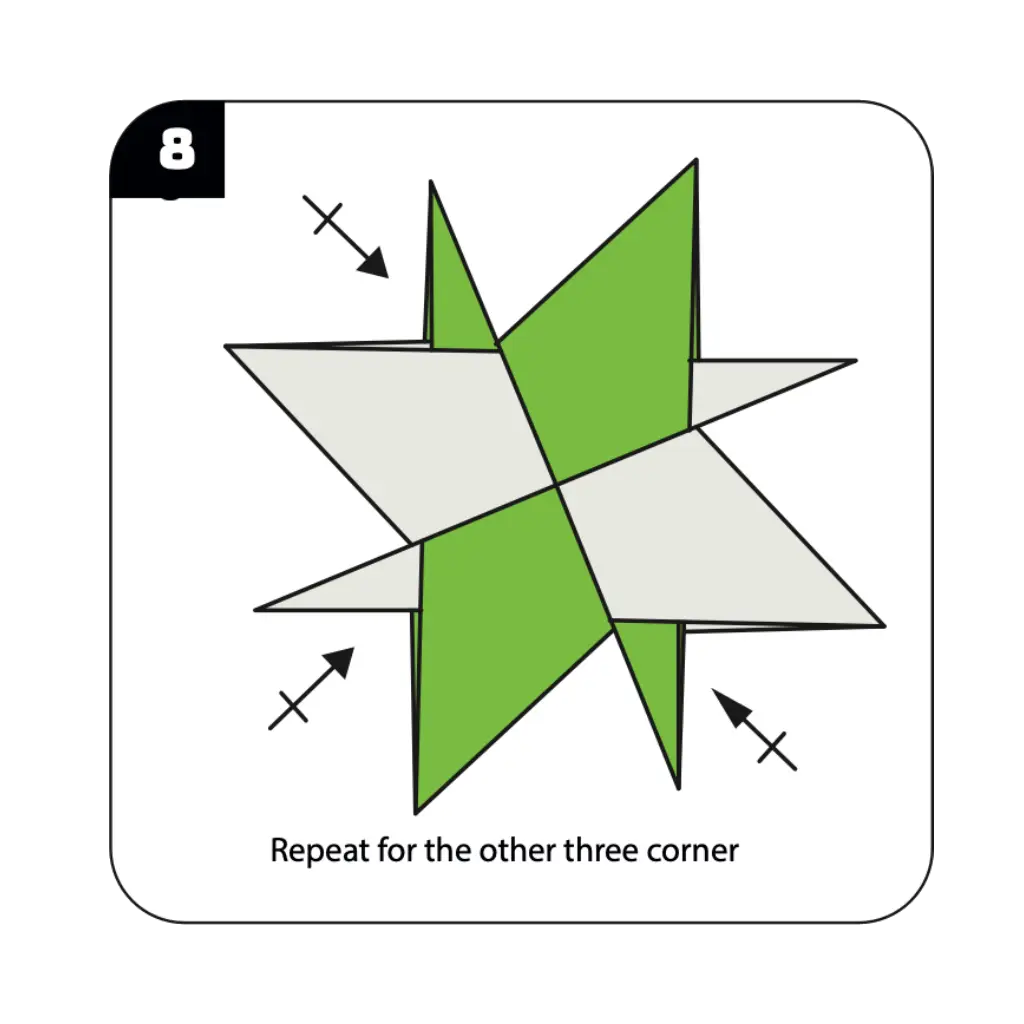
Step 9: Repeat the Process for All Units
Repeat steps 1-3 for the other three models to ensure all four units are prepared identically. Each of the four paper squares must undergo the same folding and cutting process to create uniform components for the modular assembly. The consistency between all four units is absolutely critical for successful assembly of the 3D star structure. Work methodically through each remaining square, ensuring that every diagonal crease, cut, and preliminary fold matches exactly with the first unit you completed. This repetition phase is essential for creating the four identical components needed for the complex modular interlocking system.
Conclusion
Congratulations on completing your 3D modular origami star! This advanced project represents a significant achievement in paper folding artistry, demonstrating your mastery of complex techniques and patient assembly skills. From four simple squares, you’ve created a sophisticated three-dimensional sculpture that showcases the mathematical precision and aesthetic beauty possible through advanced origami design. The 3D modular star exemplifies how individual components can be combined into structures far more impressive than the sum of their parts, illustrating fundamental principles of modular engineering through the medium of paper. Your completed star serves as both a stunning decorative piece and a testament to the advanced origami skills you’ve developed. The techniques you’ve mastered—including precise cutting, complex folding sequences, and three-dimensional assembly—represent some of the most challenging aspects of origami art. We hope this project has expanded your appreciation for the mathematical beauty inherent in paper folding and inspired you to explore other advanced modular designs. Remember that projects of this complexity require practice and patience—each 3D star you create will be more refined than the last as you perfect these sophisticated techniques.
- “Before attempting this advanced 3D star, ensure you’ve mastered fundamental techniques in our Origami Basics Guide.”
- “Explore more challenging modular designs in our comprehensive Modular Origami Collection, featuring kusudama balls and geometric sculptures.”
- “Looking for more creative paper projects? Browse our Creative Origami Gallery for innovative and artistic designs.”
- “Display your 3D star alongside other impressive models using ideas from our Decorative Origami Guide.”
- “Create themed displays by combining your star with Origami Flowers for special occasions.”
- “After mastering the 3D star, try creating paper companions from our Origami Animals Collection to complete your display.”
