
Introduction
Origami, the ancient Japanese art of paper folding, offers countless opportunities to create fascinating creatures that capture our imagination, and few are as captivating as the mysterious bat. This origami bat tutorial transforms a simple square sheet of paper into a striking representation of these remarkable nocturnal creatures, making it perfect for Halloween decorations, spooky-themed parties, or educational activities about wildlife and ecosystems. Unlike more complex animal models, this bat design achieves an impressive resemblance to real bats through just eight straightforward steps, making it accessible to folders of all skill levels while delivering maximum visual impact. What makes this origami bat particularly appealing is its distinctive silhouette—the wide wingspan, angular body, and characteristic pointed features instantly identify it as a bat, creating an effective decoration that captures the essence of these fascinating flying mammals. Whether you’re preparing for Halloween festivities, teaching children about nocturnal animals, creating autumn decorations, or simply exploring the darker side of origami animal designs, this bat tutorial provides the perfect balance of simplicity and dramatic effect. The completed model makes an excellent addition to spooky displays, educational nature collections, or as part of a larger origami menagerie that celebrates the diversity of the animal kingdom.
Step-by-Step Instructions
Step 1: Create the Initial Reference Creases For Origami Bat
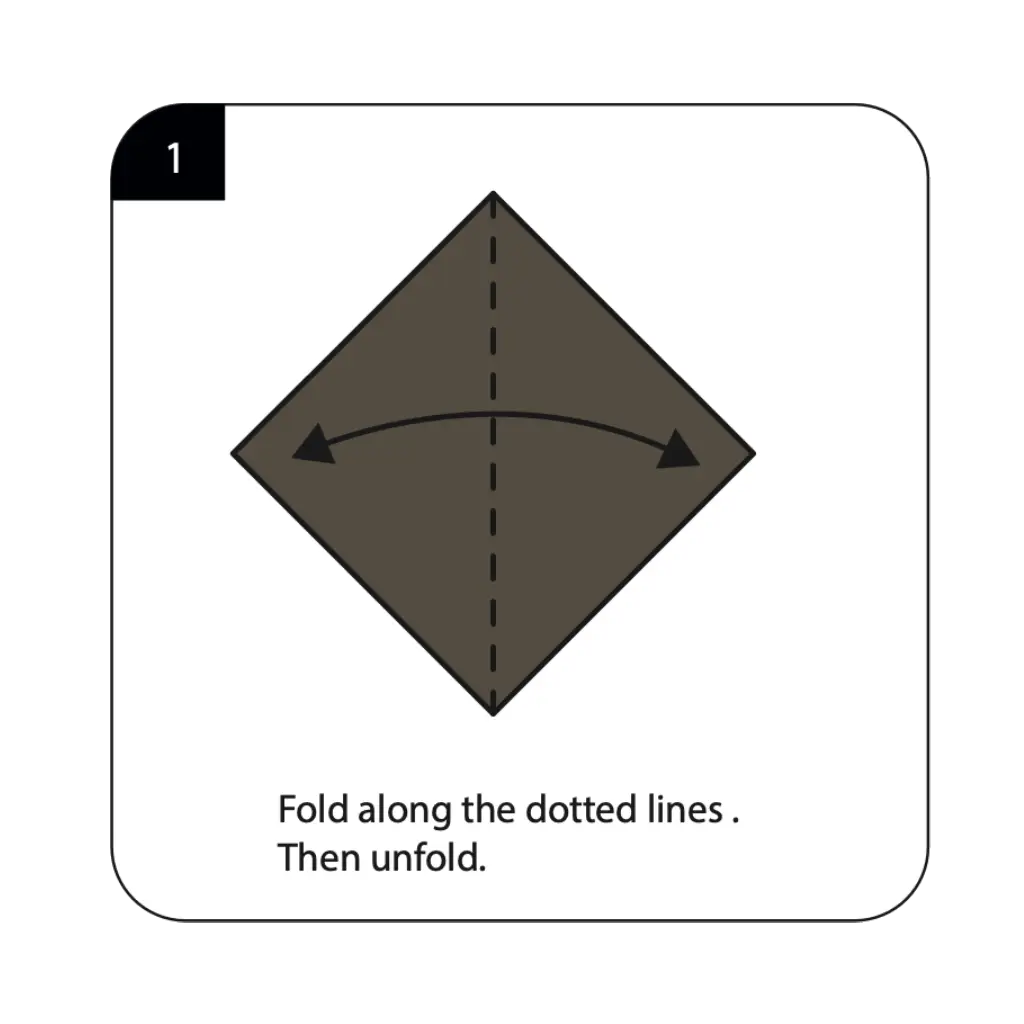
Begin with a square sheet of paper, preferably in dark brown or black for a realistic bat appearance. Fold along the dotted lines to create reference creases, then unfold the paper completely to return to the square shape. These initial folds establish crucial guidelines that will ensure proper symmetry and proportions in your finished origami bat. The precision of these first creases is essential, as they serve as the foundation for all subsequent folds and directly impact the balance and wingspan of your paper bat. Take care to align the edges perfectly and press firmly along each fold line to create sharp, well-defined guides that will support the complex wing structure to come.
Step 2: Form the Basic Diamond Structure For Origami Bat
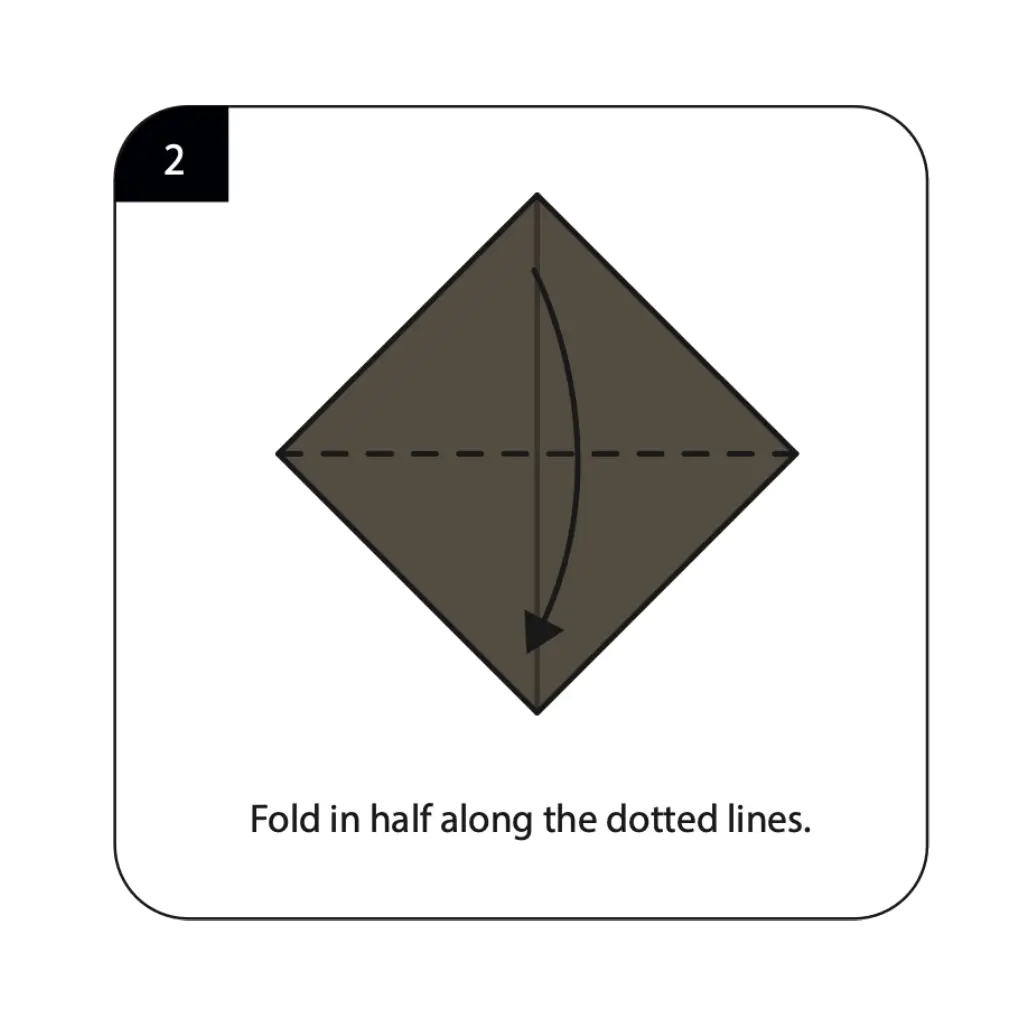
Fold the paper in half along the dotted lines as shown in the diagram, creating a layered diamond shape that serves as the foundation for your bat’s body and wing structure. This fold consolidates the square into a more manageable form while establishing the central axis from which your bat’s wings will extend. The accuracy of this fold directly affects the symmetry of your finished bat, so ensure the edges align precisely and the fold creates a sharp, clean crease. This diamond configuration provides the structural framework needed for the distinctive bat silhouette that will emerge through subsequent folding steps.
Step 3: Create the Wing Foundation For Origami Bat
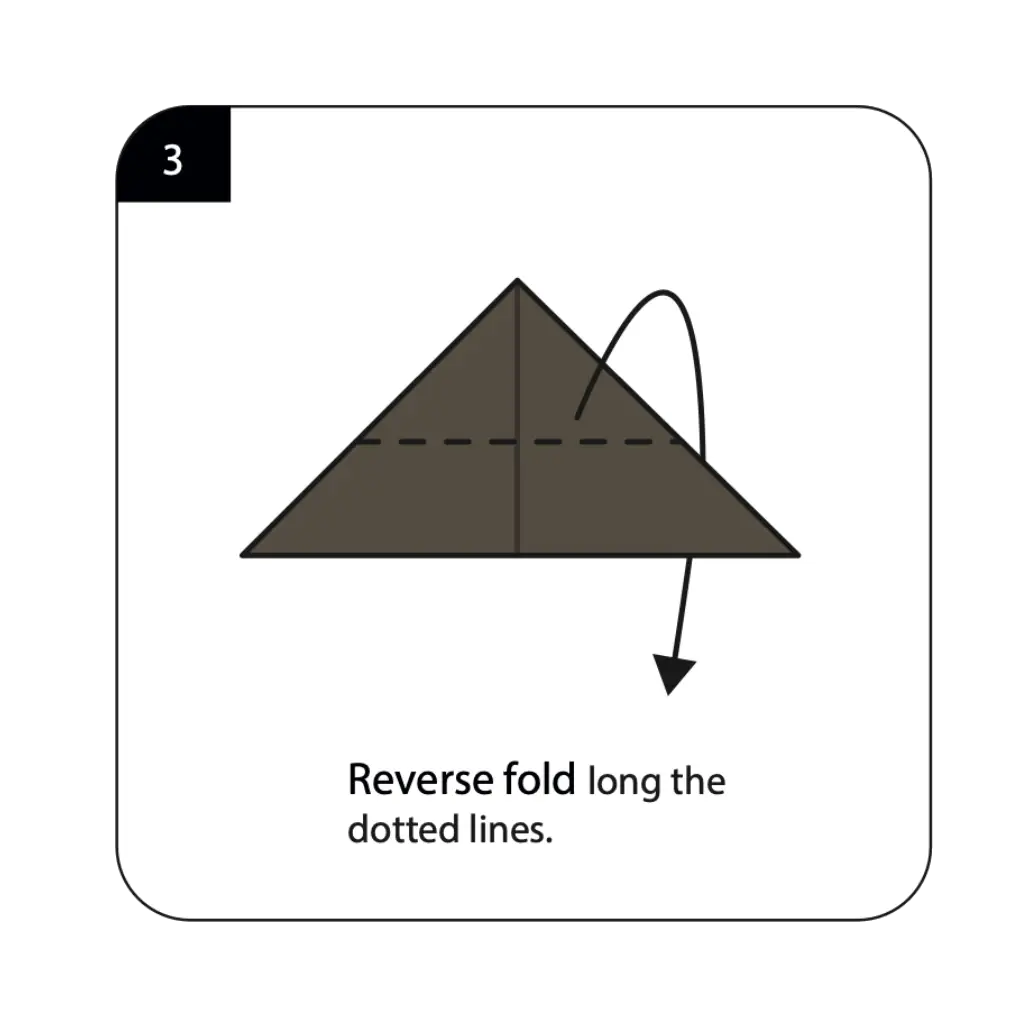
Perform a reverse fold along the dotted lines as indicated in the diagram. This technical folding technique creates the initial wing structure by manipulating the paper layers to form the broad, angular shape characteristic of bat wings. The reverse fold requires careful manipulation of multiple paper layers simultaneously while maintaining the integrity of previous folds. This step is crucial for establishing the distinctive wide wingspan that makes bats instantly recognizable, so work slowly and deliberately to ensure clean execution of this foundational wing-forming technique.
Step 4: Develop the Wing Architecture For Origami Bat
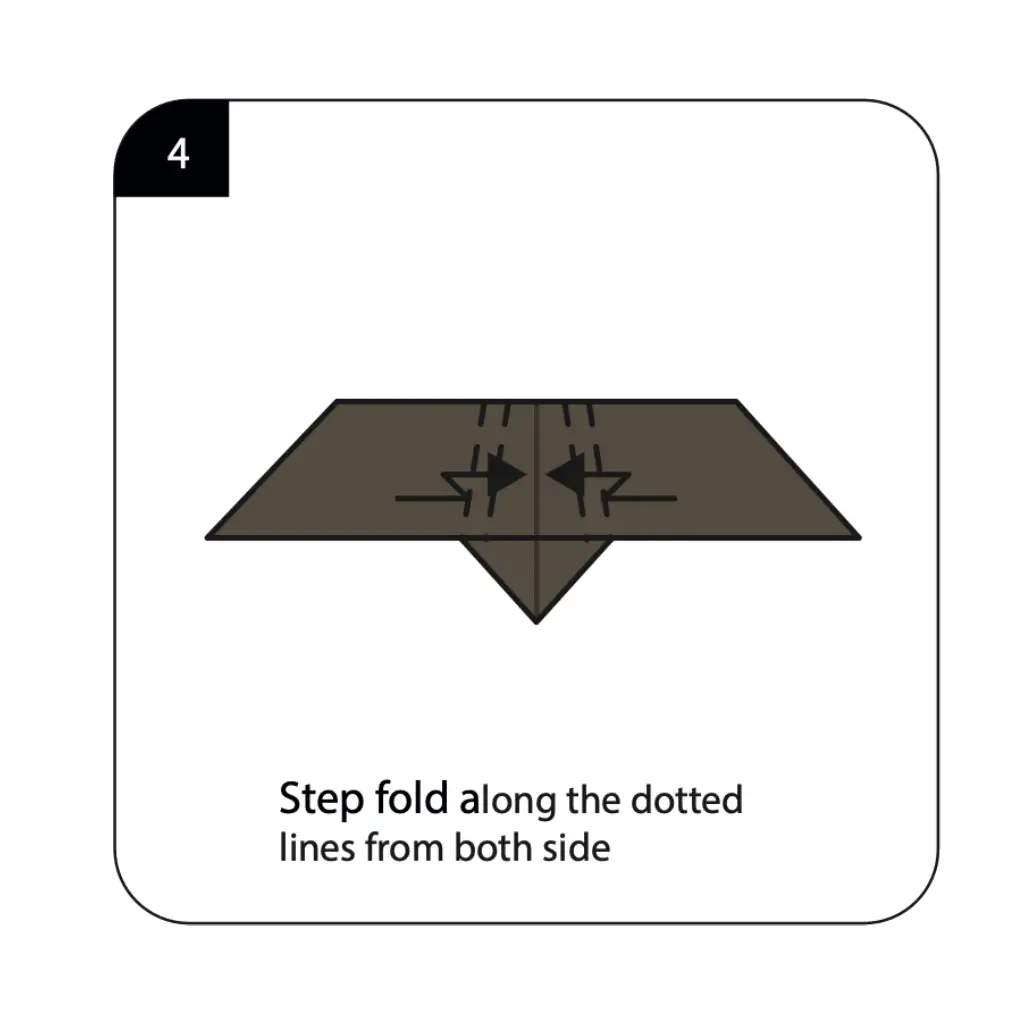
Execute step folds along the dotted lines from both sides as shown, creating the detailed wing structure that gives your origami bat its realistic appearance. These step folds add dimension and texture to the wings while establishing the angular, membrane-like quality of real bat wings. The precision and symmetry of these folds are critical for achieving balanced wings that enhance the bat’s flying appearance. Work methodically on both sides to ensure matching wing structures, as any asymmetry will be immediately noticeable in the finished model and detract from its realistic bat-like qualities.
Step 5: Define the Wing Details
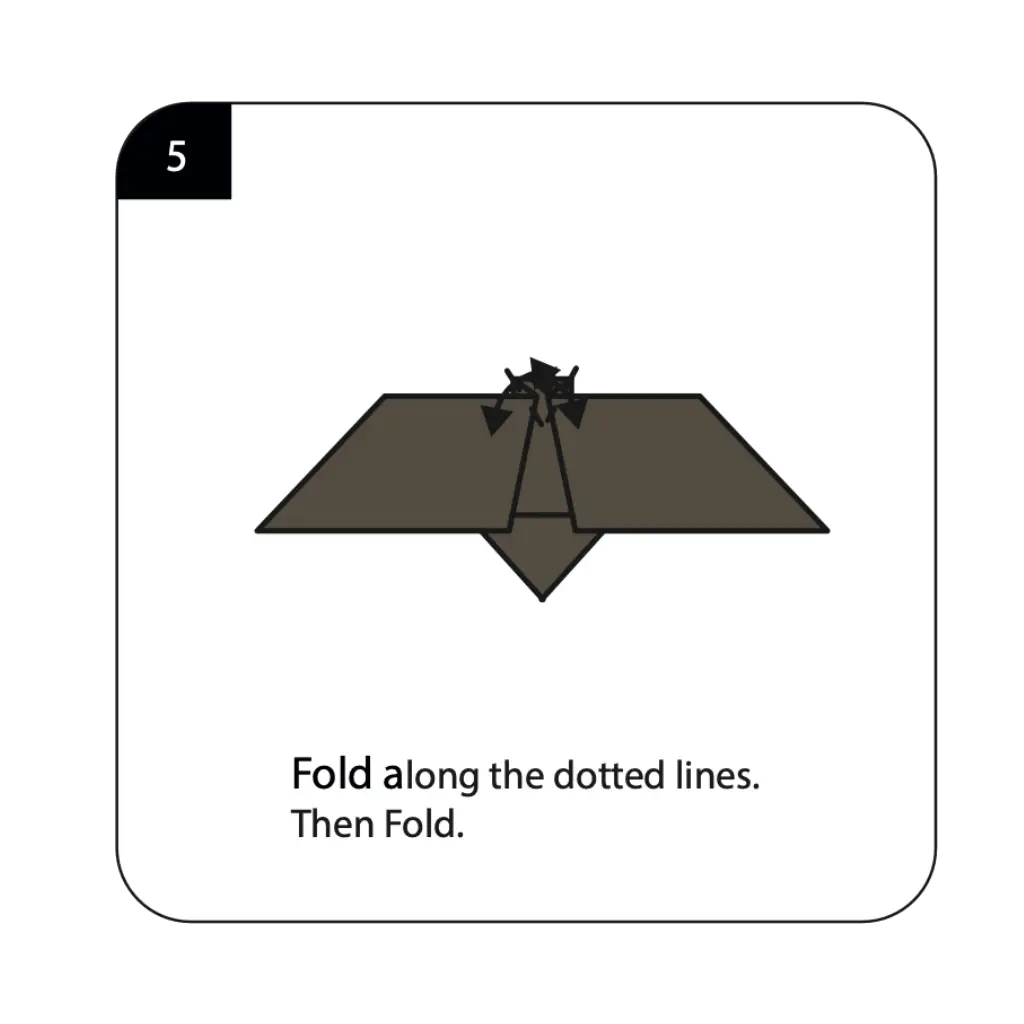
Fold along the dotted lines as indicated, then execute an additional fold to further refine the wing structure and create more detailed wing segments. These additional folds enhance the complexity and realism of your bat’s wings by creating the multi-segmented appearance found in real bat wing membranes. The careful execution of these detailed folds distinguishes a professional-looking origami bat from simpler versions, adding visual interest and anatomical accuracy. These refinements require attention to detail but significantly enhance the overall impact and recognizability of your paper bat creation.
Step 6: Shape the Wing Edges
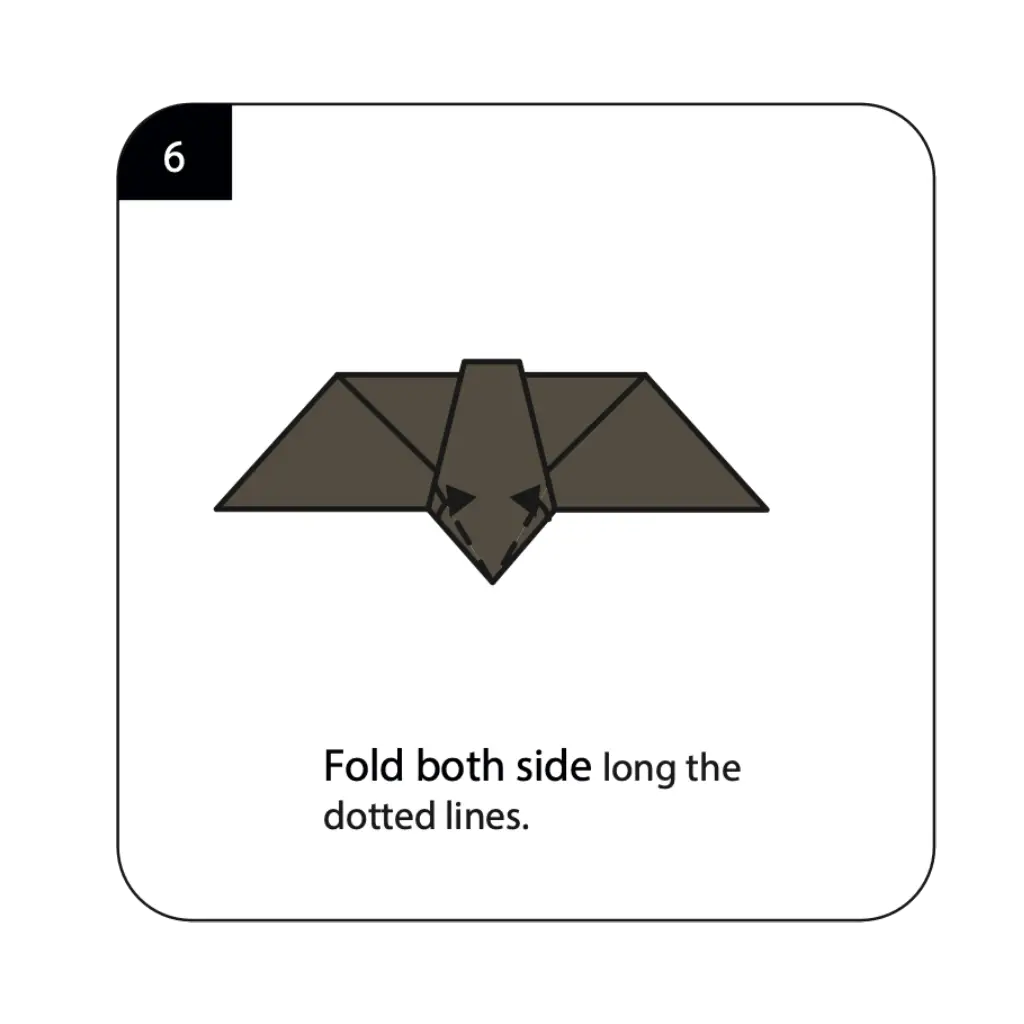
Fold both sides along the dotted lines as shown to create the final wing shape and establish the distinctive pointed wing tips characteristic of bat anatomy. These edge folds complete the wing formation process and create the sharp, angular silhouette that makes your origami instantly recognizable as a bat. The position and angle of these folds affect the overall wingspan and flight posture of your finished model. Work carefully to ensure both wings are shaped identically, creating the balanced, symmetrical appearance that captures the essence of a bat in flight.
Step 7: Complete the Body Structure
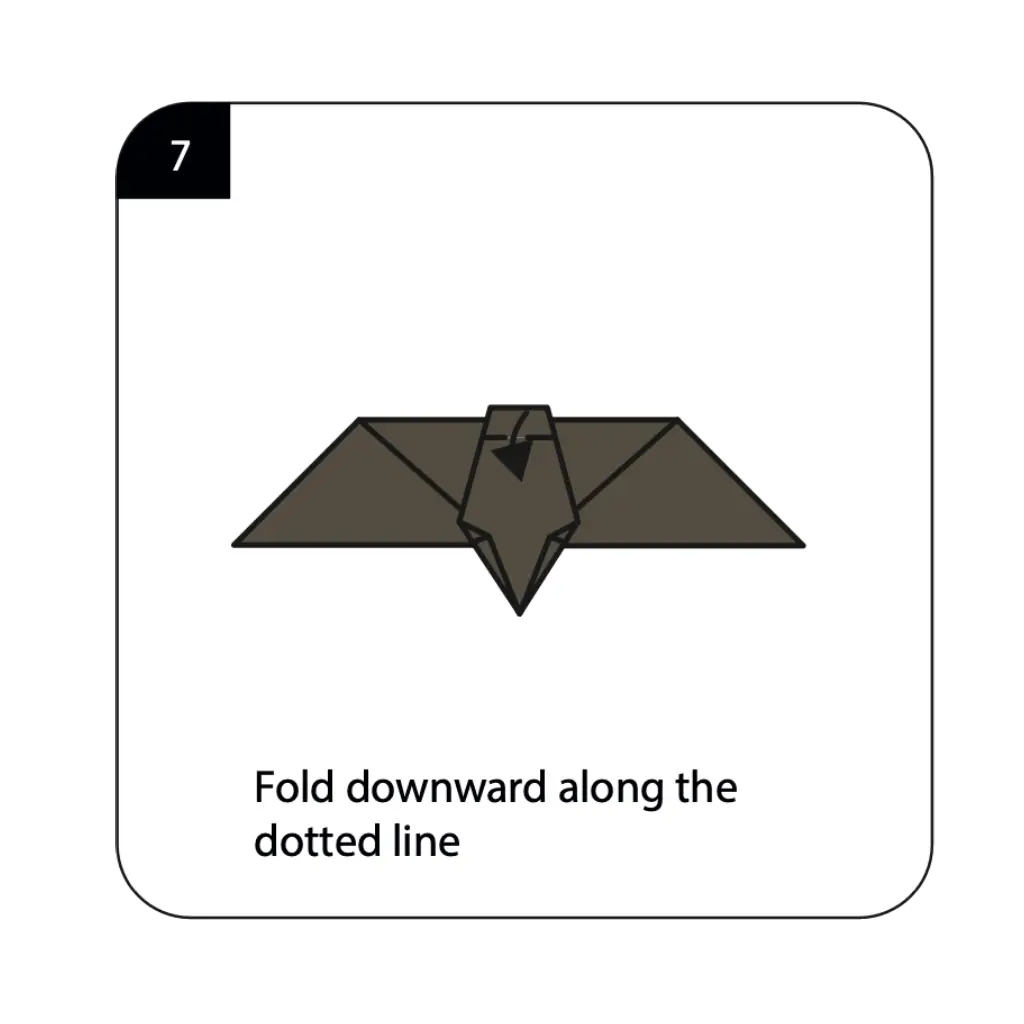
Fold downward along the dotted line as indicated to finalize the bat’s body structure and create the proper proportions between body and wings. This important fold establishes the central body mass that balances the expanded wing structure and creates the characteristic bat silhouette. The angle and position of this downward fold affects how your finished bat will display and the overall impression of the creature’s posture. This step brings together all the wing and body elements into a cohesive bat form that clearly represents this fascinating nocturnal creature.
Step 8: Finalize Your Origami Bat
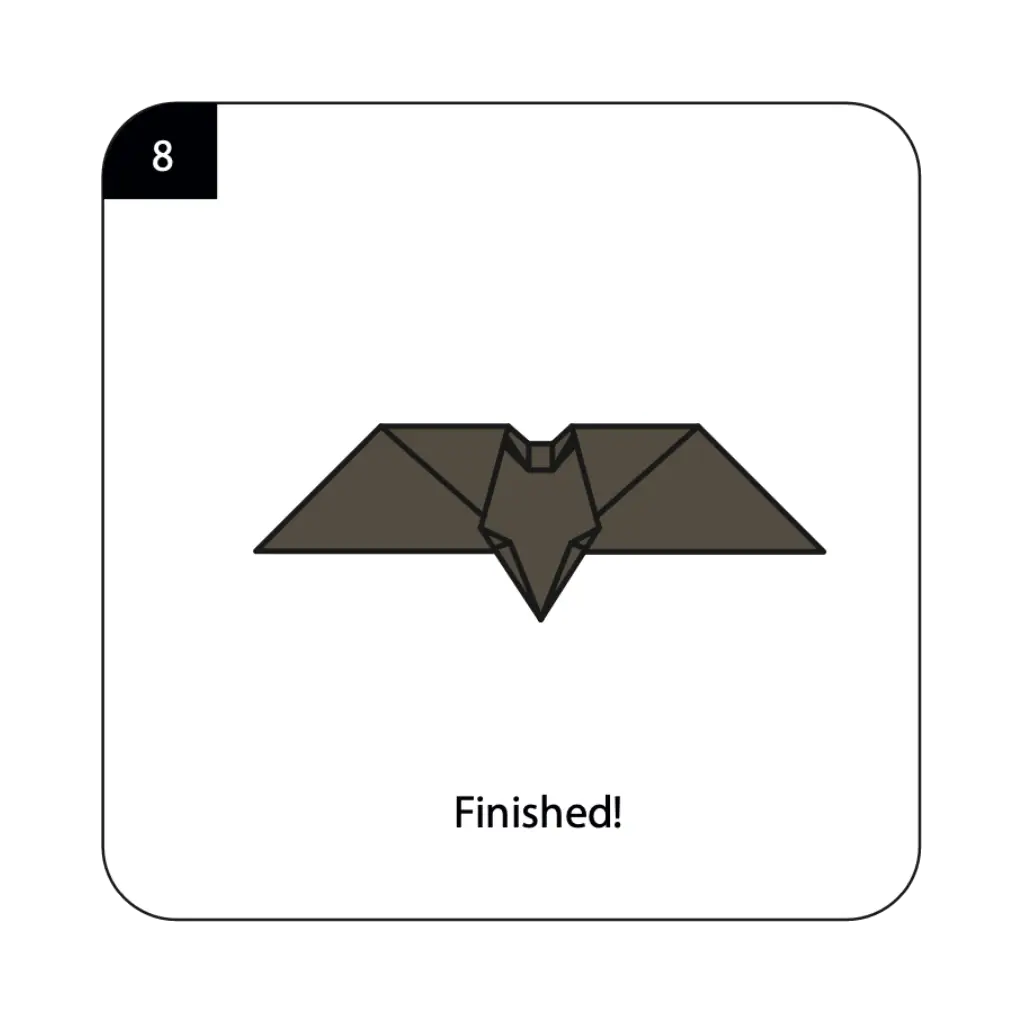
Your origami bat is now complete! Make any final adjustments to ensure the wings are properly positioned and the body maintains its structural integrity for optimal display. The finished model should clearly display the characteristic bat silhouette with broad wings, angular body, and distinctive pointed features that make it instantly recognizable. Your completed origami bat captures the essence of these remarkable flying mammals through thoughtful paper folding techniques that transform geometric shapes into a lifelike creature. The dark, dramatic appearance of your paper bat makes it perfect for Halloween decorations, educational displays about nocturnal animals, or as an impressive addition to your origami animal collection.
Conclusion
Congratulations on creating your origami bat! This striking paper creation demonstrates how simple folding techniques can capture the distinctive characteristics of one of nature’s most fascinating flying creatures. From a basic square sheet, you’ve fashioned a dimensional representation that embodies the mysterious appeal and distinctive silhouette of real bats. The origami bat showcases how thoughtful paper folding can translate complex wing structures and anatomical features into elegant geometric interpretations that remain true to the creature’s essential character. Your completed model serves multiple purposes—as a spooky Halloween decoration, an educational tool for learning about nocturnal wildlife, or simply as an impressive example of how origami can bring the animal kingdom to life through paper. The techniques you’ve mastered, including reverse folds, step folds, and precise wing shaping, build valuable skills that transfer to many other origami animal designs. We hope this tutorial has sparked your interest in both paper folding and the fascinating world of bats, creatures that play crucial roles in ecosystems worldwide. Remember that each bat you create offers opportunities to explore different poses and wing positions, allowing you to develop variations that capture different aspects of these remarkable nocturnal hunters in flight.
- “Before starting your origami bat, learn essential folding techniques in our Origami Basics for Beginners guide.”
- “Explore more nocturnal creatures in our Origami Animals Collection, featuring owls, cats, and other nighttime animals.”
- “Discover more Halloween and spooky projects in our Creative Origami Gallery for seasonal celebrations.”
- “Find beautiful ways to display your paper bats with our Decorative Origami Ideas for Halloween and autumn décor.”
- “Create spooky autumn scenes by adding Origami Flowers like black roses or autumn leaves to complement your bat.”
- “Learn how to make multiple bats for impressive displays using techniques from our Modular Origami Projectsguide.”
