
Introduction
Origami, the ancient Japanese art of paper folding, reaches its most practical application when creating functional objects that combine artistic beauty with everyday utility. The origami wallet stands out as one of the most useful and accessible projects, described as “easy and functional” for crafters who want to create something both beautiful and practical. This beginner-friendly tutorial demonstrates how to transform a simple rectangular sheet of paper into a working wallet capable of holding cards, cash, and small personal items. What makes this origami wallet particularly appealing is its perfect balance of simplicity and functionality—the clean lines, secure construction, and practical design make it genuinely useful while requiring only basic folding techniques accessible to folders of all skill levels. Unlike purely decorative origami models, this wallet serves a real purpose in daily life, making it an excellent introduction to functional origami that demonstrates how paper folding can create meaningful, practical objects. The completed model features secure pockets, a compact design that fits comfortably in your hand or bag, and the satisfaction of carrying something you’ve crafted yourself. Whether you’re looking for an emergency backup wallet, a creative gift for someone special, or simply want to explore the practical side of origami, this wallet tutorial offers both immediate utility and the deeper satisfaction of creating something genuinely useful through the elegant art of paper folding.
Step-by-Step Instructions
Step 1: Create the Foundation Creases For Origami Wallet
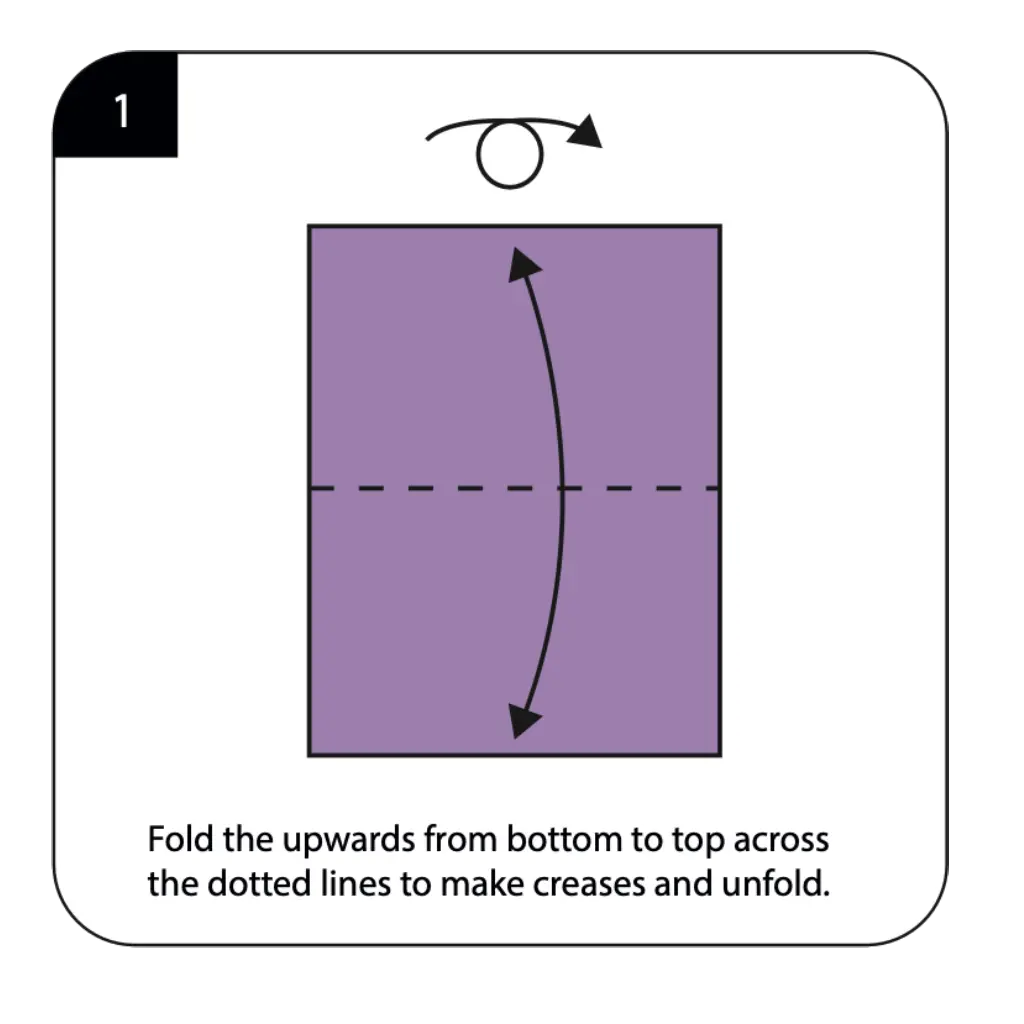
Start with a rectangular sheet of origami paper with the length longer than the width and the colored side facing up as specified in the instructions. Fold upward from bottom to top across the dotted lines to make reference creases, then unfold completely. These initial folds establish the crucial framework that will define your wallet’s compartments and overall structure throughout the construction process. The precision of these foundation creases determines how well your finished wallet will hold its shape and function as a practical storage solution. Take care to make each fold sharp and well-defined, creating the guidelines that will transform your flat rectangle into a three-dimensional functional wallet with secure pockets.
Step 2: Establish the Central Structure For Origami Wallet
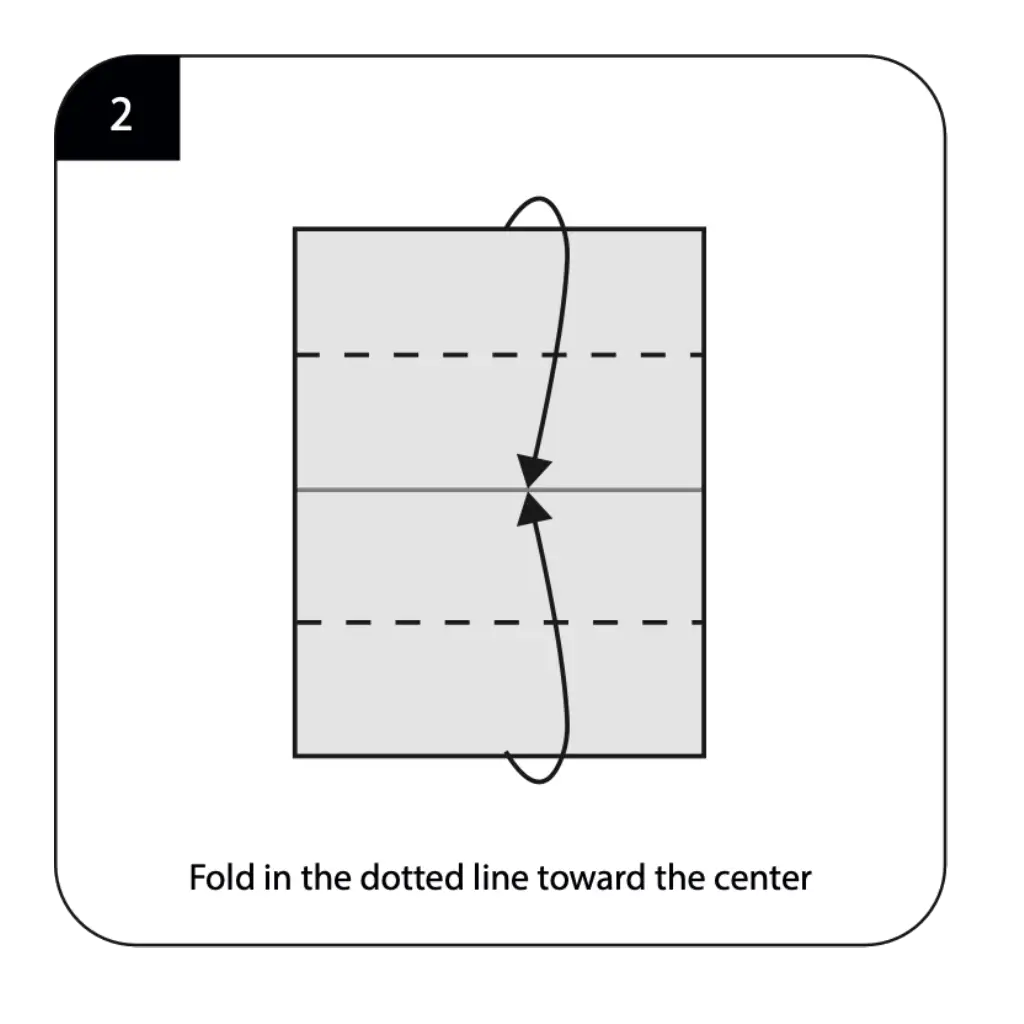
Fold along the dotted line toward the center as shown in the diagram, beginning to create the main body structure of your origami wallet. This important fold establishes the proportional relationship between the different sections of your wallet and creates the foundation for the pocket formation. The accuracy of this center-directed fold affects both the appearance and functionality of your finished wallet, determining how well it will hold cards and cash. This step begins transforming your flat paper into the dimensional form that will serve as a practical storage container for your personal items.
Step 3: Complete the Basic Form For Origami Wallet
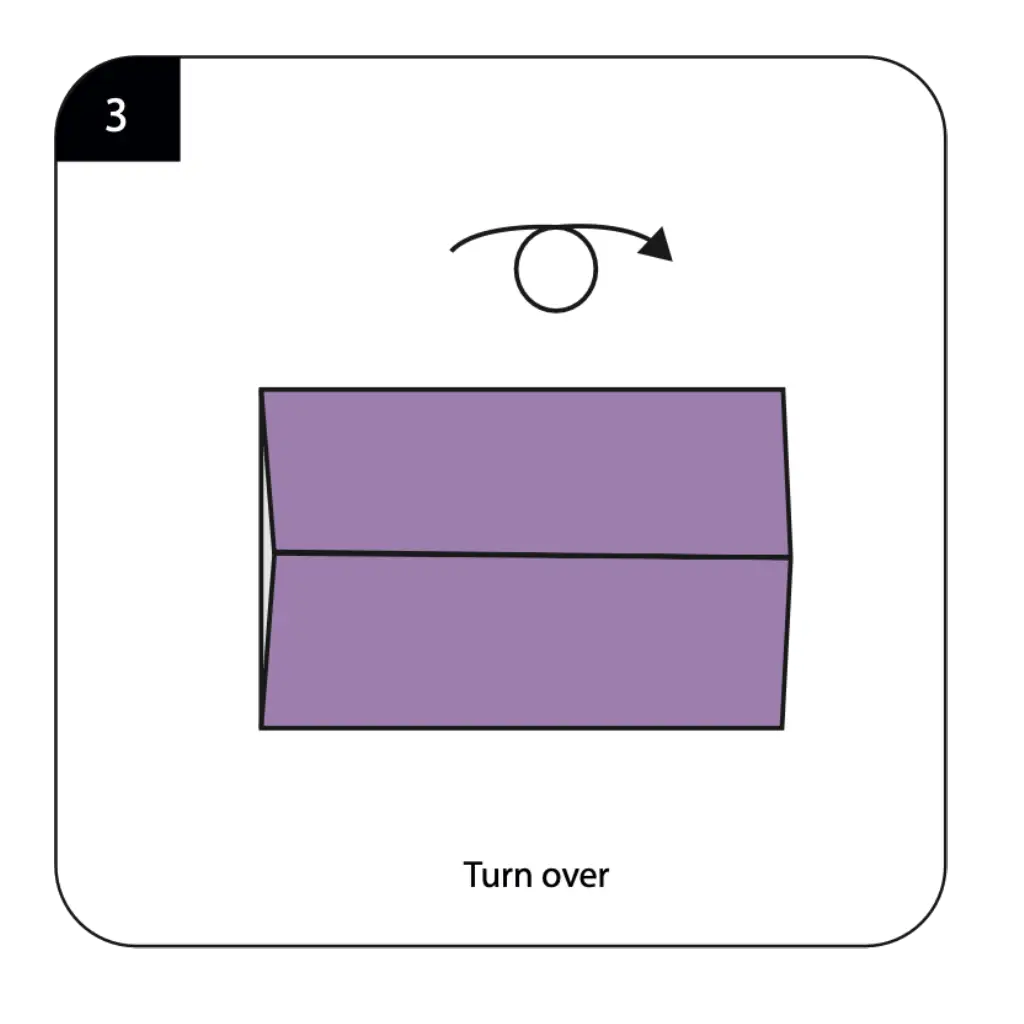
Turn over your partially folded wallet as instructed to access the reverse side for the next series of construction folds. This reorientation is essential for proper development of your wallet’s layered structure and secure pocket system. Handle the model carefully during this transition to preserve the integrity of your foundation folds and maintain the structural framework you’ve established. The reverse side provides access to the fold lines needed for creating the interlocking closure system that keeps your wallet securely shut and your contents safely contained.
Step 4: Create the Side Reference Lines For Origami Wallet
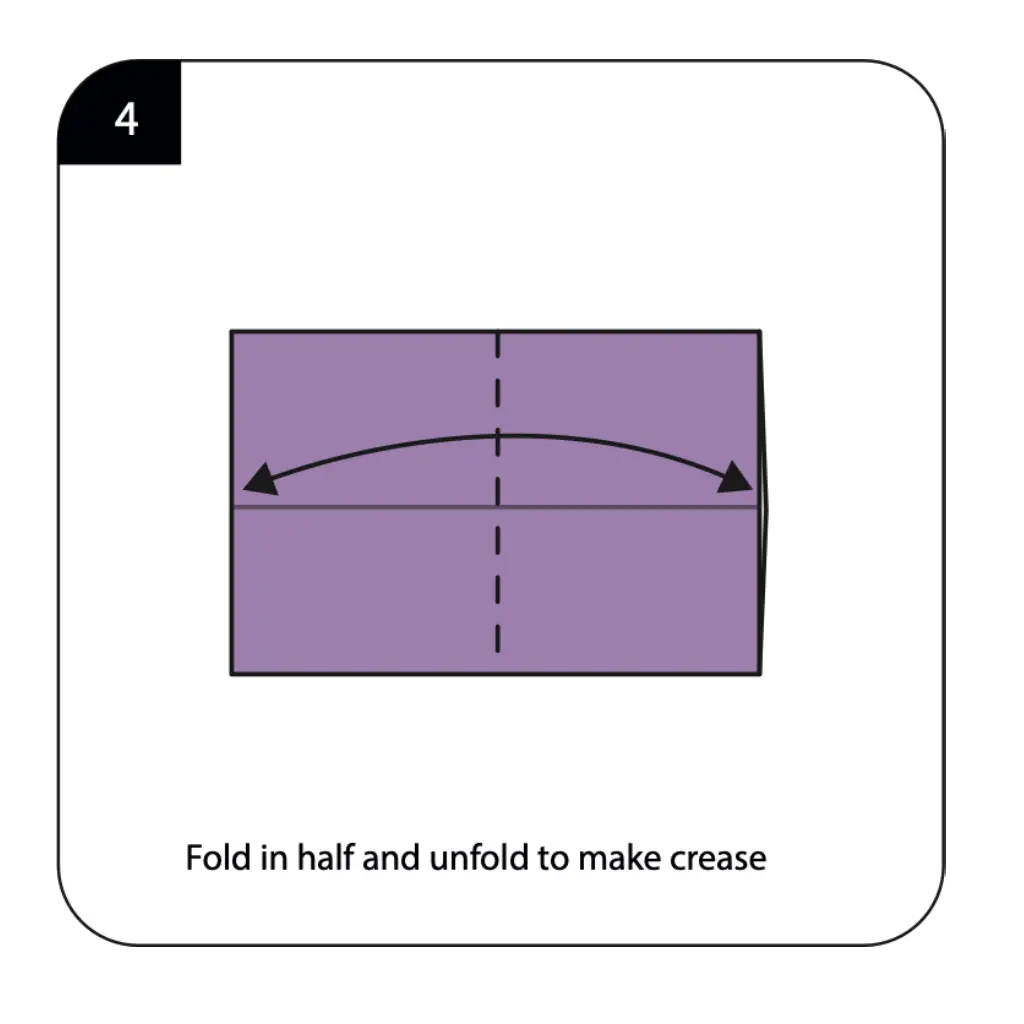
Fold the paper in half horizontally and unfold to create a permanent crease that will guide the formation of your wallet’s side panels. This reference fold is crucial for ensuring symmetrical construction and proper proportions in your finished functional wallet. The center crease established by this fold serves as an alignment guide for subsequent folds and helps maintain balance throughout the construction process. Though you unfold at this stage, this crease remains as an essential guideline that ensures your wallet’s compartments are evenly sized and properly positioned for optimal functionality.
Step 5: Form the Side Panels
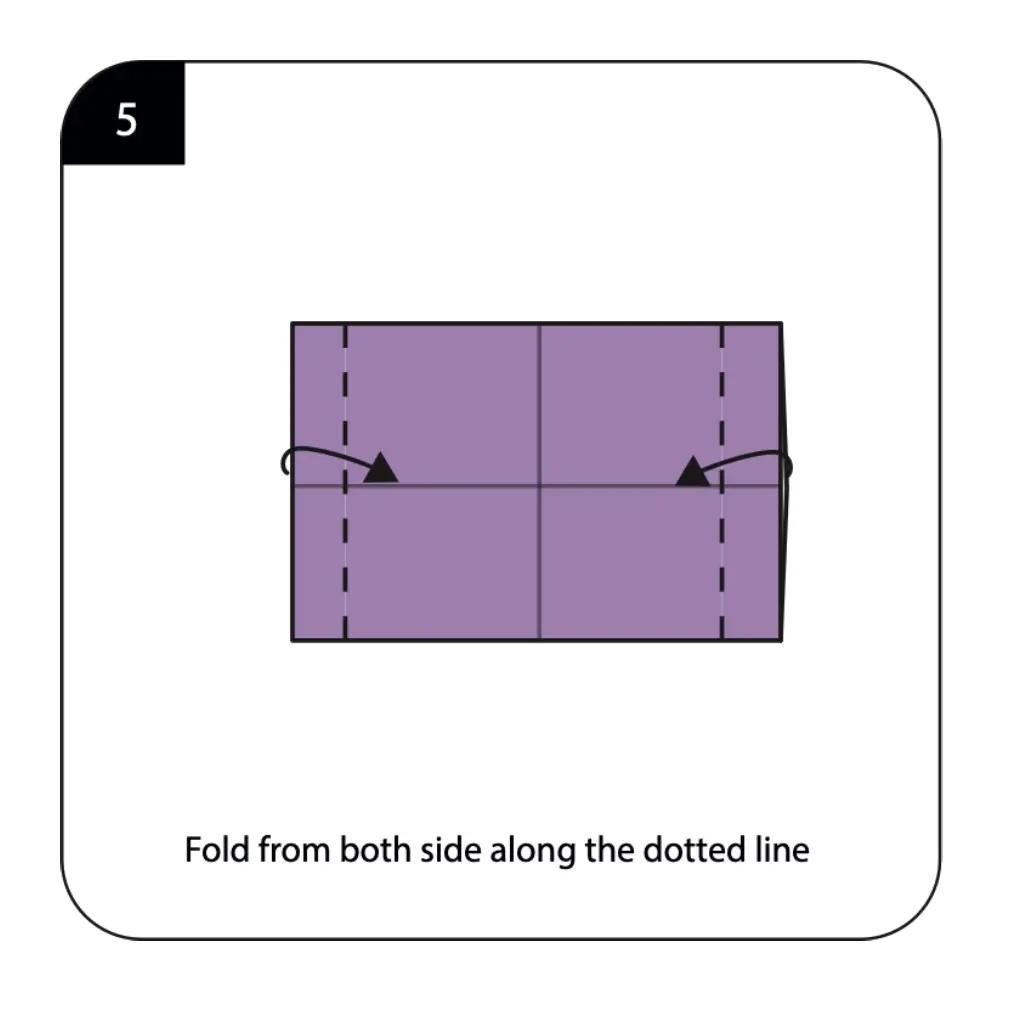
Fold from both sides along the dotted lines as indicated in the diagram, creating the side panels that will form the edges of your wallet’s storage compartments. These parallel folds establish the width of your wallet’s interior space and determine how much it can hold when complete. The symmetry of these side folds is crucial for creating a wallet that closes properly and maintains its shape during use. Work carefully to ensure both sides are folded at identical distances from the center line, creating balanced proportions that enhance both the appearance and functionality of your paper wallet.
Step 6: Create the Closure Mechanism For Origami Wallet
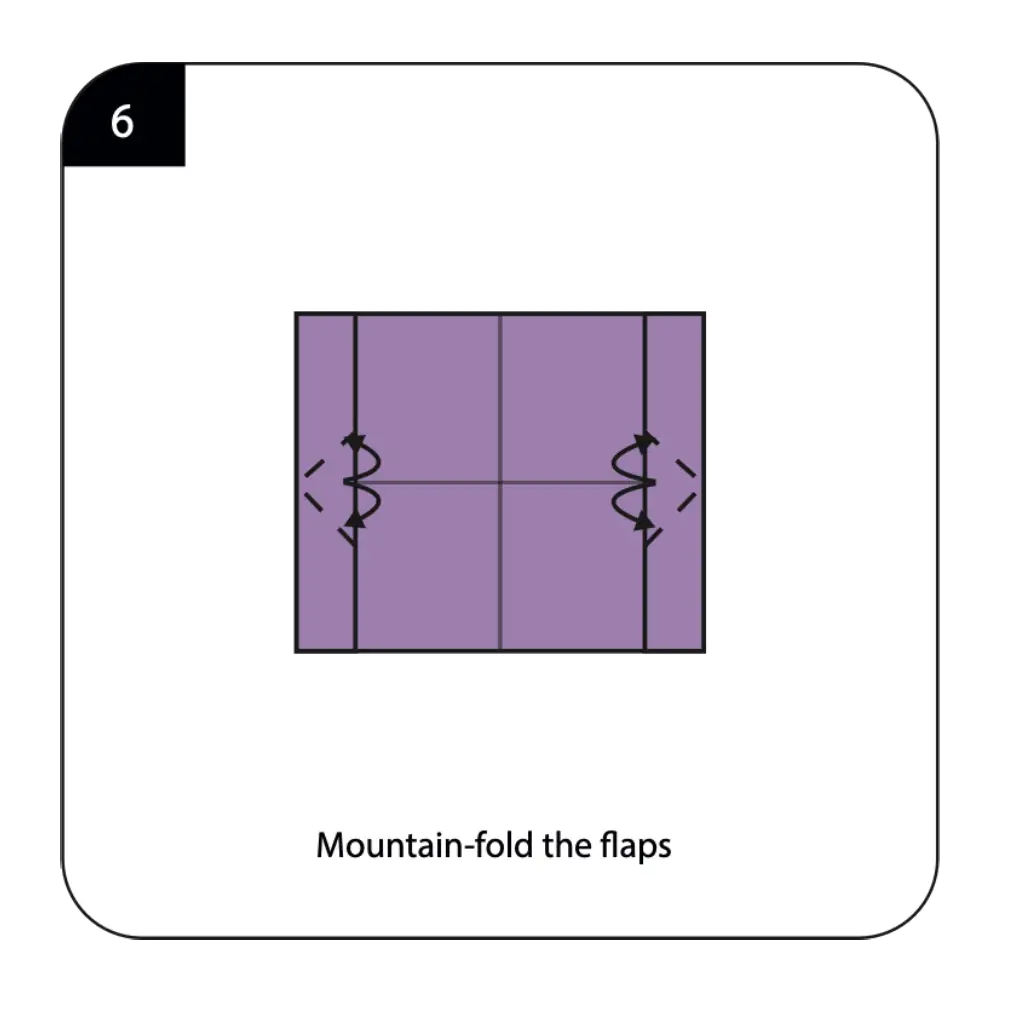
Execute mountain-folds on the flaps as shown in the diagram, creating the three-dimensional elements that will form your wallet’s secure closure system. These upward folds transform flat edges into structural components that interlock to keep your wallet securely closed. The precision of these mountain-folds affects how well your wallet will stay shut and how easy it will be to open when you need access to your contents. This step adds the dimensional complexity that distinguishes a functional wallet from simple flat paper storage, creating the mechanical elements that make your origami truly practical.
Step 7: Assemble the Main Body For Origami Wallet
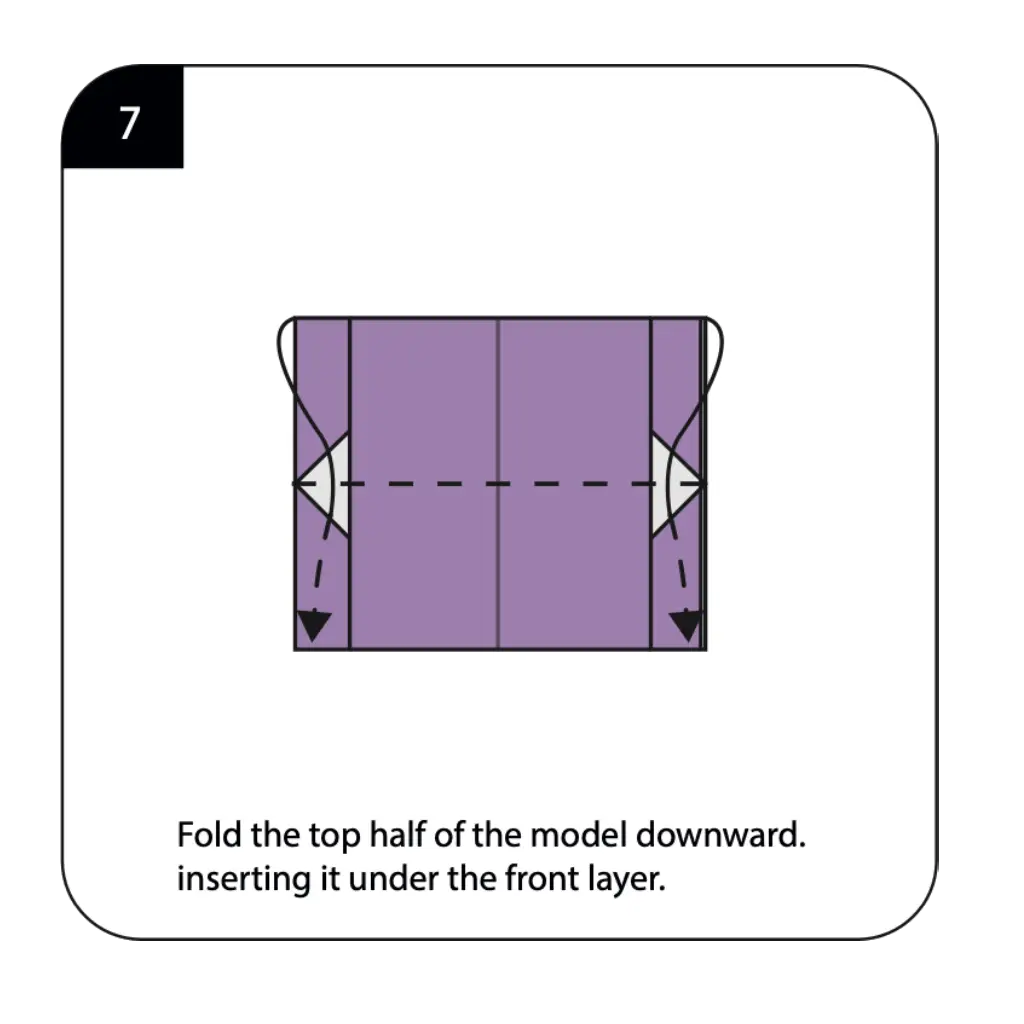
Fold the top half of the model downward, carefully inserting it under the front layer as instructed. This crucial assembly step brings together the various folded elements into the cohesive wallet structure. The insertion technique requires gentle manipulation to avoid tearing while ensuring a secure connection between layers. This step creates the main storage compartment of your wallet and establishes the basic three-dimensional form that will hold your cards and cash securely while maintaining its shape through regular use.
Step 8: Complete the Closure System For Origami Wallet
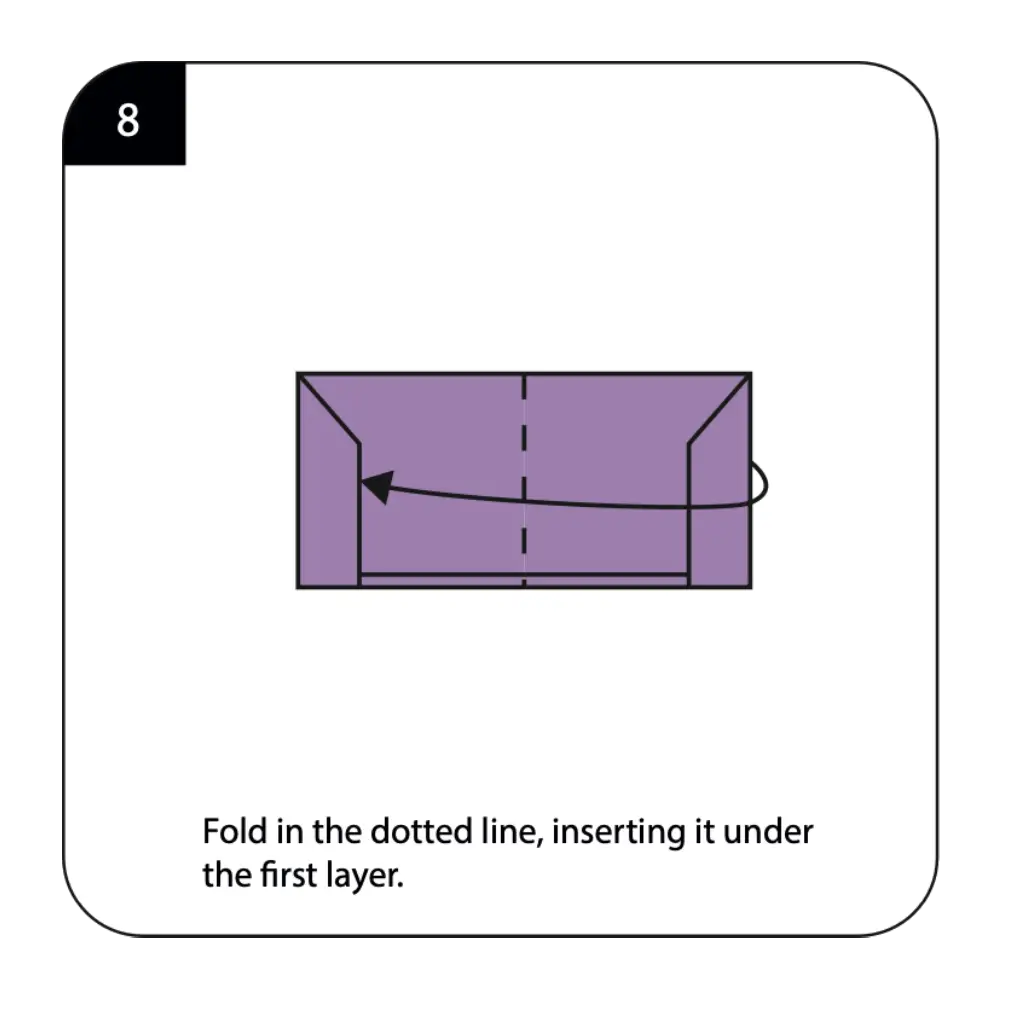
Fold along the dotted line, inserting the edge under the first layer as shown to complete your wallet’s secure closure mechanism. This final structural fold creates the interlocking system that keeps your wallet shut without requiring additional fasteners or adhesives. The careful execution of this insertion fold determines how securely your wallet will close and how long it will maintain its structural integrity during use. This step completes the mechanical aspects of your wallet, creating a functional closure that opens and closes smoothly while keeping contents secure.
Step 9: Finalize Your Origami Wallet
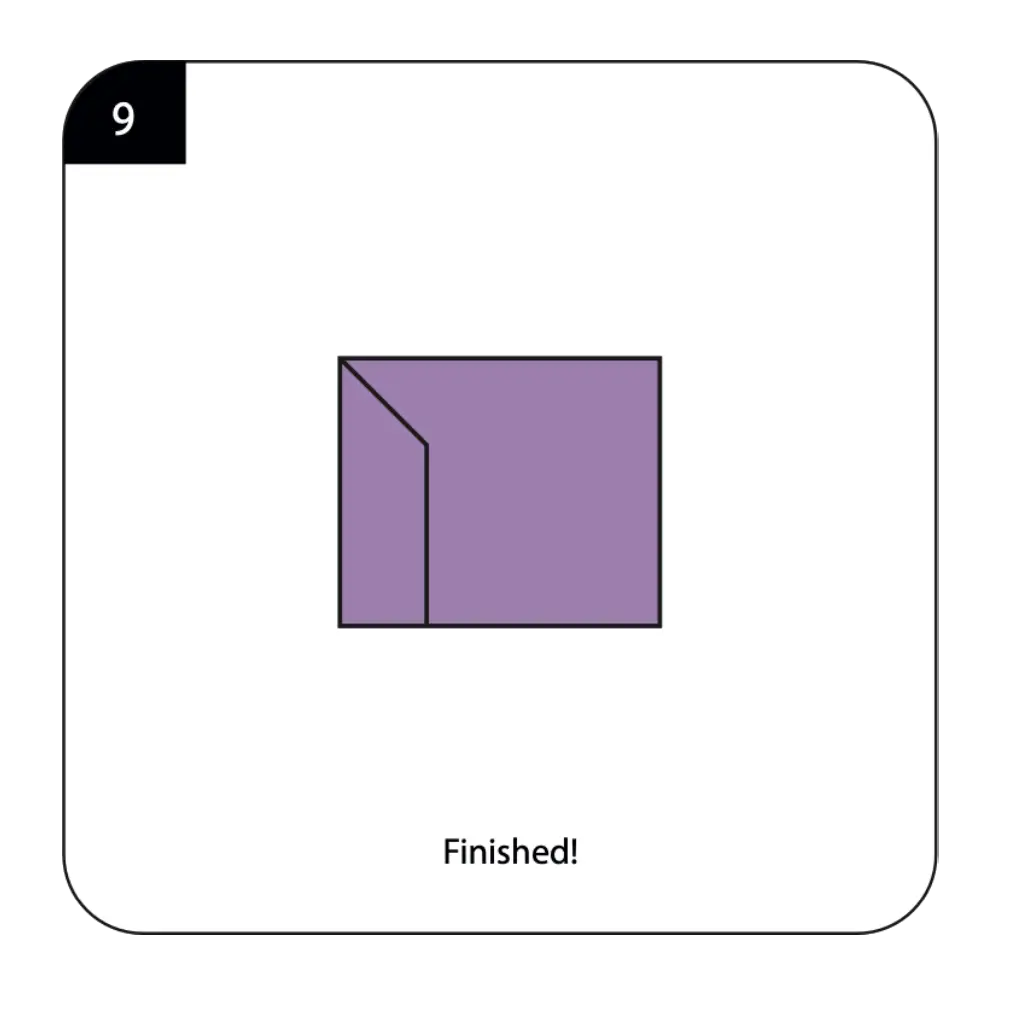
Your origami wallet is now complete and ready for practical use! Make any final adjustments to ensure all edges are properly aligned and the closure mechanism works smoothly. The finished wallet should open and close easily while maintaining secure storage for cards, cash, and small personal items. Your handcrafted paper wallet demonstrates how origami can create genuinely useful objects that serve practical purposes in daily life while showcasing the elegant problem-solving capabilities of traditional paper folding techniques, proving that functional design and artistic beauty can work together harmoniously.
Conclusion
Congratulations on creating your origami wallet! This practical paper creation demonstrates how the ancient art of origami can produce genuinely useful objects that serve real purposes in modern daily life. From a simple rectangular sheet, you’ve crafted a functional storage solution that combines elegant design principles with practical utility, proving that handmade items can be both beautiful and useful. The origami wallet showcases the perfect marriage of form and function that makes certain origami projects particularly satisfying—you’ve not only created something aesthetically pleasing but also produced a tool that can genuinely improve your daily life. Your completed wallet serves as both a testament to your growing origami skills and a practical demonstration of how traditional crafts can address contemporary needs through timeless techniques and thoughtful design. The construction methods you’ve learned, including layered folding, insertion techniques, and closure mechanisms, represent valuable skills that transfer to many other functional origami projects. We hope this tutorial has opened your eyes to the practical possibilities within paper folding and inspired you to explore other functional origami designs that blur the line between art and utility. Remember that each wallet you create offers opportunities to experiment with different papers, sizes, and decorative elements, allowing you to customize your functional origami to match your personal style and practical needs.
- “Before starting your origami wallet, master fundamental folding techniques in our Origami Basics for Beginners guide.”
- “Explore more practical paper projects in our Creative Origami Collection featuring functional and innovative designs.”
- “Create themed wallet decorations by adding small Origami Animals as pocket charms or embellishments.”
- “Display your handmade wallets alongside other functional items using ideas from our Decorative Origami Guide.”
- “Personalize your wallet with small Origami Flowers as decorative accents or gift embellishments.”
- “Learn advanced techniques for creating wallet sets and matching accessories in our Modular Origami Projects section.”
