
Introduction
Origami, the ancient Japanese art of paper folding, offers wonderful opportunities to celebrate the diverse world of birds, and few species are as distinctive and fascinating as the woodpecker. This origami woodpecker tutorial transforms a simple square sheet of paper into a striking representation of these remarkable forest birds, complete with their characteristic pointed beak, vibrant red coloring, and alert posture. What makes this origami woodpecker particularly engaging is its combination of recognizable features and accessible folding techniques—the distinctive triangular silhouette, sharp beak, and bright red coloration make it instantly identifiable while requiring only intermediate-level skills that dedicated beginners can master. Unlike more complex bird models, this woodpecker design captures the essence of these industrious forest dwellers through strategic use of reverse folds and color placement that highlights their most distinctive features. The completed model showcases the woodpecker’s iconic elements including the pointed drilling beak, compact body shape, and the brilliant red head that makes these birds unmistakable in their natural woodland habitat. Whether you’re passionate about birdwatching, teaching children about forest ecosystems, creating nature-themed decorations, or simply expanding your origami bird collection, this woodpecker tutorial offers both technical challenge and the satisfaction of crafting a beautiful representation of one of the forest’s most specialized and industrious inhabitants.
Step-by-Step Instructions
Step 1: Create the Foundation Crease Pattern For Origami Woodpecker
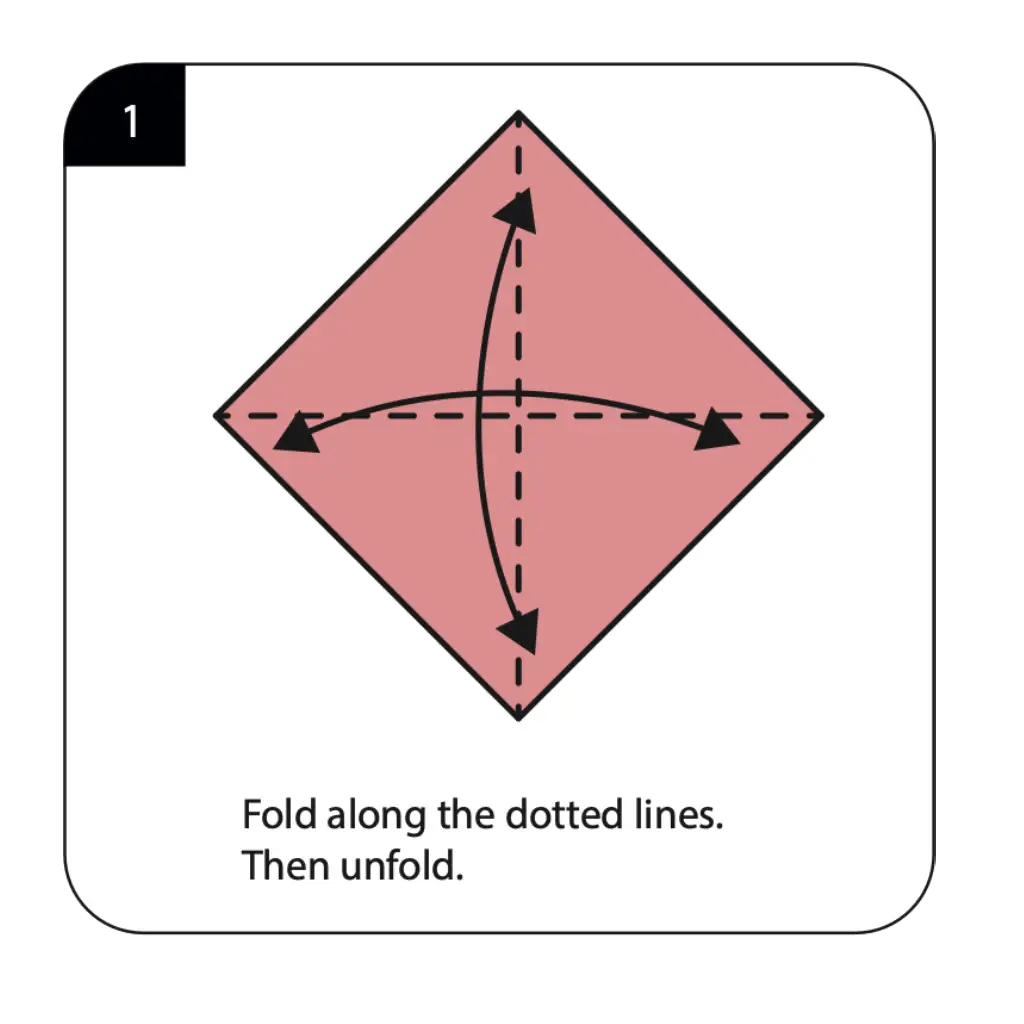
Begin with a square sheet of paper, preferably red on one side and white or light colored on the other to represent the woodpecker’s distinctive coloring. Fold along the dotted lines as shown in the diagram, then unfold completely to establish the reference creases needed for this bird model. These initial folds create the fundamental framework that will guide all subsequent shaping and ensure proper proportions in your finished woodpecker. The precision of these foundation creases is crucial for achieving the sharp, angular features characteristic of woodpeckers and their specialized anatomy. Take care to make each fold clean and well-defined, creating the roadmap that will transform your flat square into a three-dimensional forest bird.
Step 2: Form the Basic Bird Structure Origami Woodpecker

Execute reverse folds along the dotted lines as indicated in the diagram, using this advanced origami technique to begin shaping your woodpecker’s distinctive form. The reverse fold requires careful manipulation of the paper layers while maintaining the integrity of your established crease pattern. This step begins transforming the flat diamond shape into the more complex geometry needed to represent a bird’s anatomy. The precision of these reverse folds directly affects how well your finished woodpecker will capture the characteristic angles and proportions of these specialized forest birds, so work slowly and deliberately to achieve clean, sharp creases.
Step 3: Develop the Head and Beak Structure
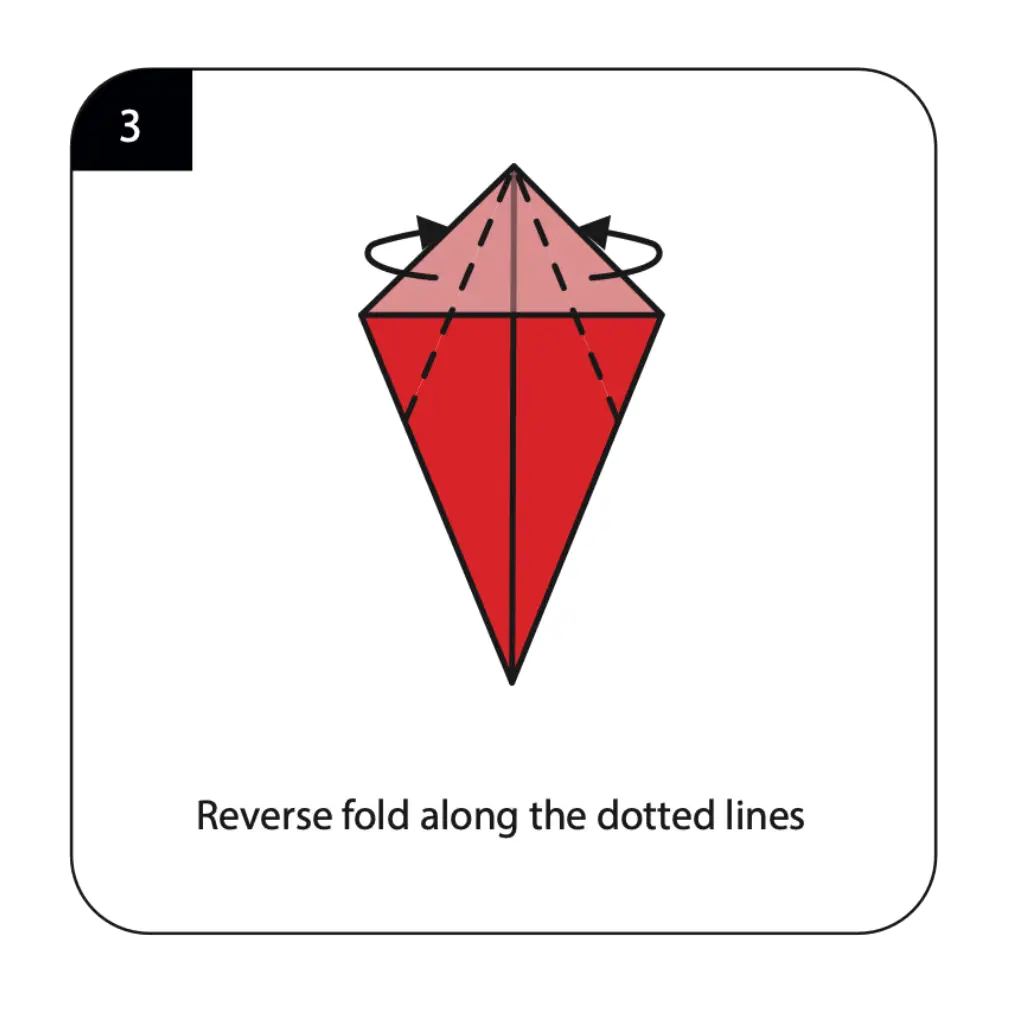
Continue with reverse folds along the dotted lines to further refine your woodpecker’s head and begin forming the distinctive pointed beak used for drilling into tree bark. These additional reverse folds add complexity and dimension to your model while establishing the proportional relationship between the head and body. The careful execution of these folds creates the angular, streamlined appearance that distinguishes woodpeckers from other bird species. This step requires attention to symmetry and precision, as the head structure is the most recognizable feature of your origami woodpecker and must capture the alert, intelligent expression of these remarkable forest birds.
Step 4: Shape the Advanced Head Features
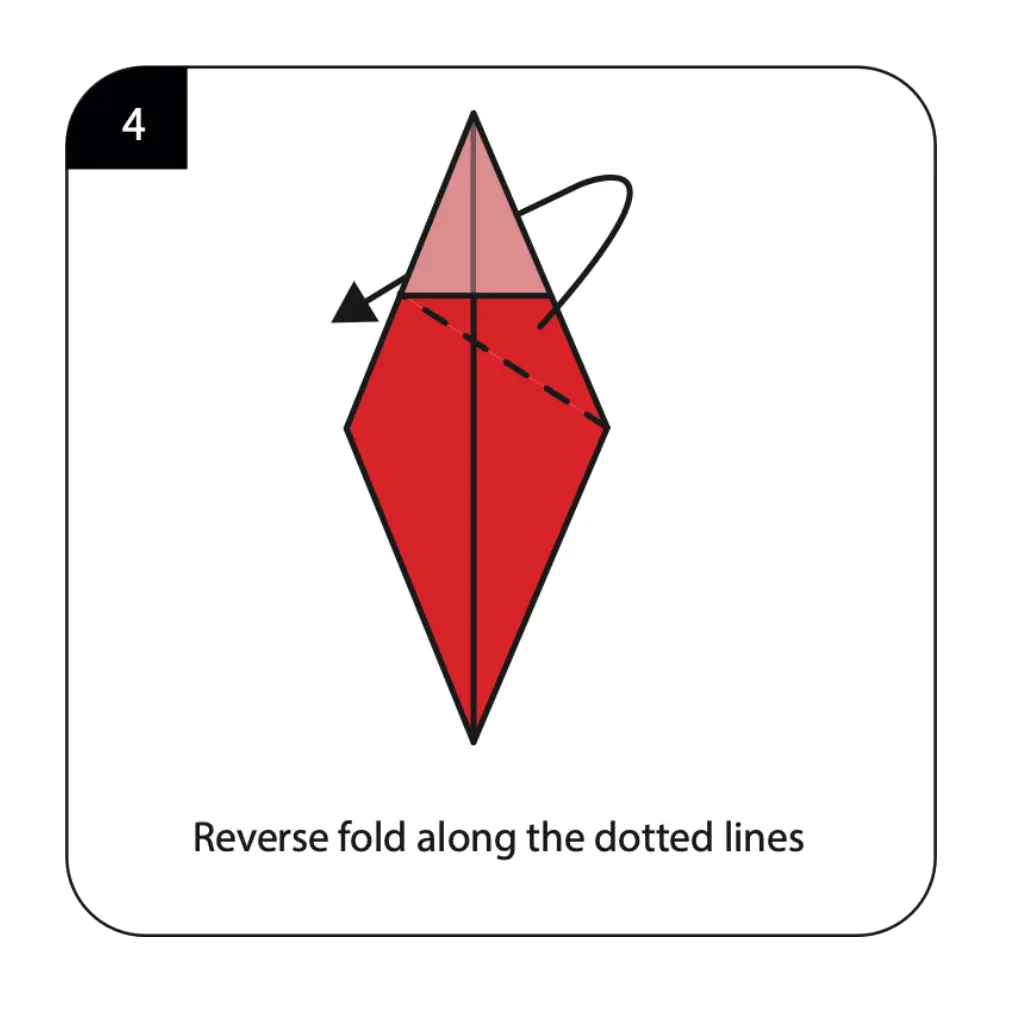
Perform another series of reverse folds along the dotted lines to add final definition to your woodpecker’s head shape and create the characteristic alert posture of these forest birds. These refinement folds enhance the three-dimensional quality of your bird while establishing the proper angles that make woodpeckers instantly recognizable. The strategic positioning of these folds affects the overall character and expression of your finished model. This step demonstrates how multiple reverse folds can build complexity gradually, creating sophisticated bird anatomy through careful geometric manipulation that captures both the physical form and behavioral characteristics of living woodpeckers.
Step 5: Complete the Beak and Final Shaping
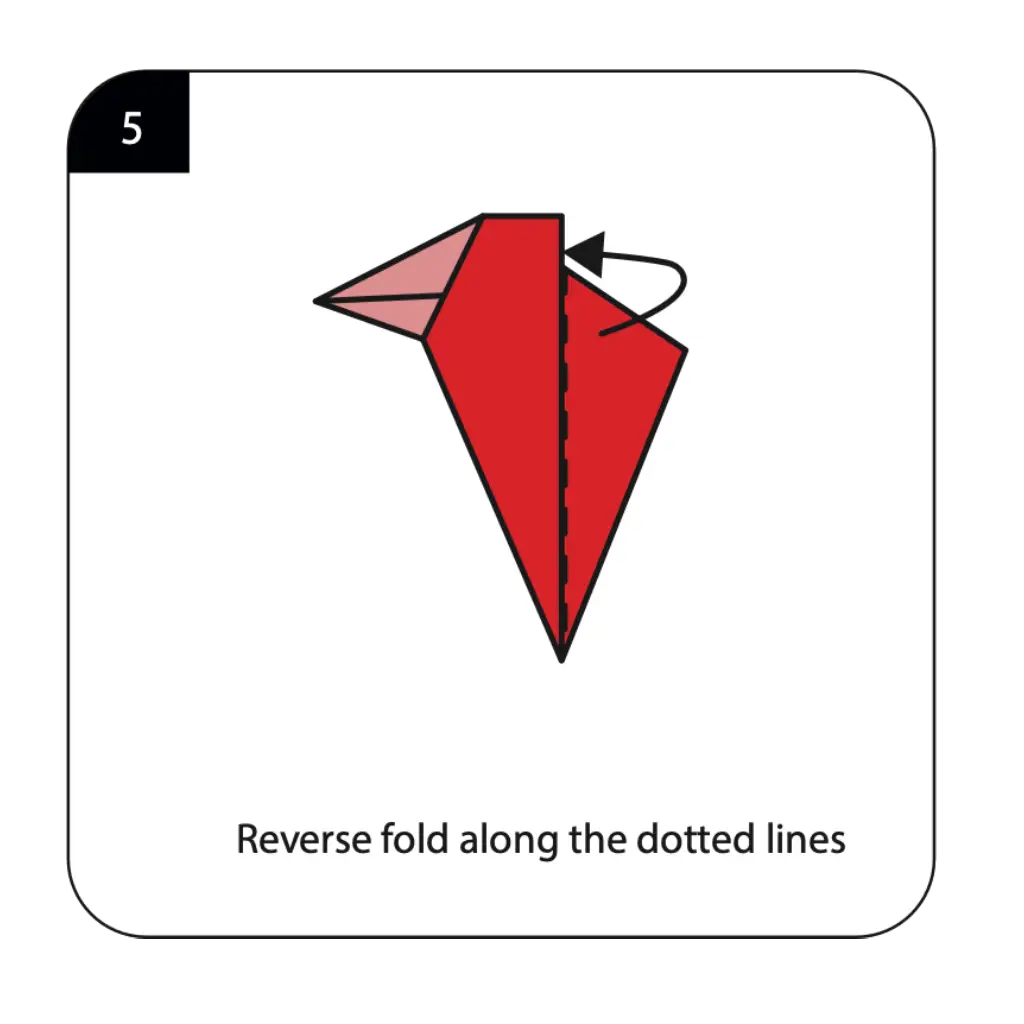
Execute the final reverse folds along the dotted lines to complete your woodpecker’s distinctive drilling beak and establish the finished proportions of your paper bird. These last structural folds bring together all previous elements into the cohesive woodpecker form that clearly represents this specialized forest species. The precision of these final reverse folds determines how convincing your origami woodpecker will appear as a representation of the real bird. This step completes the geometric transformation from flat paper to dimensional bird, creating the sharp, purposeful beak that woodpeckers use to extract insects from tree bark and excavate nesting cavities.
Step 6: Add the Finishing Details

Draw or add stickers to create your woodpecker’s eye and any additional markings that enhance its realistic appearance and bring personality to your paper creation. This creative finishing phase allows you to add the specific details that make your origami clearly identifiable as a woodpecker, including the characteristic eye position and facial markings. The simple addition of an eye dramatically transforms your geometric paper creation into a lifelike bird character with personality and presence. Your completed origami woodpecker now combines the technical precision of advanced paper folding with artistic expression, ready to perch in displays about forest wildlife, serve as an educational tool for learning about bird behavior, or simply delight viewers as a beautiful representation of these industrious forest dwellers.
Conclusion
Congratulations on creating your origami woodpecker! This striking paper bird demonstrates how intermediate folding techniques can capture the distinctive characteristics and specialized adaptations of one of the forest’s most remarkable inhabitants. From a simple square sheet, you’ve crafted a dimensional representation that embodies both the physical form and the industrious spirit of these fascinating woodland birds. The origami woodpecker showcases how thoughtful use of reverse folds and strategic color placement can translate complex bird anatomy into elegant geometric interpretations that remain true to the creature’s essential character. Your completed model serves multiple purposes—as an impressive display of advancing origami skills, an educational tool for learning about forest ecosystems and bird behavior, or simply as a beautiful accent that brings the wonder of wildlife into your home. The techniques you’ve mastered through this project, particularly the extensive use of reverse folds to create complex three-dimensional forms, represent valuable skills that open doors to even more challenging bird and animal designs. We hope this tutorial has deepened your appreciation for both the technical artistry of origami and the remarkable adaptations that make woodpeckers such successful forest specialists. Remember that each woodpecker you create offers opportunities to explore different poses and expressions, allowing you to capture various aspects of these birds’ behavior and personality through the precision and creativity of paper folding.
- “Before attempting this intermediate woodpecker, master essential techniques in our Origami Basics for Beginners guide.”
- “Explore more forest birds in our Origami Animals Collection, featuring owls, cardinals, and other woodland species.”
- “Discover more bird-themed projects in our Creative Origami Gallery for nature enthusiasts and advanced folders.”
- “Display your woodpecker with other forest creatures using ideas from our Decorative Origami Guide for nature-themed arrangements.”
- “Create a complete forest scene by adding Origami Flowers to represent the woodland habitat where woodpeckers live.”
- “Build an entire forest ecosystem using techniques from our Modular Origami Projects for comprehensive wildlife displays.”
