
Introduction: Create a lifelike origami snake that slithers across your desk with this easy-to-follow tutorial perfect for beginners and kids. Using just one square sheet of paper, you’ll transform flat material into a three-dimensional reptile complete with realistic curves. This classic paper folding project teaches fundamental techniques while producing an impressive result. Follow these seven simple steps to craft your own paper snake that’s sure to charm everyone.
Step-by-Step Origami Snake Instructions:
Step 1: Begin with Diamond Base For Origami Snake
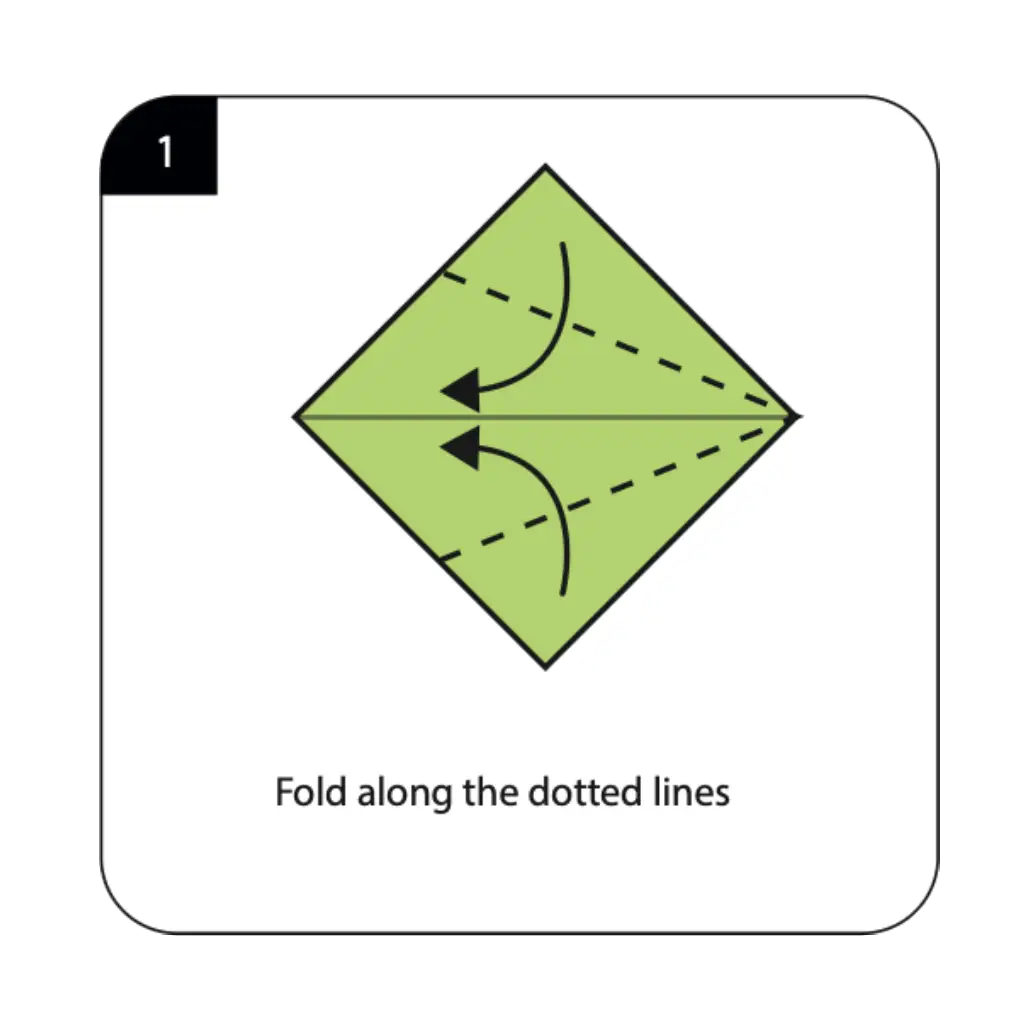
Start with your square paper positioned as a diamond shape and fold along the indicated dotted lines to create initial creases. These foundational folds divide your paper into sections that will become the snake’s body segments. Make sure each fold is sharp and precise, as these guidelines determine the proportions of your finished snake. This diamond starting position is one of the most common bases in origami animals and provides the perfect foundation for creating elongated creatures.
Step 2: Form the Basic Triangle Shape For Origami Snake

Fold your diamond along the central dotted lines to create a triangular form that will serve as your snake’s basic structure. This step narrows the paper and begins establishing the serpentine shape characteristic of snakes. Press firmly along each crease to ensure the folds hold their position throughout the remaining steps. The triangular configuration you’re creating here is essential for achieving the tapered appearance of a real snake’s body.
Step 3: Narrow the Snake’s Body
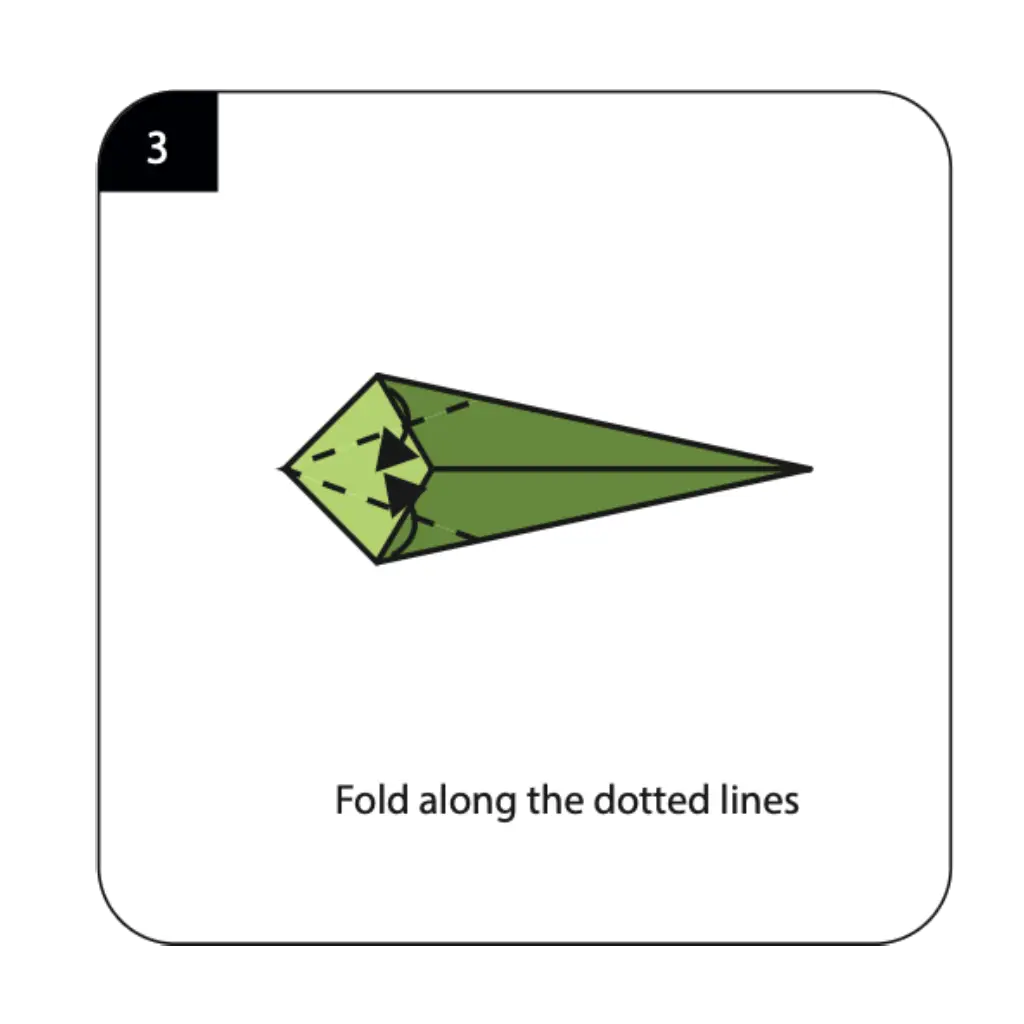
Continue folding along the new dotted lines to further narrow your triangle into a sleeker, more snake-like form. This progressive narrowing creates the elongated body shape that distinguishes snakes from other origami snake creatures. Each fold should be aligned carefully with the previous ones to maintain symmetry and proportion. These refinement folds are similar to techniques used in origami basics where precision creates realism.
Step 4: Create the Signature Zig-Zag Pattern

Execute a zig-zag fold along the entire length of your model, alternating between mountain and valley folds to create the snake’s characteristic slithering motion. This accordion-style folding technique brings your snake to life by giving it natural-looking curves and movement. Space your folds evenly to create a realistic undulating pattern that mimics how real snakes move. The zig-zag pattern is what transforms your straight paper form into a dynamic creative origami sculpture.
Step 5: Shape the Head with Inside Reverse Fold
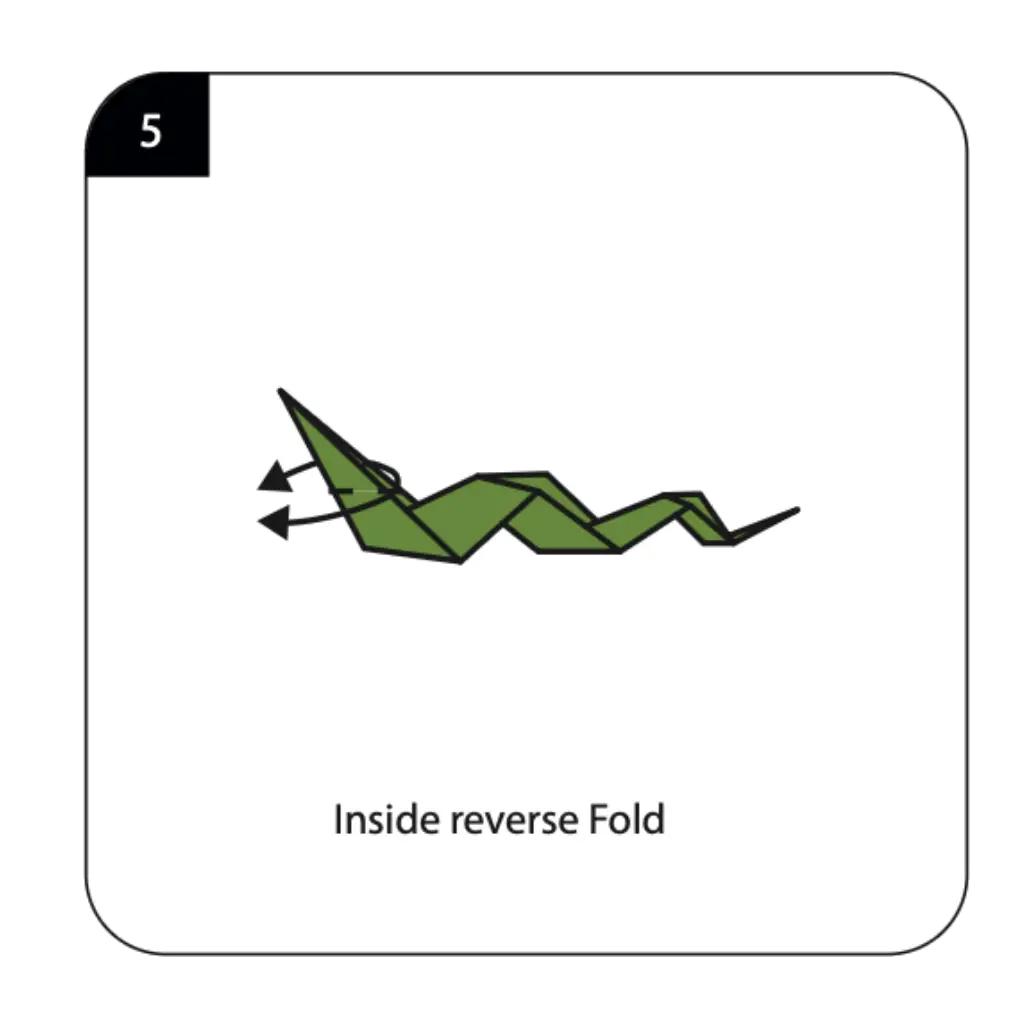
Perform an inside reverse fold at one end of your snake to create the distinctive triangular head shape. This advanced folding technique involves opening the paper slightly and reversing the direction of the fold to form a three-dimensional head. The inside reverse fold adds depth and realism to your snake’s appearance, distinguishing the head from the body. This technique is commonly used in intermediate origami snake projects to create more complex and lifelike features.
Step 6: Refine with Second Inside Reverse Fold
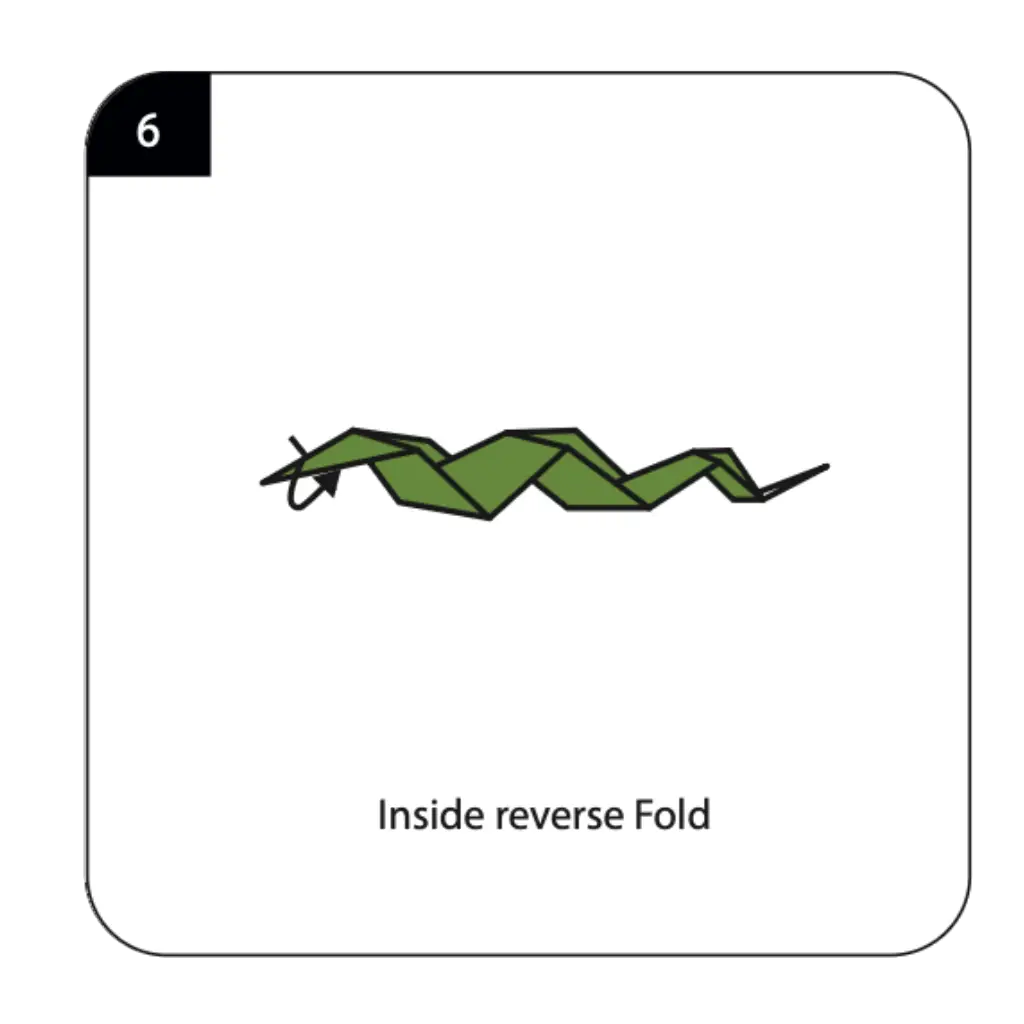
Apply another inside reverse fold to further refine the head shape and create a more realistic snake profile. This second reverse fold allows you to adjust the angle of the head, making it appear as if the snake is alert and ready to strike. The double reverse fold technique creates a more sophisticated head structure with better definition. This advanced shaping method is often found in detailed decorative origami designs that require precision.
Step 7: Add Eyes to Complete Your Snake
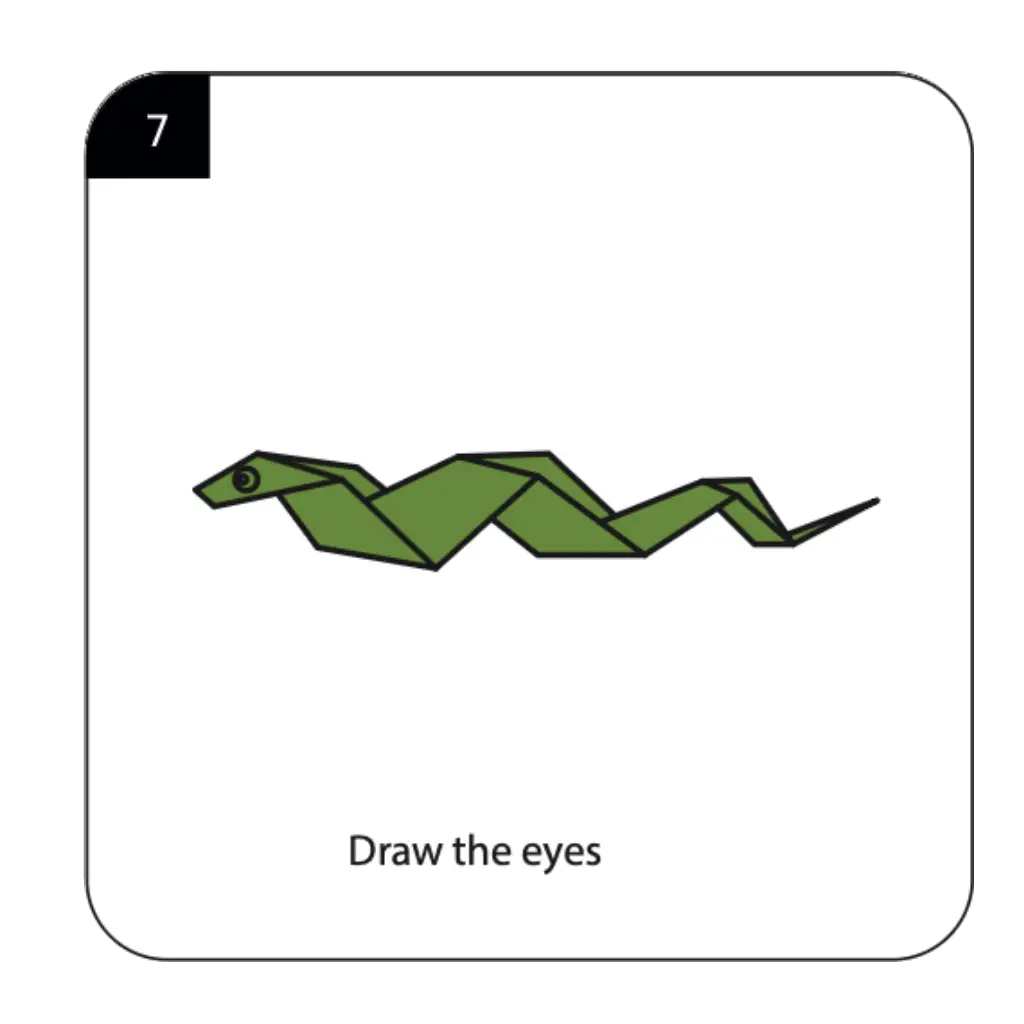
Draw eyes on both sides of the snake’s head to bring your creation to life with personality and expression. Position the eyes carefully to create a realistic appearance, placing them symmetrically for the best effect. The addition of eyes transforms your folded paper from an abstract shape into a recognizable creature with character. This final detail makes your origami snake perfect for display or as part of a larger paper animal collection.
Conclusion: You’ve successfully created a charming origami snake that captures the essence of these fascinating reptiles through simple paper folding. This project demonstrates how basic techniques can produce surprisingly lifelike results that delight both children and adults. Try making multiple snakes in different colors and sizes to create your own paper reptile collection. With practice, you’ll master the zig-zag technique and create even more dynamic and realistic origami snakes.
