
Introduction: Create your own adorable origami whale using just a square piece of paper and these easy-to-follow instructions. This charming ocean creature is perfect for beginners and kids who love marine animals. With only six simple steps, you’ll transform flat paper into a three-dimensional whale complete with a tail fin. Let’s dive into this fun paper folding project and bring the ocean to your craft table!
Step-by-Step Origami Whale Instructions:
Step 1: Create Initial Diamond Folds
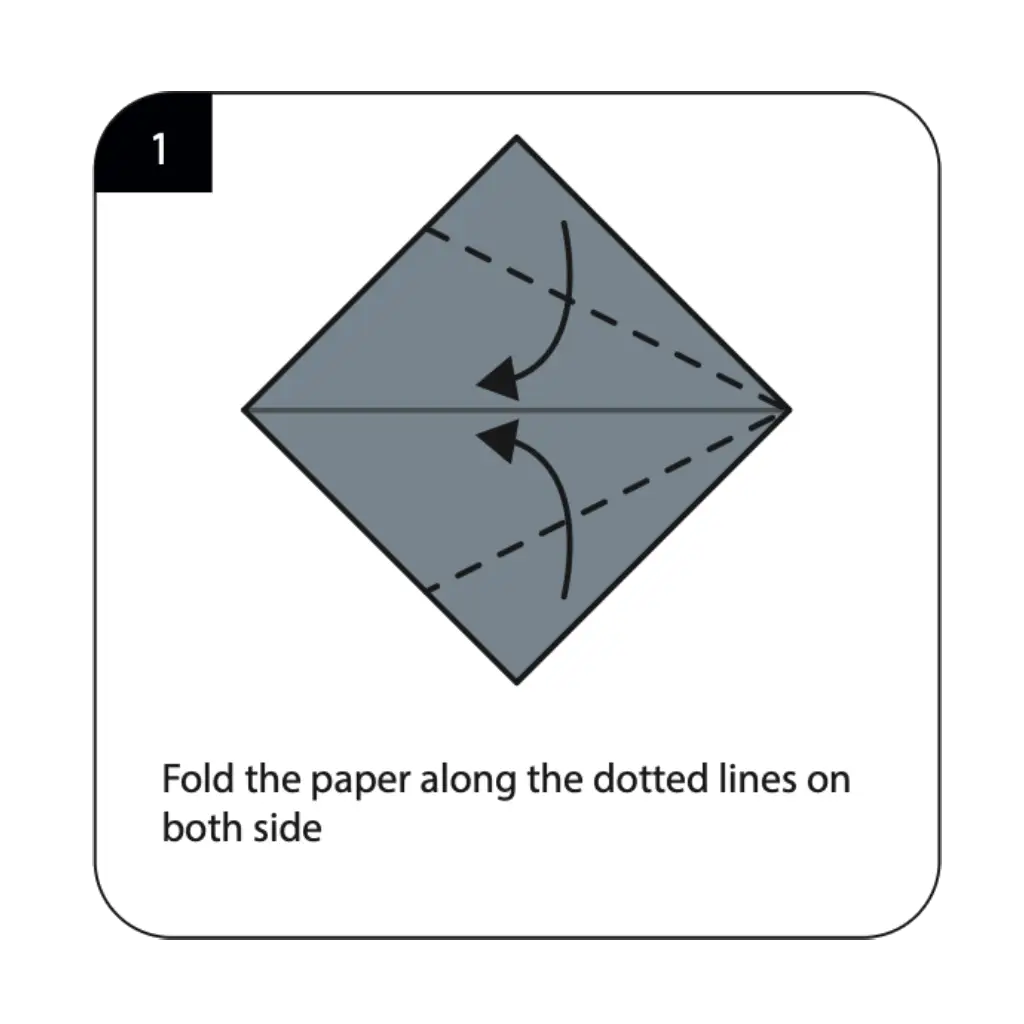
Begin with your square paper in a diamond position and fold along the dotted lines on both sides to create preliminary creases. These foundational folds divide your paper into sections that will form the whale’s body structure. Make each fold sharp and precise, as these guidelines determine the proportions of your finished whale. This diamond-based starting technique is commonly used in origami animals to create symmetrical creatures.
Step 2: Form the Basic Whale Shape
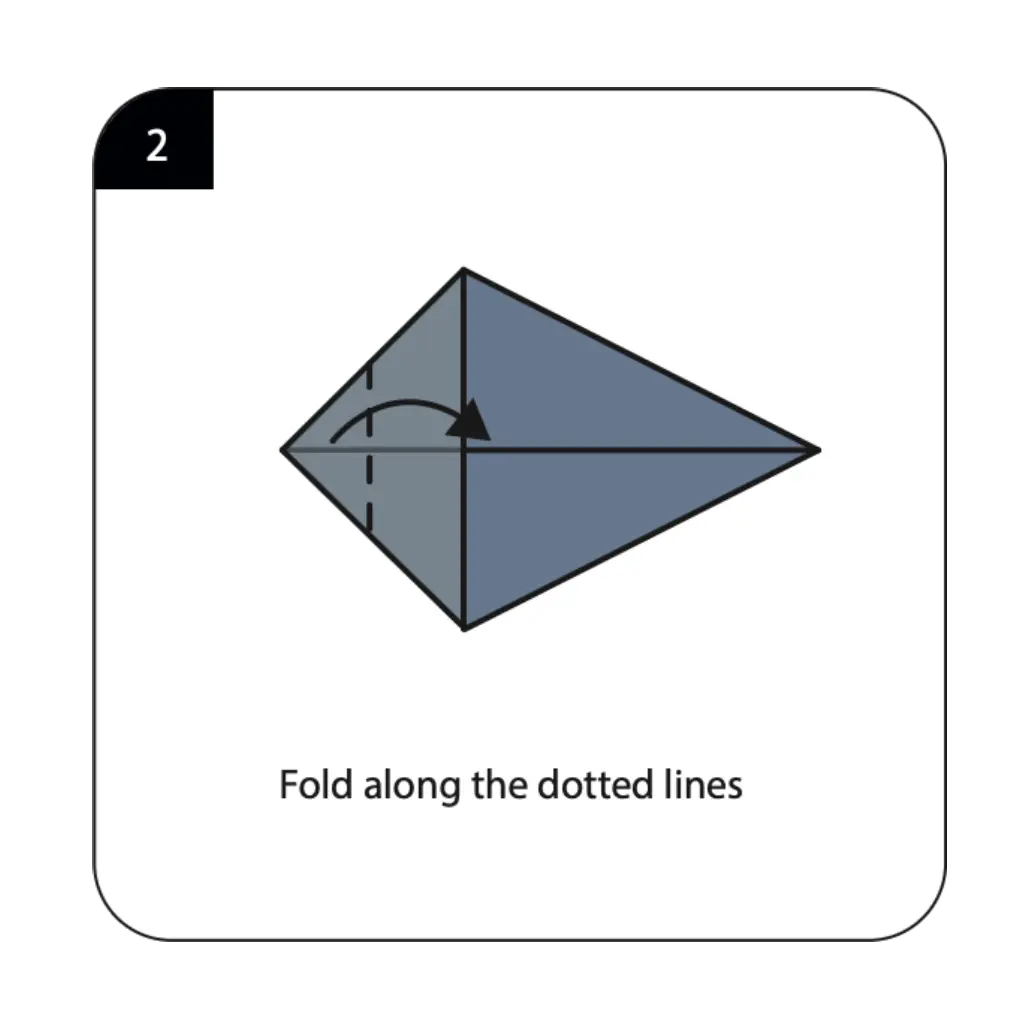
Fold along the indicated dotted lines to begin transforming your diamond into the elongated shape characteristic of whales. This step narrows the paper and starts creating the streamlined body that makes whales such graceful swimmers. Press firmly on each crease to ensure the folds hold their position throughout the remaining steps. The careful shaping in this phase establishes the foundation for your whale’s realistic appearance.
Step 3: Fold Backward in Half
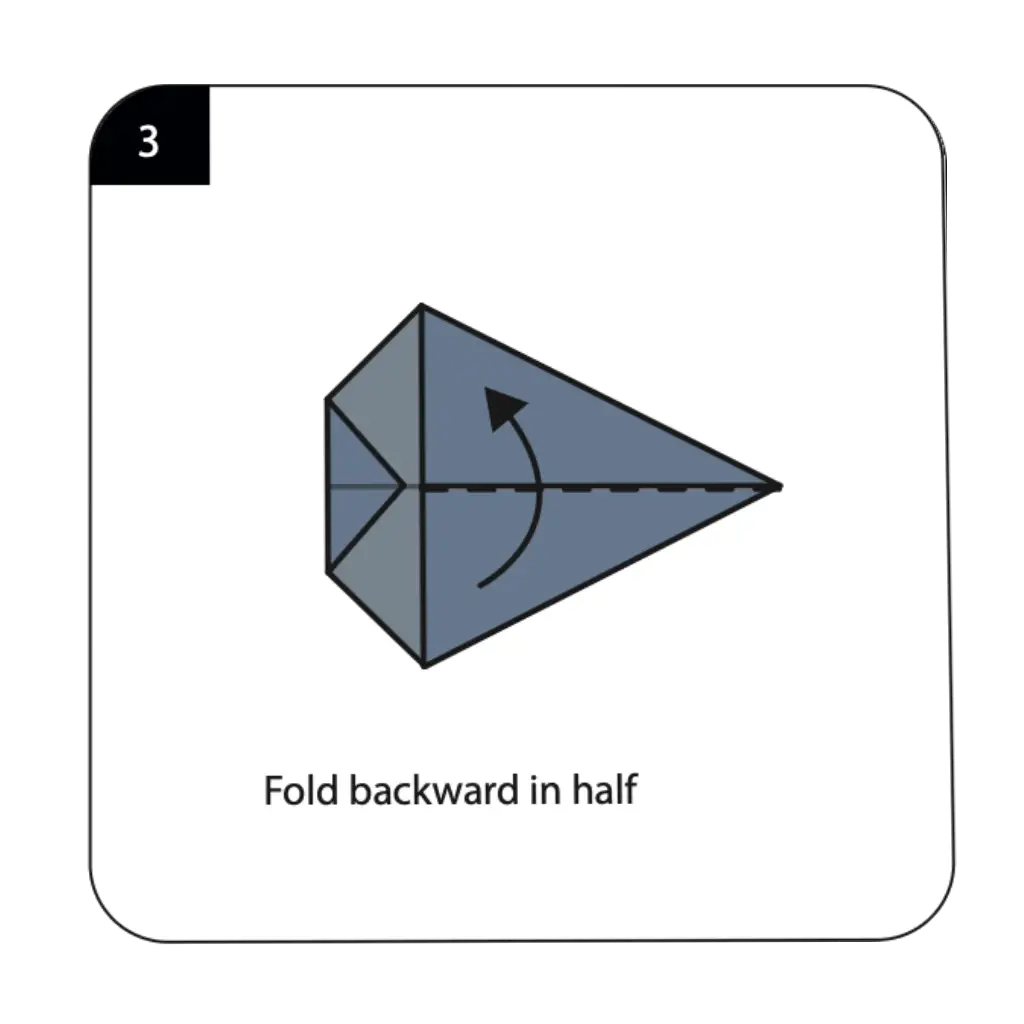
Fold your model backward in half along the center line, bringing one side over to meet the other. This mountain fold creates the whale’s three-dimensional body and establishes the central ridge that runs along its back. The backward fold technique adds depth to your origami whale and prepares it for the final shaping steps. This folding method is essential in origami basics for creating dimensional figures from flat paper.
Step 4: Create the Tail Section
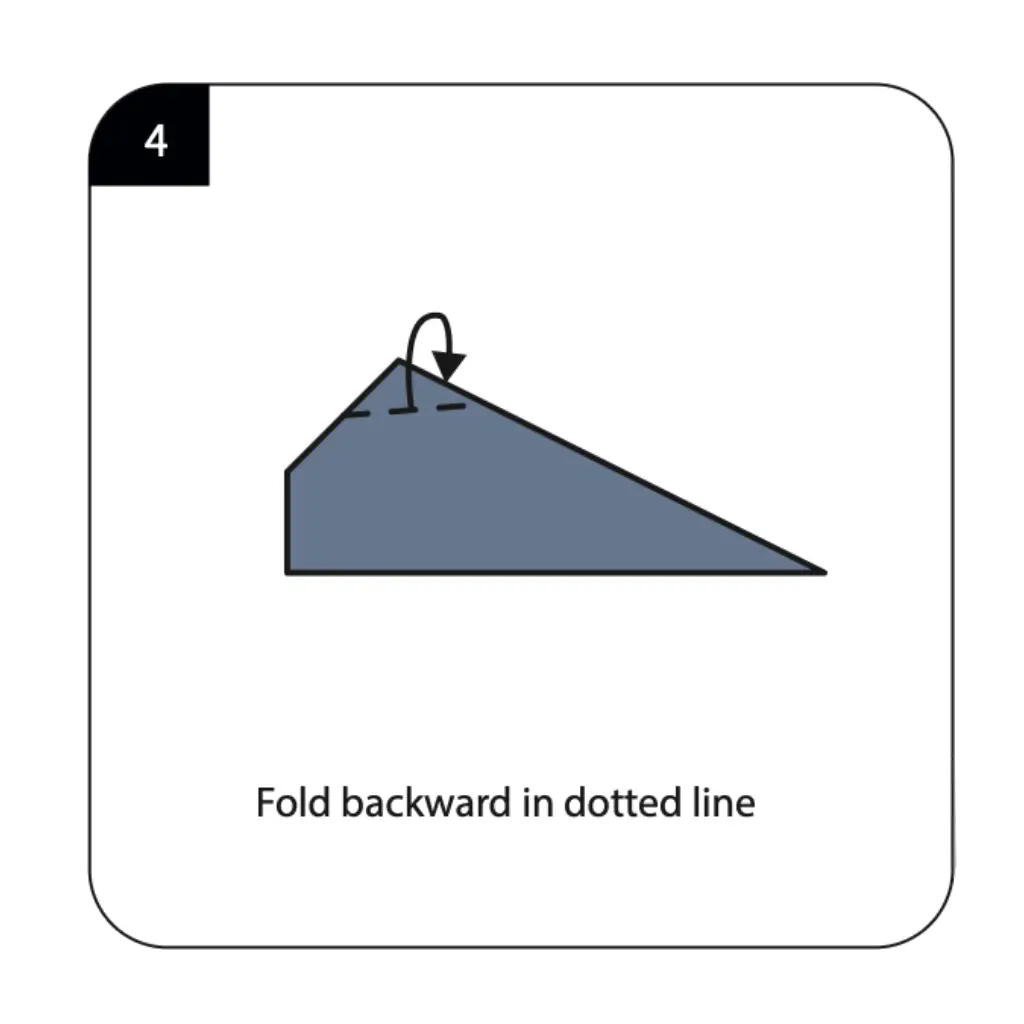
Fold backward along the dotted line at one end of your model to begin forming the whale’s distinctive tail. This fold angles the tail section away from the body, creating the characteristic whale silhouette. The positioning of this fold determines how dynamic your whale appears, whether swimming or resting. Proper tail placement is crucial for achieving the balanced look that makes your origami whale recognizable.
Step 5: Shape the Tail Fin
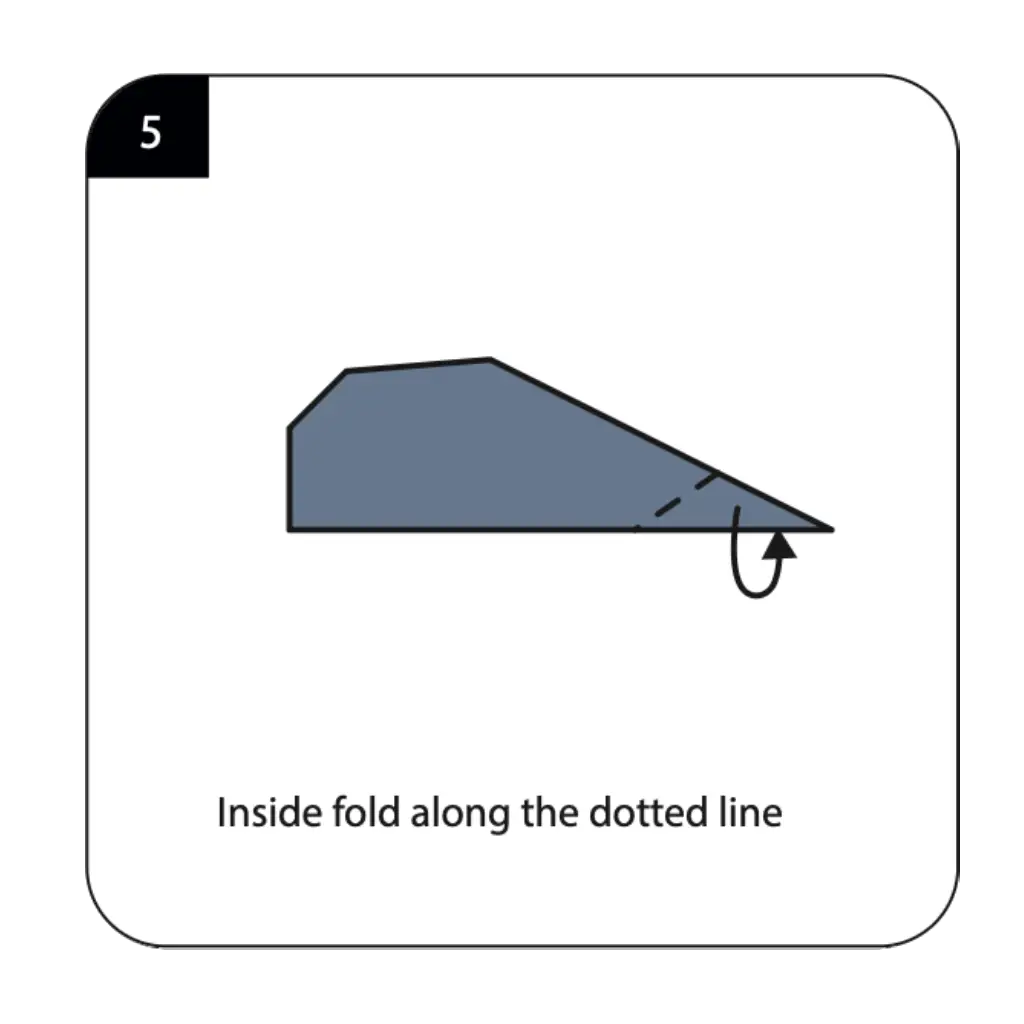
Execute an inside fold along the dotted line to create the whale’s tail fin, also known as the fluke. This advanced technique involves opening the paper slightly and reversing the fold direction to form the horizontal tail. The inside fold creates a more realistic tail shape that captures the essence of how real whales propel themselves through water. This sophisticated folding technique elevates your project beyond simple creative origami to more lifelike representations.
Step 6: Add the Finishing Touch
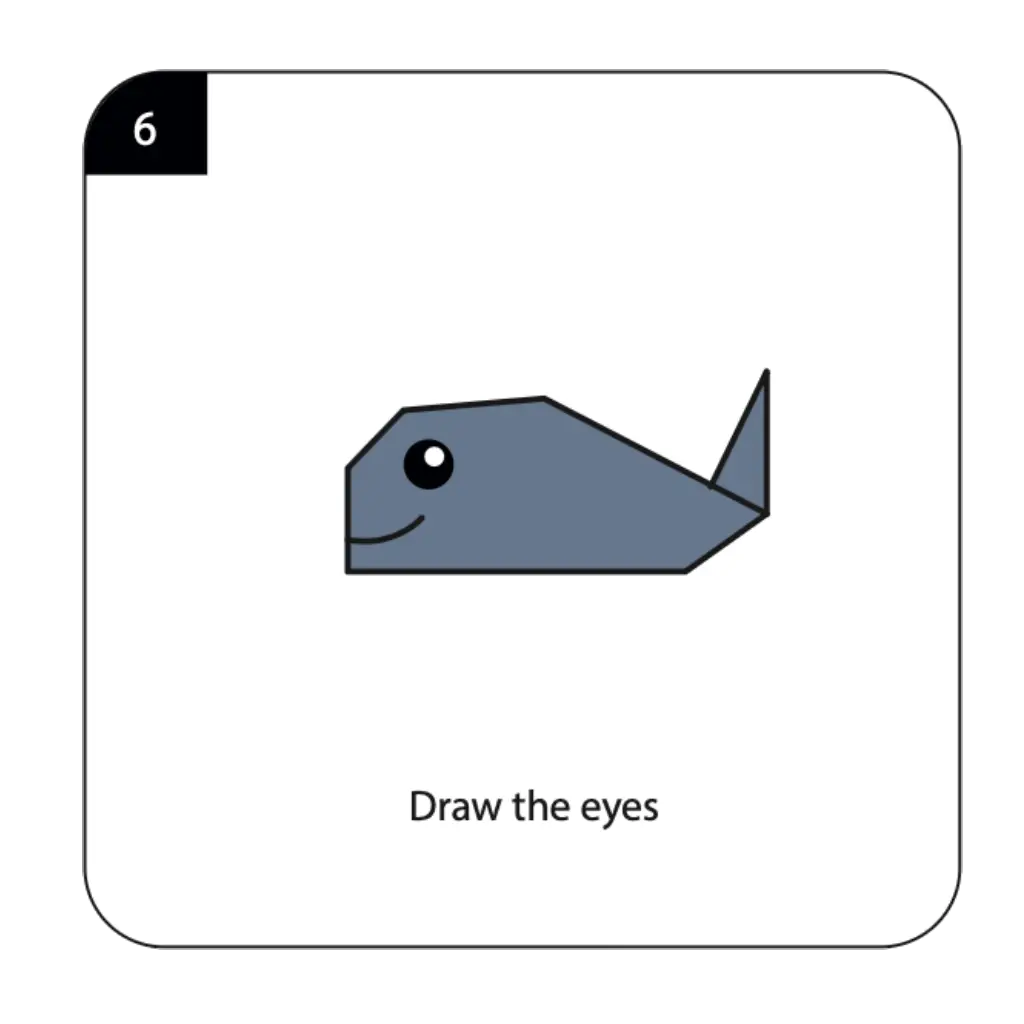
Complete your origami whale by drawing an eye on each side of the head to bring your ocean creature to life. Position the eyes carefully near the front of the whale for the most realistic appearance. The addition of eyes transforms your folded paper from an abstract shape into a charming marine animal with personality. Your finished whale is now ready to join other ocean-themed decorative origami pieces in your collection.
Conclusion:
You’ve successfully created a delightful origami whale that captures the grace and beauty of these magnificent ocean mammals. This simple project demonstrates how basic folds can produce recognizable animal shapes that spark imagination. Try making a pod of whales in different sizes or colors to create your own paper ocean scene. With practice, you’ll be folding these charming whales quickly and sharing this enjoyable craft with others.
