
Introduction: Transform a simple square of paper into a charming origami kite that captures the essence of traditional diamond kites. This beginner-friendly project requires just one sheet of paper and basic folding skills to create a decorative kite perfect for display. Whether you’re new to paper folding or looking for a quick craft project with kids, this tutorial guides you through each step. Add a string to your finished kite for an authentic touch that brings childhood memories to life.
Step-by-Step Origami Kite Instructions:
Step 1: Create the Center Crease
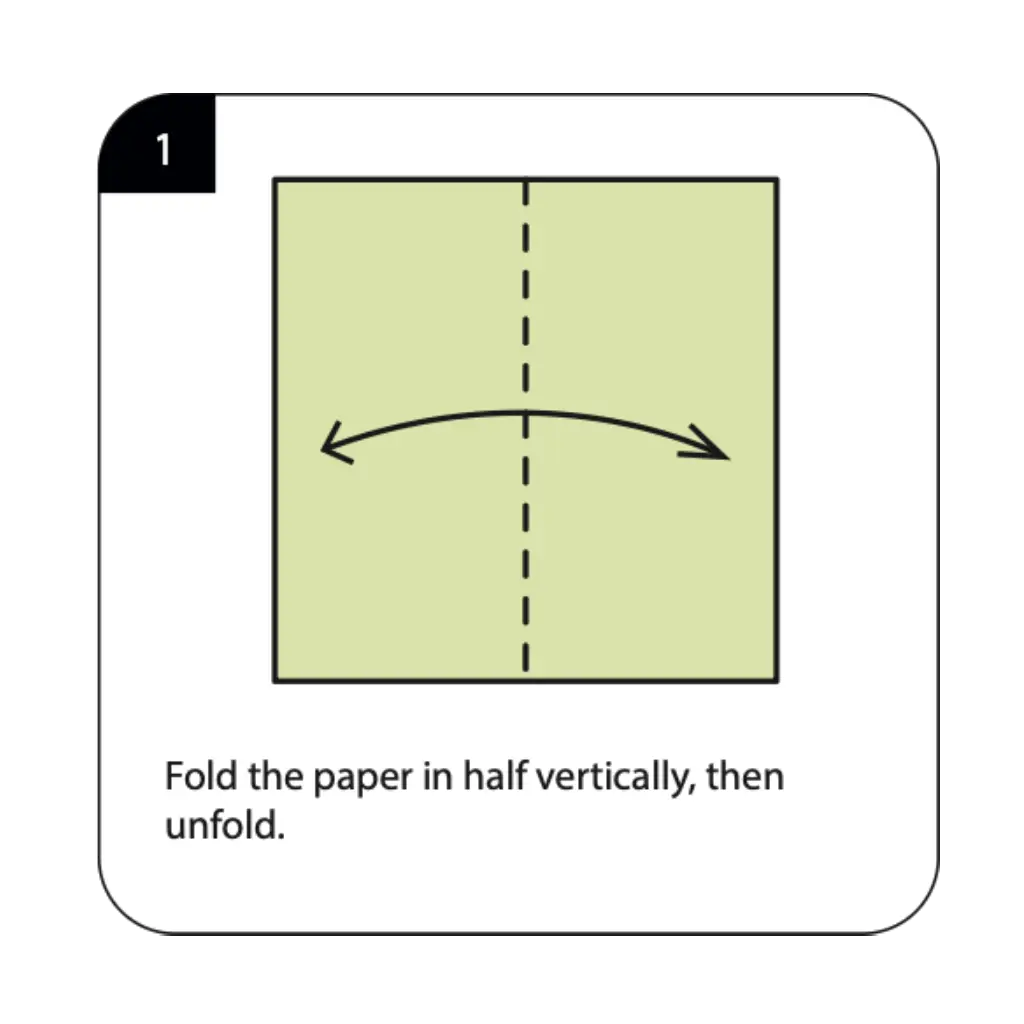
Begin by folding your square paper in half vertically to create a center guideline, then carefully unfold it to reveal the crease. This foundational line serves as the reference point for all subsequent folds in your origami kite. Make sure the crease is sharp and precise by running your fingernail along the fold for best results. This vertical center line is one of the most fundamental techniques in origami basics and ensures perfect symmetry.
Step 2: Form the Initial Triangle Shape
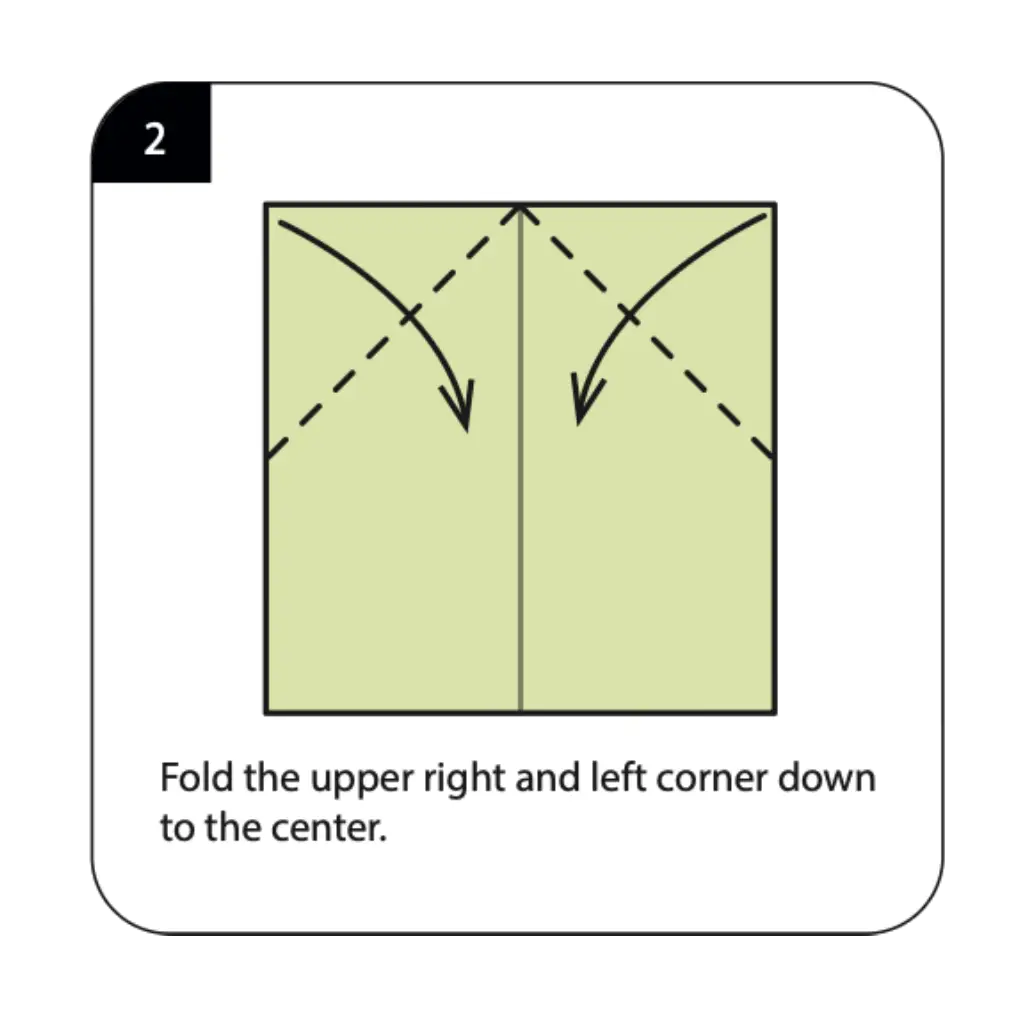
Fold the upper right and left corners down to meet at the center crease, creating a triangular top section. These diagonal folds begin transforming your square into the characteristic diamond shape of a traditional kite. Press firmly on each fold to ensure they hold their position and create clean, sharp edges. The precision of these corner folds determines how well-proportioned your finished origami kite will appear.
Step 3: Turn Over the Model
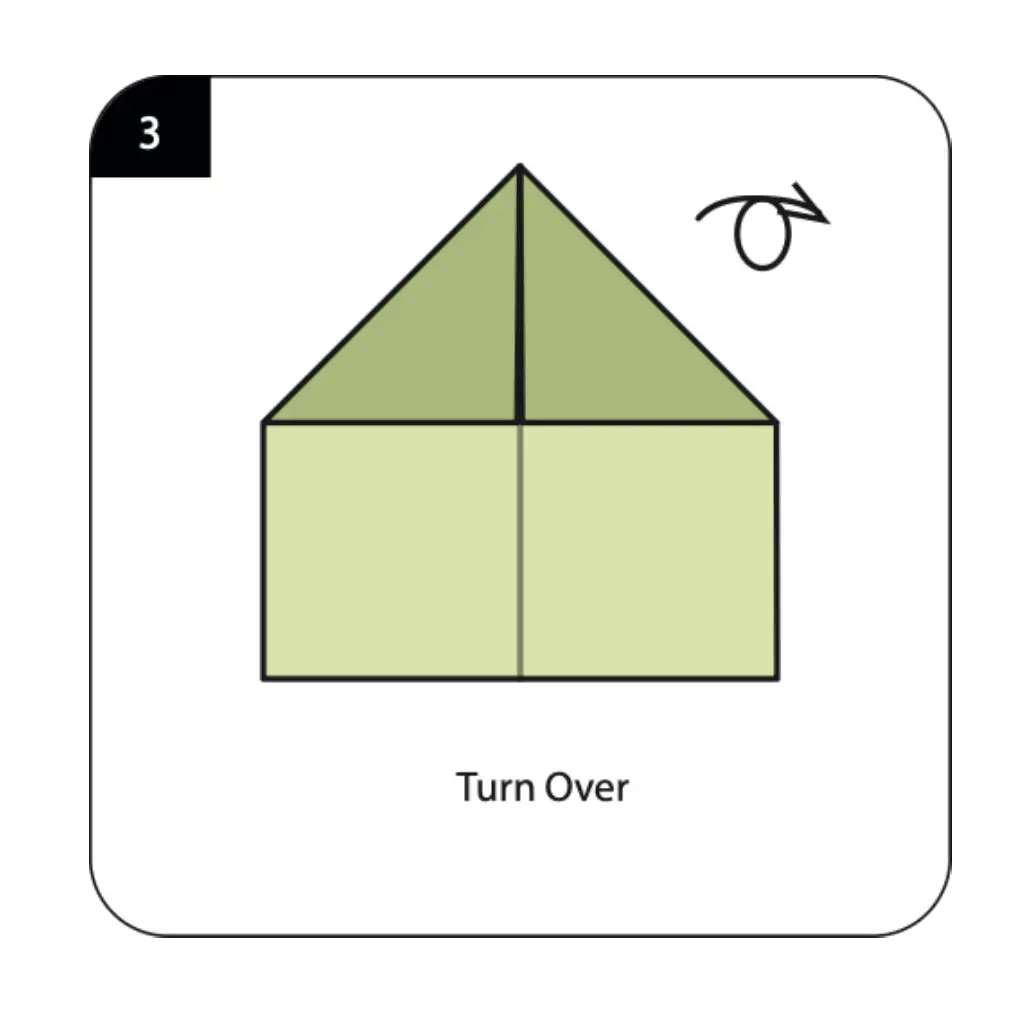
Flip your paper over to the opposite side to continue working on the reverse surface of your kite. This turning action allows you to add layers and depth to your design while maintaining the clean appearance on the front. Handle the paper gently during this step to avoid disturbing the folds you’ve already created. The technique of working on both sides is common in intermediate creative origami projects.
Step 4: Create the Diamond Shape
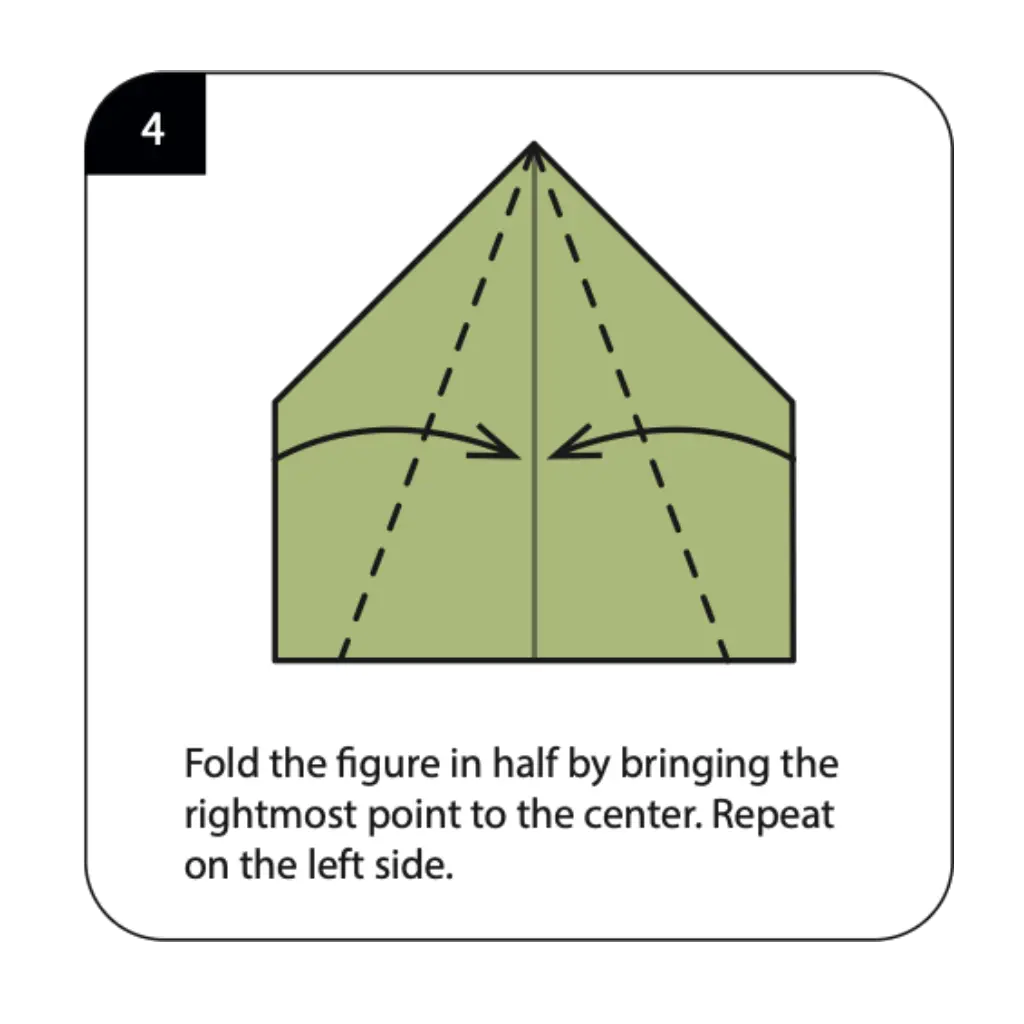
Fold the figure in half by bringing the rightmost point to the center line, then repeat this same fold on the left side. These symmetrical folds narrow your model and create the classic elongated diamond shape characteristic of kites. Ensure both sides are folded equally to maintain balance and proportion in your design. This shaping technique transforms the basic form into the recognizable kite silhouette.
Step 5: Flip and Rotate the Model
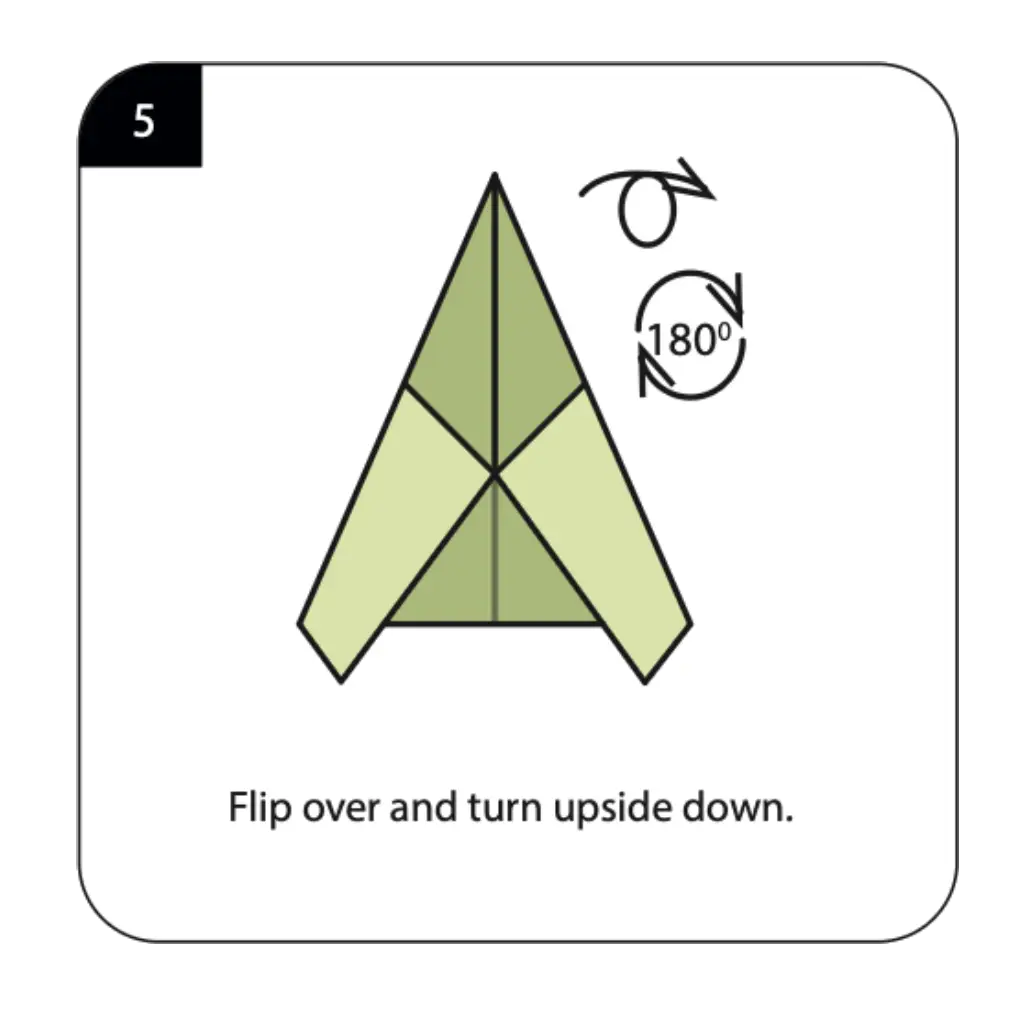
Turn your model over once more and rotate it 180 degrees (turn it upside down) to prepare for the final shaping steps. This repositioning allows you to work on the tail section of your kite from the optimal angle. The rotation ensures that your finished kite will have the correct orientation when displayed. This multi-directional approach is essential for creating three-dimensional effects in decorative origami pieces.
Step 6: Shape the Kite Wings
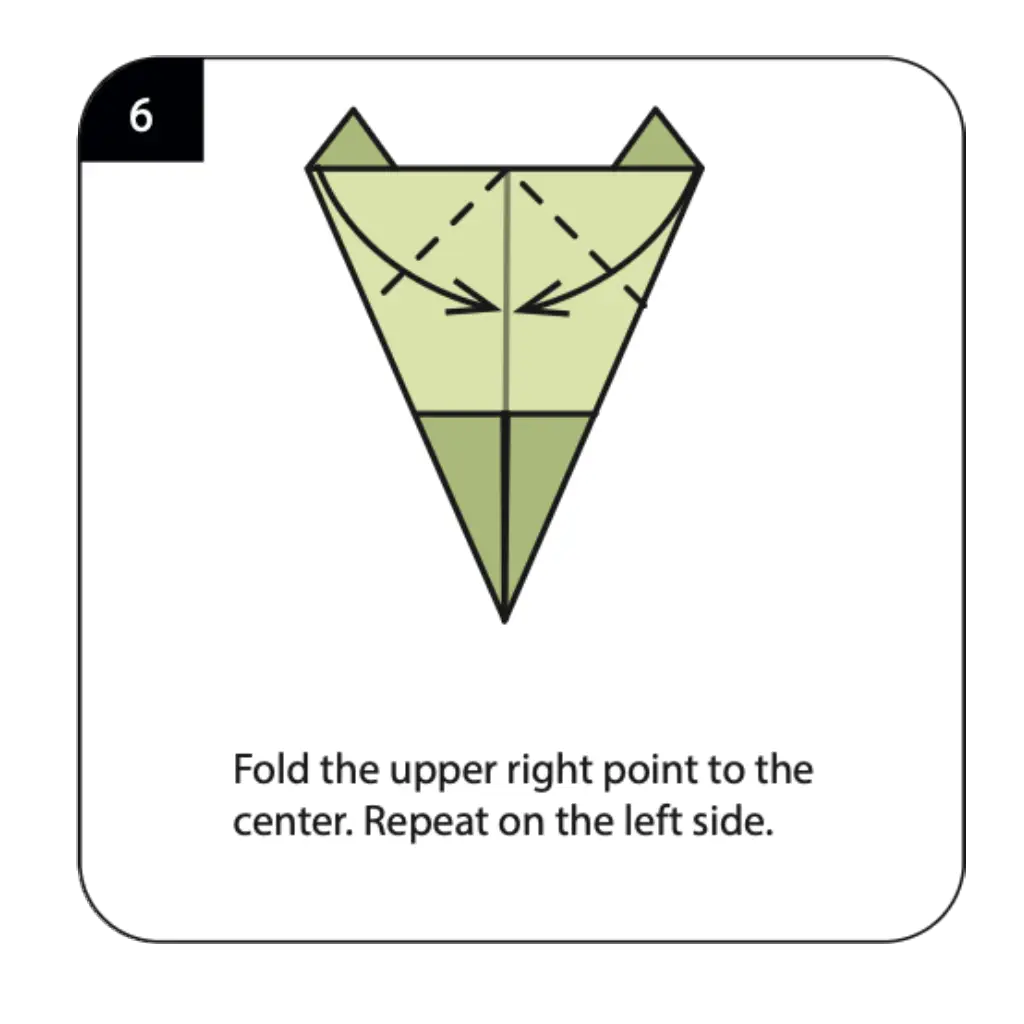
Fold the upper right point to the center, creating one wing of your kite, then repeat this fold on the left side for symmetry. These final folds define the wing structure and give your origami kite its distinctive aerodynamic appearance. The angle of these folds affects the overall proportions, so aim for consistency between both sides. These wing folds are what transform your paper from a simple diamond into a realistic kite design.
Step 7: Complete Your Origami Kite
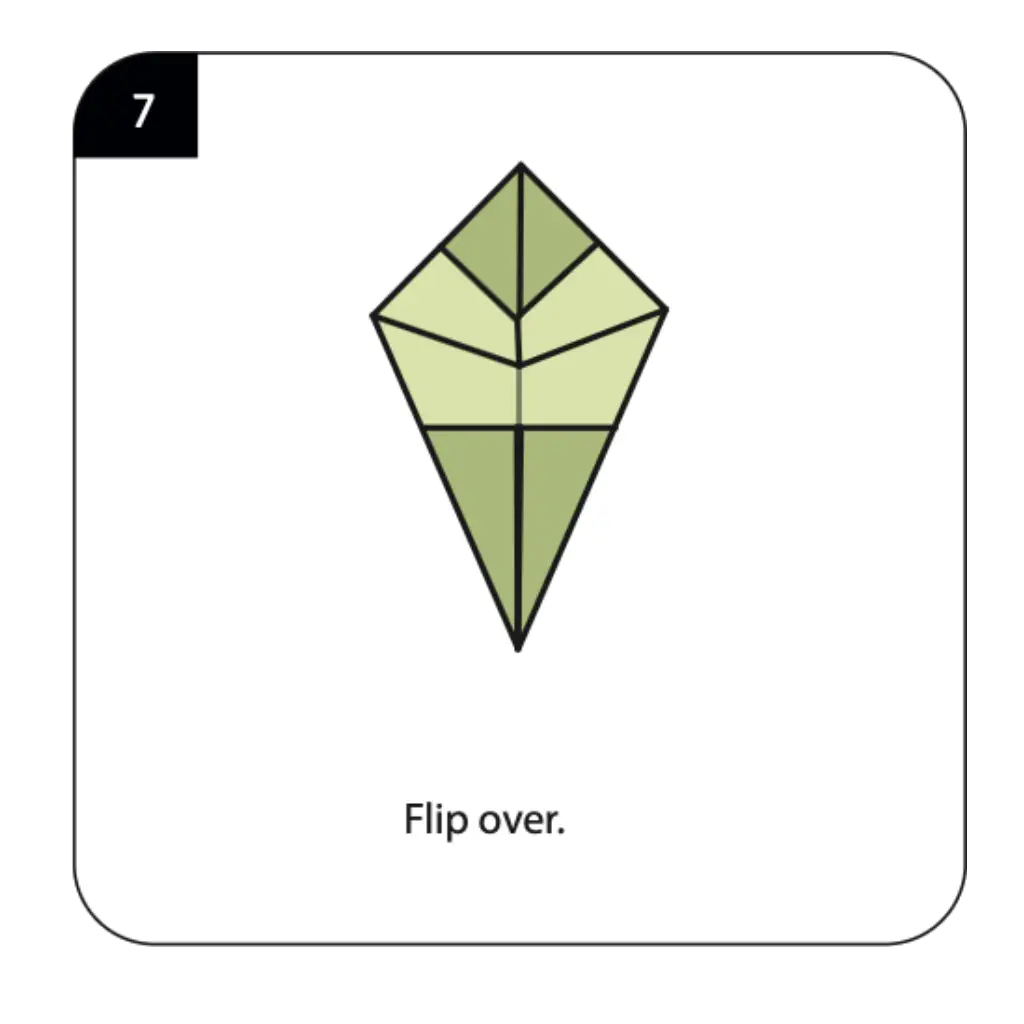
Flip your model over one final time to reveal your finished origami kite with its clean, geometric lines. For added authenticity, attach a string to the bottom point of your kite using tape or by threading it through a small hole. Your completed kite showcases the diamond shape and proportions of a real kite in miniature paper form. This charming creation makes a perfect decoration or can be part of a larger origami display.
Conclusion: Congratulations on creating your own origami kite using just paper and simple folding techniques! This classic design captures the joy of kite flying in a decorative paper form perfect for any season. Try making multiple kites in different colors and sizes to create a beautiful mobile or wall display. With practice, you’ll fold these delightful kites quickly and may even inspire others to discover the magic of paper folding.
