
Introduction: Step into Japanese tradition by folding your own origami samurai helmet, known as a kabuto. This classic design has been enjoyed by children in Japan for generations during Boys’ Day celebrations. Using just one square sheet of paper, you’ll create a wearable helmet perfect for play or display. Follow these eight simple steps to craft this iconic piece of Japanese culture.
Step-by-Step Origami Samurai Helmet Instructions:
Step 1: Start with Triangle Foundation For Origami Samurai Helmet
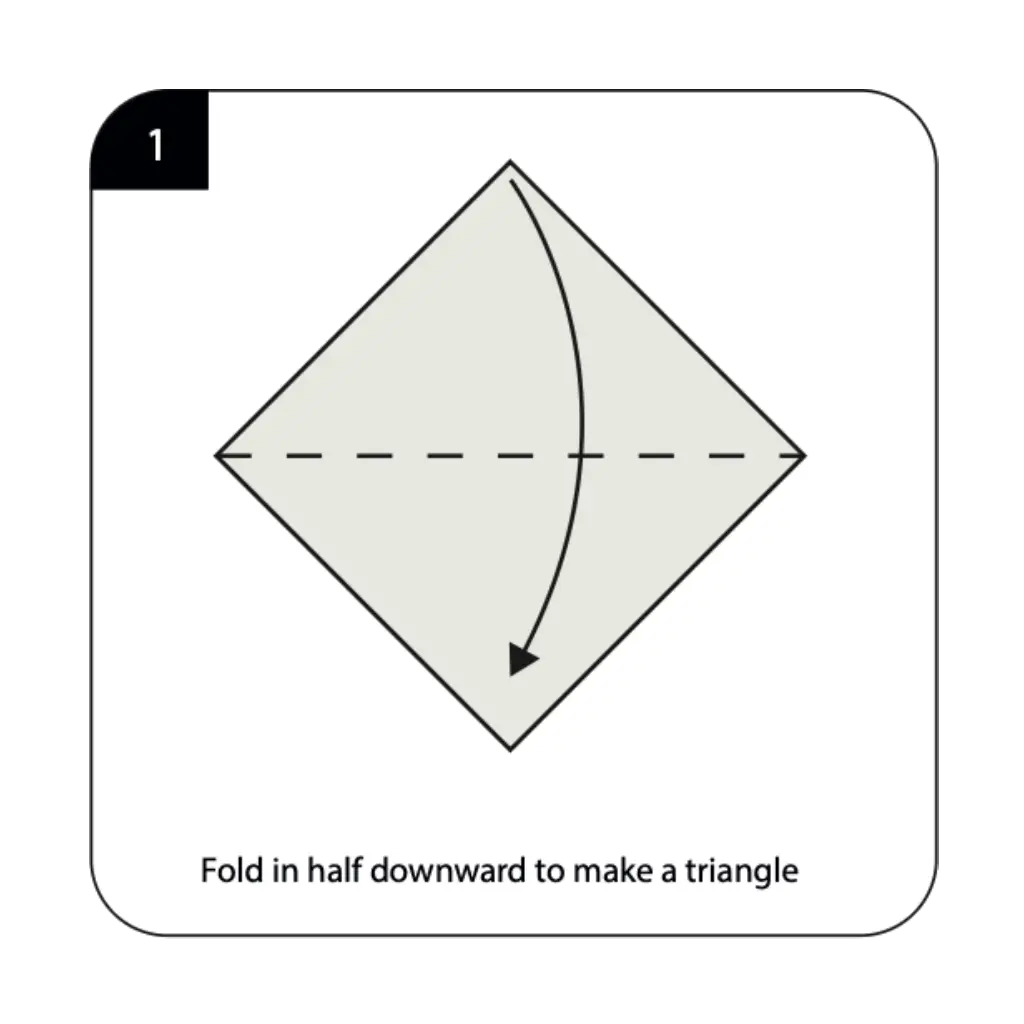
Begin with a square sheet of origami paper placed diagonally with the white side facing up, then fold it in half downward to create a triangle. This fundamental fold establishes the base structure for your samurai helmet and ensures proper symmetry. Press the crease firmly as this forms the main guideline for all subsequent folds. The triangular base is one of the most essential shapes in origami basics and provides stability for the helmet.
Step 2: Create a Smaller Triangle For Origami Samurai Helmet
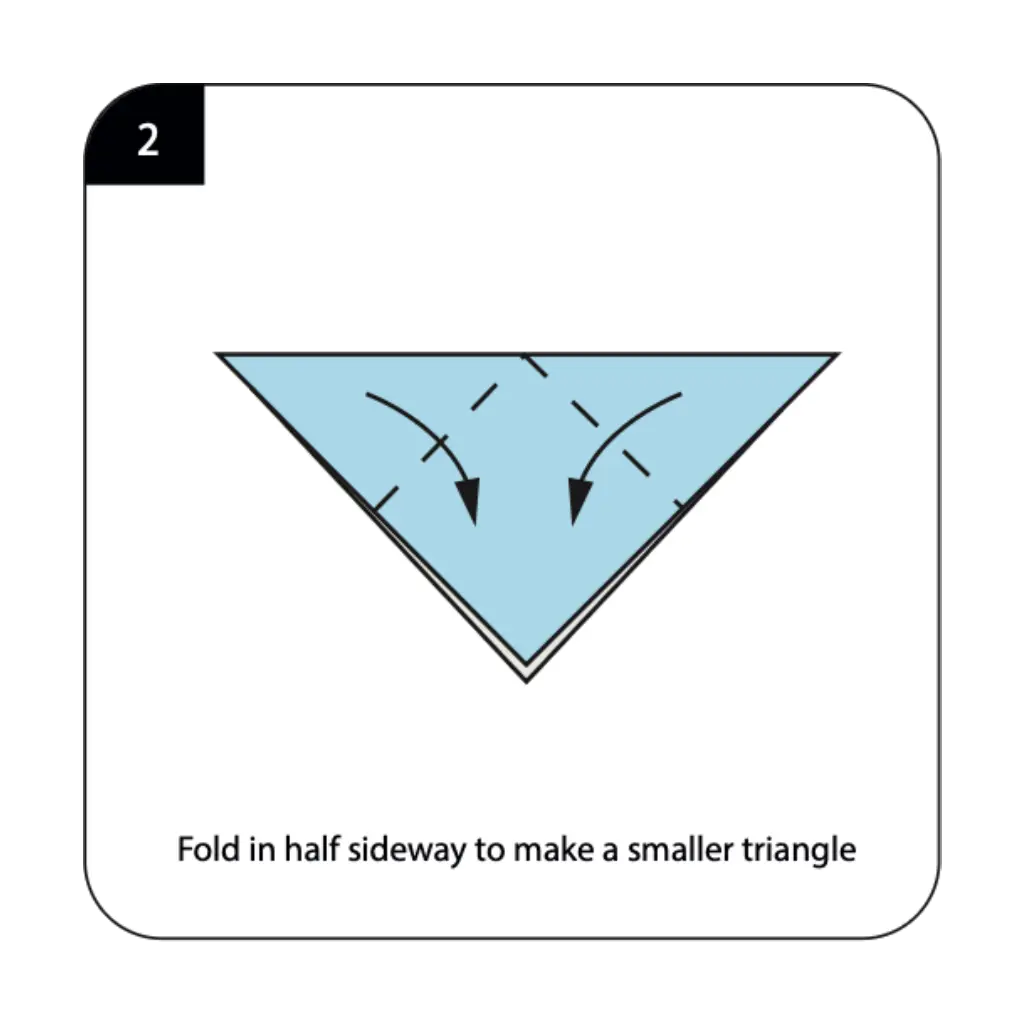
Fold your triangle in half sideways to make a smaller triangle, creating a vertical center crease. This fold helps establish the centerline of your helmet and ensures both sides will be perfectly symmetrical. After making the crease, unfold back to the larger triangle shape, as this was just to mark the center. The precision of this guideline fold is crucial for achieving a balanced samurai helmet design.
Step 3: Form the Helmet Horns For Origami Samurai Helmet
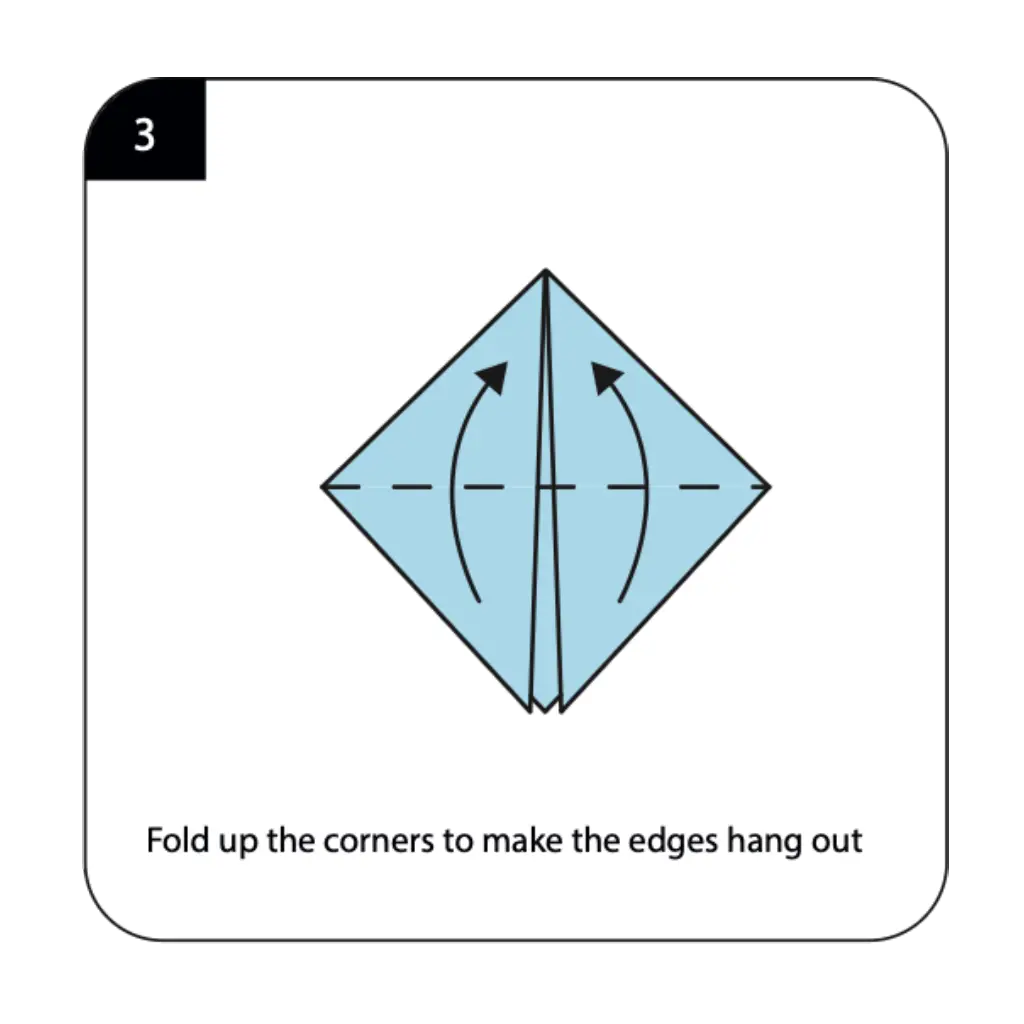
Fold up the bottom corners of your triangle to make the edges hang out beyond the top edge, creating the distinctive horns of the samurai helmet. These upward folds should be made at equal angles on both sides to maintain symmetry. The protruding corners represent the traditional maedate (front crest) found on authentic samurai helmets. This characteristic feature is what makes the origami samurai helmet instantly recognizable among decorative origami projects.
Step 4: Shape the Front Flap For Origami Samurai Helmet
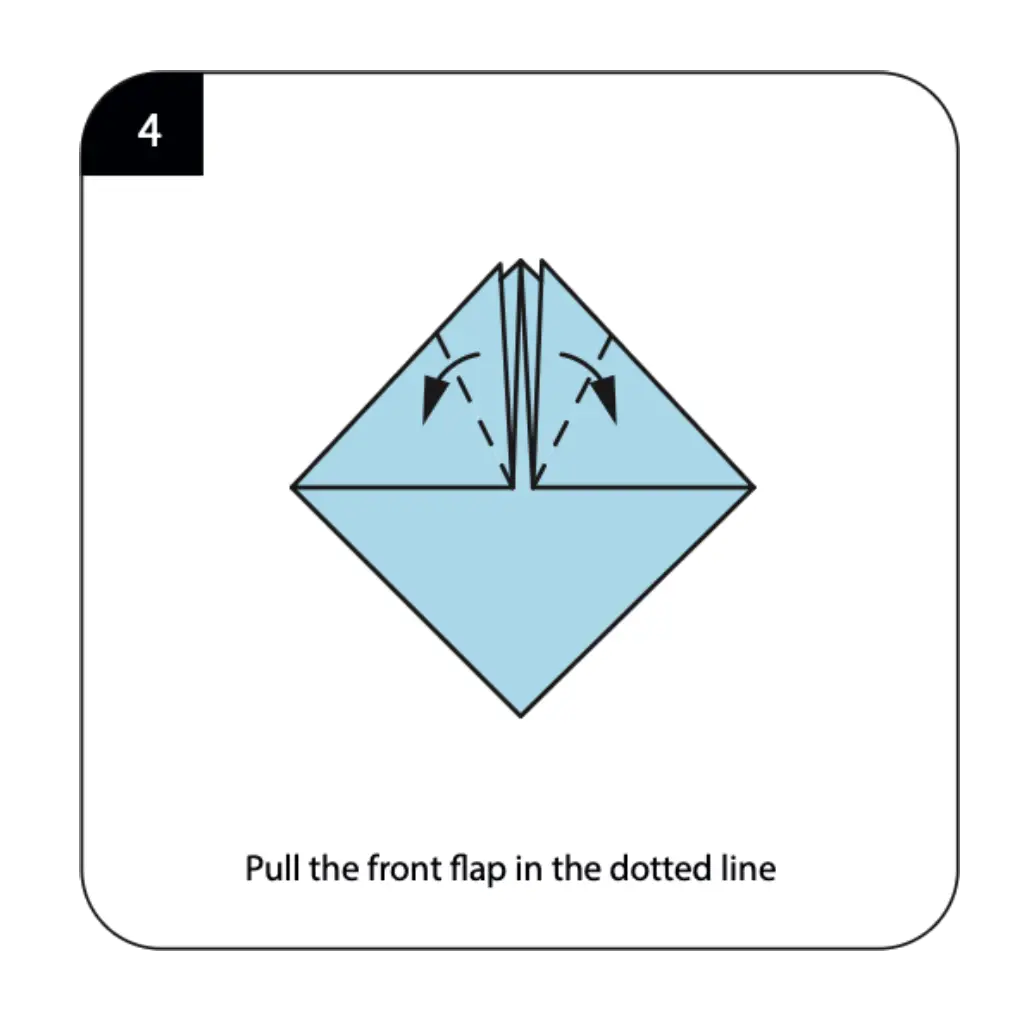
Pull the front flap along the dotted line, folding it upward to begin forming the helmet’s face guard. This fold creates depth in your helmet and starts to transform the flat triangle into a three-dimensional structure. The angle of this fold determines how open the helmet will be, affecting both appearance and wearability. Careful manipulation here ensures your helmet will fit comfortably if worn.
Step 5: Create the Bottom Layer For Origami Samurai Helmet
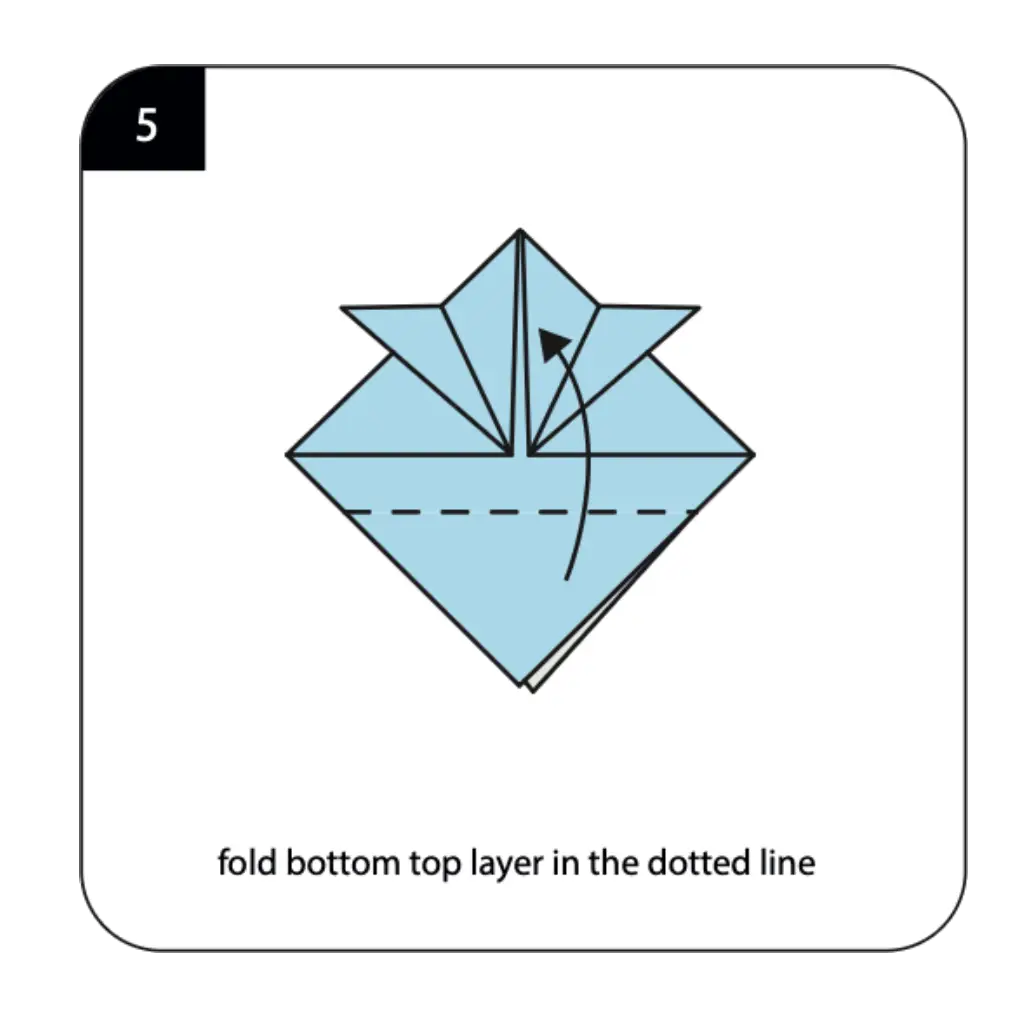
Fold the bottom top layer along the dotted line, which helps secure the helmet’s structure and creates the lower edge. This fold locks previous layers in place and adds stability to the overall design. The placement of this fold affects the helmet’s proportions and how it sits when worn or displayed. This layering technique is commonly used in functional creative origami designs.
Step 6: Form the Triangular Base For Origami Samurai Helmet
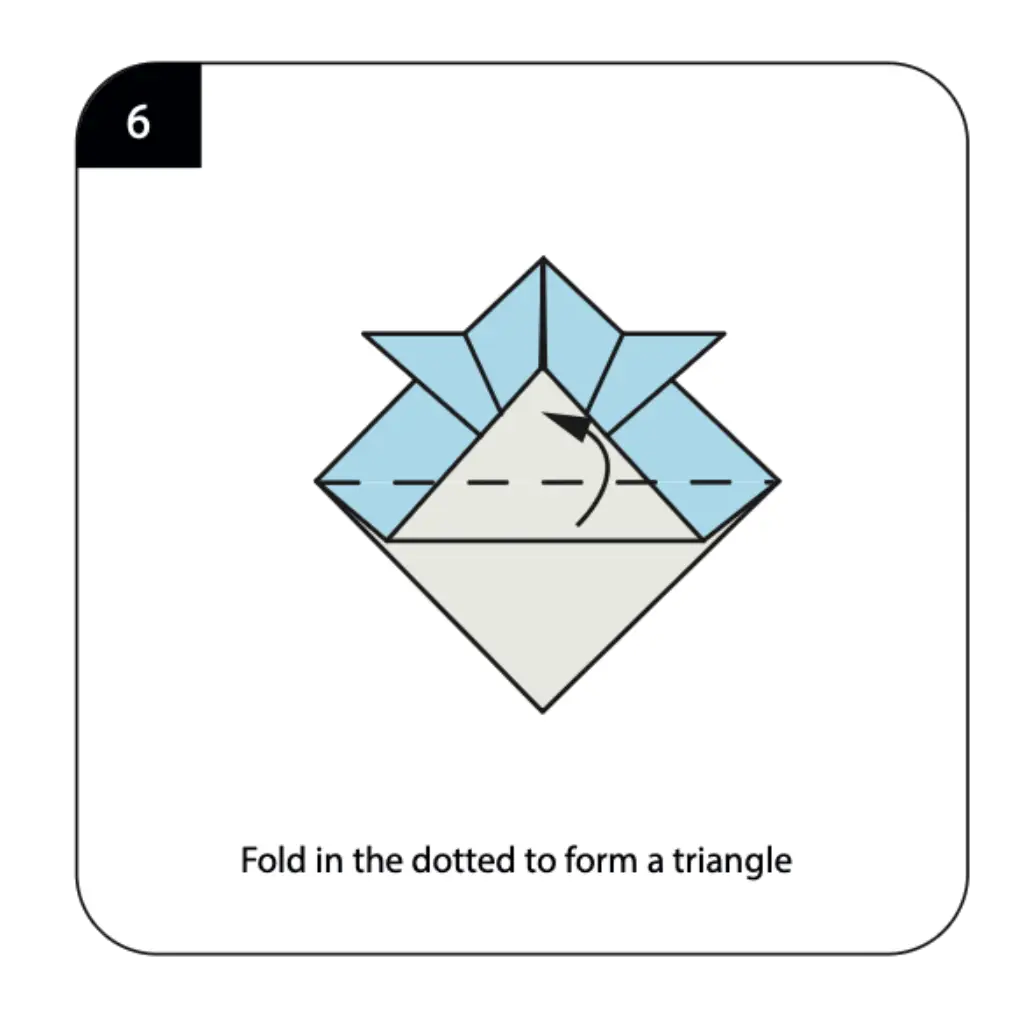
Fold along the dotted lines to form a triangle at the bottom of your helmet, creating the chin guard area. This triangular section provides structural support and gives the helmet its authentic appearance. The precise folding here ensures the helmet maintains its shape whether being worn or displayed. This base triangle is essential for the helmet’s stability and traditional aesthetic.
Step 7: Add Dimensional Layers
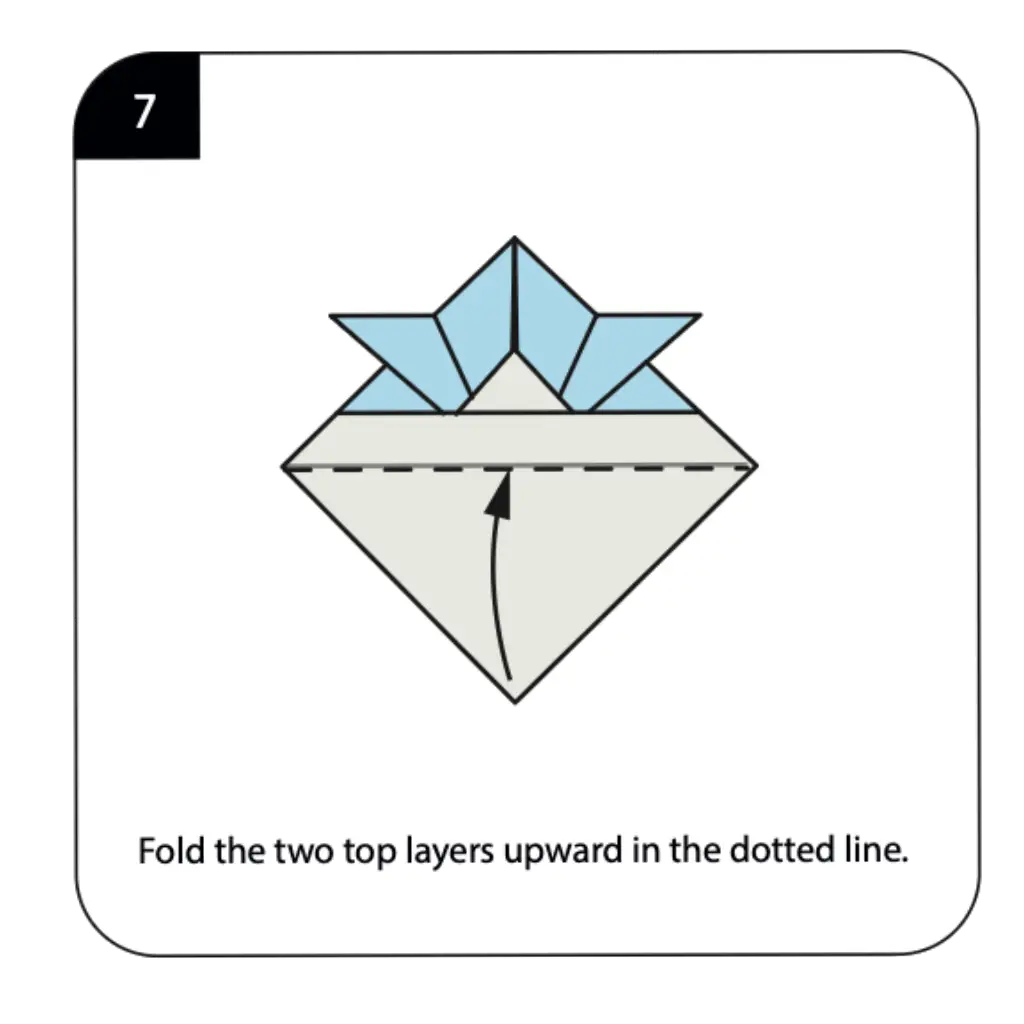
Fold the two top layers upward along the dotted lines to add dimension and detail to your samurai helmet. These upward folds create the layered appearance characteristic of real kabuto armor plates. Each layer should be folded crisply to maintain the helmet’s sharp, warrior-like appearance. The multiple layers give your origami creation the complex look of authentic samurai armor.
Step 8: Open and Complete
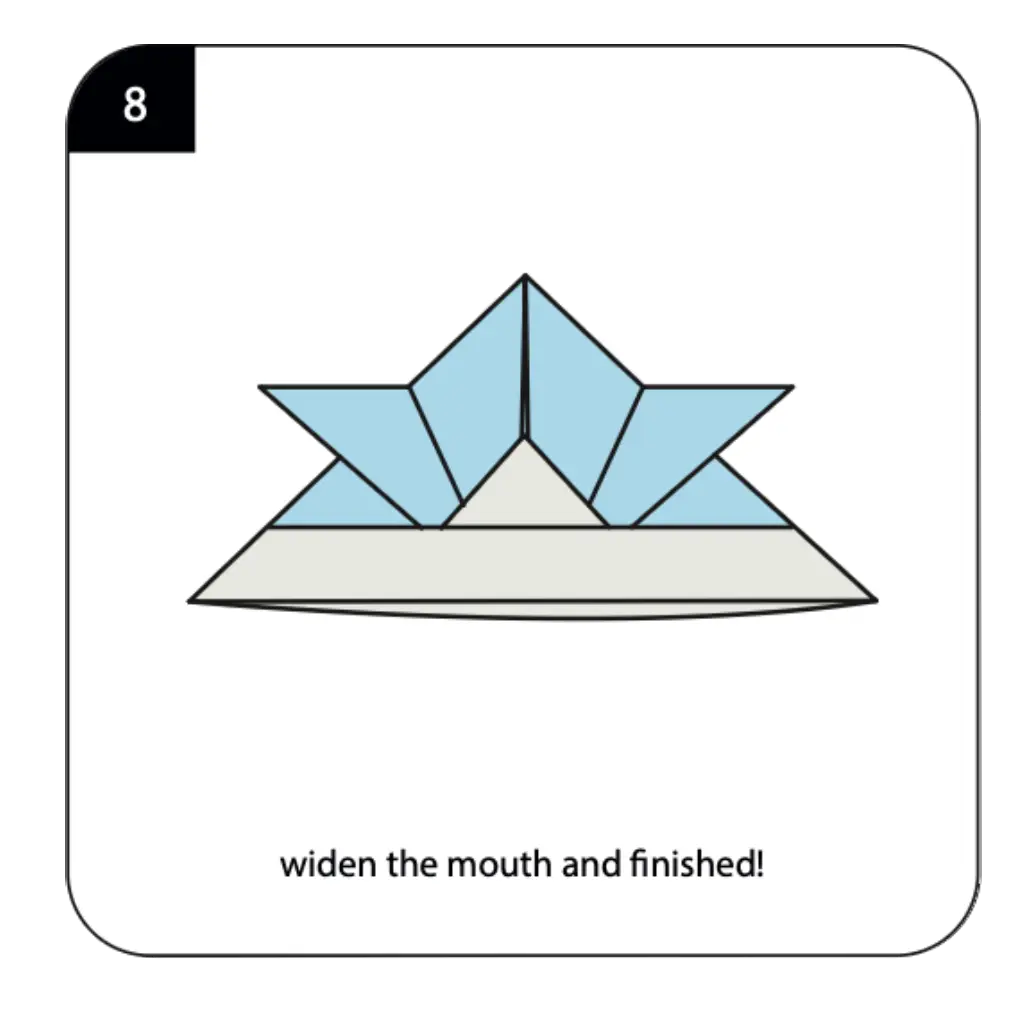
Widen the mouth of the helmet by gently pulling apart the sides, allowing it to open into its final three-dimensional form. This opening action transforms your flat folds into a wearable or displayable helmet with proper depth. Adjust the opening to ensure the helmet sits properly and maintains its distinctive samurai shape. Your finished origami samurai helmet is now ready for play, display, or as part of a cultural celebration.
Conclusion: Congratulations on creating your own origami samurai helmet, a timeless symbol of Japanese warrior culture! This traditional design makes an excellent craft for Children’s Day, cultural studies, or imaginative play. Try making helmets in different sizes and colors to create a whole samurai display. With practice, you’ll master this classic fold and share the rich tradition of Japanese paper folding with others.
