
Introduction:
Welcome to the fascinating world of origami fish! This traditional Japanese paper art transforms a simple square sheet into a beautiful swimming creature through a series of strategic folds. Whether you’re a beginner or experienced folder, our comprehensive step-by-step guide makes creating origami fish accessible and enjoyable. Origami fish designs are among the most popular paper creations, perfect for underwater-themed decorations, educational activities, or mindful crafting. With the right techniques and a bit of practice, you’ll soon be folding impressive fish that appear to swim right off the paper. Follow along as we explore each fold in detail, creating a beautiful origami fish that showcases your newfound paper folding skills.
Detailed Step Descriptions:
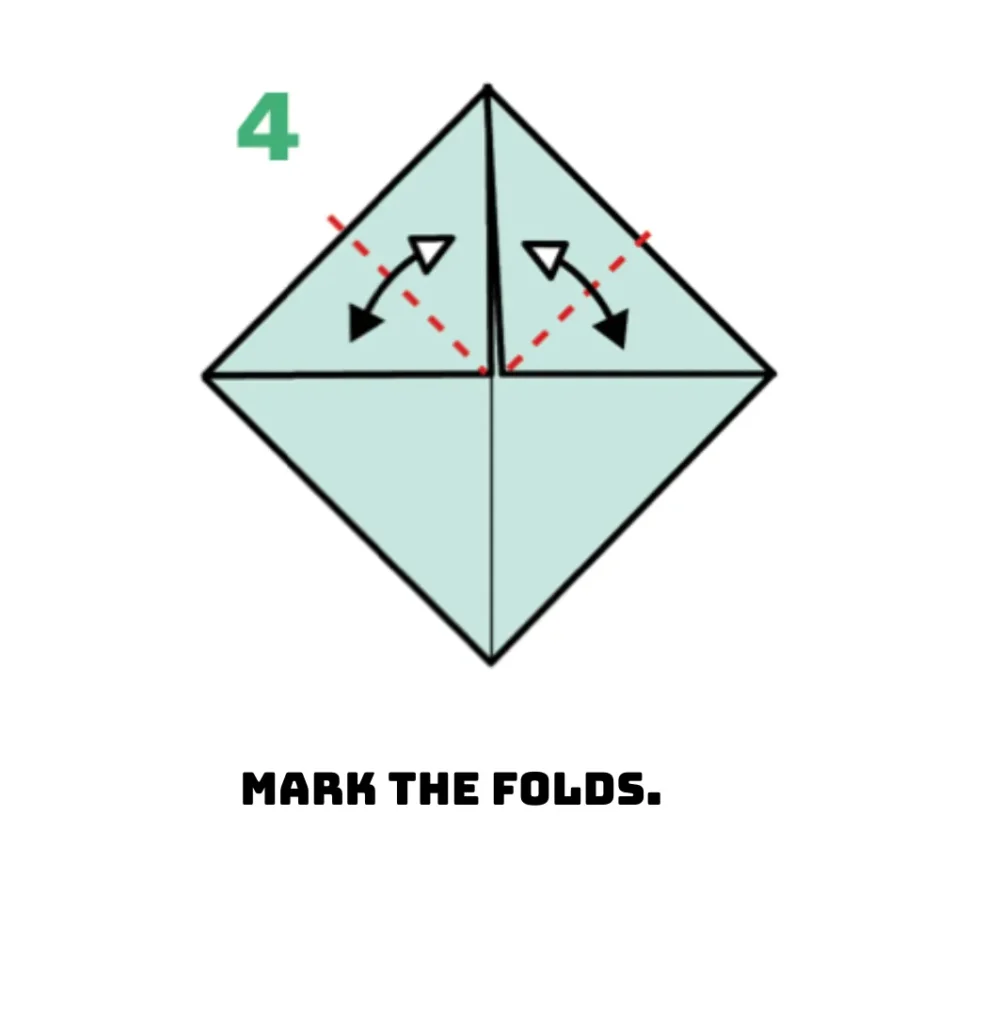
STEP 4: MARKING THE DIAGONAL CREASES
Begin your origami fish by creating precise diagonal creases across your paper square. These fundamental folds establish the geometric foundation that will form your fish’s body shape. Quality origami fish designs rely on clean, sharp creases at this stage for optimal final results. Take your time with these initial folds, as they directly influence your finished fish’s symmetry.
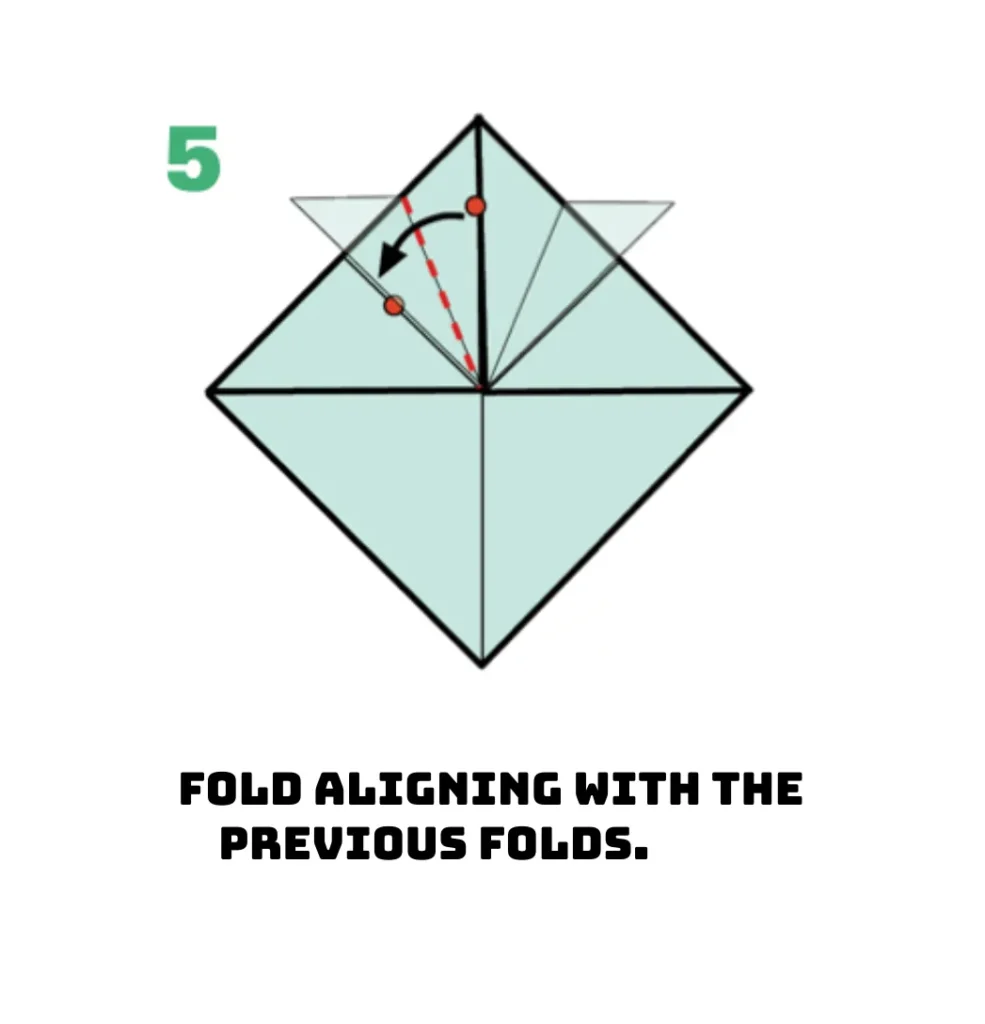
STEP 5: ALIGNING WITH PREVIOUS CREASES
Create new folds by carefully aligning your paper with the creases established in step four. This precise alignment is essential in origami fish techniques for creating proper proportions. Japanese origami masters emphasize this step for achieving geometric harmony in aquatic designs. Press firmly along each fold line to create crisp creases that will hold their shape throughout the process.
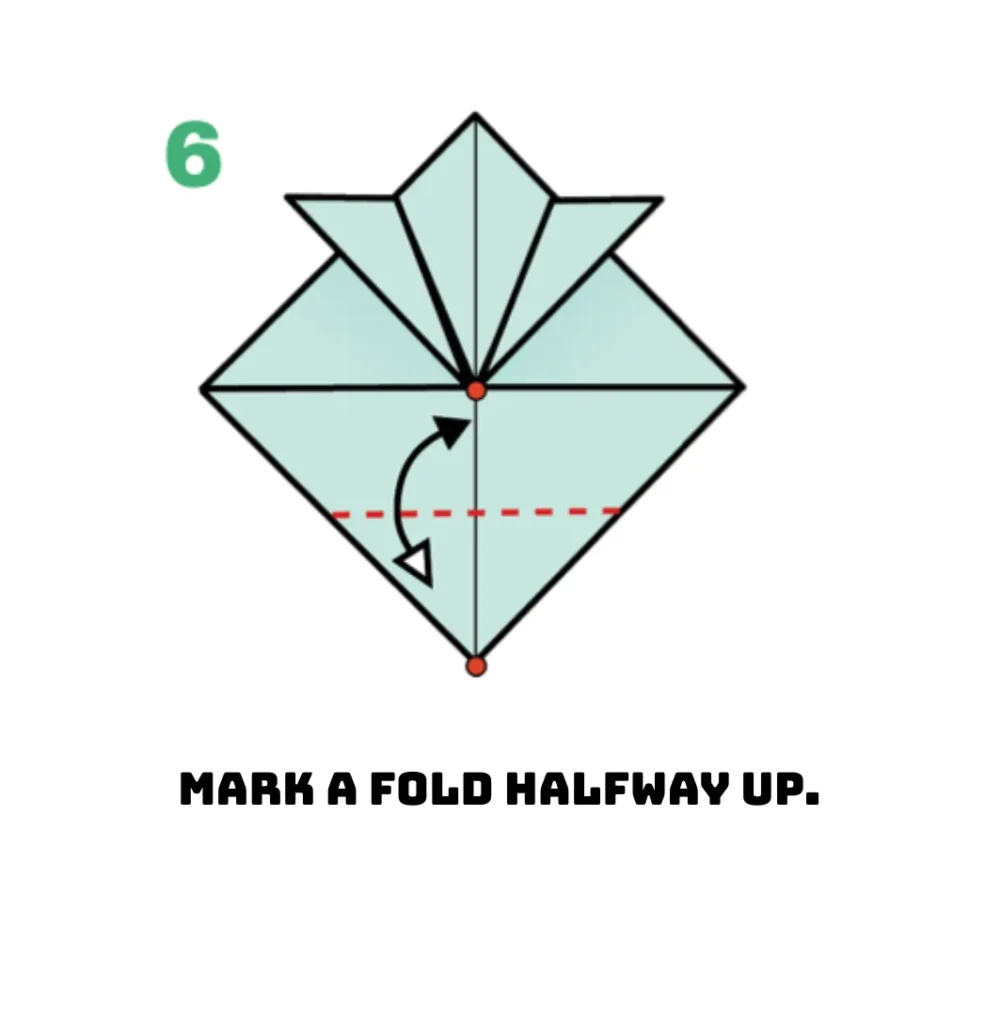
STEP 6: CREATING THE MID-HEIGHT MARKING
Mark a critical fold at the midpoint, which will help define your fish’s distinctive body profile. This strategic crease establishes where your origami simple fish’s fins and tail will eventually form. Traditional origami fish patterns rely on this precise positioning for creating lifelike movement. Use your fingernail to create a sharp, defined crease that will guide subsequent folding steps.
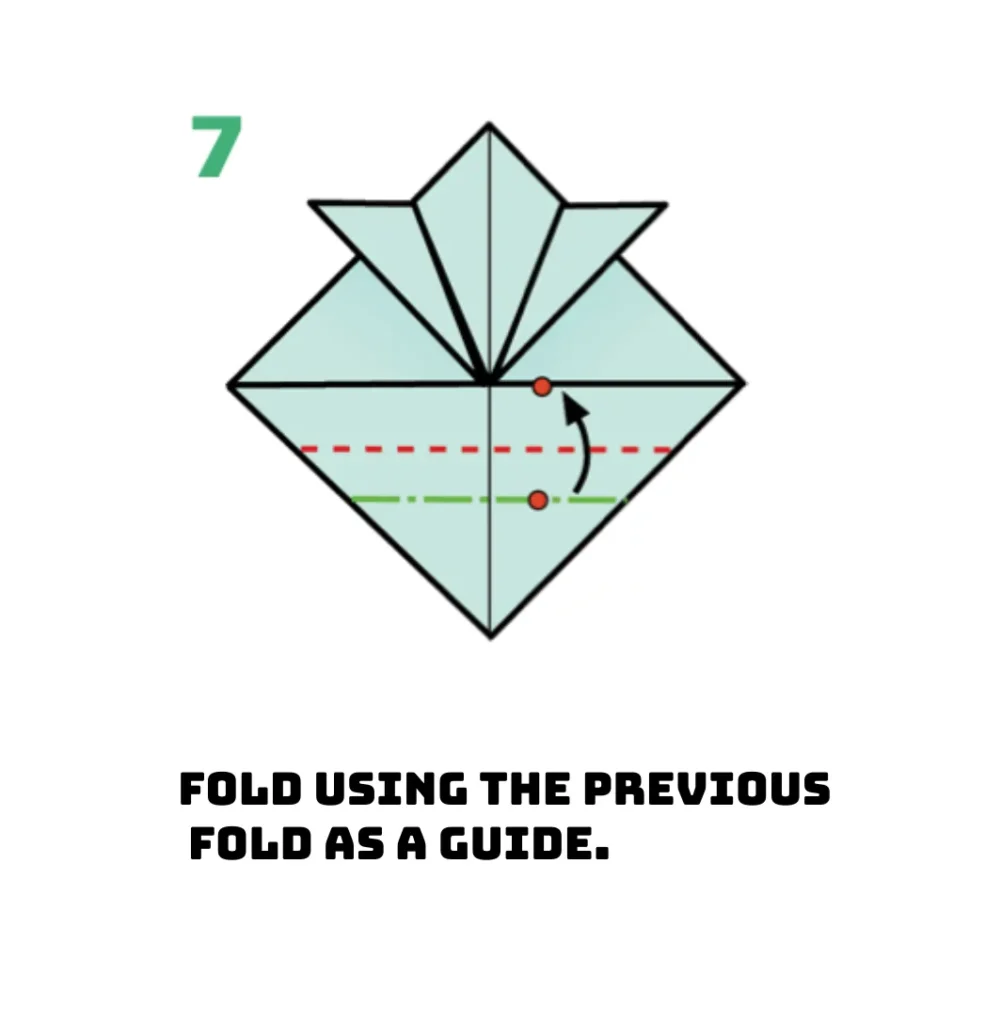
STEP 7: ESTABLISHING SUPPORTING FOLDS
Build upon previous creases with supportive folds that add structure to your developing fish. These valley folds create the dimensional framework that gives your origami fish its swimming position. Popular origami simple fish tutorials emphasize the importance of these supporting folds for realistic results. Maintain consistent pressure along the entire fold line for clean, professional-looking creases.
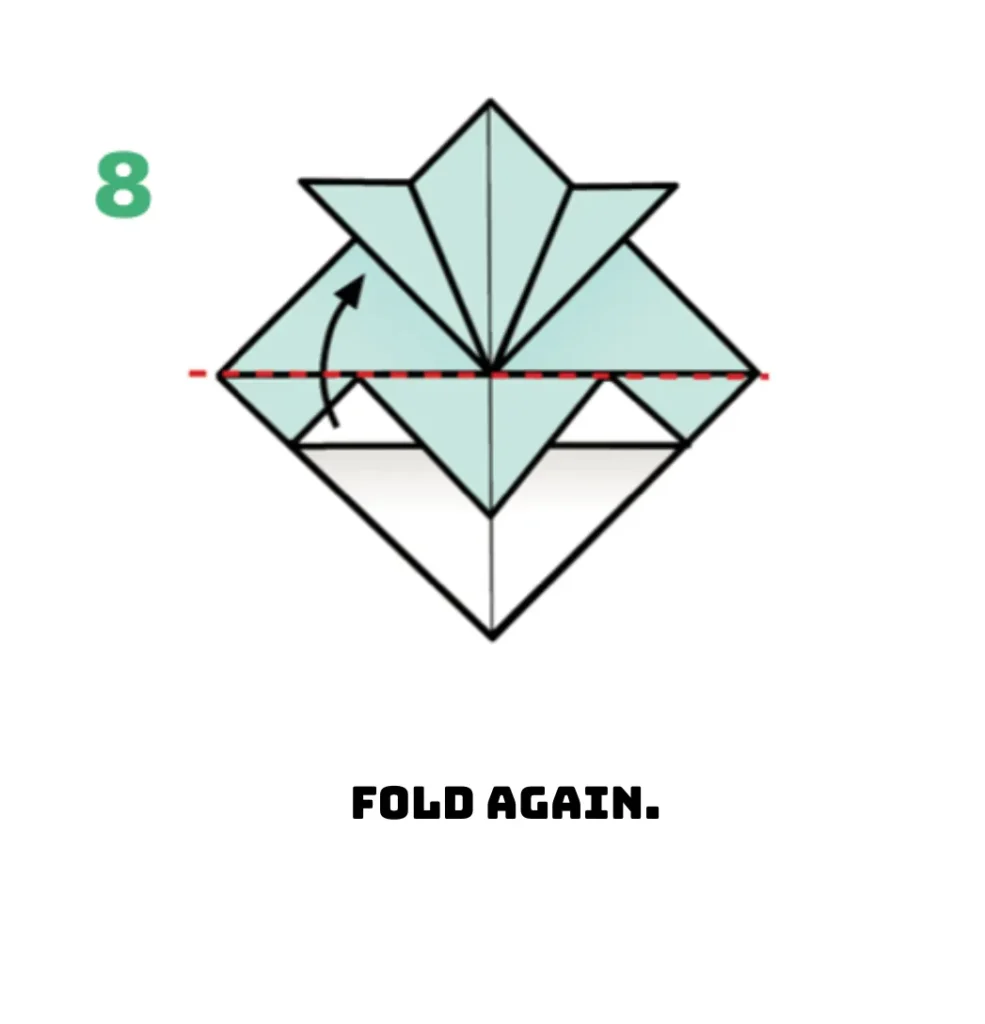
STEP 8: REINFORCING THE FOLD PATTERN
Create another set of folds to strengthen the emerging fish structure and define its features. This repetition builds the complex three-dimensional aspects that make your origami fish come alive. Each successive fold brings your paper closer to the iconic fish shape beloved in Japanese origami. Patience during these repeated folds significantly enhances the definition of your fish’s tail and fins.
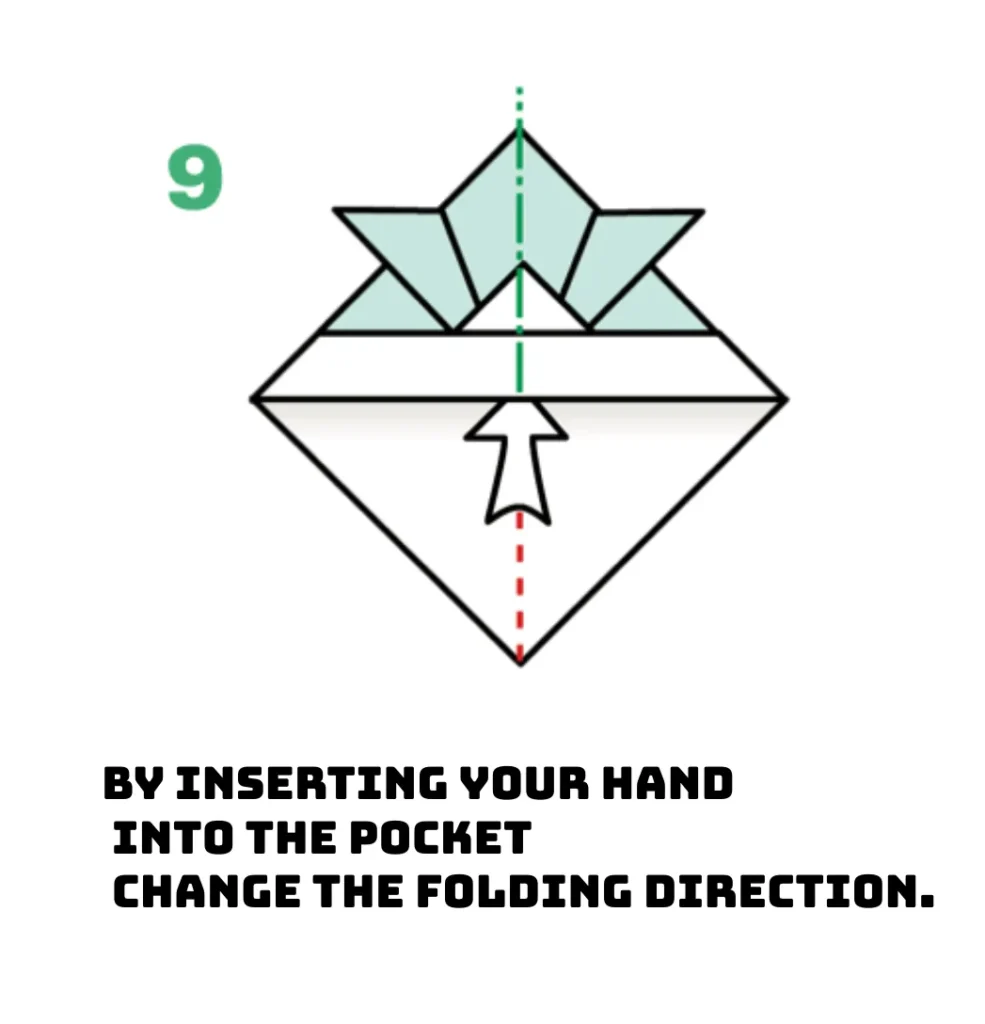
STEP 9: CHANGING FOLDING DIRECTION
Insert your hand into the pocket and reverse the fold direction, a pivotal moment in fish creation. This inside reverse fold technique is fundamental to creating dynamic movement in origami fish designs. Experienced folders consider this directional shift essential for transforming flat paper into lifelike fish. Carefully maintain previously established creases while introducing this new dimensional element.
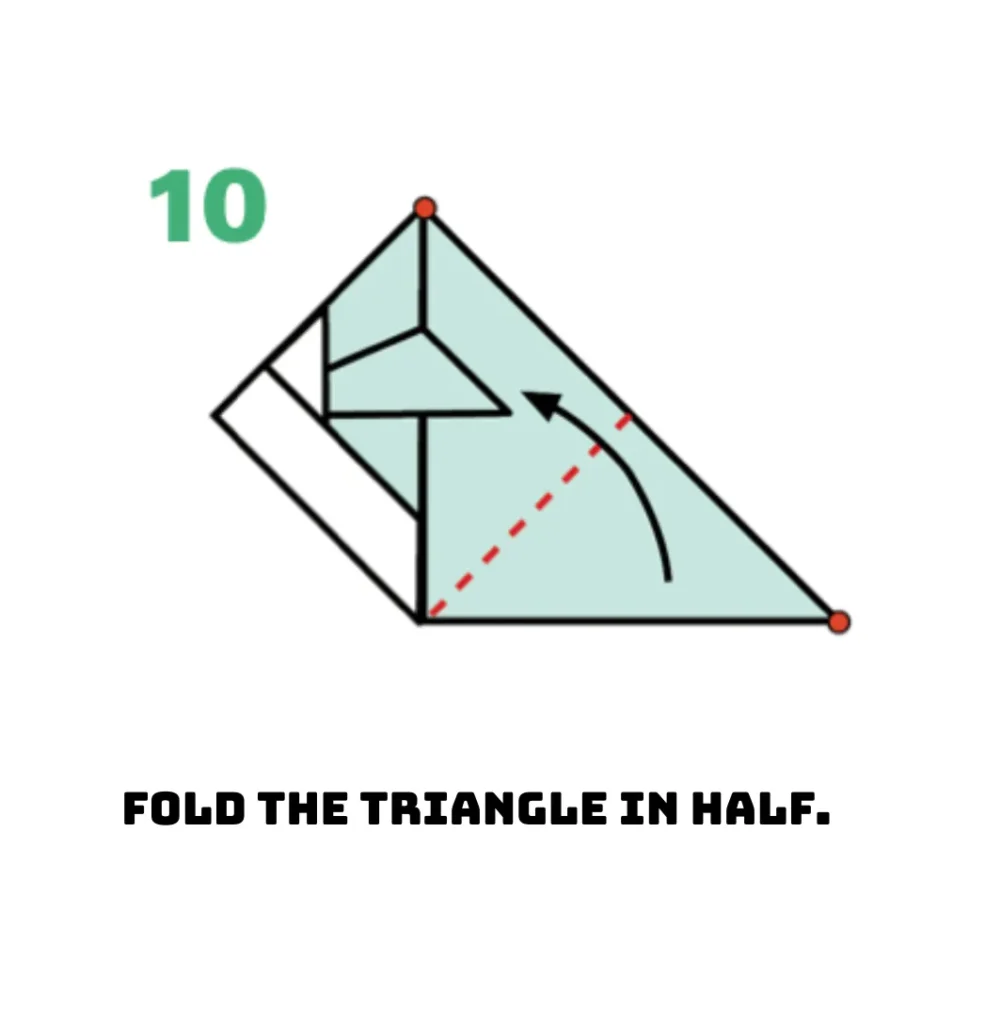
STEP 10: FOLDING THE TRIANGLE SECTION
Fold the triangular section in half to create definition for your origami simple fish’s tail structure. This precise fold ensures your fish will have a symmetrical, naturally proportioned tail fin. Classic origami fish patterns emphasize the importance of this step for realistic swimming posture. Apply even, gentle pressure to create a sharp crease without damaging the integrity of your paper.
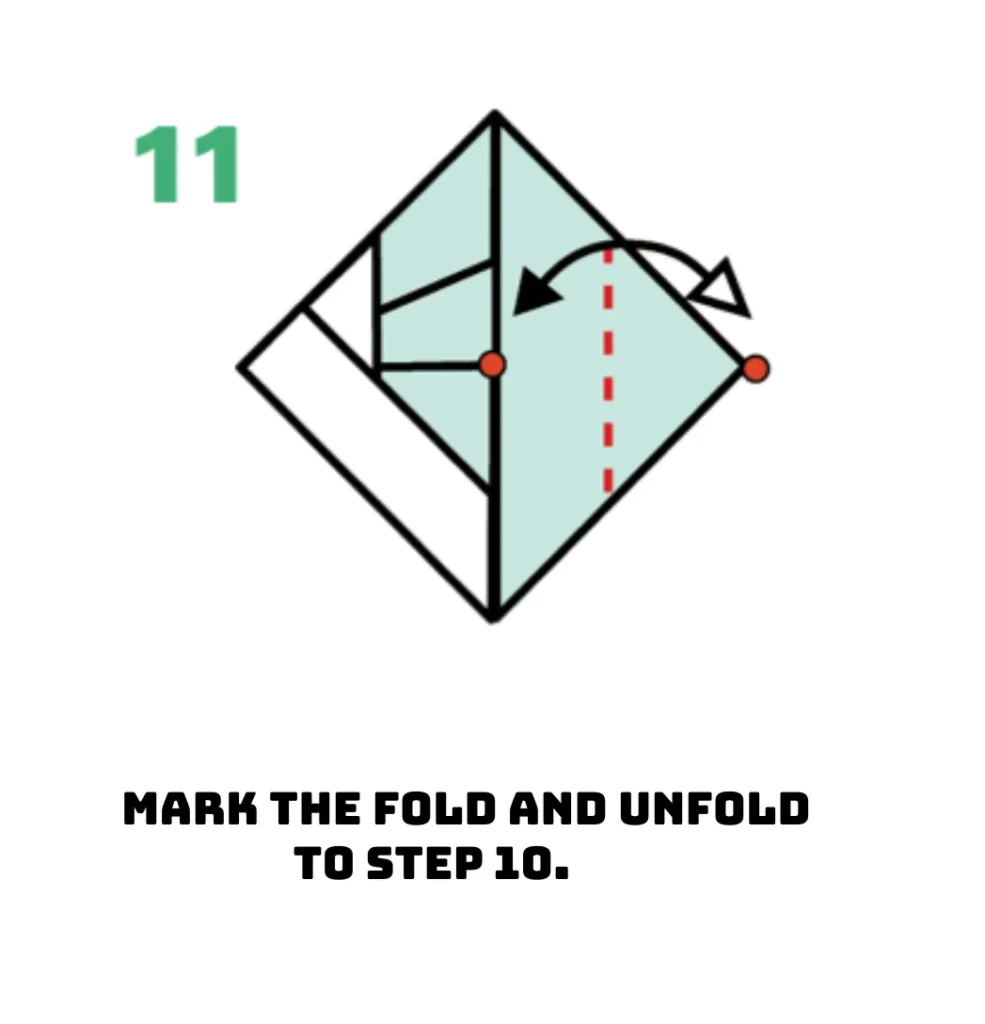
STEP 11: MARKING AND UNFOLDING REFERENCE POINTS
Create a clear crease mark before carefully unfolding back to the previous position. This temporary reference fold guides the subsequent complex steps in your origami fish creation. Expert origami artists use this technique to ensure precise geometric patterns in fish designs. The accuracy of this marking significantly impacts your finished fish’s symmetry and proportions.
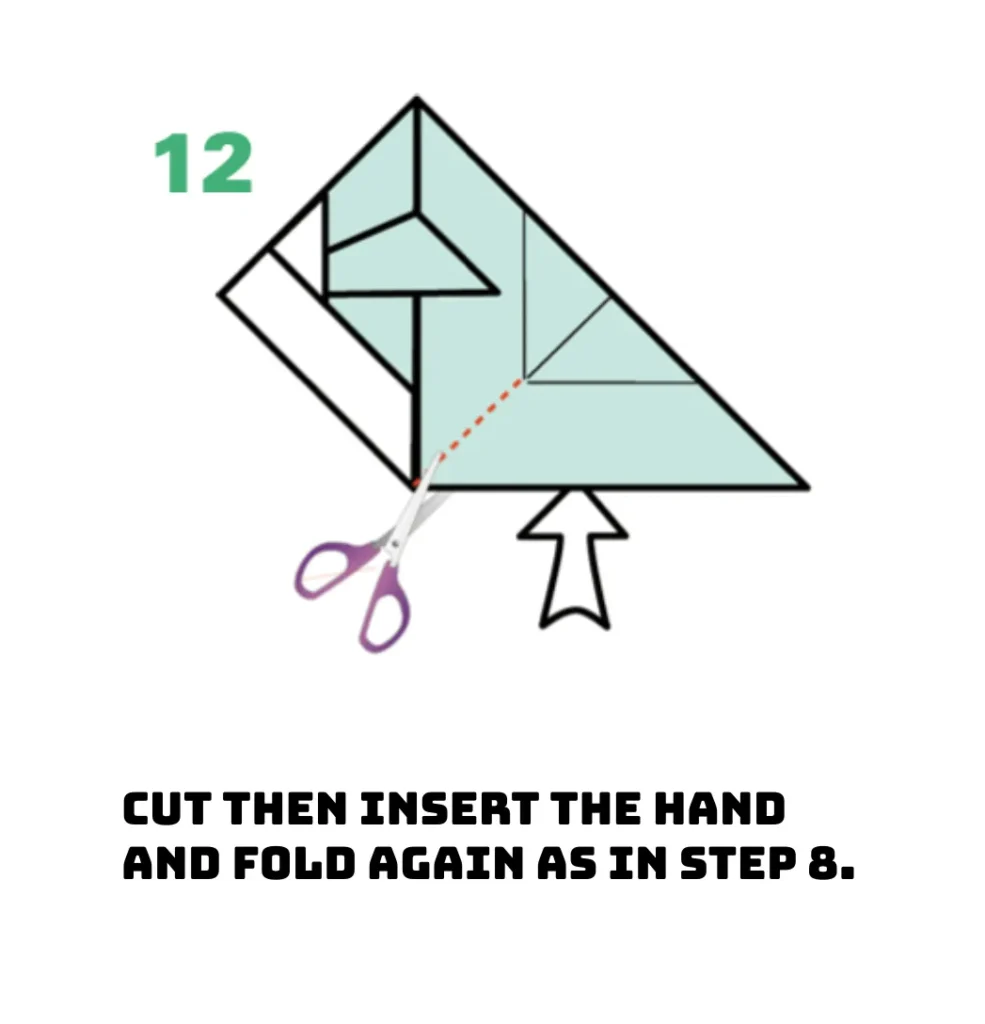
STEP 12: CUTTING AND RESHAPING
Carefully cut along the indicated line, then reinsert your hand to recreate the pocket fold structure. While traditional origami simple fish typically use only folds, this strategic cut creates more realistic fins. Use sharp scissors for a clean cut that enhances rather than detracts from your paper fish design. After cutting, carefully refold the paper following the established pattern from step eight.
Explore our complete origami fish collection →Discover various origami simple fish species including koi, goldfish, and tropical designs with step-by-step tutorials.
Essential origami folding techniques →Master the fundamental folds used in this fish tutorial, including the crucial inside reverse fold.
Best paper for origami fish projects →Learn which papers create the most beautiful and durable origami fish with our comprehensive guide.
Create an origami aquarium scene →Combine your origami simple fish with paper seaweed, coral, and other underwater elements to create a complete display.
Colorful origami fish variations →Discover how different paper colors and patterns can transform your origami simple fish into various species.
Conclusion:
Congratulations on creating your beautiful origami fish! You’ve mastered essential Japanese paper folding techniques while crafting an elegant aquatic design. This origami fish showcases the perfect balance of simplicity and sophistication that makes paper folding so captivating. Your finished creation can be displayed as a standalone piece, incorporated into underwater dioramas, or strung together with others to create a stunning mobile. The skills you’ve learned—precise creasing, geometric alignment, and three-dimensional shaping—build a solid foundation for exploring more complex origami fish designs and other paper creatures. We hope this tutorial has sparked your creativity and inspired you to continue your origami journey! Share your paper fish creations with our community and discover more exciting folding projects.
