
Introduction:
Welcome to our delightful origami fox tutorial! This charming paper project brings the clever woodland creature to life through simple folding techniques that capture the fox’s distinctive pointed ears and cute face. Perfect for beginners, children, and animal enthusiasts alike, this origami fox design is both accessible and visually appealing. What makes this fox model special is its expressive face and characteristic triangular ears that are instantly recognizable as belonging to this beloved forest animal. The warm orange paper shown creates the perfect fox coloration, though brown or red paper would also work beautifully to represent different fox species. Whether you’re creating woodland-themed decorations, teaching children about forest animals, or simply enjoying a relaxing crafting session, this origami fox offers both simplicity and charm. In just eight straightforward steps, you’ll transform a square piece of paper into an adorable fox face that will delight crafters of all ages. Let’s begin folding our way to a cute paper fox that captures the essence of this clever woodland creature!
Detailed Step Descriptions:
STEP 1: CREATING THE INITIAL FOLD FOR ORIGAMI FOX

Begin your origami fox by folding the square paper in half along the dotted line, then unfolding to create a central crease. This foundational fold establishes the vertical axis that will help define the symmetry of your fox’s face. Simple origami animals for beginners always start with these basic reference lines for proper structure. After unfolding, the visible crease serves as an essential guideline that will direct all subsequent folding steps.
STEP 2: ESTABLISHING THE HORIZONTAL CREASE FOR ORIGAMI FOX
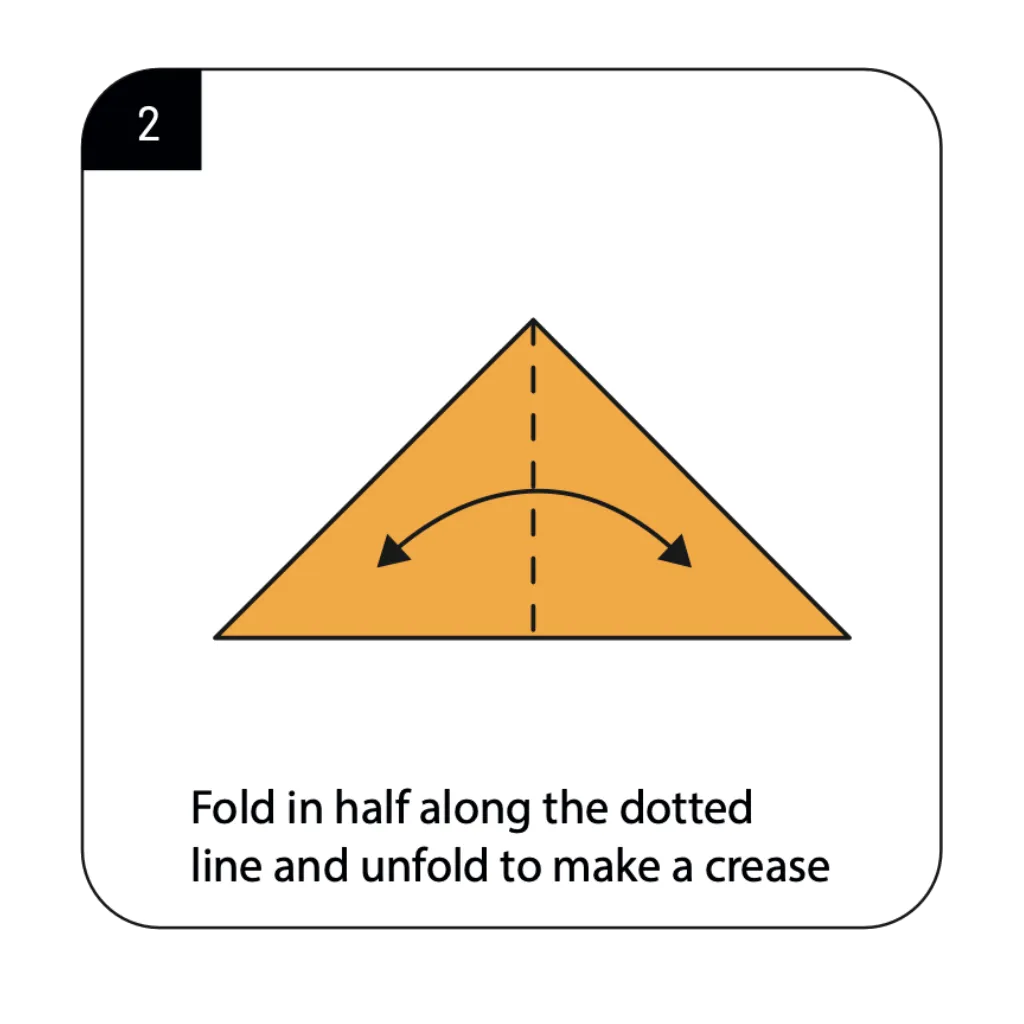
Fold the paper in half horizontally along the dotted line and unfold again to create a second reference crease. This perpendicular fold intersects with the first crease to create a cross pattern that guides the fox’s proportions. Woodland animal origami designs rely on these preliminary creases to establish balanced facial features. The combination of vertical and horizontal creases creates a folding map that ensures your fox will have proper symmetry.
STEP 3: FORMING DIAGONAL CREASES FOR ORIGAMI FOX
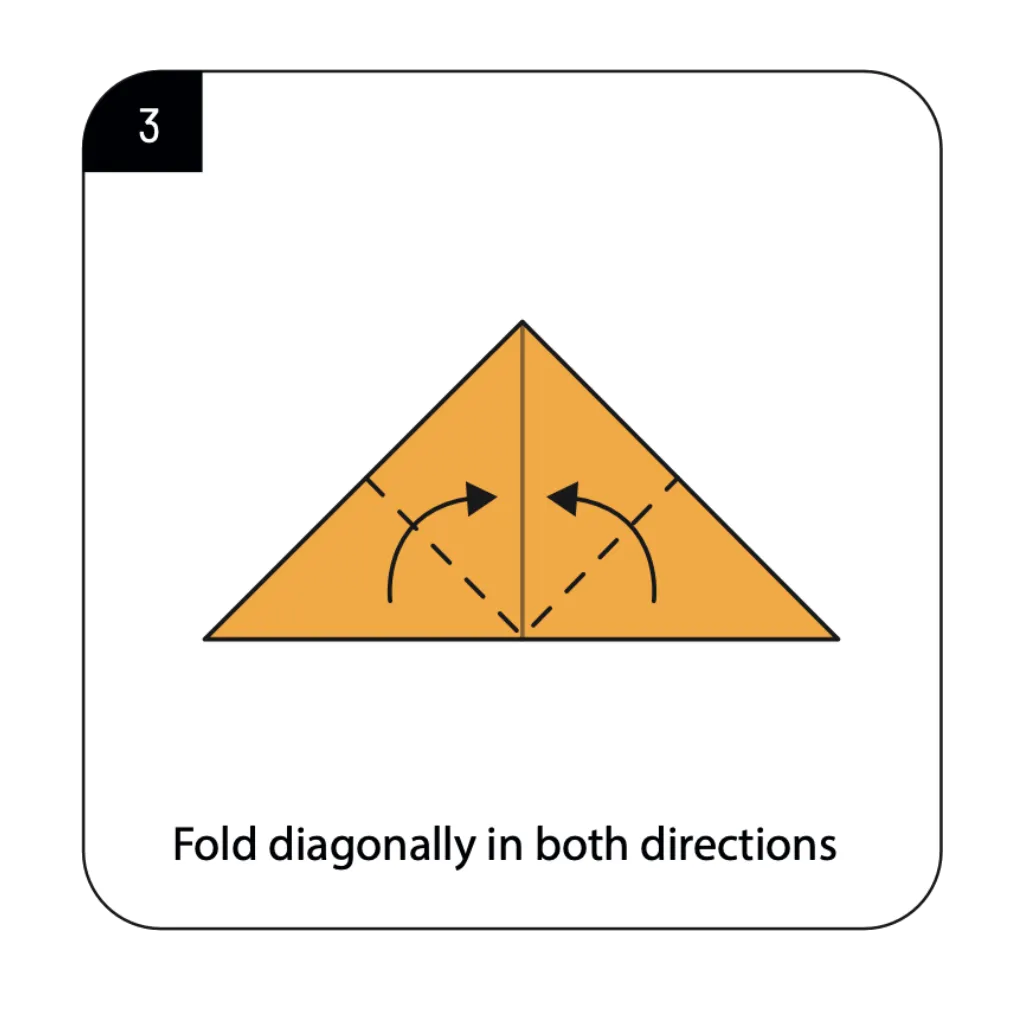
Fold the paper diagonally in both directions as shown by the arrows to create an X-shaped crease pattern. These diagonal folds establish the geometric framework needed for your fox’s triangular face and pointed ears. Fox origami tutorials emphasize these intersecting creases for achieving the characteristic vulpine features. After making firm creases and unfolding, your paper should display a comprehensive grid of reference lines.
STEP 4: FOLDING BACKWARD
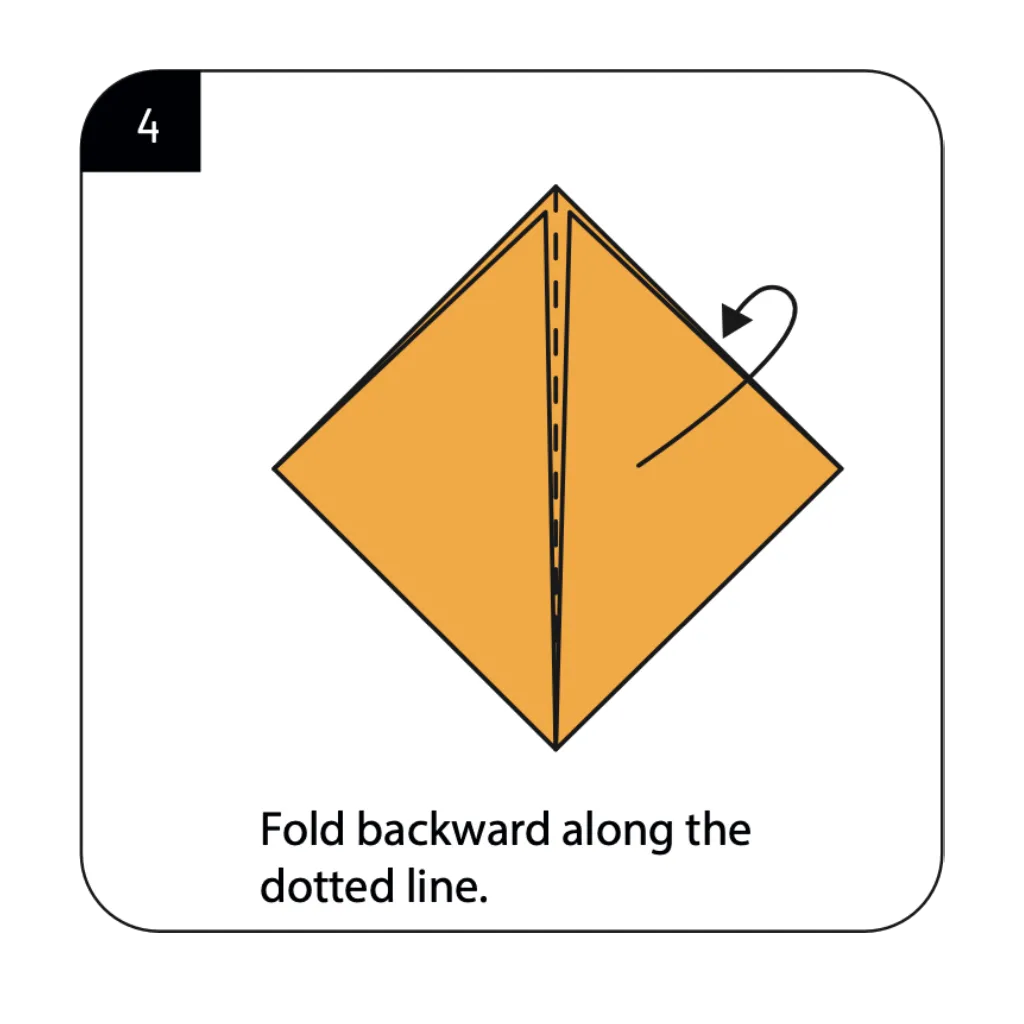
Fold the paper backward along the dotted vertical line to begin forming the three-dimensional structure. This strategic fold initiates the transformation from flat paper to the more complex fox face shape. Paper fox crafts often utilize this backward fold to create the central division that will become the face. The precision of this fold directly influences how balanced and symmetrical your finished fox will appear.
STEP 5: ROTATING THE MODEL
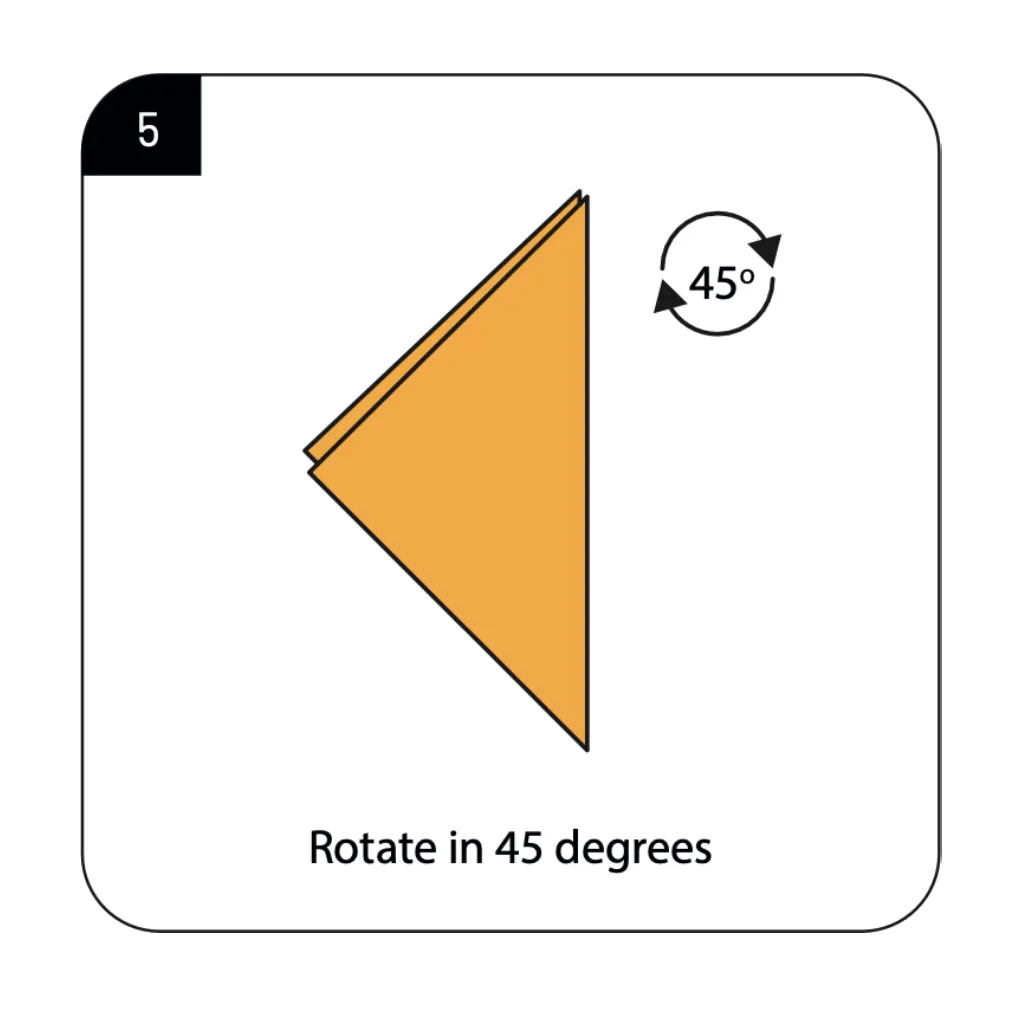
Rotate the entire model 45 degrees to reorient it for the ear-forming steps that follow. This pivotal rotation positions the paper at the optimal angle for creating the fox’s distinctive pointed ears. Animal origami patterns frequently include these reorientations to facilitate accessing critical folding areas. The diagonal positioning prepares your model for the defining features that make foxes so recognizable.
STEP 6: OPENING AND FLATTENING
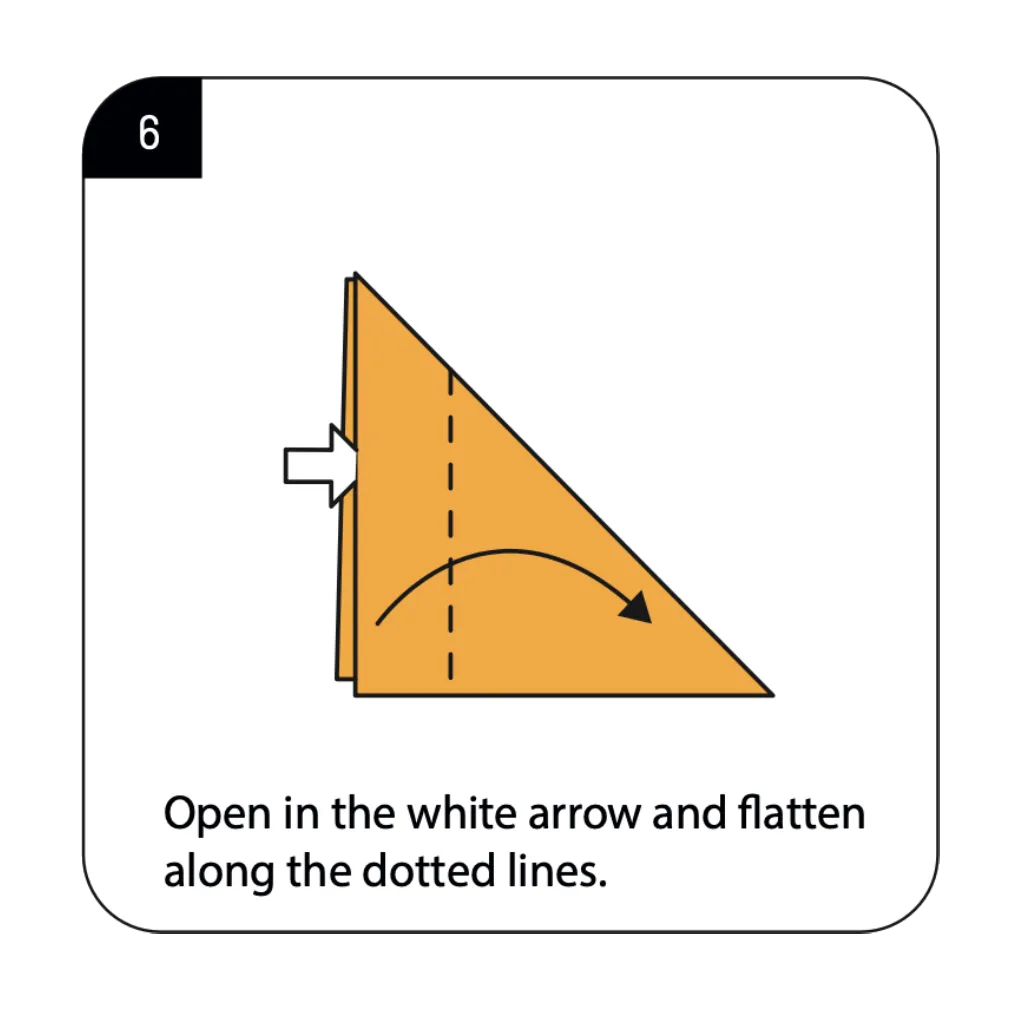
Open the model at the white arrow and flatten along the dotted lines to begin forming the fox’s facial structure. This transformative step converts previously made creases into the three-dimensional elements of your fox’s face. Cute animal origami designs rely on these opening techniques to create expressive facial features. The careful flattening creates the planes and angles that will define your fox’s characteristic triangular face.
STEP 7: CREATING THE EARS AND FACE

Fold along the dotted line to establish the fox’s distinctive pointed ears and facial structure. This crucial fold transforms the geometric shape into a recognizable fox face with its characteristic pointed top. Woodland creature origami tutorials highlight this step as essential for capturing species-specific features. The precision of these folds determines how clearly your paper creation will resemble a fox’s distinctive silhouette.
STEP 8: COMPLETING YOUR ORIGAMI FOX
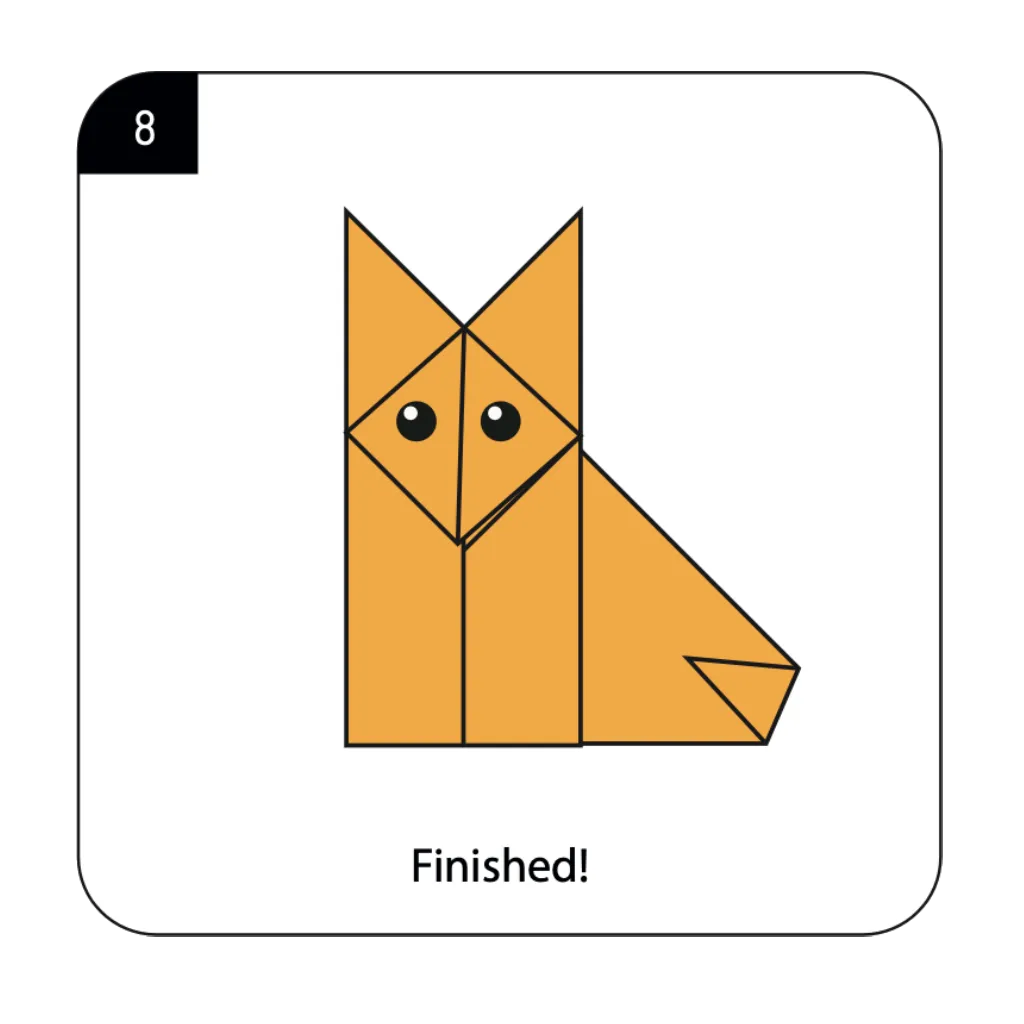
Finish your fox by adding simple eye details and making any final adjustments to perfect the shape. The completed model displays the characteristic features that make foxes immediately recognizable: pointed ears and triangular face. Easy origami animals like this fox combine simplicity with recognizable features perfect for beginners and children. Your finished origami fox now showcases all the charm and character of this beloved woodland creature.
Conclusion:
Congratulations on creating your adorable origami fox! Through eight carefully designed steps, you’ve transformed a simple square of paper into a charming representation of one of nature’s most clever and beautiful creatures. Your completed fox showcases the distinctive features that make these woodland animals so recognizable—the pointed ears, triangular face, and expressive eyes. This paper creation serves multiple purposes: as a woodland-themed decoration, an educational craft for learning about forest animals, or simply as a cute desk companion. The techniques you’ve mastered—precise folding, strategic rotation, and three-dimensional shaping—provide valuable skills for exploring more complex origami animal designs. We encourage you to experiment with different paper colors to create various fox species: red for the classic red fox, gray for gray foxes, or white for arctic foxes. Whether displayed individually or as part of a woodland creature collection, these origami foxes bring a touch of forest charm to any setting. Happy folding, and enjoy your clever paper fox!
- Explore our woodland animals origami collection → Discover more forest creature designs including owls, bears, rabbits, and other charming woodland inhabitants.
- Easy origami animals for kids → Find simple animal folding projects perfect for children, with clear instructions and minimal steps.
- Origami techniques for animal faces → Master the folding methods used in this fox tutorial to create various expressive animal faces.
- Forest-themed origami crafts → Create a complete woodland scene with trees, animals, and other nature elements using paper folding.
- Seasonal origami projects → Find paper folding ideas perfect for autumn decorations, including foxes, acorns, leaves, and other fall themes.
