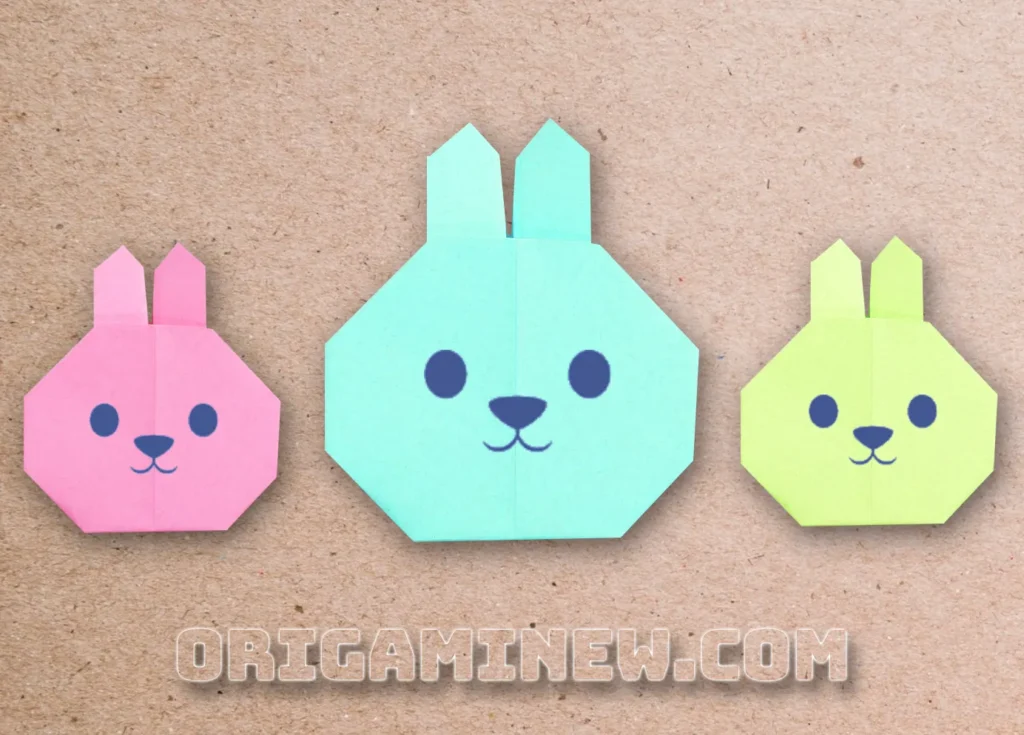

Paper folding enthusiasts and beginners alike can appreciate the charm of creating an origami rabbit face. This delightful paper creation captures the essence of a bunny’s sweet expression using just a single sheet of paper and some strategic folds. The origami rabbit face is perfect for Easter celebrations, spring decorations, or simply as a creative activity to enjoy during quiet moments.
In this comprehensive guide, I’ll walk you through creating an adorable origami rabbit face in 12 straightforward steps. Even if you’re new to the art of origami, this origami rabbit face tutorial is designed to be accessible while producing impressive results. Let’s dive into the wonderful world of paper folding and create an origami rabbit facethat will delight both children and adults!
Materials Needed for Your Origami Rabbit Face
Before we begin folding our origami rabbit face, gather these simple supplies:
- A square sheet of paper (origami paper works best, but any square paper will do)
- A flat, clean surface for folding
- A pen, marker, or googly eyes for the finishing touches
- Patience and attention to detail
Traditional origami paper with white on one side and a color on the reverse creates an interesting effect for your origami rabbit face. However, you can use any paper you have available—just ensure it’s cut into a perfect square before beginning your origami rabbit face project.
Step-by-Step Instructions for Creating Your Origami Rabbit Face
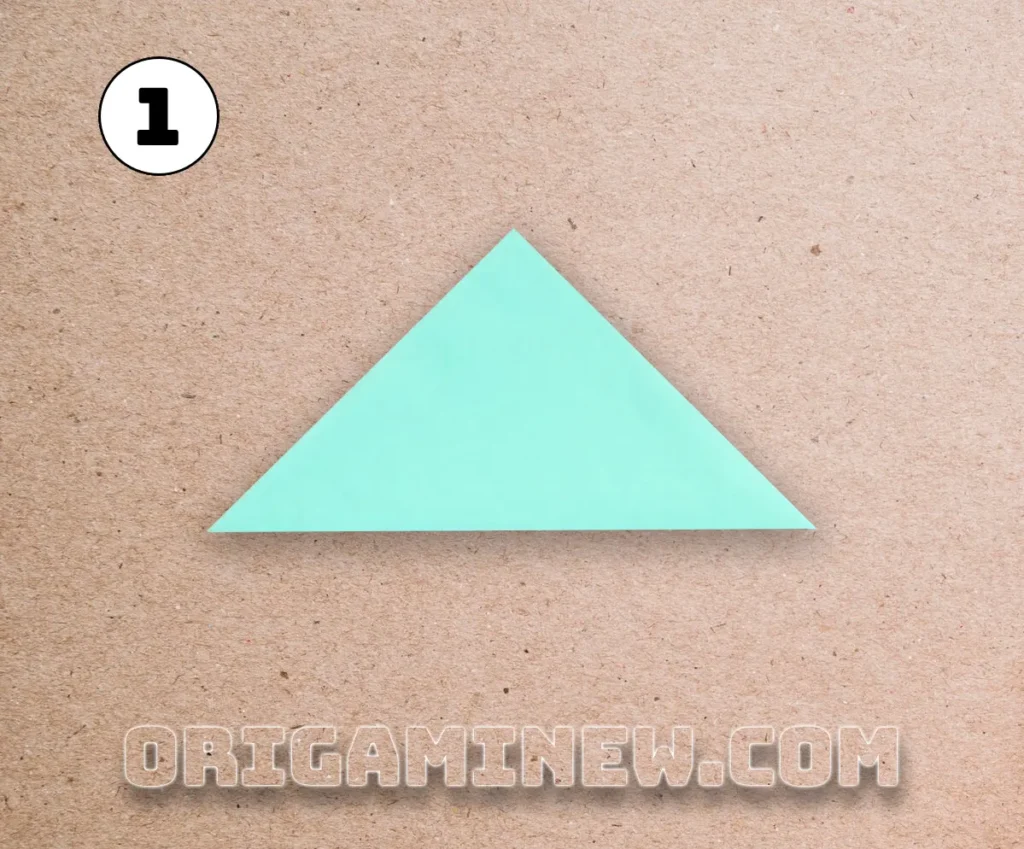
Step 1: Create the Foundation Triangle
Begin your origami rabbit face with the white side of your paper facing upward. Position the square as a diamond shape (with points facing up, down, left, and right). Take the bottom corner and fold it upward to meet the top corner, creating a triangle. Press firmly along the fold to create a sharp crease. This triangle forms the foundation of your origami rabbit face and establishes the initial structure from which all other folds will develop.
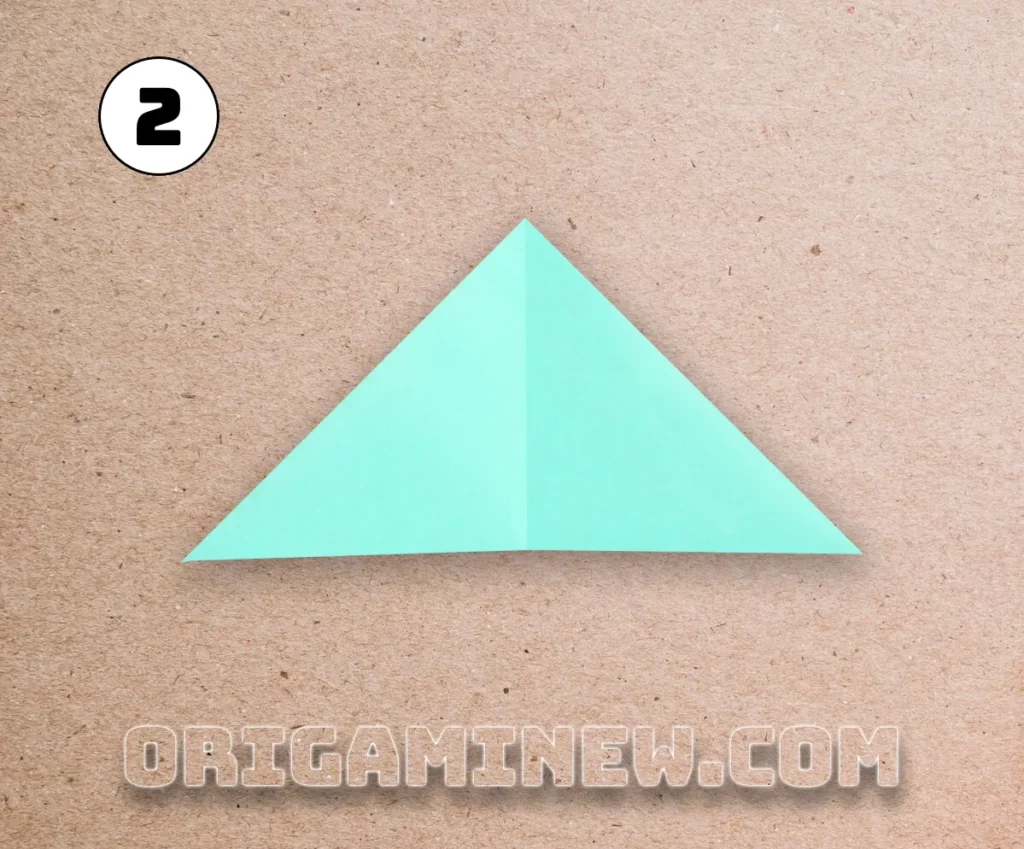
Step 2: Establish the Center Reference Line
For this critical origami rabbit face step, you’ll need to create a center reference line. Take the right point of your triangle and bring it over to meet the left point. Don’t actually fold the entire triangle in half—just create a crease in the center by folding it slightly and then unfolding. This center crease serves as an important reference line for subsequent folds in your origami rabbit face, ensuring symmetry and proper alignment throughout the process.
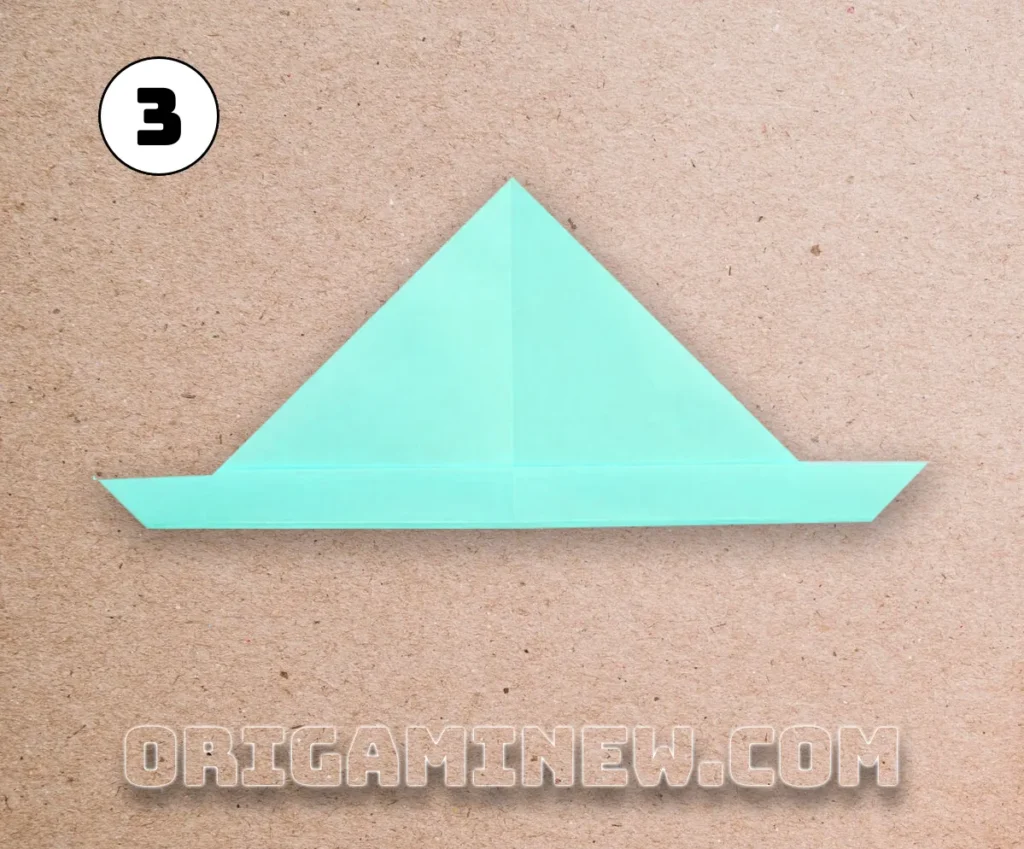
Step 3: Form the Base of the Face
Now we’ll begin shaping the base of your origami rabbit face. Take the bottom edge of your triangle (the long edge opposite the top point) and fold it upward just a small amount (approximately half an inch or 1 cm). This short fold creates the foundation for your origami rabbit face’s lower features and will eventually contribute to the rabbit’s chin and mouth area. The precise height of this fold will affect the proportions of your finished origami rabbit face, so adjust according to your preference.
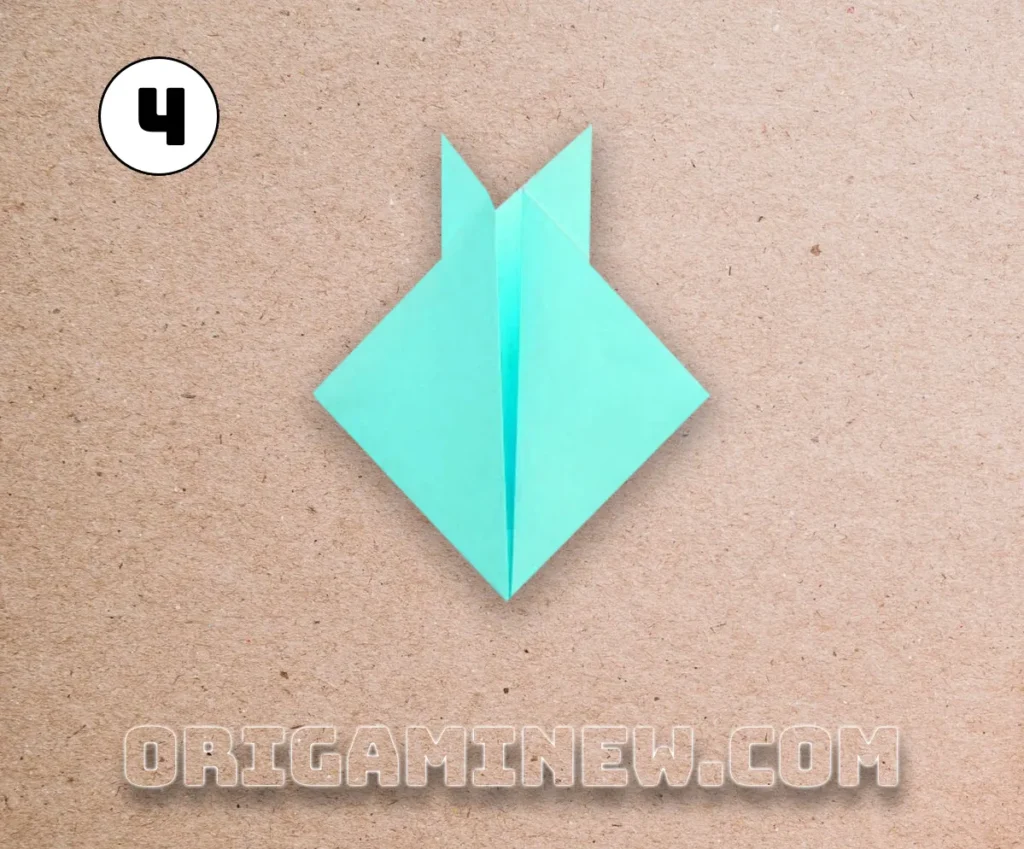
Step 4: Create the Initial Ear Shapes
This step begins the transformation into a recognizable origami rabbit face by forming the distinctive ears. Take the bottom right corner of your original triangle and fold it diagonally upward so it meets the top point. Then, repeat this fold with the bottom left corner, creating symmetrical diagonal folds on both sides. These folds will eventually form the base of your origami Easy rabbit face’s ears, giving your creation its characteristic bunny appearance. Ensure these folds are symmetrical for the most appealing origami Easy rabbit face.
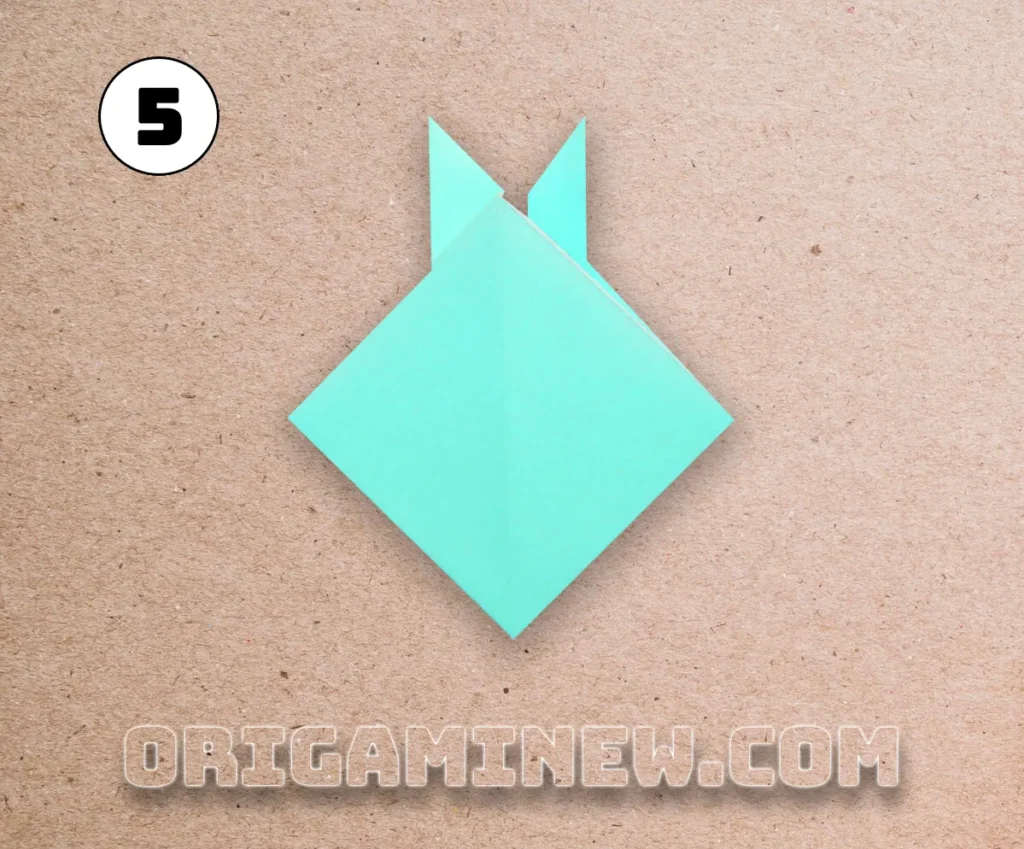
Step 5: Reveal the Inner Surface
For this step in creating your origami Easy rabbit face, simply flip the entire model over. You should now see the colored side of the paper (if you’re using dual-colored origami paper) or the reverse of your previous folds if using single-colored paper. This flip is necessary to access the surfaces needed for subsequent folds in your origami Easy rabbit facecreation. Handle your model carefully during this transition to maintain the integrity of your previous folds.
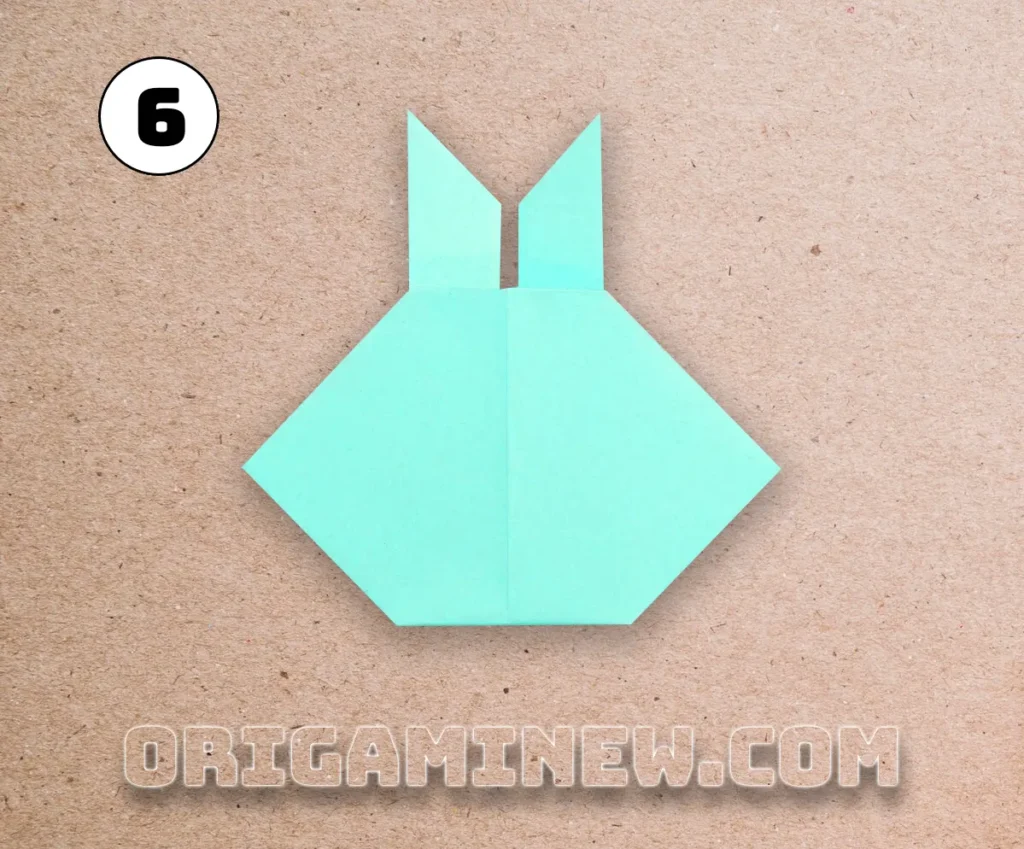
Step 6: Form the Chin Detail
Now we’ll add character to your origami Easy rabbit face by creating a chin. Locate the bottom point of your model and fold it backward (away from you) slightly—about a quarter-inch or half a centimeter. This small but important fold gives dimension to your origami Easy rabbit face by defining the chin area. The size of this fold affects the final expression of your origami Easy rabbit face, so experiment with different depths to achieve various looks from cute to distinguished.
Step 7: Shape the Forehead and Position the Ears
At this stage, your origami rabbit face is taking shape as a square front with two triangular projections (ears) behind. To refine the forehead area of your origami rabbit face, take the top point of the square front and fold it backward slightly. This subtle fold softens the top edge of your origami rabbit face and creates a more natural forehead shape. After this fold, you should clearly see the distinction between the face and ears of your origami rabbit face, with the ears positioned properly behind the head.

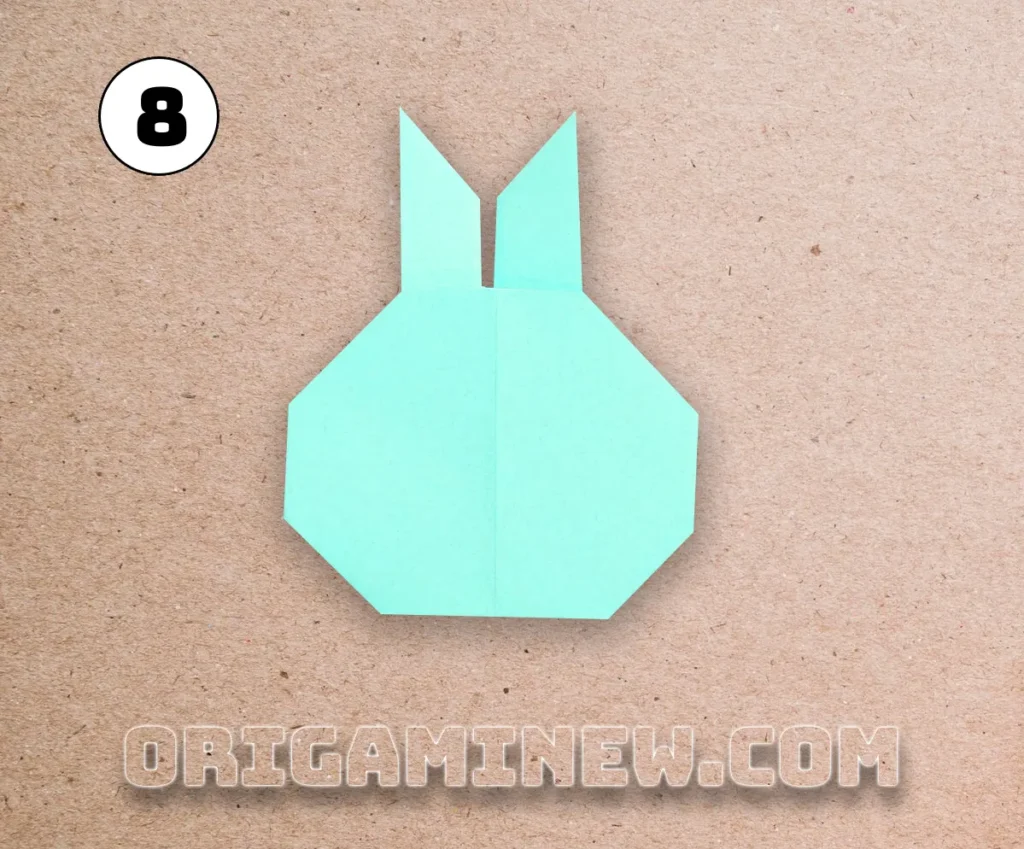
Step 8: Define the Cheeks for Character
This step adds personality to your origami Easy rabbit face by creating defined cheek areas. Fold both the right and left corners of the face section backward slightly. These folds don’t need to be large—just enough to create gentle curves that suggest cheekbones on your origami Easy rabbit face. The angle and depth of these folds can be adjusted to give your origami Easy rabbit face different expressions and character. Feel free to experiment with these folds until you achieve your preferred look for your origami rabbit face.
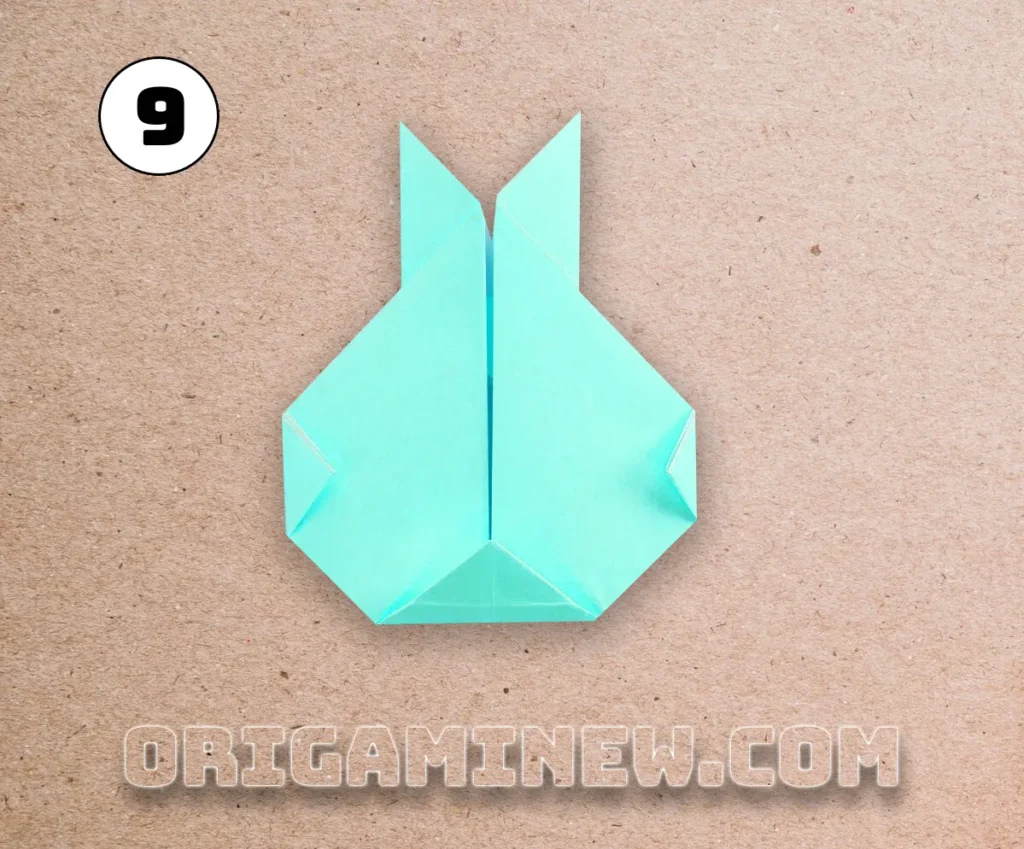
Step 9: Access the Ear Structure
For this step in your origami rabbit face creation, flip the entire model over again. This flip allows you to access the ear structures that need refinement in the following steps. Handle your origami rabbit face gently during this transition to preserve all your previous folds. After flipping, you should see the back of your origami Easy rabbit face with the ears clearly visible and accessible for the upcoming shaping.
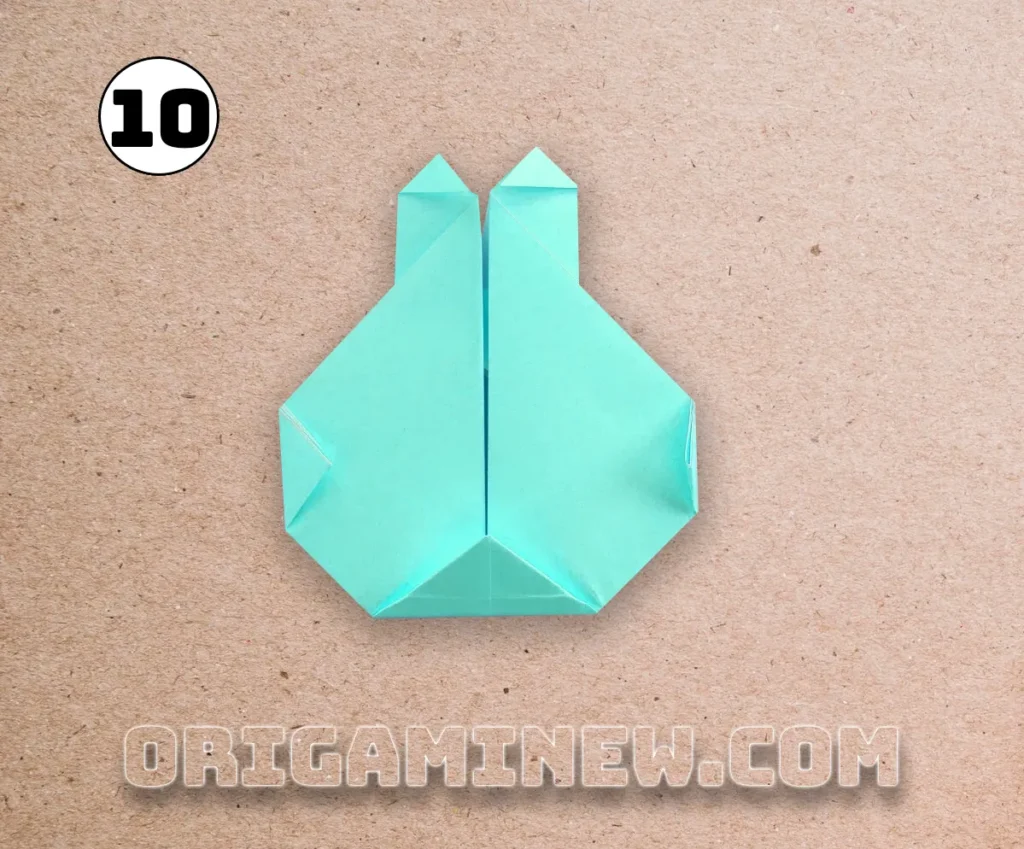
Step 10: Shape the Ear Tips
This step refines the ears of your origami rabbit face to give them a more natural, folded appearance. Take the top point of the right ear and fold it down diagonally so it points toward the top of the face. Then, repeat this fold with the left ear, ensuring both ear tips are folded at the same angle for a symmetrical origami rabbit face. These folds create the distinctive bent tips often seen on rabbit ears in illustrations and add dimension to your origami Easy rabbit face.
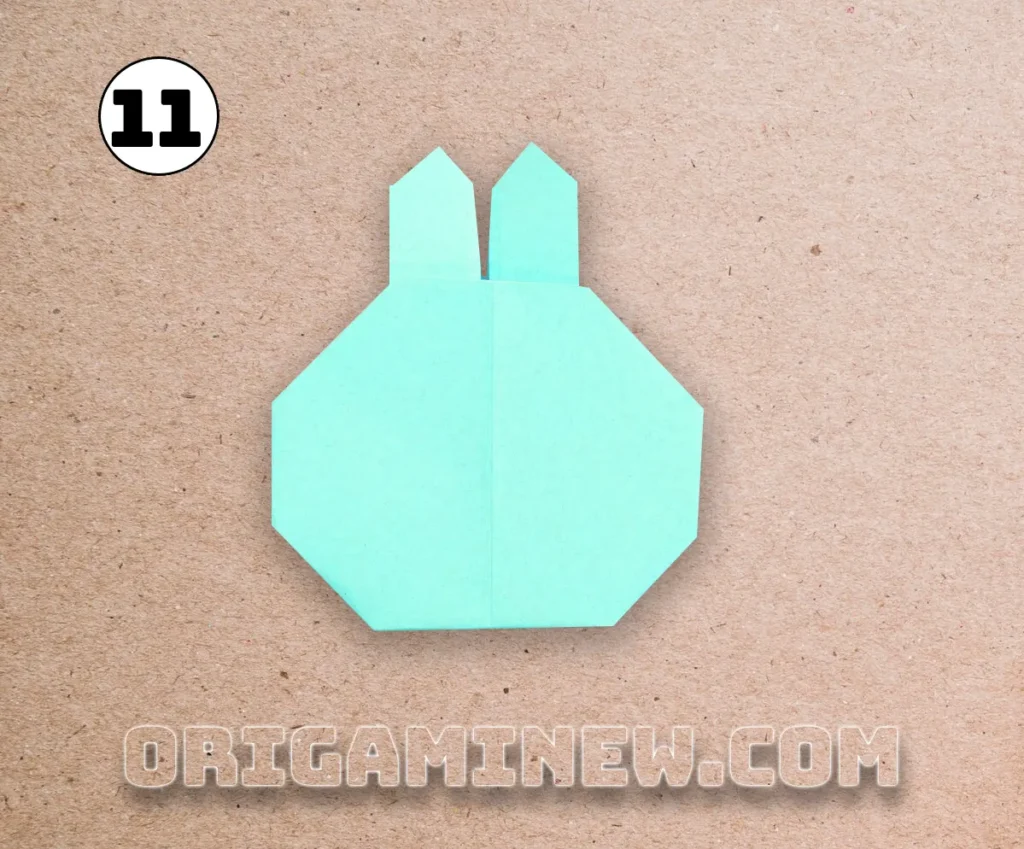
Step 11: Reveal Your Completed Creation
Now it’s time to reveal your nearly completed origami Easy rabbit face! Flip your model over one final time to see the front view of your creation. At this point, you should see a charming origami Easy rabbit face with a well-defined head shape, properly positioned ears with bent tips, and facial features ready for final detailing. Take a moment to make any small adjustments to ensure symmetry and proper shape in your origami rabbit face before proceeding to the final step.
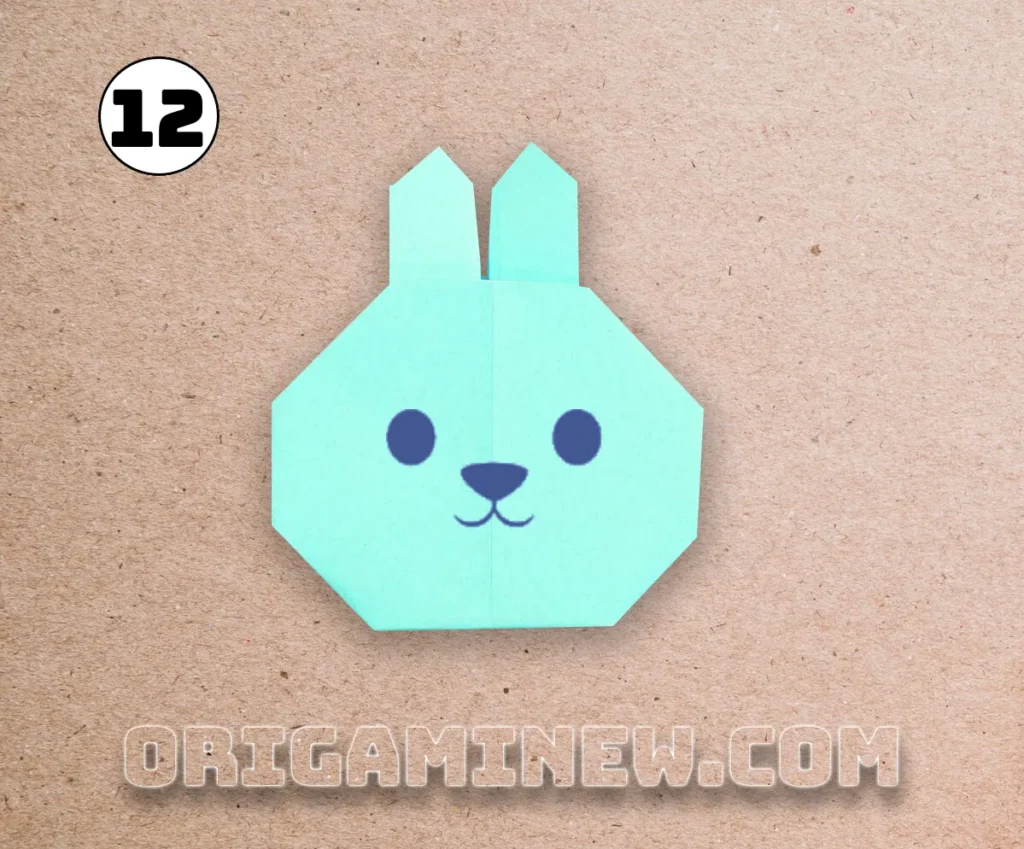
Step 12: Add Personality with Facial Features
The final step brings your origami rabbit face to life! Using a pen or marker, draw two eyes positioned in the upper portion of the face. You might also add a small nose and mouth to complete the expression of your origami rabbit face. For a creative alternative, consider using small googly eyes or colored paper cutouts adhered with a tiny dot of glue. These simple details transform your folded paper from a shape into a character full of personality. Your adorable origami rabbit face is now complete and ready to display!
Tips for Creating the Perfect Origami Rabbit Face
Creating an exceptional origami rabbit face takes practice, but these helpful tips will ensure better results:
- Use proper paper: Thin, crisp paper creates the best origami rabbit face results. Paper that’s too thick may not hold creases properly.
- Make precise creases: The secret to a great origami rabbit face is sharp, precise folds. Run your fingernail or a bone folder along each crease to make it crisp.
- Maintain symmetry: For the most appealing origami rabbit face, ensure that folds on both sides are symmetrical and balanced.
- Work slowly: Rushing through the steps can lead to misaligned folds and an uneven origami rabbit face. Take your time with each fold.
- Practice makes perfect: Your first origami rabbit face might not be perfect, but each one you make will improve as you master the technique.
Creative Variations for Your Origami Rabbit Face
Once you’ve mastered the basic origami rabbit face, consider these creative variations:
Design Variations for Origami Rabbit Faces
- Color combinations: Try different colored papers to create unique origami rabbit face designs
- Patterned paper: Use papers with subtle patterns for an interesting origami rabbit face with texture
- Size variations: Create tiny origami rabbit face models with 3-inch paper or large display pieces with 12-inch paper
- Expression changes: Slight adjustments to the angle of folds can create different expressions in your origami rabbit face
- Seasonal themes: Create origami rabbit face designs with seasonal colors for holidays and special occasions
Decorative Enhancement Ideas
Take your origami rabbit face to the next level with these embellishment ideas:
- Add whiskers using thin strips of paper or metallic thread
- Create a bow tie under the chin of your origami rabbit face
- Add small paper flowers behind the ears for a spring-themed origami rabbit face
- Use metallic pens to add subtle highlights to your origami rabbit face
- Create a frame from contrasting paper to showcase your origami rabbit face
Display Ideas for Your Origami Rabbit Face
Your completed origami rabbit face deserves to be showcased! Consider these display options:
Seasonal Displays
- Arrange multiple origami rabbit face creations in different colors for an Easter display
- Create a spring-themed mobile by hanging origami rabbit face models at different heights
- Use origami rabbit face designs as place cards for holiday meals
- Incorporate your origami rabbit face into a seasonal wreath design
- Create a shadow box display with your origami rabbit face as the focal point
Practical Applications
- Attach your origami rabbit face to the front of handmade greeting cards
- Use your origami rabbit face as a bookmark by adding a ribbon tail
- Create gift toppers by securing an origami rabbit face to wrapped packages
- Design a garland of origami rabbit face models for party decorations
- Incorporate your origami rabbit face into scrapbook pages or journal covers
The History and Cultural Significance of Origami Rabbits
The origami rabbit face has roots in both Japanese paper folding traditions and cultural symbolism. In Japanese culture, rabbits symbolize good luck and intelligence, making the origami rabbit face a particularly auspicious creation. According to Japanese folklore, rabbits live on the moon making rice cakes, which is why the origami rabbit face is sometimes associated with moon-viewing festivals.
Traditional origami rabbit face designs have evolved over centuries, with modern versions becoming simpler and more accessible to beginners. The contemporary origami rabbit face we’ve created in this tutorial combines traditional techniques with modern aesthetics for a charming result that appeals to origami enthusiasts worldwide.
Educational Benefits of Creating an Origami Rabbit Face
Making an origami rabbit face offers numerous educational benefits, particularly for children:
- Fine motor skill development: The precise folding required for an origami rabbit face helps develop hand-eye coordination
- Spatial reasoning: Understanding how a flat paper transforms into a three-dimensional origami rabbit facebuilds spatial awareness
- Following instructions: The sequential steps of creating an origami rabbit face teach the importance of following directions
- Geometric concepts: The origami rabbit face incorporates principles of symmetry, angles, and proportions
- Patience and perseverance: Completing an origami rabbit face teaches the value of working through challenges
Frequently Asked Questions About Origami Rabbit Faces
Q: How long does it take to make an origami rabbit face?
A: For beginners, creating an origami rabbit face might take 10-15 minutes. With practice, you can complete an origami rabbit face in about 5 minutes.
Q: What type of paper works best for an origami rabbit face?
A: Traditional origami paper (kami) works best for an origami rabbit face because it holds creases well and is thin enough for detailed folds. However, any square paper will work for practicing your origami rabbit face technique.
Q: Is the origami rabbit face suitable for young children?
A: The origami rabbit face is most suitable for children aged 8 and up. Younger children may need assistance with some of the more precise folds required for the origami rabbit face.
Q: Can I use rectangular paper to make an origami rabbit face?
A: You need to start with a square for your origami rabbit face. If you only have rectangular paper, you can create a square by folding one corner to meet the opposite edge and cutting off the excess.
Q: How can I preserve my origami rabbit face?
A: To preserve your origami rabbit face, display it away from direct sunlight to prevent fading. For long-term preservation, a light spray of clear acrylic sealer can help your origami rabbit face maintain its shape and color.
Conclusion: The Joy of Creating an Origami Rabbit Face
Creating an origami rabbit face connects you to the ancient art of paper folding while producing a charming result that brings joy to creators and viewers alike. The origami rabbit face represents the perfect balance of simplicity and character—accessible enough for beginners yet offering enough detail to satisfy experienced folders.
As you practice creating your origami rabbit face, you’ll find that each one becomes more refined and expressive. The meditative quality of folding an origami rabbit face offers a moment of calm creativity in our busy lives, while the finished origami rabbit face provides a tangible reminder of your skill and patience.
Whether you’re making an origami rabbit face as a seasonal decoration, a gift for someone special, or simply as a creative outlet, the process itself is as rewarding as the result. As your fingers learn the sequence of folds, you connect with generations of paper folders who have created origami rabbit face designs throughout history.
So gather your paper, find a quiet moment, and enjoy the simple pleasure of transforming a flat square into an adorable origami rabbit face that seems almost ready to twitch its nose!
Recommended Resources for Origami Enthusiasts
To further explore the world of origami and perfect your origami rabbit face and other designs, consider these trusted resources:
- Origami USA – The largest origami organization in America, offering patterns, tutorials, and resources for all skill levels, including various origami rabbit face designs.
- Japan Origami Academic Society – Explore the cultural and mathematical aspects of origami, including traditional origami rabbit face models.
- The Origami Resource Center – A comprehensive website with free diagrams, including multiple origami rabbit face variations.
- Origami with Robert J. Lang – Learn about the mathematics behind origami and explore advanced techniques that can be applied to origami rabbit face designs.
- British Origami Society – One of the oldest origami societies, offering extensive resources for paper folders interested in traditional designs like the origami rabbit face.
Happy folding!
Have you created an origami rabbit face using this tutorial? Share your creations in the comments below! I’d love to see how your unique paper bunnies turned out.
