
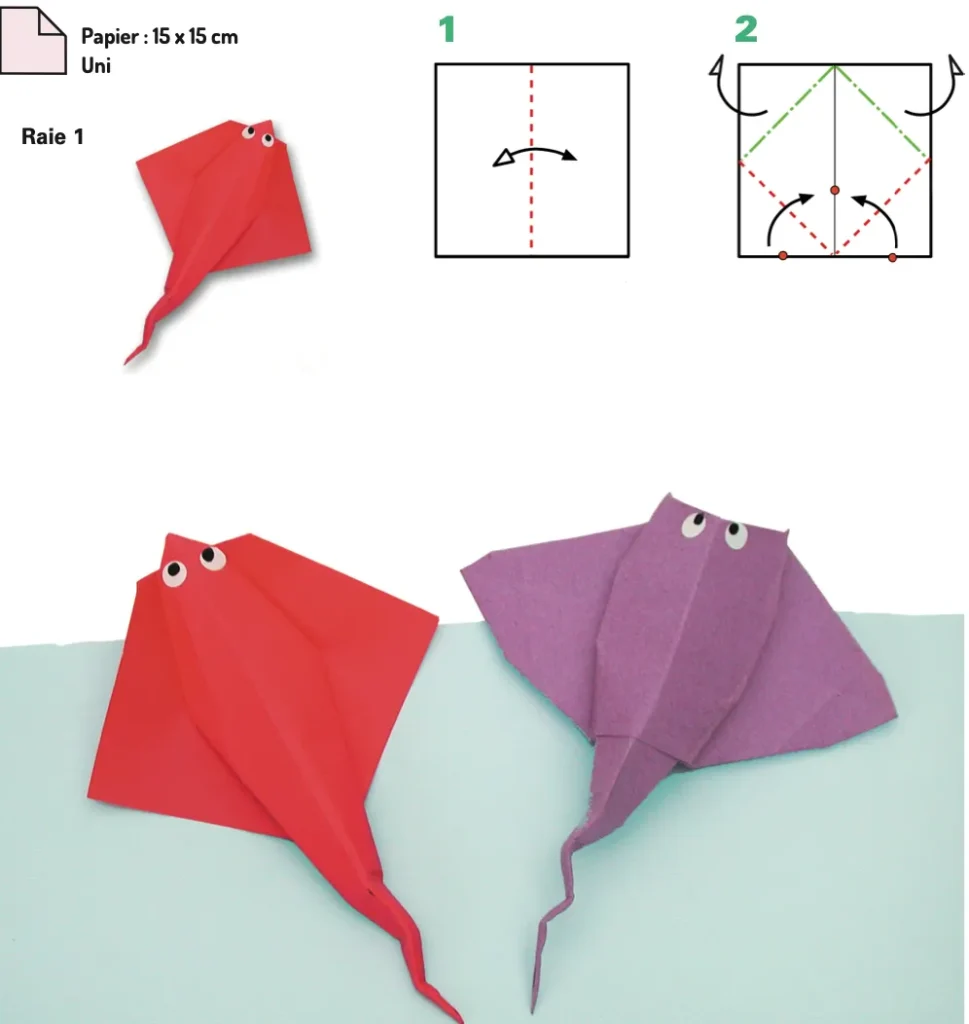
Origami Raie In 11 Steps
Introduction:
Welcome to the fascinating world of marine origami! In this comprehensive tutorial, you’ll learn how to create a beautiful paper stingray (raie) using traditional Japanese folding techniques. Stingrays are among the ocean’s most graceful creatures, with their distinctive diamond-shaped bodies and long, elegant tails—characteristics that translate beautifully into the art of paper folding. This step-by-step guide breaks down each fold with clear instructions, making it accessible for beginners while still offering satisfying results for experienced folders. Whether you’re creating an underwater origami collection, looking for an educational craft project, or simply enjoying the meditative practice of paper folding, this stingray model combines simplicity with elegant design. Grab a square sheet of paper—perhaps in blue or gray to mimic the natural coloration of stingrays—and let’s begin crafting this majestic ocean dweller!
Detailed Step Descriptions:
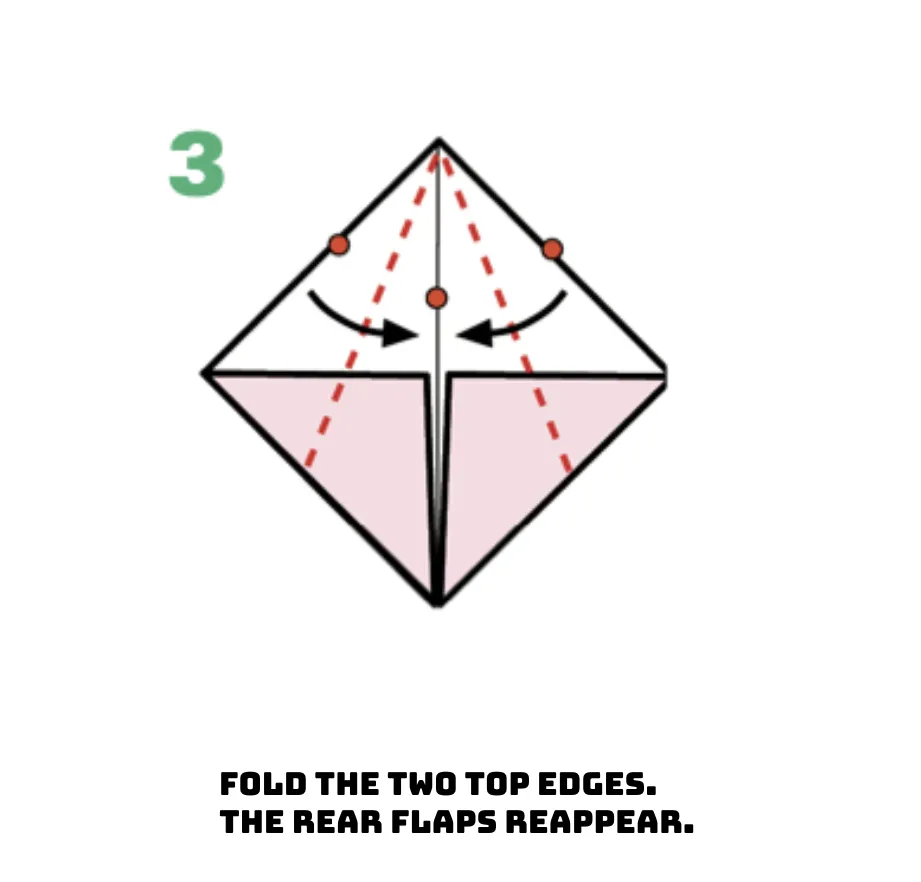
STEP 3: FOLDING THE UPPER EDGES
Fold both upper edges toward the center, creating a symmetrical shape for your origami stingray. Notice how the previously folded back panels will reappear during this process, forming the foundation of the ray’s body. This traditional origami technique creates the characteristic diamond shape that mimics a stingray’s wide, flat body. Professional origami artists recommend using your fingernail to create crisp, precise creases for best results.
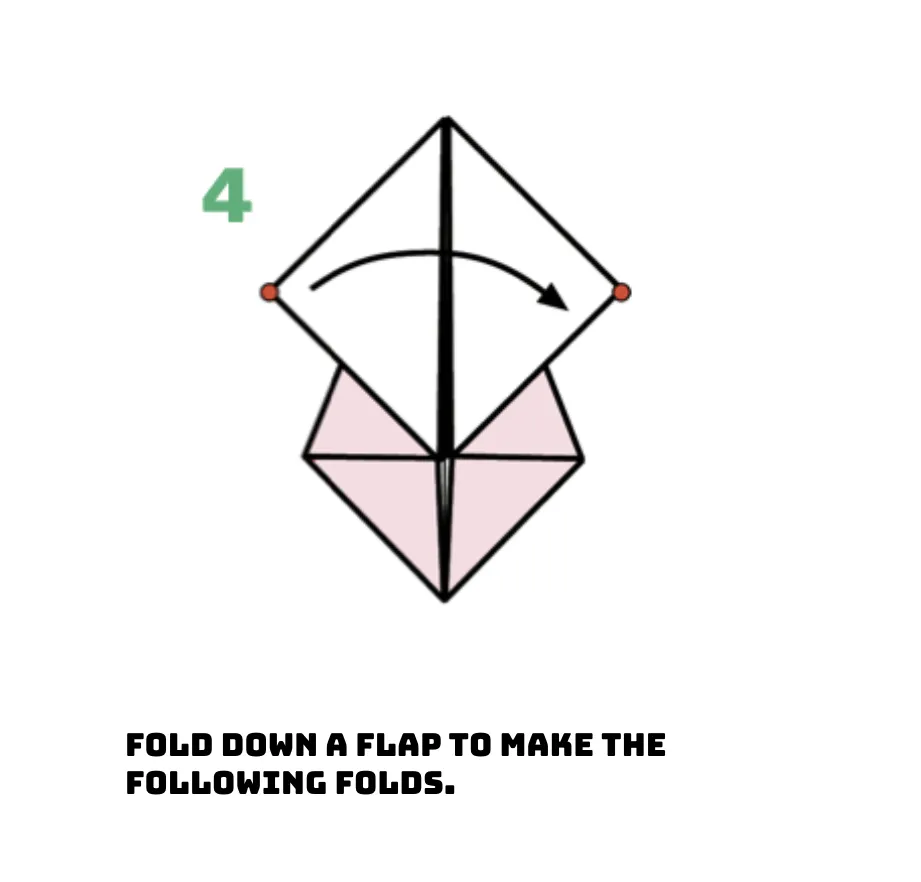
STEP 4: FOLDING DOWN A PANEL
Fold down one panel to create the foundation for subsequent folds in your origami stingray. This strategic fold begins defining the three-dimensional structure of your paper ray’s distinctive body shape. Japanese origami masters consider this a pivotal step in transforming a flat design into a lifelike marine creature. Apply even pressure along the fold line to create a clean crease that will maintain its shape throughout the process.
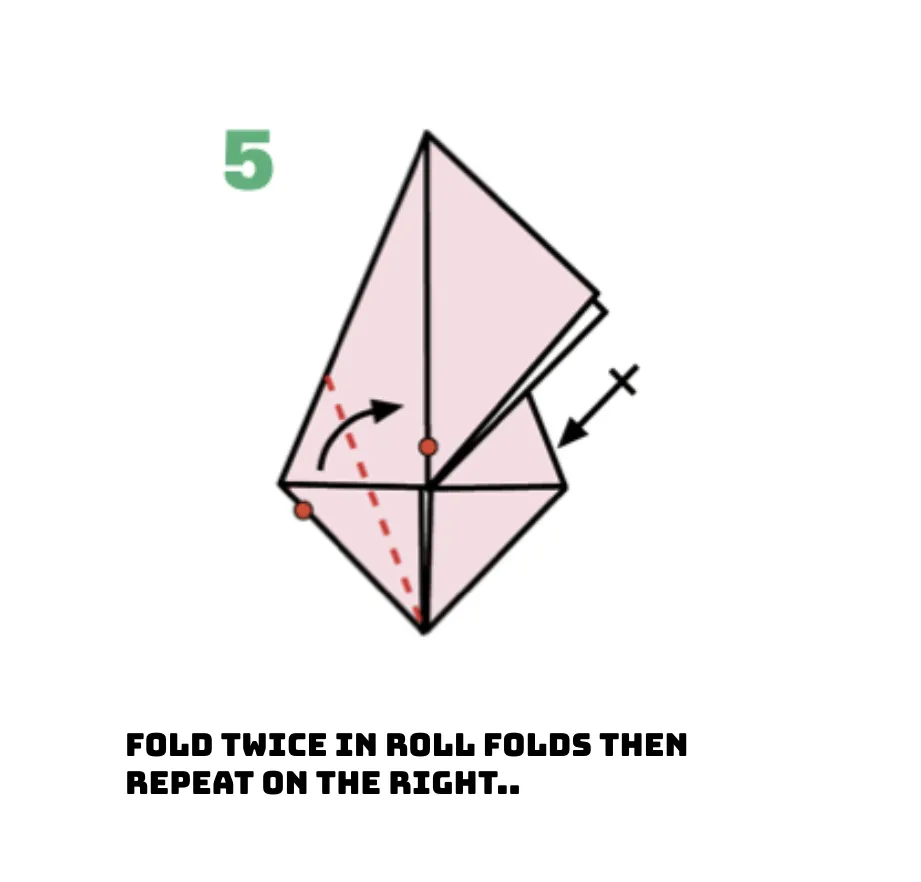
STEP 5: CREATING SCROLL FOLDS
Create two scroll folds on the left side, then repeat the same technique on the right side. These specialized origami folds add dimensional texture to your stingray’s wings, mimicking their flexible movement in water. Popular origami sea creature designs often incorporate this technique to create lifelike aquatic features. Take your time with these precision folds, as they directly influence how realistic your finished stingray will appear.
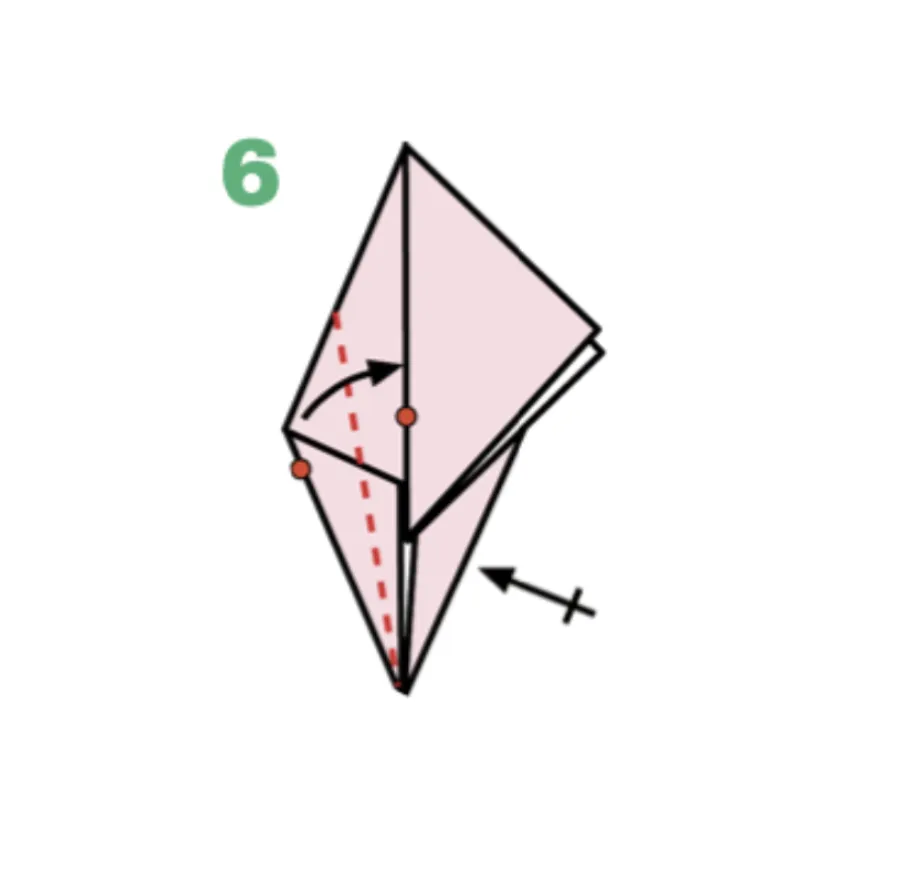
STEP 6: CONTINUING THE STRUCTURAL FOLDS
Build upon previous steps by adding more detailed folds along the marked lines. These precise creases define the distinctive wing structure that gives stingrays their graceful underwater appearance. Traditional marine origami emphasizes these defining features to capture the essence of aquatic movement. Follow the dotted lines carefully to ensure symmetry in your origami stingray’s elegant wing formations.
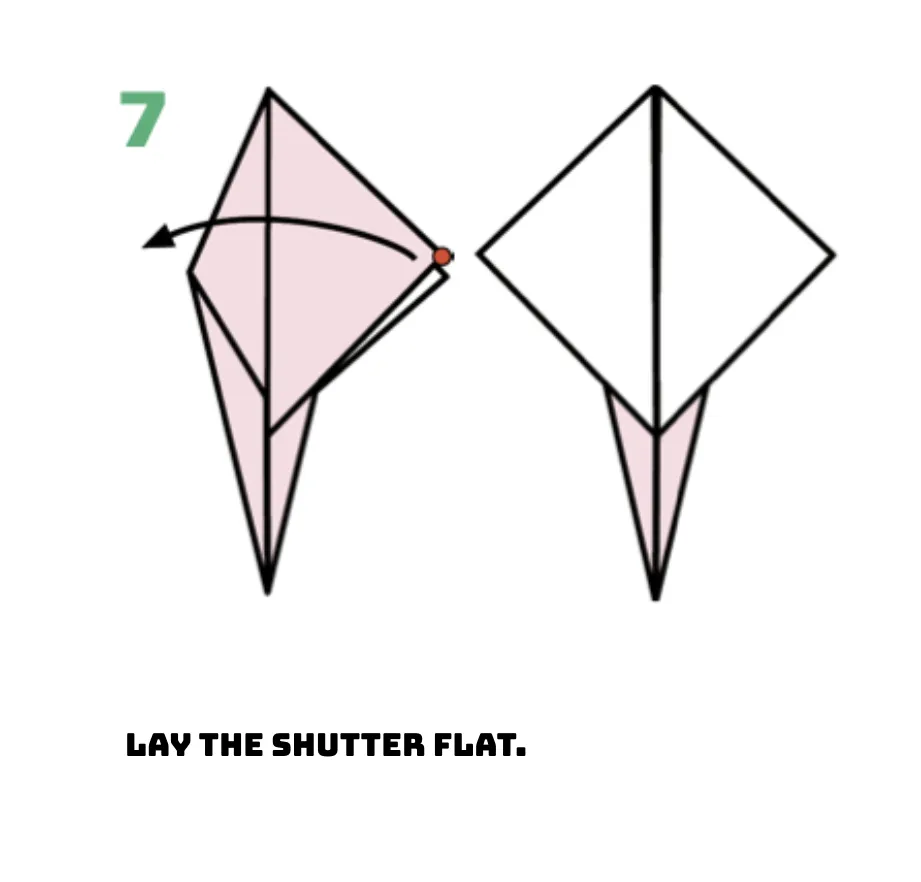
STEP 7: FLATTENING THE PANEL
Return the folded panel to a flat position, smoothing out the paper while maintaining previous creases. This strategic flattening prepares your origami stingray for the final shaping stages that define its characteristic profile. The contrast between the textured sides and smooth center creates the distinctive body shape of a realistic paper ray. Use gentle pressure to avoid disrupting the intricate fold pattern you’ve established in previous steps.
STEP 8: CREATING SIMPLE PLEATS
Mark two folds to create a simple pleat structure that forms the stingray’s central body. Then flip the entire model over to prepare for the final shaping sequence in your origami creation. These pleats create the three-dimensional depth essential for realistic marine origami designs. Professional paper folders emphasize the importance of symmetrical pleating for balanced aquatic models.

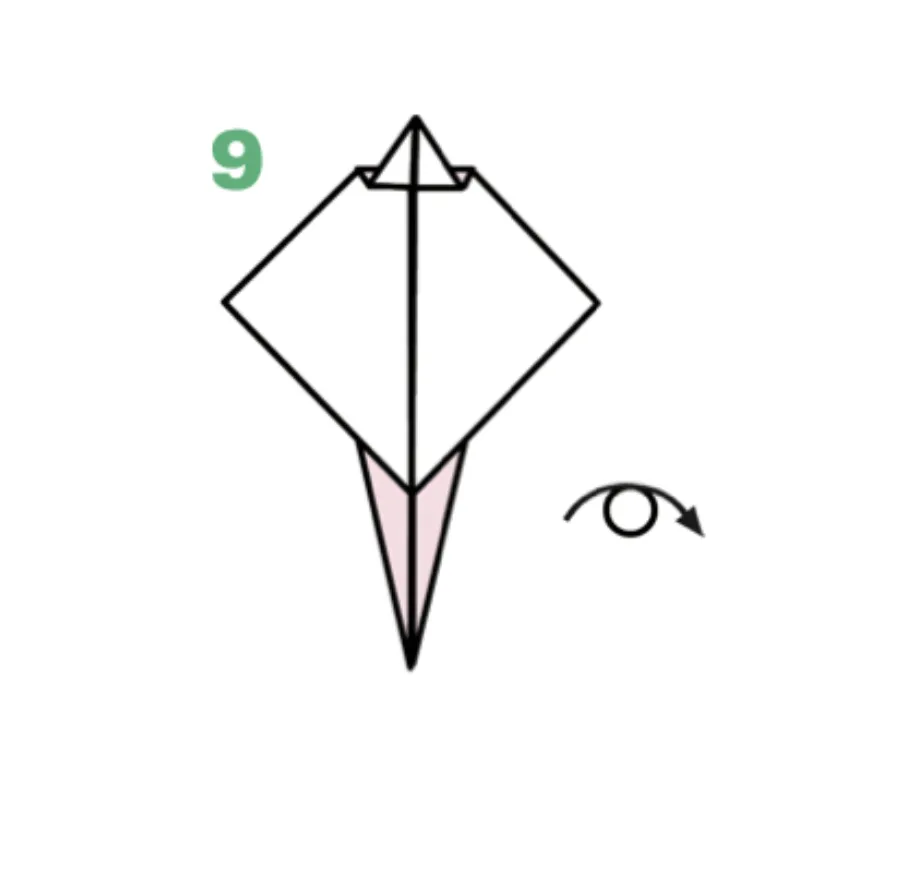
STEP 9: PREPARING THE MODEL’S FINAL FORM
After flipping the model, check that all previous folds are properly aligned and well-defined. This verification ensures your origami stingray will have the proper proportions and clean lines when completed. Many advanced origami fish tutorials include this quality-control step before proceeding to final details. Small adjustments at this stage can significantly enhance the finished appearance of your paper stingray.
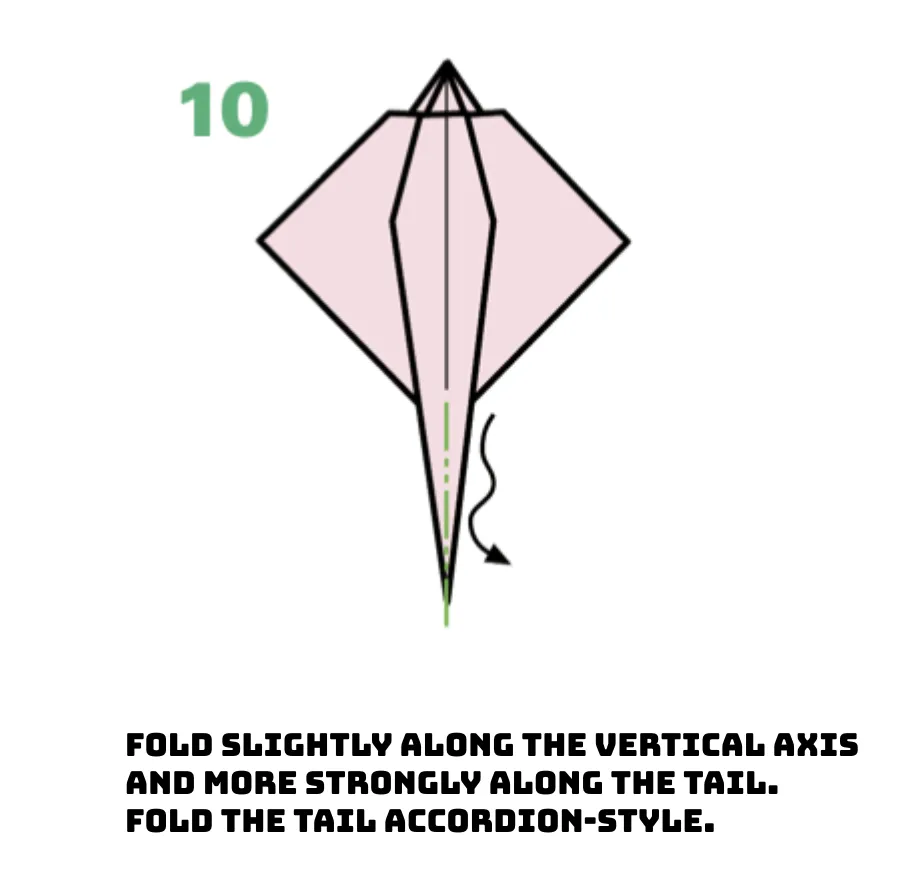
STEP 10: SHAPING THE BODY AND TAIL
Create gentle folds along the vertical axis and more pronounced folds along the tail section. This differential folding technique gives your origami stingray its characteristic shape with a prominent tail extension. The accordion fold used for the tail mimics the flexible, whip-like tail that stingrays are known for in nature. These final shaping folds transform your flat origami creation into a recognizable marine creature with dimensional presence.
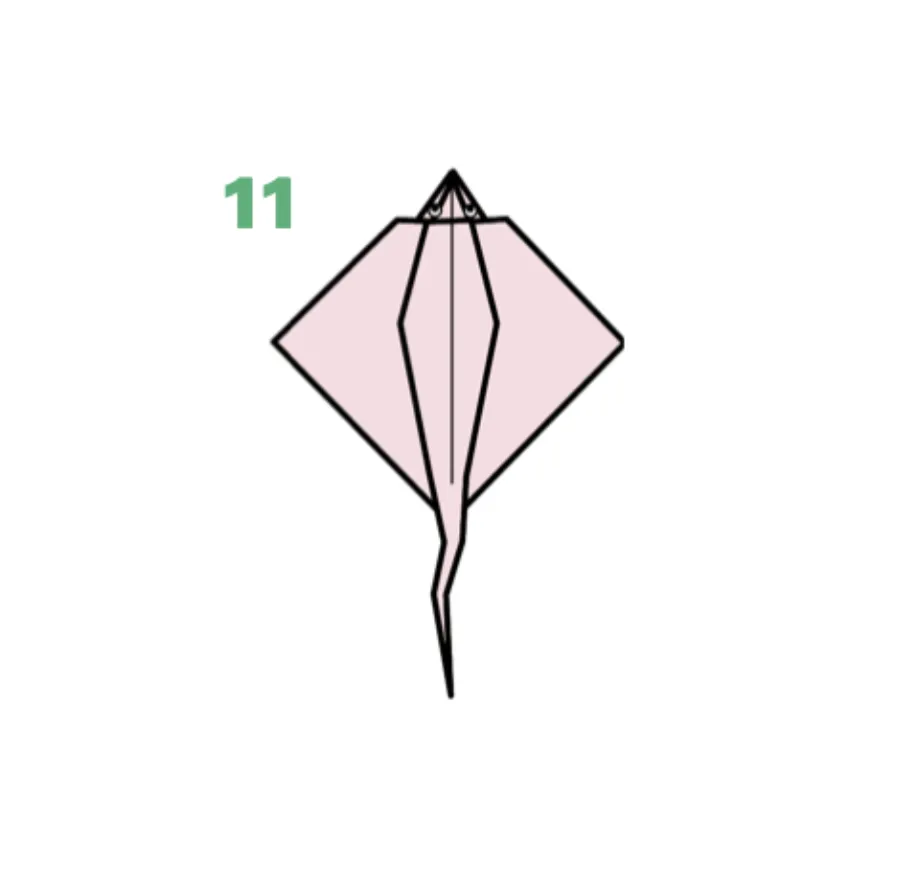
STEP 11: FINALIZING YOUR ORIGAMI STINGRAY
Add the finishing touches to your origami stingray by refining all the folds for a polished appearance. The completed model captures the elegant proportions and distinctive features of this graceful ocean dweller. Your finished paper stingray showcases both the artistic tradition of origami and the natural beauty of marine life. Display your origami creation as a standalone piece or combine it with other sea creatures for an underwater paper ecosystem.
Conclusion:
Congratulations on completing your origami stingray! Through a series of precise folds and creative techniques, you’ve transformed a simple square of paper into an elegant marine creature. Your paper ray captures the distinctive diamond-shaped body and graceful tail that make stingrays such fascinating ocean dwellers. This model demonstrates how origami can beautifully represent the natural world through the art of paper folding. Whether you display your stingray alongside other sea creatures in an origami aquarium, use it as an educational tool, or simply enjoy the meditative process of creating it, you’ve mastered an impressive piece of paper art. We hope this tutorial has enhanced your origami skills and inspired you to explore more marine-themed paper folding projects. Share your creations with our community and continue your journey into the captivating world of origami!
- Explore our complete marine origami collection → Discover more underwater creatures including origami sharks, dolphins, and octopuses to create your own paper aquarium.
- Master essential origami techniques for sea creatures → Learn specialized folding methods used in this stingray tutorial, including scroll folds and accordion pleating.
- Best papers for origami sea creatures → Find out which papers create the most beautiful and durable origami stingrays and other marine models.
- Create an underwater origami diorama → Learn how to display your stingray in a creative underwater scene alongside coral, seaweed, and other ocean elements.
- Advanced stingray and manta ray variations → Ready for a challenge? Discover more complex stingray models with additional realistic features and dynamic poses.
