
Introduction:
Welcome to the practical world of origami boxes! This comprehensive tutorial will guide you through creating a versatile and functional origami box that requires no glue, tape, or additional materials. Whether you’re looking to craft unique gift boxes, organize small items, or explore the satisfying art of paper folding, this classic origami box design offers both beauty and utility. What makes this particular box special is its two-toned color scheme, achieved through strategic folding that reveals both sides of your paper. The finished box features a sturdy base and attractive design that’s perfect for holding jewelry, candies, small gifts, or desk accessories. This project is ideal for beginners and experienced folders alike, offering a perfect introduction to functional origami while providing endless customization possibilities. Using just a single square sheet of paper, you’ll discover how traditional Japanese folding techniques can create practical everyday objects. Let’s begin crafting your own origami box that combines aesthetic appeal with real-world functionality!
Detailed Step Descriptions:
STEP 1: CREATING THE FOUNDATION CREASES

Begin by folding the paper in half to create horizontal and vertical creases, then unfold and turn the paper over. These initial folds establish the fundamental grid system that will guide the construction of your origami box. Professional origami artists emphasize the importance of precise creasing as it determines the final box dimensions. The blue and yellow color scheme in the diagram will help you track which side of the paper faces outward.
STEP 2: FORMING DIAGONAL CREASES
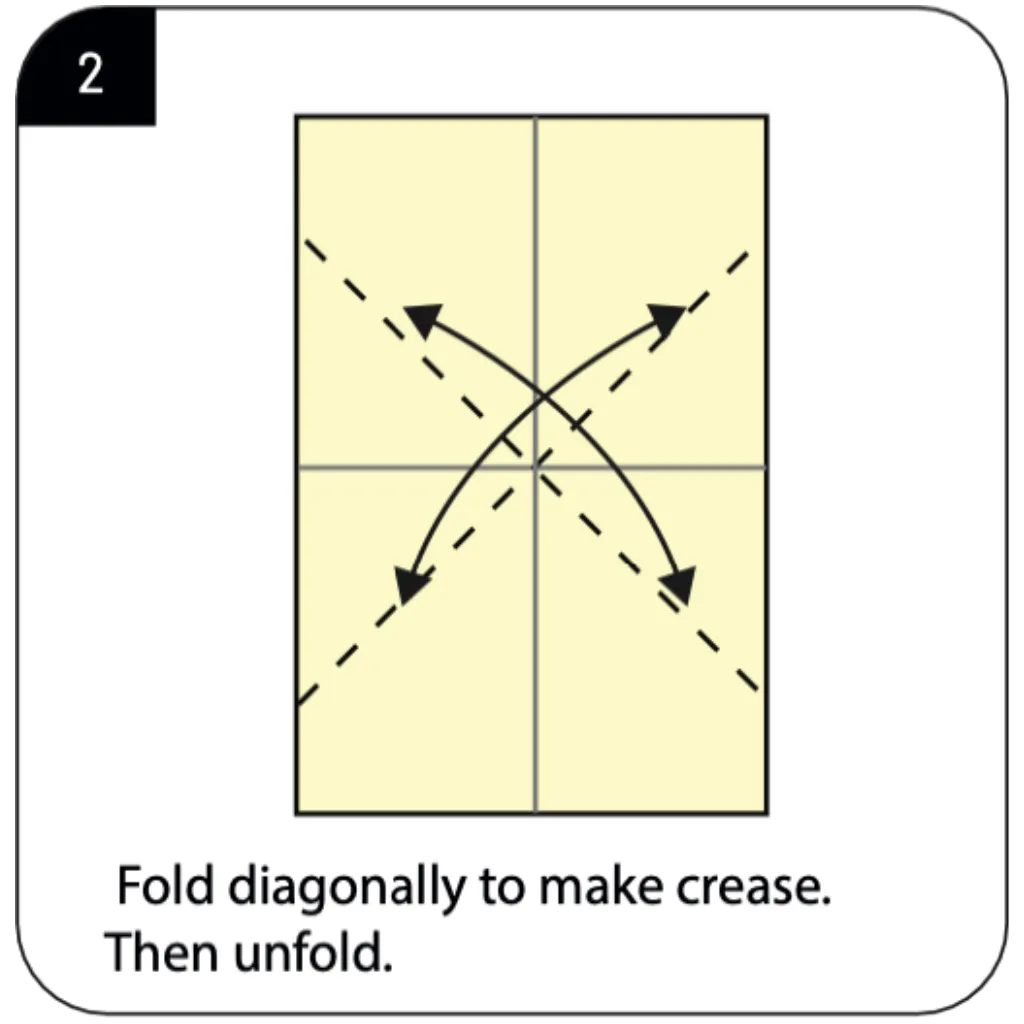
Fold the paper diagonally in both directions to create an X pattern of creases, then unfold completely. These diagonal folds work with the previous creases to create a comprehensive folding map for your box. Popular origami box tutorials utilize this combination of straight and diagonal folds for structural integrity. The resulting crease pattern forms the mathematical foundation necessary for creating a perfect square box.
STEP 3: EXECUTING THE SQUASH FOLD

Using all the established creases, perform a squash fold that transforms the flat paper into a preliminary base. This crucial technique collapses the paper along multiple creases simultaneously, creating a layered structure. The squash fold is fundamental to many origami box designs, providing the depth needed for three-dimensional forms. Watch as the yellow and blue sections begin to separate, indicating the interior and exterior of your future box.
STEP 4: FOLDING THE SIDE FLAPS
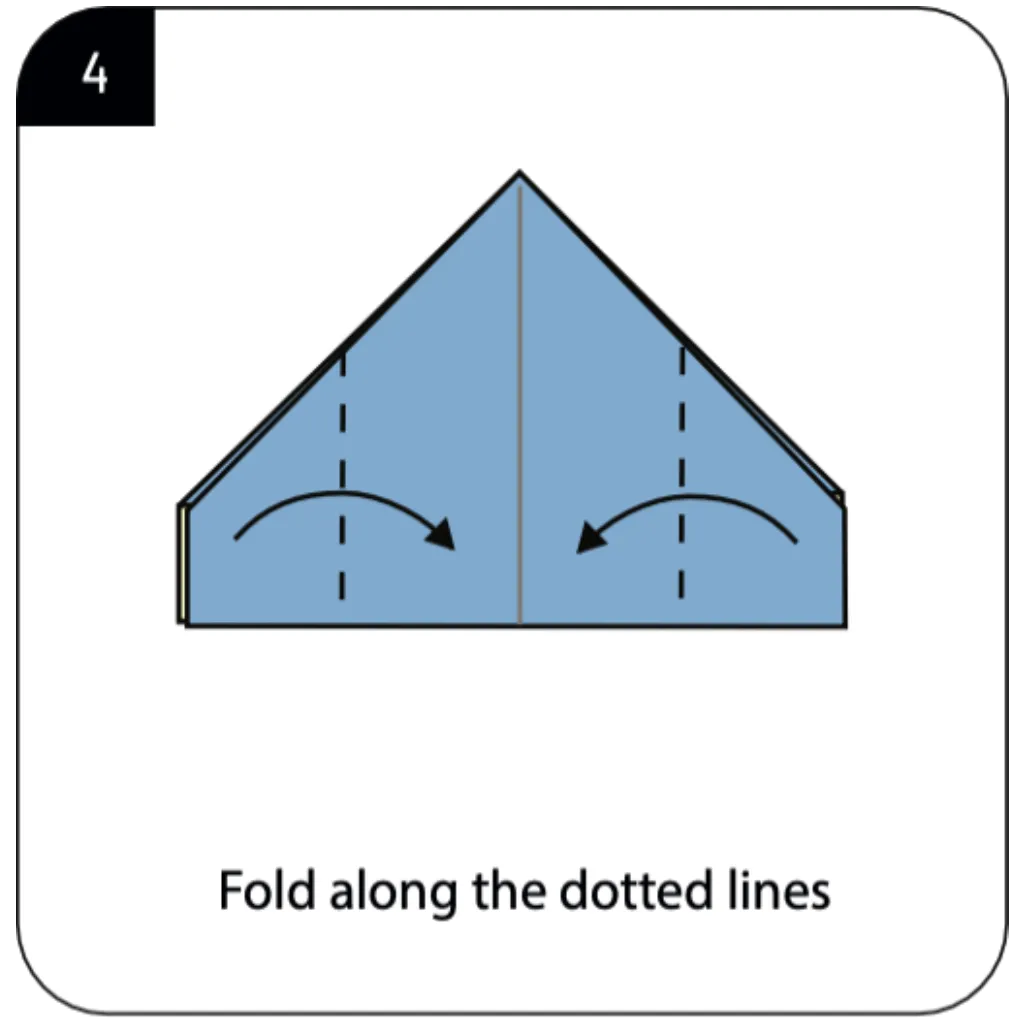
Fold along the dotted lines as shown, bringing the side sections toward the center of your model. These folds begin defining the walls of your origami box while maintaining the color contrast design. Origami gift box tutorials often feature this step as it establishes both structure and aesthetic appeal. The precise alignment of these folds ensures your finished box will have straight sides and a level rim.
STEP 5: REPEATING THE PATTERN

Repeat the previous folding step on the back side of your model to maintain symmetry. This mirrored folding creates uniform walls on all sides of your developing origami box structure. DIY box tutorials emphasize the importance of consistent folding on all sides for a professional finish. The yellow interior begins to take shape while the blue sections form the distinctive exterior pattern.
STEP 6: CREATING THE CORNER STRUCTURE
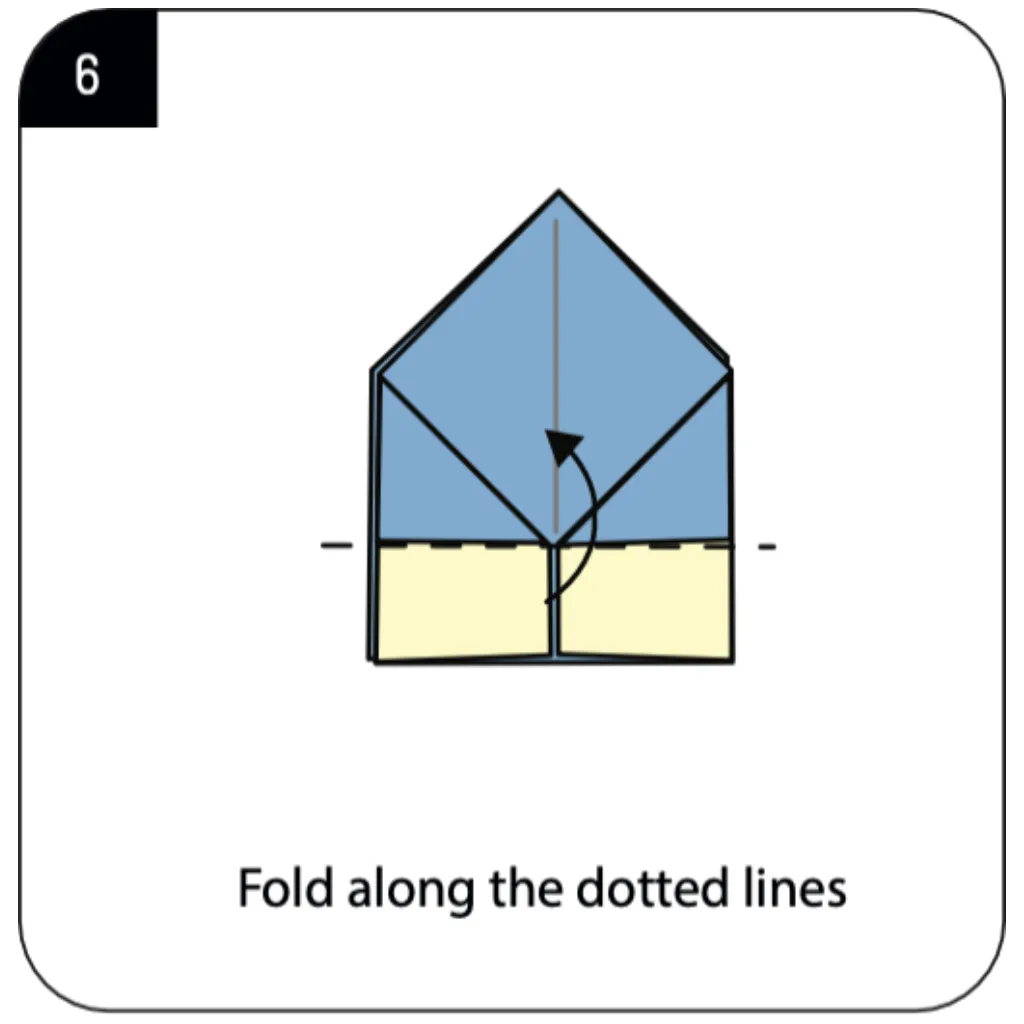
Fold along the indicated dotted lines to further define the corners and edges of your box. These strategic folds lock the corners in place and create the clean edges characteristic of well-made origami boxes. Paper box crafting techniques rely on these precise corner folds for both stability and visual appeal. The combination of previous folds now clearly shows the emerging three-dimensional form of your box.
STEP 7: REINFORCING THE STRUCTURE

Repeat the previous folding pattern on the remaining sections to complete the box walls. This systematic approach ensures all four sides of your origami box receive identical treatment. Storage box origami designs benefit from this repetitive folding that creates uniform strength throughout. The model now displays the characteristic peaked top that will be transformed in the final steps.
STEP 8: ROTATING AND FINAL PREPARATION
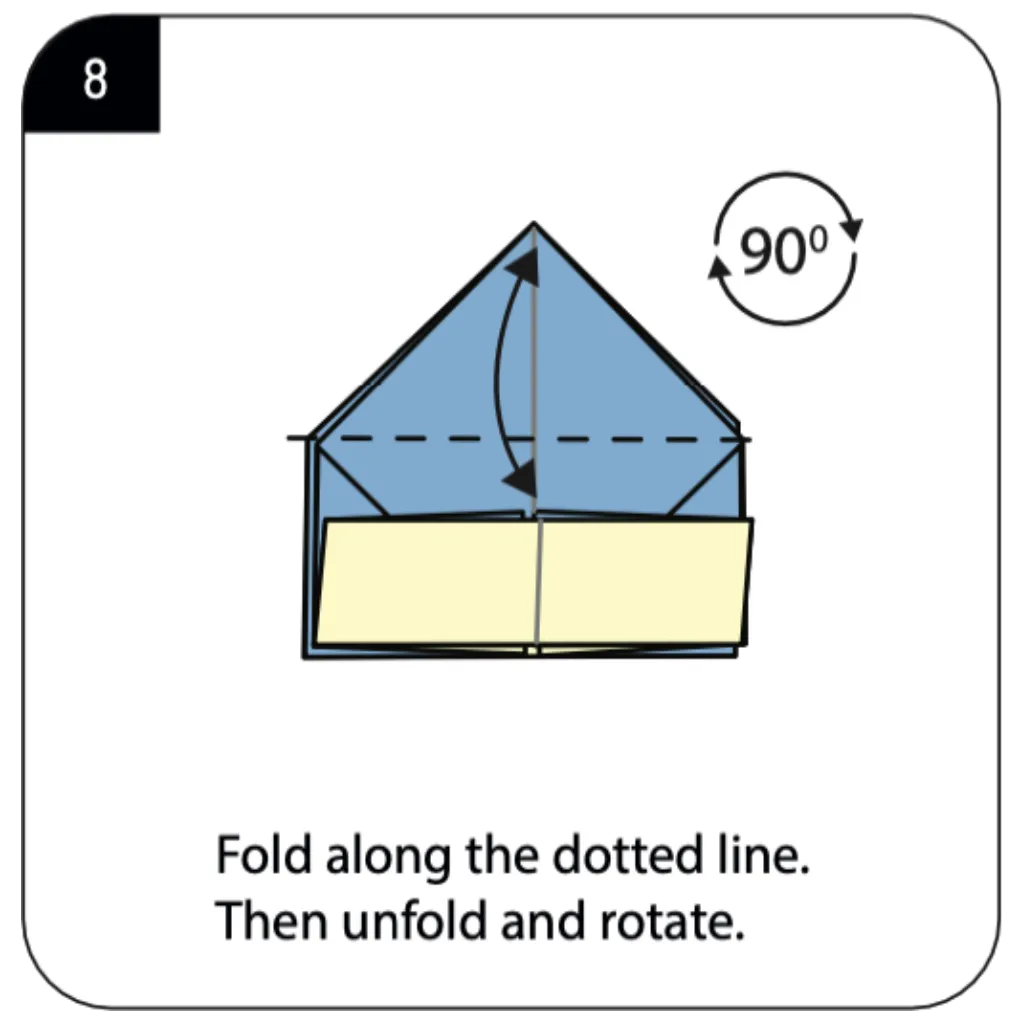
Fold along the dotted line as indicated, then unfold and rotate the model 90 degrees. This preparatory step sets up the final transformation from a peaked form to a flat-topped box. The rotation allows access to the final folding points needed to complete your functional origami container. Traditional origami box patterns often include this reorientation step before the dramatic final reveal.
STEP 9: OPENING AND SHAPING THE BOX
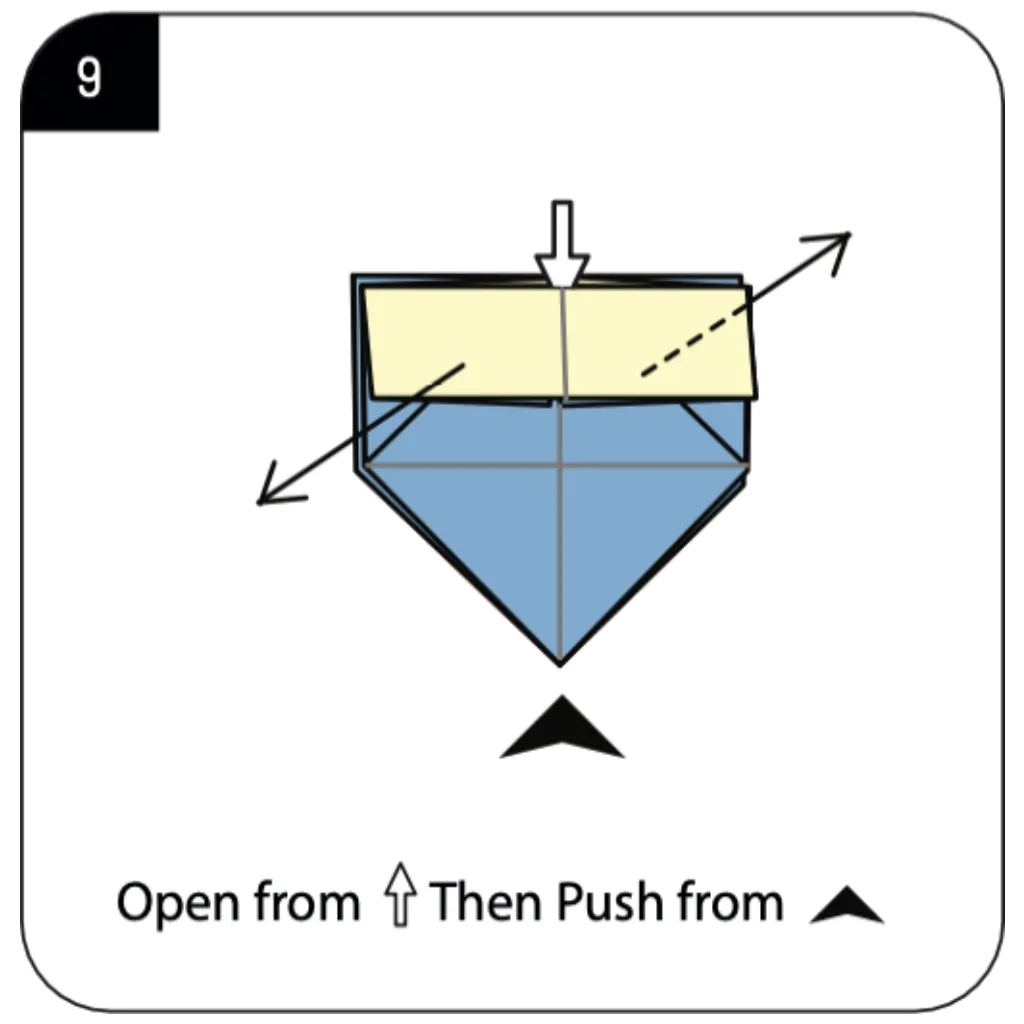
Open the model from the indicated point, then push from the marked areas to form the box shape. This transformative step converts the folded structure into a functional three-dimensional container. The opening technique is what makes origami boxes so satisfying to create, revealing the hidden interior. Apply gentle pressure to shape the walls into perfect right angles for a crisp, professional appearance.
STEP 10: COMPLETING YOUR ORIGAMI BOX
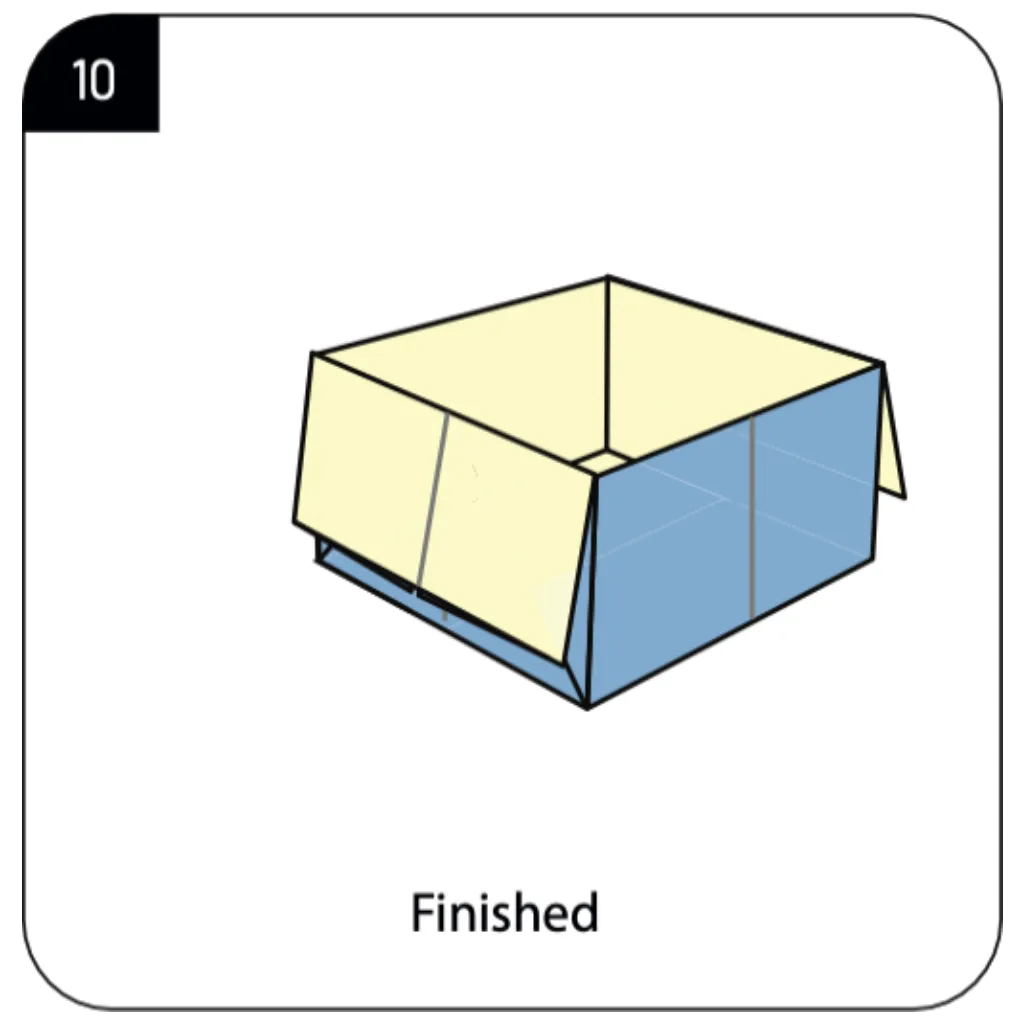
Finalize any remaining folds and adjustments to achieve the perfect box shape shown in the diagram. Your completed origami box now features sturdy walls, a flat base, and an attractive two-toned design. The finished product demonstrates how simple folding techniques can create practical, beautiful containers. This versatile box is ready for use as a gift container, desk organizer, or decorative storage solution.
Conclusion:
Congratulations on creating your beautiful origami box! Through ten carefully designed steps, you’ve transformed a single square of paper into a functional and attractive container that showcases the practical applications of origami art. Your finished box demonstrates the perfect balance between form and function, featuring sturdy construction, clean lines, and an eye-catching two-tone design. This versatile creation can serve countless purposes: as an eco-friendly gift box, a desktop organizer, a jewelry holder, or simply as a decorative piece. The techniques you’ve mastered—including squash folds, systematic corner construction, and the dramatic opening transformation—provide a solid foundation for exploring more complex box designs and other functional origami projects. We hope this tutorial has inspired you to continue creating practical paper art and discovering the endless possibilities of origami. Share your colorful boxes with friends and family, and enjoy the satisfaction of giving handmade, sustainable packaging that’s as beautiful as the gifts inside!
- Explore more origami box designs → Discover various box styles including hinged lids, dividers, and decorative patterns for every occasion.
- Gift wrapping origami ideas → Learn creative paper folding techniques for presenting gifts, including boxes, bows, and envelope designs.
- Master essential box folding techniques → Understand the fundamental methods used in this tutorial and apply them to more complex container projects.
- Best papers for origami boxes → Find the ideal paper weights, sizes, and patterns for creating durable and attractive origami containers.
- Functional origami projects → Explore practical paper creations including organizers, holders, and everyday useful items made through folding.
