
Introduction
Origami, the ancient Japanese art of paper folding, offers countless opportunities to create beautiful decorative objects that bring warmth and charm to any space. The origami candle stands out as one of the most elegant and versatile projects, transforming a simple square sheet of paper into a symbol of light, comfort, and celebration. This beginner-friendly tutorial demonstrates how to fold a realistic-looking candle complete with flame, making it perfect for romantic dinners, holiday decorations, birthday celebrations, or any occasion where you want to add a cozy, intimate atmosphere without the safety concerns of real flames. What makes this origami candle particularly appealing is its combination of simplicity and visual impact—the clean lines, recognizable silhouette, and characteristic flame top make it instantly identifiable while requiring only basic folding techniques accessible to crafters of all skill levels. Unlike more complex decorative models, this candle design achieves maximum decorative effect through just five straightforward steps, making it ideal for table centerpieces, mantle displays, or creating romantic ambiance for special occasions. The completed model captures the essence of candlelight’s warmth and tranquility while being completely safe and reusable, making it an excellent choice for homes with children, pets, or anywhere open flames would be inappropriate but the symbolic presence of candlelight is desired.
Step-by-Step Instructions
Step 1: Create the Foundation Grid
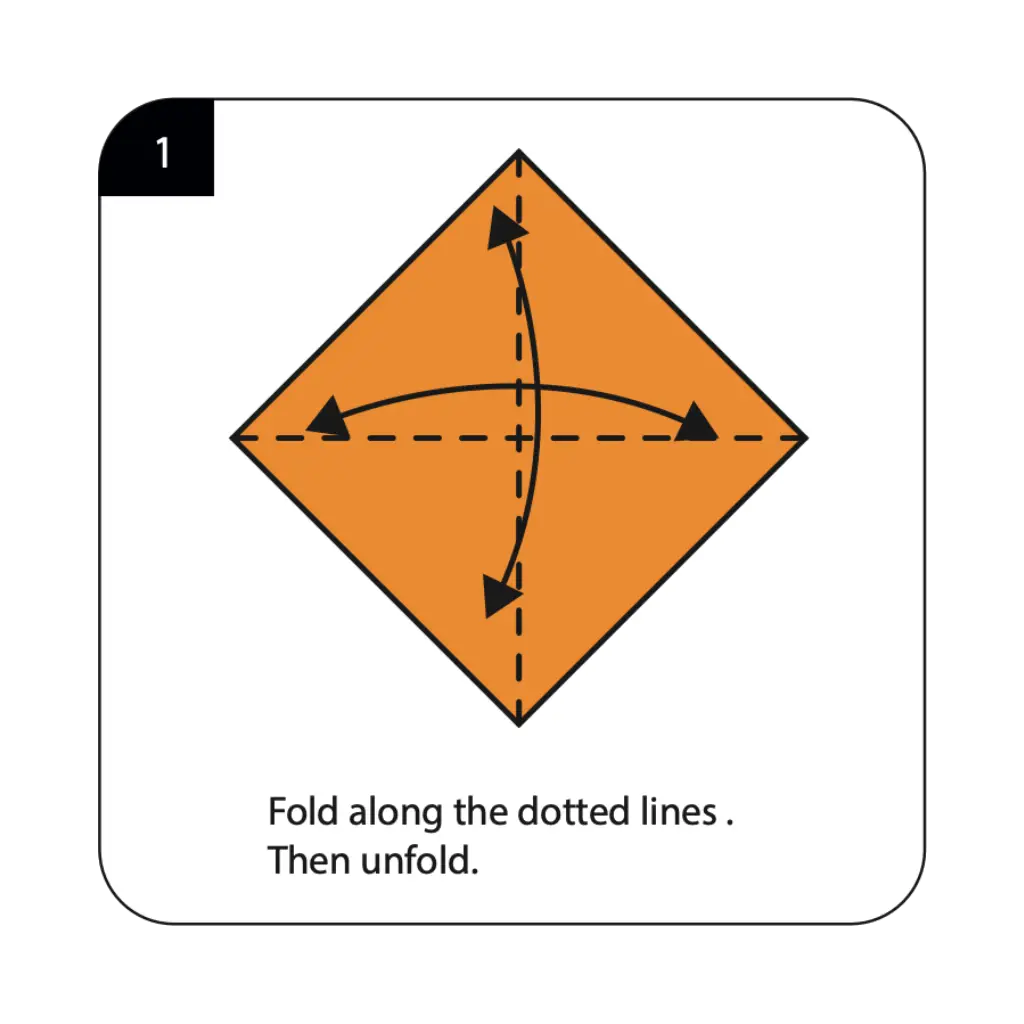
Begin with a square sheet of paper, preferably white or cream with orange or yellow on one side for realistic candle and flame coloring. Fold along all the dotted lines as shown in the diagram, then unfold completely to create a comprehensive grid of reference creases. These initial folds establish the crucial framework that will guide all subsequent folds in your origami candle construction. The precision of these foundation creases is essential for creating the symmetrical structure and proper proportions that make your finished model recognizable as a candle. Take care to make each fold sharp and well-defined, as these grid lines will serve as the roadmap for transforming your flat square into a three-dimensional candle with realistic proportions.
Step 2: Establish the Candle Structure

Fold along the dotted lines as indicated in the second diagram, building upon the crease pattern established in Step 1. These strategic folds begin consolidating the square paper into the elongated rectangular form that will become your candle’s body. The accuracy of these folds directly affects the final proportions and stability of your origami candle. Work methodically to ensure each fold aligns precisely with the established grid pattern, creating clean edges and maintaining symmetry throughout the folding process. This step transforms the flat square into the preliminary three-dimensional structure that will support the candle’s characteristic tall, slender appearance.
Step 3: Form the Basic Candle Shape

Fold along the dotted lines as shown in the third diagram to further define your candle’s rectangular body structure. These folds continue the transformation process, creating the distinctive tall, narrow proportions characteristic of traditional candles. The positioning and angle of these folds are crucial for achieving the proper candle silhouette and ensuring structural stability in your finished model. Pay careful attention to maintaining parallel edges and consistent measurements as you work through these shaping folds. This step brings your origami closer to the recognizable candle form by establishing the vertical body that will support the flame element in subsequent steps.
Step 4: Create the Three-Dimensional Form

Perform reverse folds along the dotted lines as indicated, executing this advanced technique to create the final three-dimensional structure of your origami candle. The reverse fold requires careful manipulation of the paper layers while maintaining the integrity of all previous folds, transforming your flat folded form into a standing candle. This critical step creates the depth and dimension that allows your candle to stand upright and display properly as a decorative element. Work slowly and deliberately during this complex fold, ensuring the candle maintains its rectangular cross-section and the flame element remains properly positioned at the top for a realistic appearance that captures the essence of a real candle.
Step 5: Complete Your Origami Candle
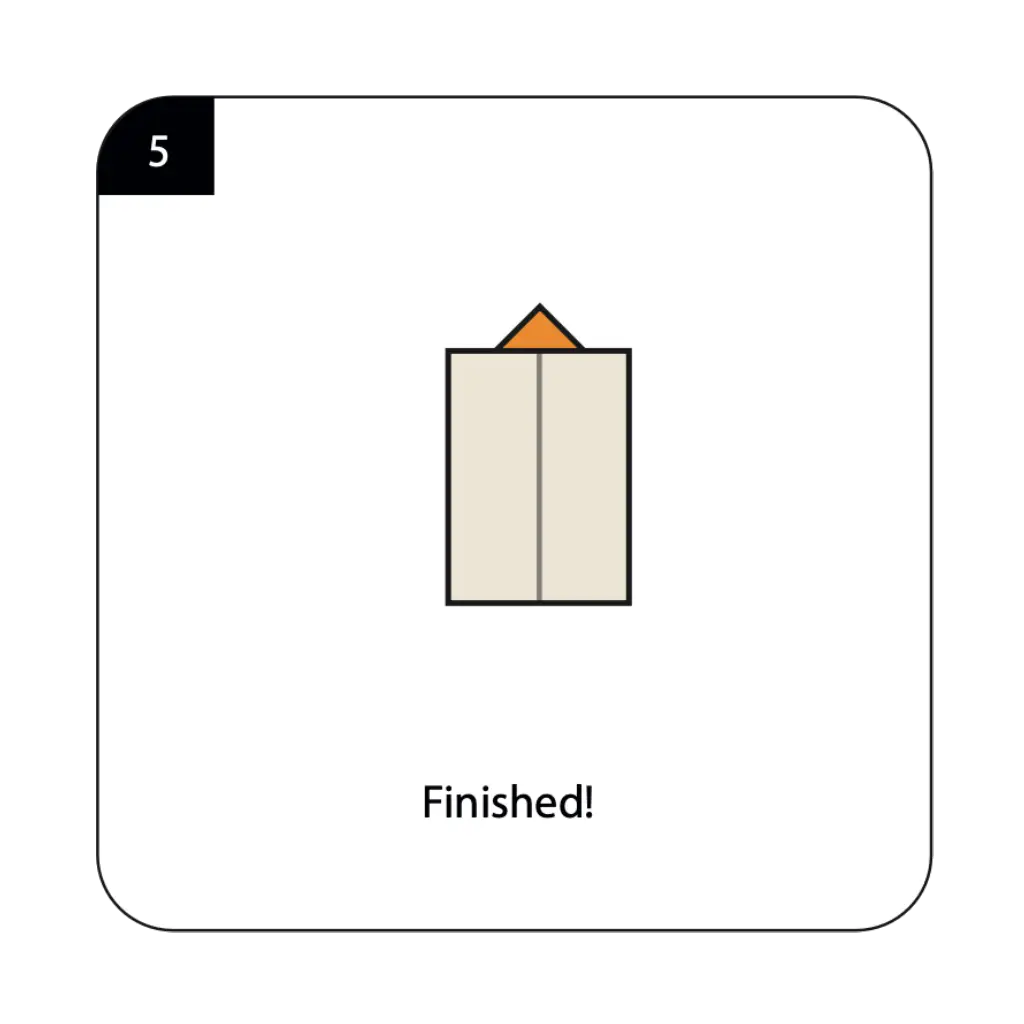
Your origami candle is now finished and ready to illuminate your space with its symbolic presence! Make any final adjustments to ensure the candle stands straight and the flame element is properly positioned for optimal visual impact. The completed model should clearly display the characteristic candle silhouette with a tall, rectangular body topped by a distinctive triangular flame. Your handcrafted paper candle now serves as a beautiful decorative element that can enhance romantic dinners, holiday celebrations, or any setting where you want to create a warm, inviting atmosphere without the safety concerns of real flames. The simple elegance of your origami candle demonstrates how basic folding techniques can create meaningful decorative objects that bring comfort and beauty to everyday spaces.
Conclusion
Congratulations on creating your origami candle! This elegant paper decoration demonstrates how simple folding techniques can transform an ordinary square sheet into a symbol of warmth, light, and celebration. From basic grid folds to the final three-dimensional form, you’ve mastered the essential steps needed to create a decorative element that brings ambiance and charm to any setting. The origami candle showcases the perfect balance between simplicity and visual impact that makes paper folding such a rewarding craft for creating meaningful home decorations. Your completed model serves multiple purposes—as a safe alternative to real candles, a romantic table decoration, a holiday ornament, or simply as a beautiful accent that adds warmth to your living space. The techniques you’ve learned, including grid folding, structural shaping, and reverse folding, build valuable foundation skills that transfer to many other origami projects while creating practical decorative items. We hope this tutorial has inspired your appreciation for how origami can enhance your home environment through handcrafted beauty that combines artistic expression with functional design. Remember that each candle you create offers opportunities to experiment with different colors and sizes, allowing you to develop collections that perfectly complement your personal decorating style and create customized ambiance for any occasion.
- “Before starting your origami candle, learn fundamental folding techniques in our Origami Basics for Beginnersguide.”
- “Create a complete table setting by adding origami animals from our Origami Animals Collection for themed dinner parties.”
- “Discover more home decoration projects in our Creative Origami Gallery featuring functional and artistic designs.”
- “Find beautiful ways to display your paper candles with our Decorative Origami Ideas for special occasions and home décor.”
- “Complete your romantic table setting by adding Origami Flowers as centerpiece accents around your candles.”
- “Create impressive candle arrangements using techniques from our Modular Origami Projects for special celebrations.”
