
Introduction
Origami transforms simple paper into incredible creations, and the paper car stands out as one of the most engaging projects for both children and adults. This beginner-friendly tutorial demonstrates how to fold a recognizable vehicle complete with windows, body, and the characteristic shape of an automobile. With just seven straightforward steps, you’ll create a charming paper car that captures the essence of real vehicles while building fundamental origami skills. Whether for play, decoration, or learning basic folding techniques, this origami car offers immediate satisfaction and endless creative possibilities.
Step-by-Step Instructions
Step 1: Create the Foundation Grid
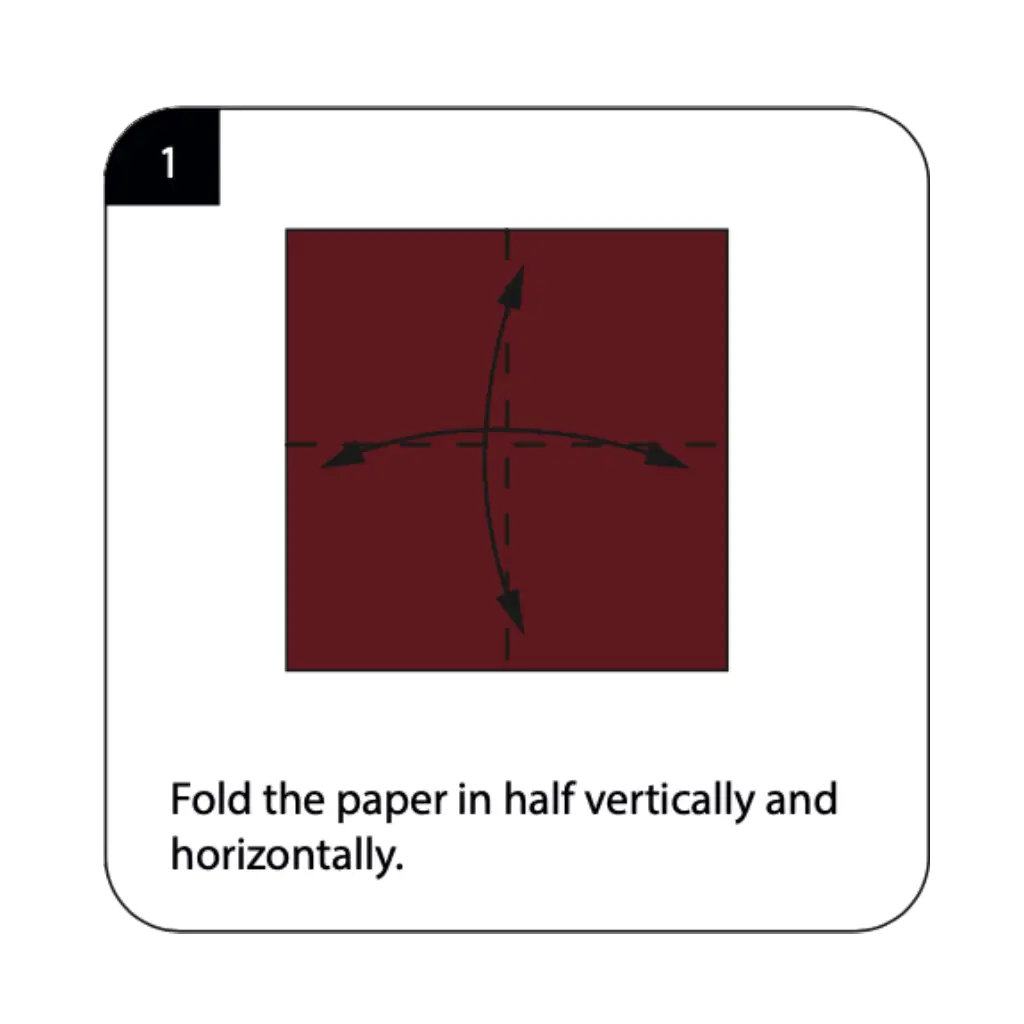
Begin with a square sheet of paper, preferably red or your favorite car color. Fold the paper in half vertically and horizontally to create intersecting crease lines, then unfold completely. These foundation creases establish the reference framework that will guide all subsequent folds in your origami car construction. The precision of these initial folds is crucial for achieving proper symmetry and proportions in your finished vehicle. Take care to align the edges perfectly and create sharp, well-defined creases that will serve as guidelines throughout the folding process.
Step 2: Form the Base Structure

Fold the bottom edge up to meet the center line created in Step 1, establishing the foundational structure for your car’s body. This horizontal fold creates the platform that will support the rest of your vehicle’s construction and determines the overall proportions of your finished car. The accuracy of this edge-to-center fold affects both the stability and appearance of your completed origami automobile. Work carefully to ensure the bottom edge aligns precisely with the center crease, creating a clean, straight foundation for your paper vehicle.
Step 3: Create the Wheel Wells
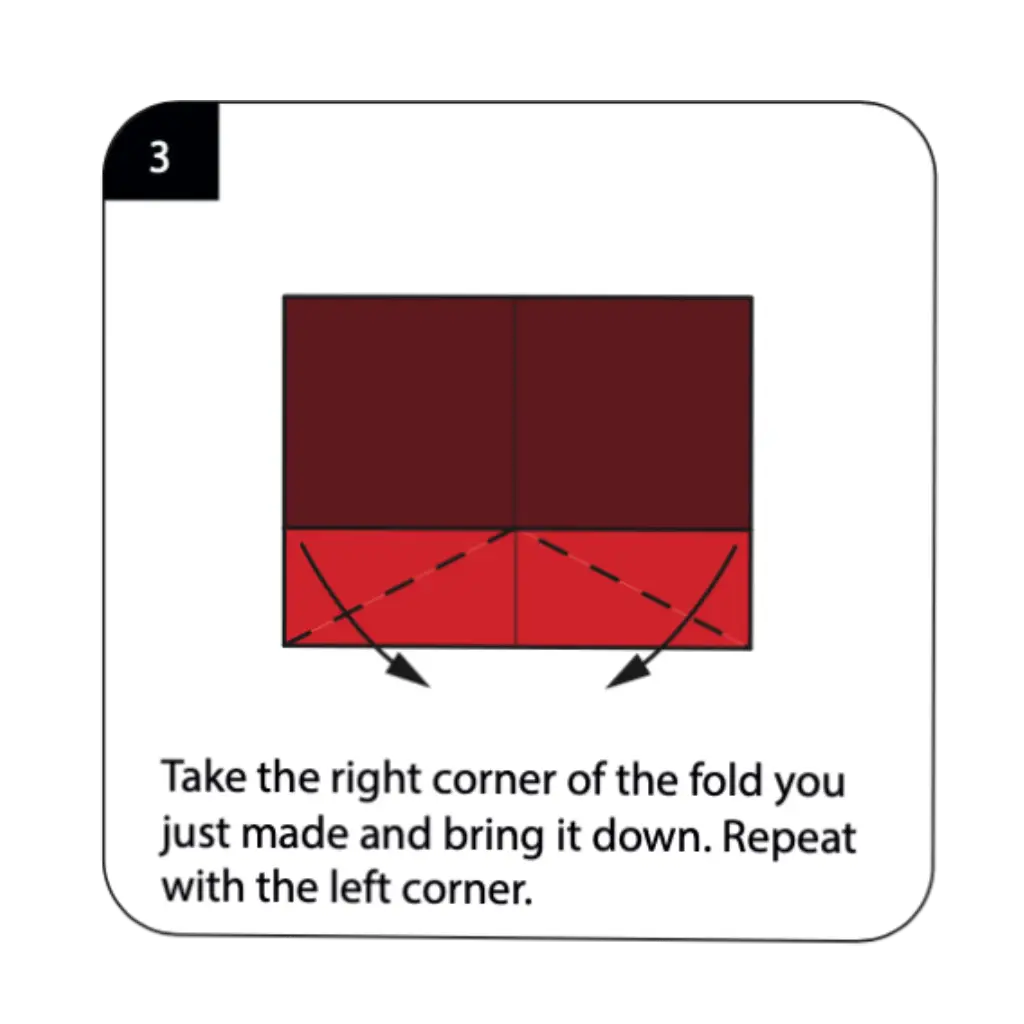
Take the right corner of the fold you just made and bring it down diagonally, then repeat this same technique with the left corner. These corner folds begin creating the characteristic shape of a car by forming the wheel well areas beneath the vehicle’s body. The symmetrical execution of these corner folds is essential for achieving a balanced, professional-looking car that clearly represents an automobile. These diagonal folds transform the rectangular base into a more recognizable vehicle silhouette while establishing the foundation for the car’s distinctive shape.
Step 4: Shape the Vehicle Profile
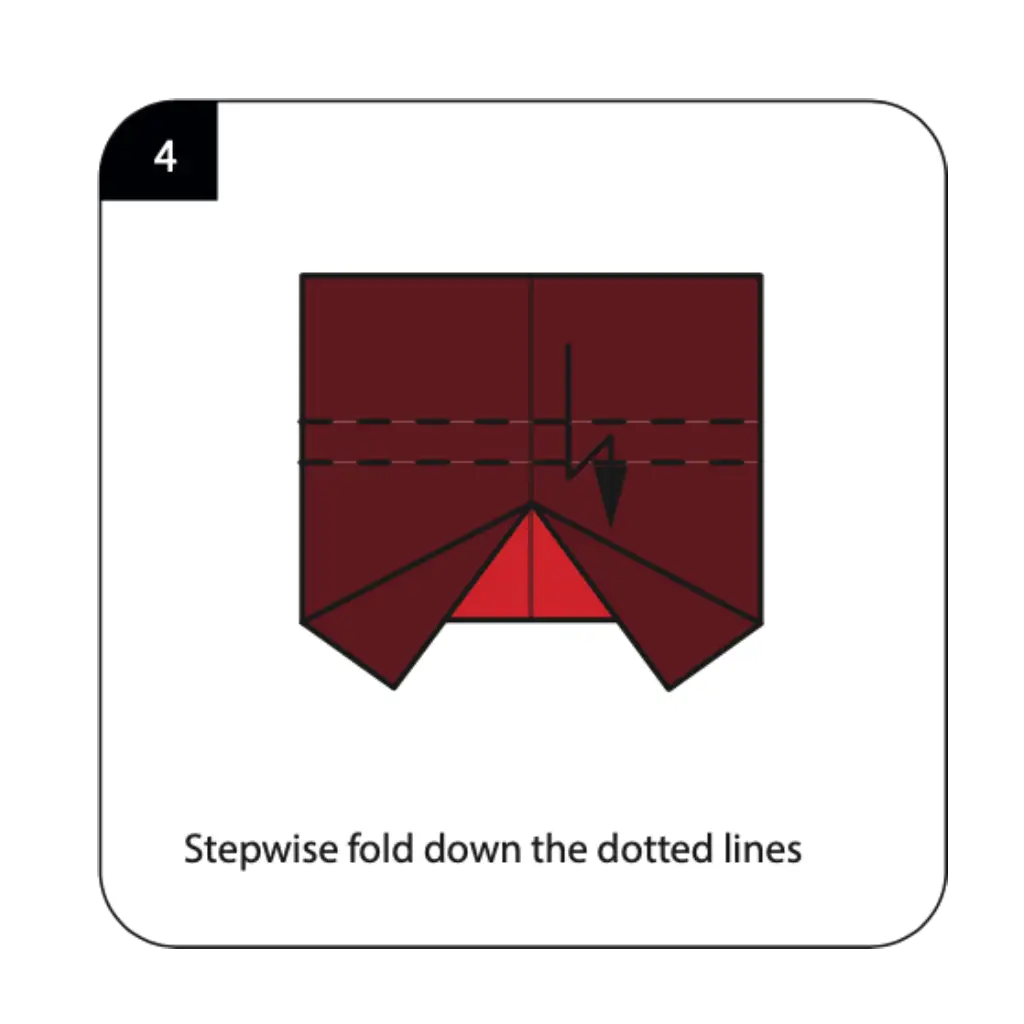
Execute stepwise folds down the dotted lines as indicated, creating the dimensional elements that will form your car’s distinctive profile and three-dimensional appearance. These strategic folds add depth and character to your paper vehicle while maintaining the clean, geometric lines characteristic of origami design. The careful execution of these profile-shaping folds determines how convincingly your finished model represents a real automobile. Work methodically to ensure each fold contributes to the overall vehicle shape while preserving the structural integrity of your paper construction.
Step 5: Define the Front and Rear

Fold the upper right corner down to meet the fold you just made on the right side, creating the angled front or rear section of your car. This corner fold establishes the automotive proportions that make your origami clearly recognizable as a vehicle rather than an abstract shape. The precision of this angled fold affects the overall character and realism of your finished paper car. This step demonstrates how strategic corner folding can create the distinctive sloped profiles that characterize different types of automobiles and vehicles.
Step 6: Complete the Vehicle Shape
Fold the upper left corner down to match the right side, creating symmetrical front and rear sections that complete your car’s basic automotive silhouette. This final shaping fold brings balance and completion to your vehicle’s design while establishing the characteristic proportions of a recognizable automobile. The careful execution of this matching corner fold ensures your origami car displays proper symmetry and automotive character. Work precisely to maintain consistency between both sides for a professional-looking paper vehicle that clearly represents a real car.
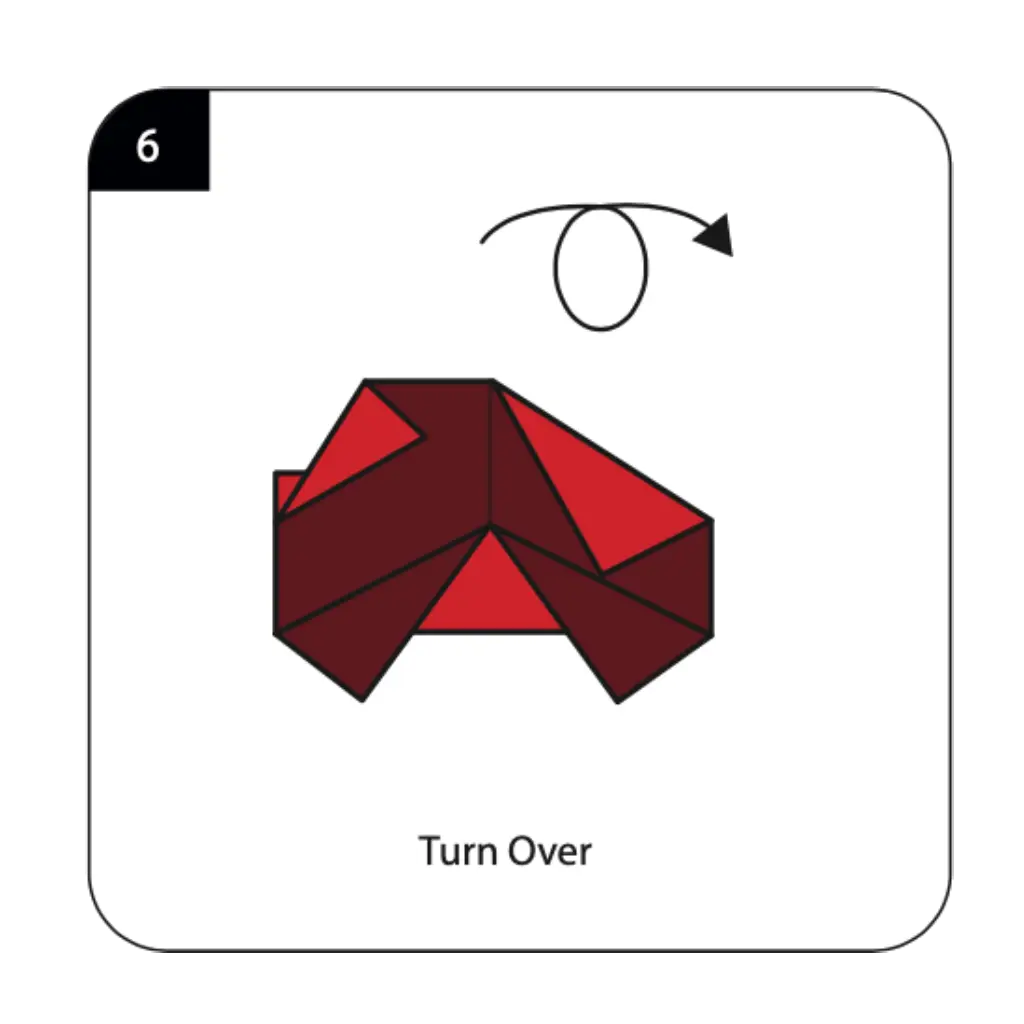
Step 7: Finalize Your Origami Car
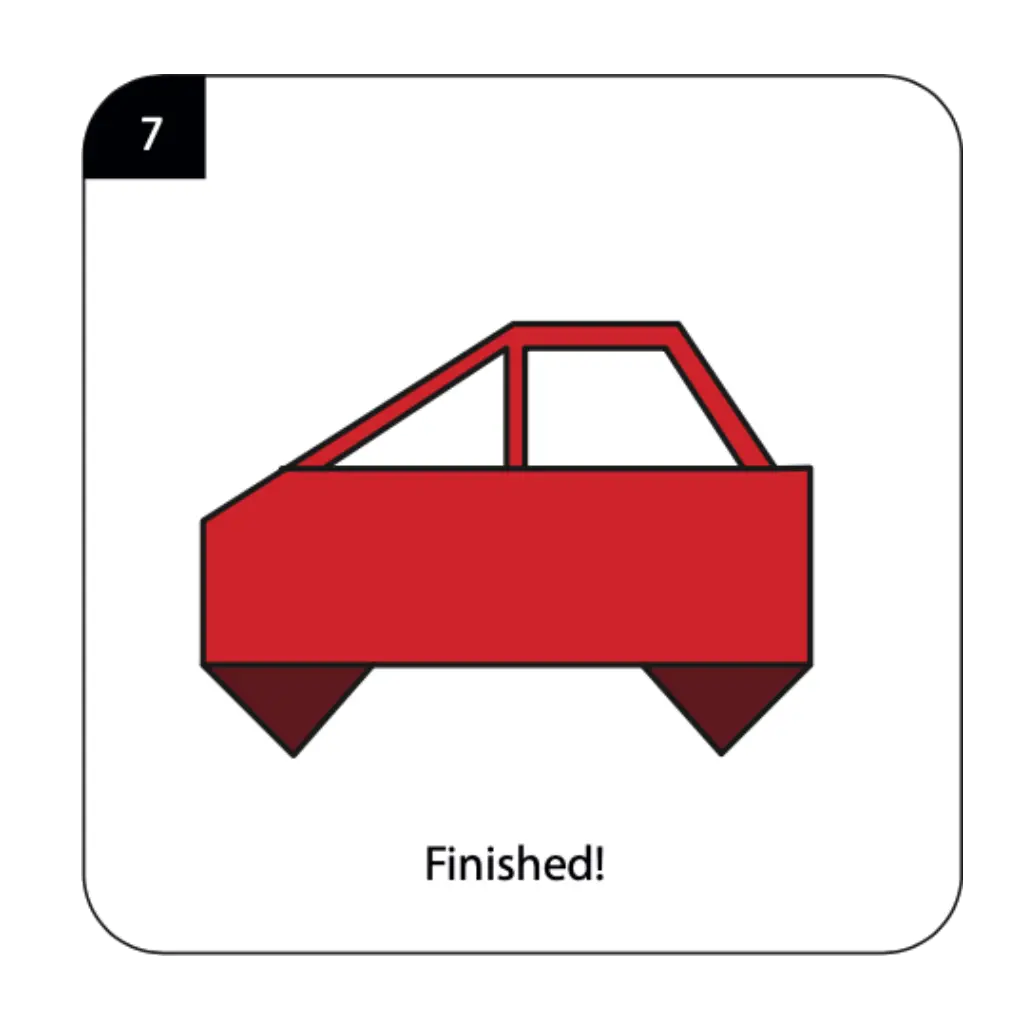
Turn over your completed model to reveal your finished origami car, ready for imaginative play or display as a charming paper vehicle. Make any final adjustments to ensure all folds are properly positioned and the car maintains its distinctive automotive shape. Your completed origami car now displays the characteristic elements of a real vehicle—body, windows, and wheel areas—while maintaining the clean geometric aesthetic of traditional paper folding. The finished model captures the essence of an automobile through simple yet effective folding techniques that transform flat paper into a recognizable three-dimensional vehicle.
Conclusion
Your origami car demonstrates how basic folding techniques can create recognizable everyday objects that spark imagination and provide hours of creative play. This simple paper vehicle serves as an excellent introduction to geometric folding while producing a satisfying result that clearly resembles a real automobile. The fundamental techniques learned through this project—including precise creasing, symmetrical folding, and dimensional shaping—build valuable skills for more complex origami challenges. Whether used for play, decoration, or skill-building, your handcrafted paper car showcases the timeless appeal of transforming simple materials into meaningful creations.
- “Master fundamental techniques in our Origami Basics for Beginners before starting your paper car.”
- “Create a garage full of vehicles with more projects from our Creative Origami Collection.”
- “Add paper animals as passengers from our Origami Animals Collection for complete play scenes.”
- “Display your car collection using ideas from our Decorative Origami Guide.”
- “Build scenic roads with Origami Flowers as landscape decorations.”
- “Create an entire vehicle fleet with Modular Origami Projects techniques.”
