
.
Introduction
Origami Caterpillar, the ancient Japanese art of paper folding, provides wonderful opportunities to introduce children to the fascinating world of insects and nature through creative hands-on activities. The origami caterpillar stands out as one of the most engaging and educational projects for young crafters, combining simple folding techniques with vibrant decorative possibilities that bring this garden creature to life. This beginner-friendly tutorial is specifically designed to be “easy for kids and colorful,” making it perfect for classroom science lessons, nature-themed activities, or simply as an entertaining craft that teaches children about the important role caterpillars play in our ecosystem. What makes this origami caterpillar particularly appealing is its combination of basic folding skills and creative expression—children can master the fundamental paper techniques while exercising their artistic imagination through colorful decorations and personal touches. The completed model captures the distinctive segmented body of a real caterpillar while remaining simple enough for young folders to complete independently, building confidence and interest in both Origami Caterpillar and natural science. Whether you’re preparing for spring celebrations, teaching about metamorphosis and butterfly life cycles, or looking for an engaging craft that combines learning with creativity, this caterpillar tutorial offers the perfect introduction to both paper folding and the wonderful world of insects.
Step-by-Step Instructions
Step 1: Create the Foundation Crease For Origami Caterpillar
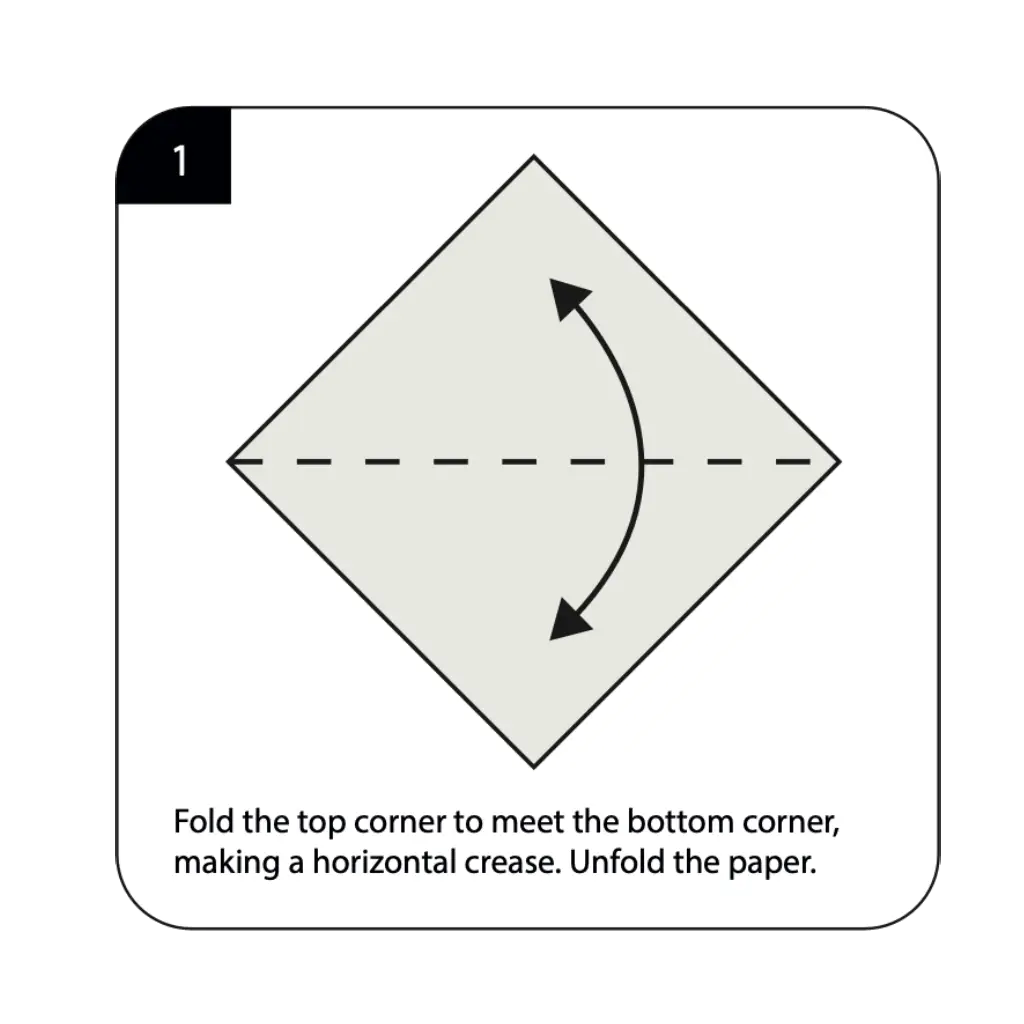
Start with a square of Origami Caterpillar paper placed diagonally with the non-colored (white) side facing up as specified in the instructions. Fold the top corner down to meet the bottom corner, creating a horizontal crease across the center of the diamond shape, then carefully unfold the paper. This initial fold establishes the primary reference line that will guide the formation of your caterpillar’s segmented body structure throughout the folding process. The precision of this horizontal crease is essential for creating the symmetrical body segments that characterize a caterpillar’s distinctive appearance. Take care to align the corners exactly and press firmly along the fold line to create a sharp, well-defined guide that will ensure proper proportions in your finished insect model.
Step 2: Form the Basic Body Shape For Origami Caterpillar
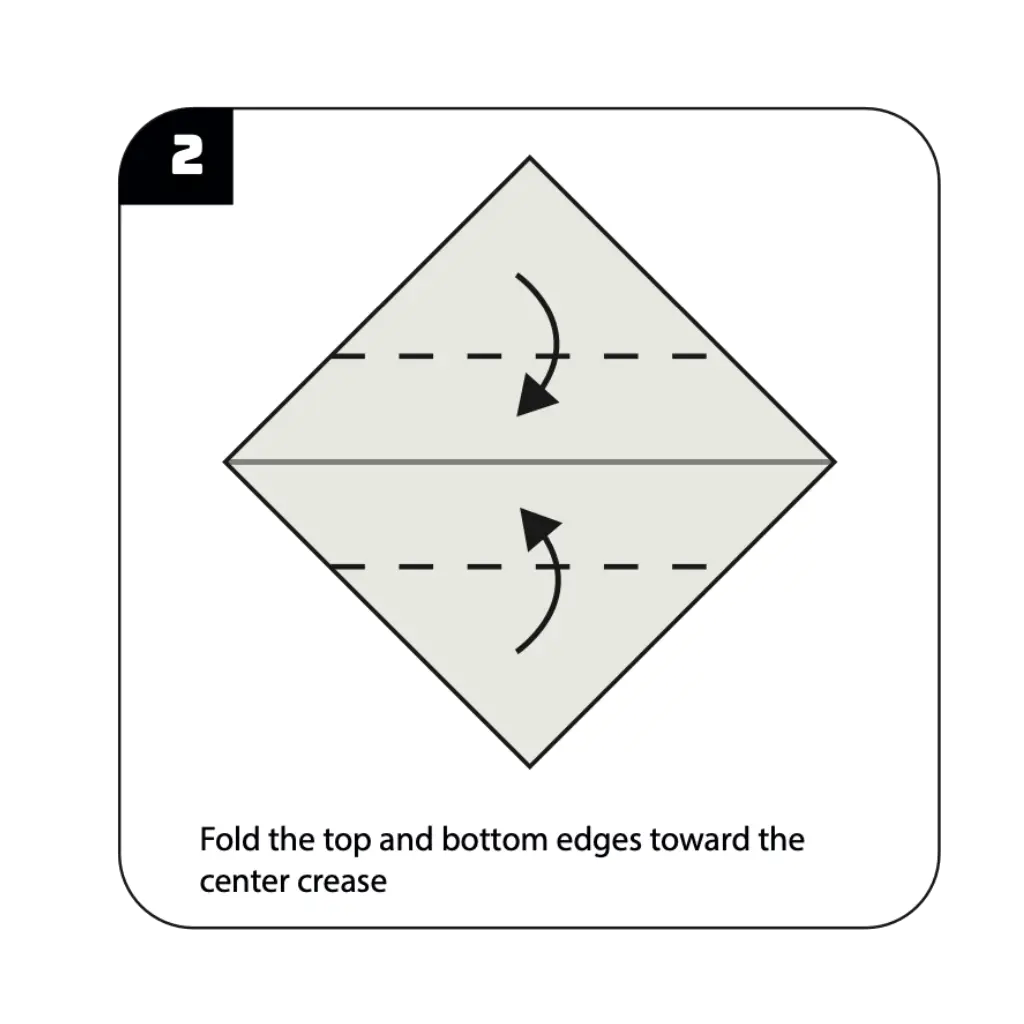
Fold the top and bottom edges toward the center crease as shown in the diagram, creating a narrower rectangular shape that will become the foundation of your caterpillar’s body. These parallel folds establish the width and basic proportions of your paper insect while creating the layered structure needed for subsequent dimensional folds. The accuracy of these edge-to-center folds directly affects the final appearance and symmetry of your caterpillar, so work carefully to ensure both edges meet precisely at the center line. This step transforms the diamond shape into the elongated form characteristic of caterpillars, preparing your paper for the segmentation folds that will create the realistic body structure.
Step 3: Prepare for Dimensional Folding For Origami Caterpillar
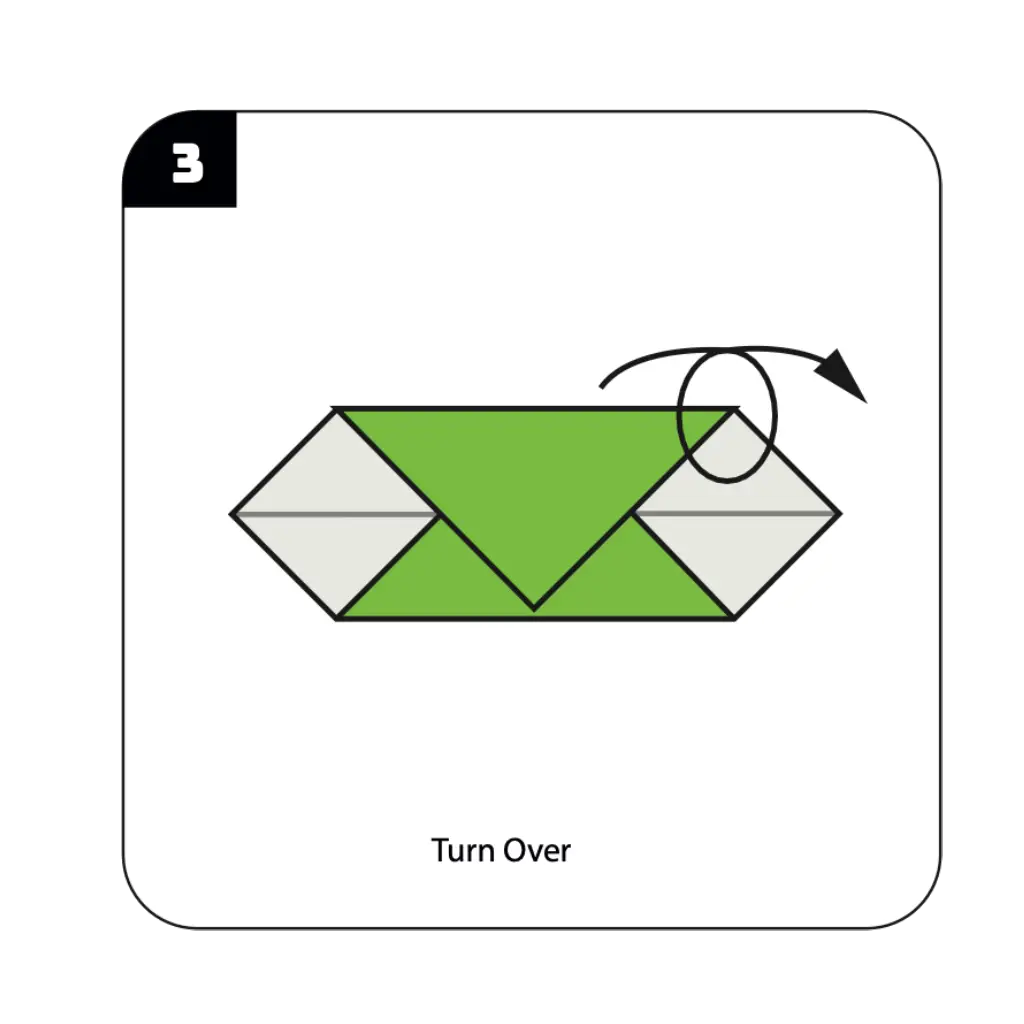
Turn over your folded paper as instructed to prepare for the next phase of construction. This reorientation positions your model correctly for creating the three-dimensional segments that will give your caterpillar its characteristic bumpy, segmented appearance. Handle the folded paper gently during this transition to maintain the integrity of your previous folds and preserve the proper body shape. The turned-over surface provides the ideal working area for creating the step folds that will transform your flat paper into a dimensional caterpillar with realistic body segments.
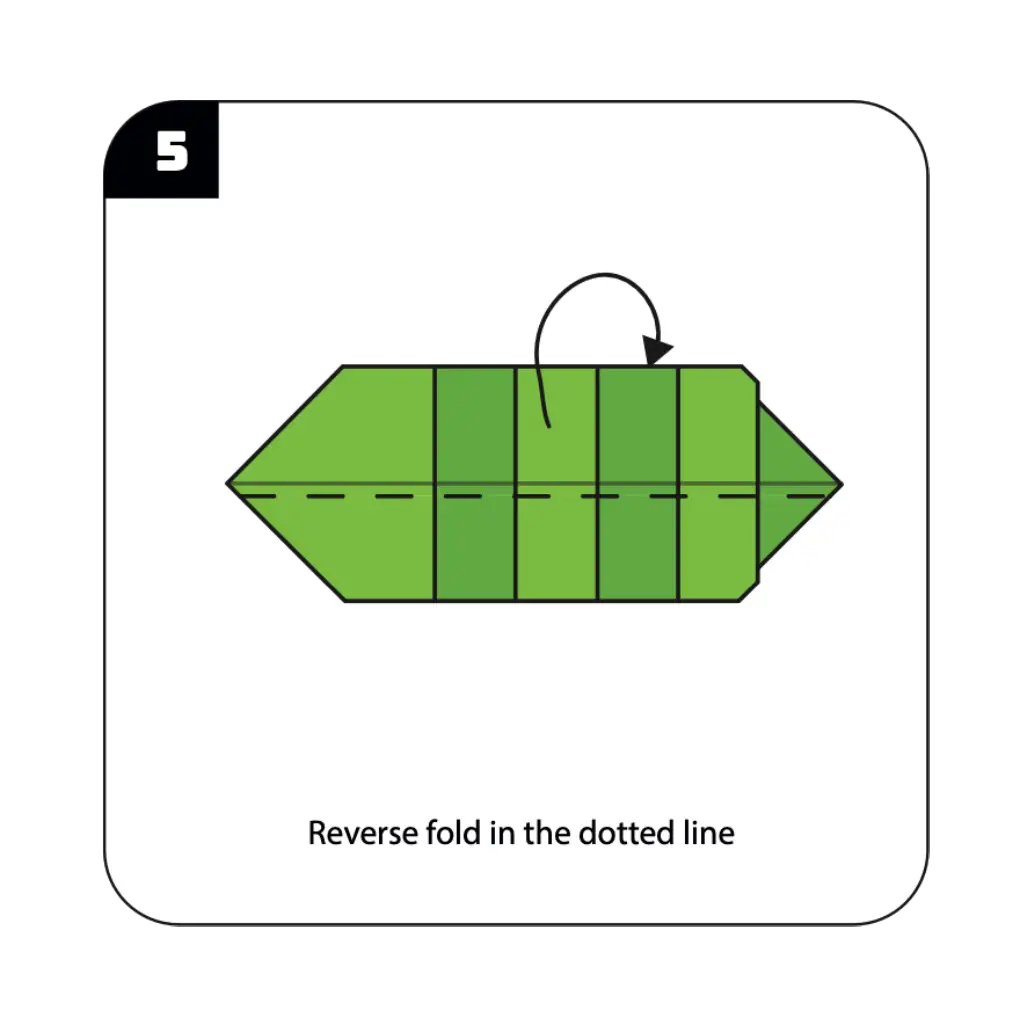
Step 4: Create the Segmented Body Structure For Origami Caterpillar

Make step folds along all the dotted lines as indicated in the diagram, creating the distinctive segmented appearance of a caterpillar’s body. These step folds are crucial for achieving the realistic bumpy texture that characterizes real caterpillars and distinguishes them from other insects. Work methodically along the entire length of your paper caterpillar, ensuring each segment is consistently sized and properly aligned for a professional appearance. The precision of these step folds determines how convincing your paper caterpillar will look, so take time to create clean, sharp creases that clearly define each body segment.
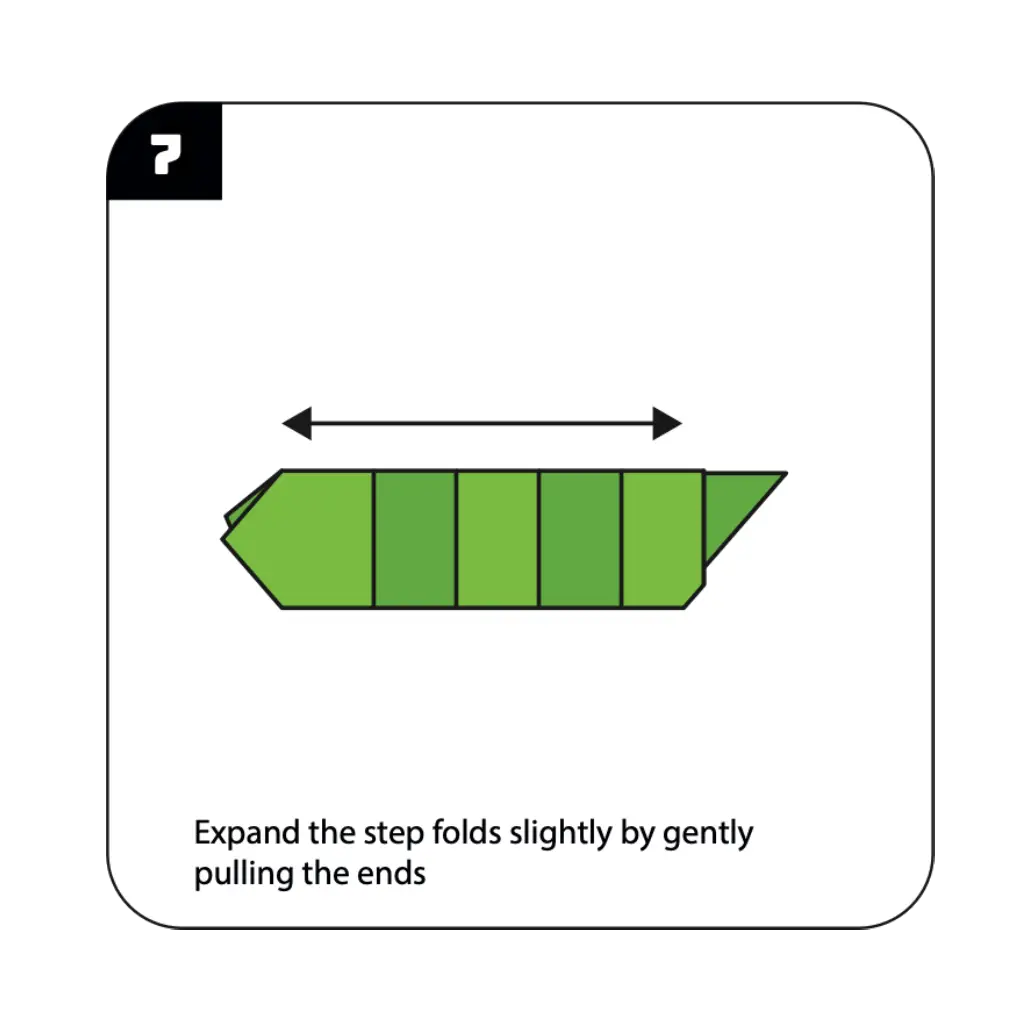
Step 5: Add Dimensional Reality For Origami Caterpillar
Expand the step folds slightly by gently pulling the ends as instructed, creating more pronounced three-dimensional segments that enhance the realistic appearance of your caterpillar. This careful manipulation transforms the flat step folds into rounded, lifelike body segments that capture the characteristic plump appearance of real caterpillars. Work gently during this expansion process to avoid tearing the paper while achieving the desired dimensional effect that makes your origami insect look more realistic. The proper execution of this step significantly enhances the visual impact of your caterpillar, creating depth and texture that brings the paper creation to life.
Step 6: Define the Head Section For Origami Caterpillar
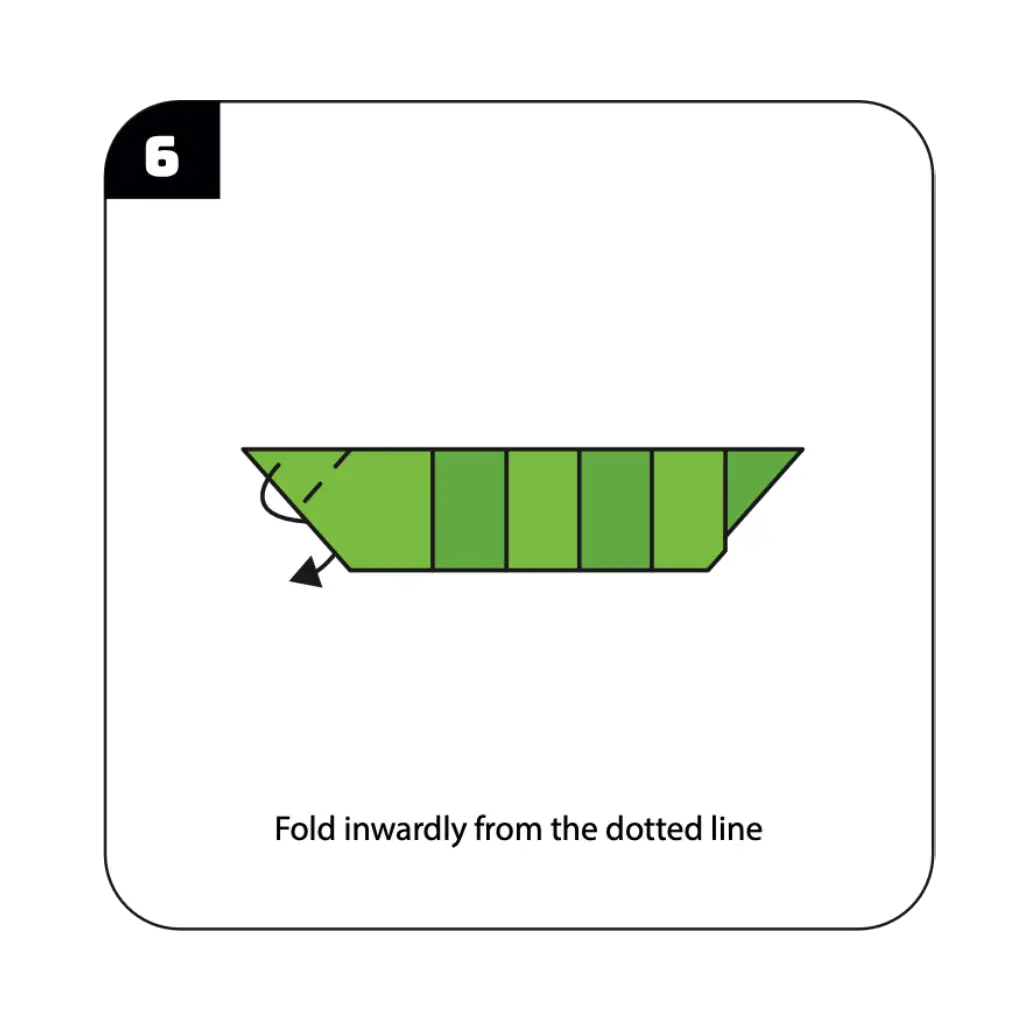
Fold inwardly from the dotted line as shown to create the head section of your caterpillar. This important fold differentiates the head from the body segments and establishes the proper proportions characteristic of caterpillar anatomy. The position and angle of this inward fold affects the overall character and appearance of your finished insect, so work carefully to achieve the desired head shape. This fold completes the basic structural elements of your caterpillar, creating a clear distinction between the head region and the segmented body that matches the anatomy of real caterpillars.
Step 7: Refine the Final Shape For Origami Caterpillar
Perform a reverse fold along the dotted line as indicated to add final definition to your caterpillar’s form. This advanced folding technique creates subtle but important details that enhance the realism and character of your paper insect. The reverse fold requires careful manipulation of the paper layers while maintaining the integrity of all previous folds, demonstrating how technical Origami Caterpillar skills can enhance creative projects. This final structural fold prepares your caterpillar for the decorative phase that will transform it into a personalized, colorful creature.
Step 8: Complete Your Origami Caterpillar
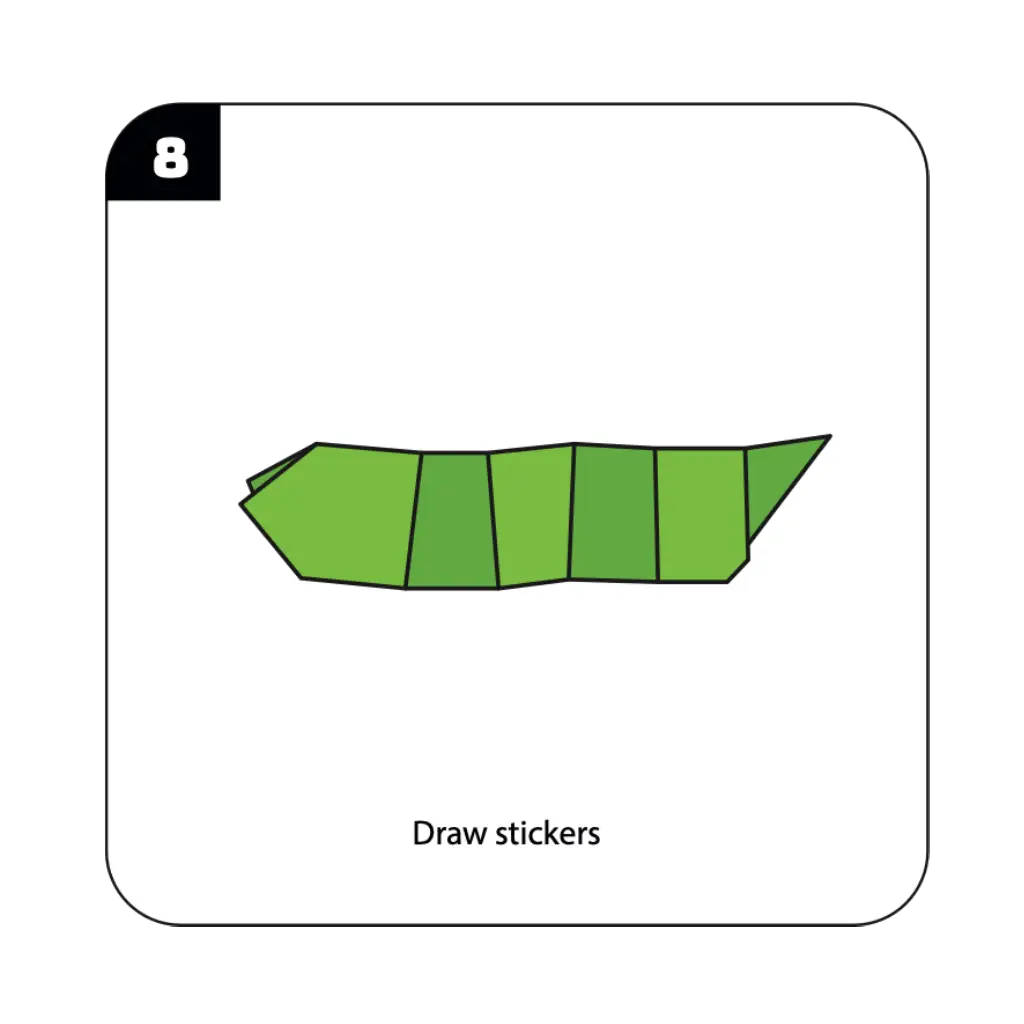
Add stickers, draw features, or use colorful markers to bring your caterpillar to life with distinctive markings, eyes, and personality. This creative finishing phase allows unlimited artistic expression as you design unique patterns, colors, and facial features that reflect your imagination or mimic real caterpillar species. The well-structured paper foundation provides an excellent canvas for creative decoration, whether using simple dot stickers for spots or elaborate hand-drawn patterns. Your completed origami caterpillar now combines the precision of paper folding with the joy of artistic expression, ready to crawl into imaginative play scenarios or serve as an educational tool for learning about insect life cycles and natural science.

Conclusion
Congratulations on creating your origami caterpillar! This delightful paper insect demonstrates how simple folding techniques can create engaging educational tools that connect children with the natural world around them. From a basic square sheet, you’ve fashioned a dimensional creature that captures the essential characteristics of real caterpillars while providing endless opportunities for creative expression and learning. The origami caterpillar showcases how paper folding can serve as both a technical craft and an educational activity, introducing young learners to insect anatomy, metamorphosis concepts, and the important role these creatures play in our ecosystem. Your completed caterpillar makes an excellent addition to nature study activities, spring classroom decorations, or simply as a charming handmade toy that encourages imaginative play and scientific curiosity. The techniques you’ve learned—including step folding, reverse folding, and creative finishing—build valuable foundation skills for more advanced Origami Caterpillar projects while fostering appreciation for both paper crafts and natural science. We hope this tutorial has sparked interest in both origami and entomology, encouraging exploration of the fascinating world of insects through hands-on creative activities. Remember that each caterpillar you create offers opportunities to learn about different species, colors, and patterns found in nature, making this simple paper craft a gateway to broader scientific discovery and environmental awareness.
- “Before starting your caterpillar, learn fundamental folding techniques in our Origami Basics for Beginnersguide.”
- “Create a complete garden ecosystem by exploring our Origami Animals Collection featuring butterflies, ladybugs, and other insects.”
- “Discover more kid-friendly projects in our Creative Origami Gallery designed specifically for young crafters.”
- “Find beautiful ways to display your paper insects with our Decorative Origami Ideas for nature-themed displays.”
- “Complete your garden scene by adding Origami Flowers for your caterpillar to crawl on and eat.”
- “Create multiple caterpillars for educational displays using techniques from our Modular Origami Projectsguide.”
