
Creating an adorable origami chicken should be a fun and rewarding experience, but many beginners find themselves frustrated when their creation doesn’t match their expectations. If your paper chicken looks more like a crumpled napkin than a cute bird, you might be making one of these common mistakes. Let’s walk through the perfect process while highlighting what typically goes wrong.
MISTAKE #1: Using the wrong paper
For the perfect origami chicken, you’ll need:
- 15×15 cm origami paper with yellow on one side and white on the other
- A clean, flat work surface
- A bone folder (optional) for crisp creases
Using printer paper or paper that’s too thick will create bulky folds that won’t hold properly. With the right materials, your finished chicken face will measure approximately 9×10 cm.
Step 1: Begin with White Side Up
MISTAKE #2: Starting with the wrong side up
Start with the white side of your origami paper facing upward. This ensures your finished chicken will display the yellow side, giving it that classic chick appearance. It’s a simple mistake but completely changes your final result.
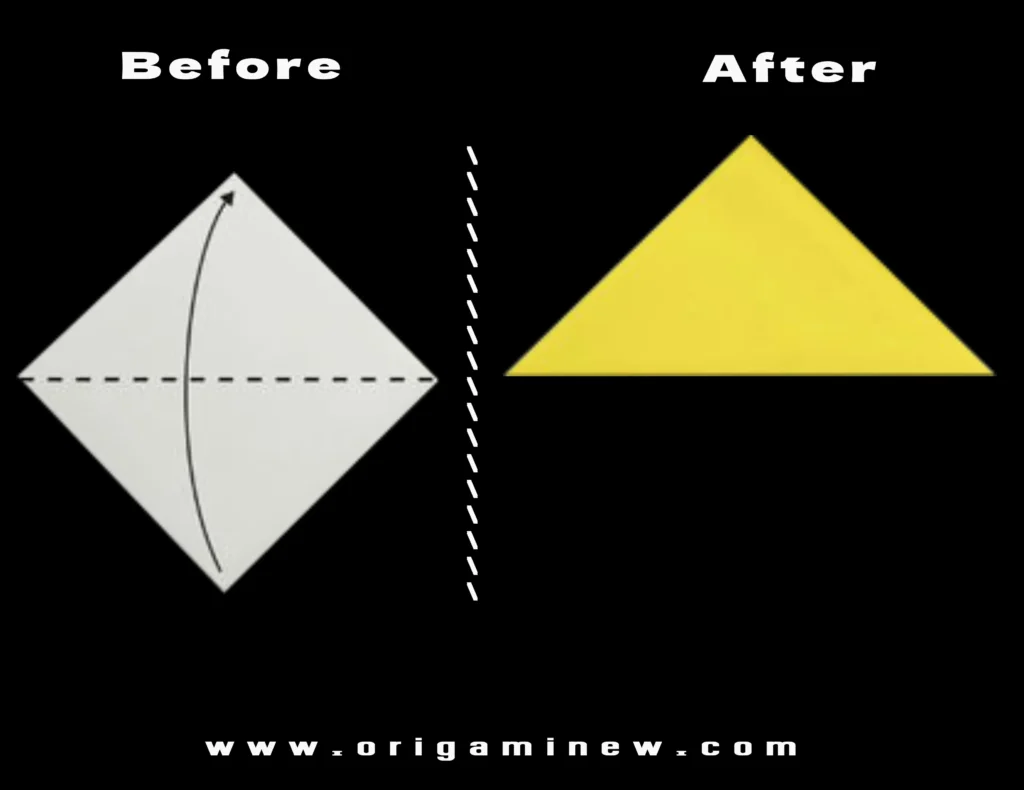
Step 2: Create Your First Diagonal Fold
Fold the paper in half diagonally, bringing the right corner to meet the left corner. Press firmly to create a clean crease, then unfold.
MISTAKE #3: Weak or imprecise diagonal creases
This initial fold serves as your roadmap for the entire project. If this crease is weak or off-center, every subsequent fold will be misaligned. Take your time with this foundational step.
Step 3: Reinforce Your Diagonal Reference
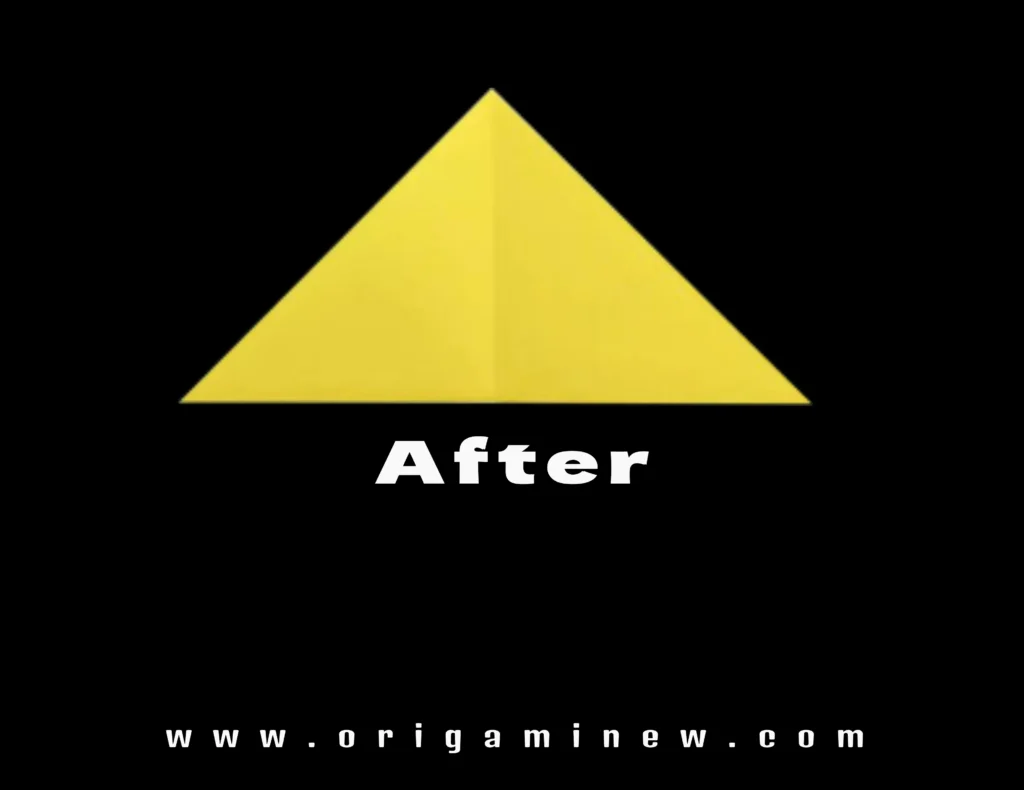
Fold the right corner to the left corner diagonally again, crease well, then unfold. You should now have a square with an X-shaped crease pattern.
MISTAKE #4: Rushing through the preparation folds
Many folders rush these setup steps, but they’re crucial for proper alignment. These reference creases guide all your future folds.
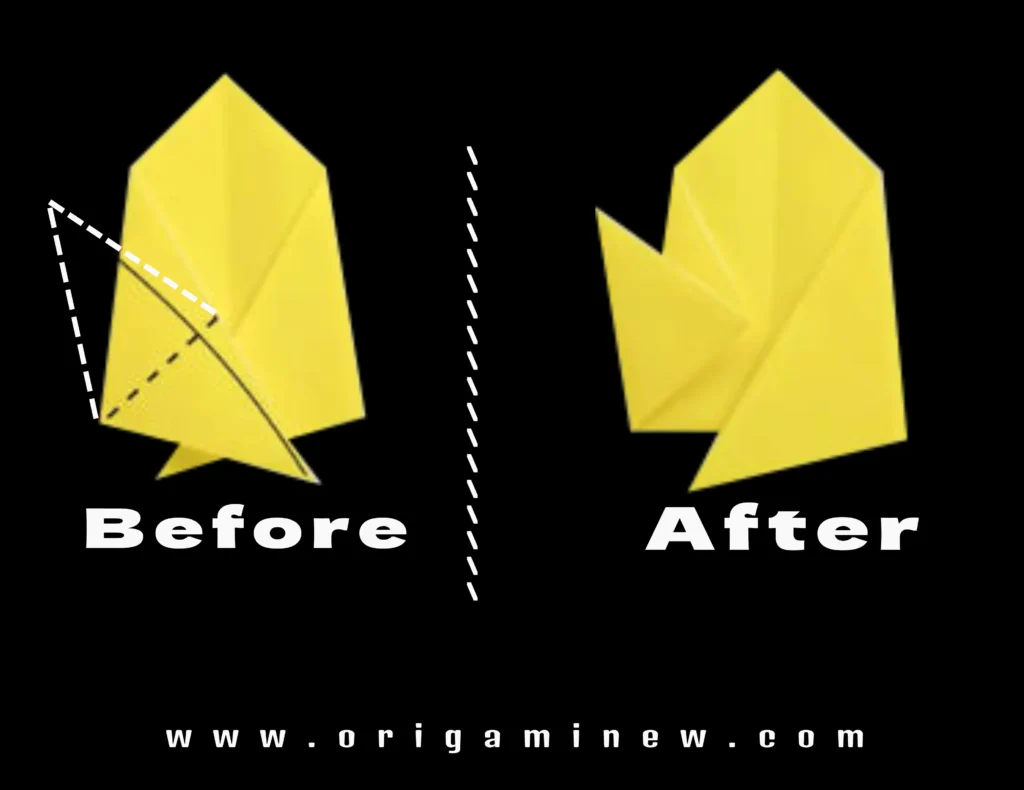
Step 4: Create the First Wing Base
Take the right corner and fold it toward the center along the black dotted line, making sure it crosses over the middle crease but stays under the bottom edge of the paper.
MISTAKE #5: Incorrect wing base positioning
Remember that the placement of this fold determines your chicken’s face size. The more you fold inward, the smaller the chicken’s face will be. Aim for a fold that will give you that ideal 9×10 cm face.
Step 5: Establish Symmetry
Repeat the previous step with the left corner, folding it inward to match the right side exactly.
MISTAKE #6: Asymmetrical folds
Ensure both sides mirror each other perfectly. Uneven wing folds will give your chicken a lopsided appearance that no amount of decorating can fix.
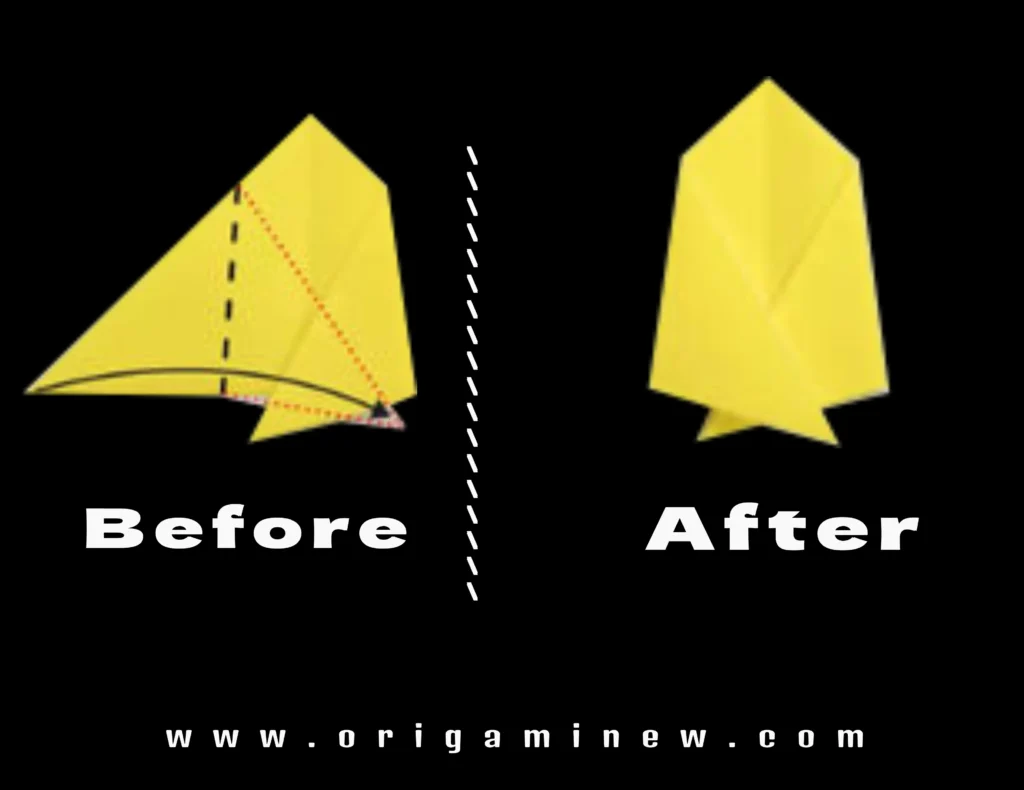
Step 6: Form the Left Wing
Take the left top flap and fold it upward along the black dotted line shown in the diagram.
MISTAKE #7: Incorrect wing angle
The wing flaps should fold at approximately a 45-degree angle. Too flat makes your chicken look squashed; too vertical makes it unstable.
Step 7: Create the Right Wing
Repeat the previous step for the right top flap, folding it upward at the same angle as the left wing.
Step 8: Add the Chicken’s Cheeks
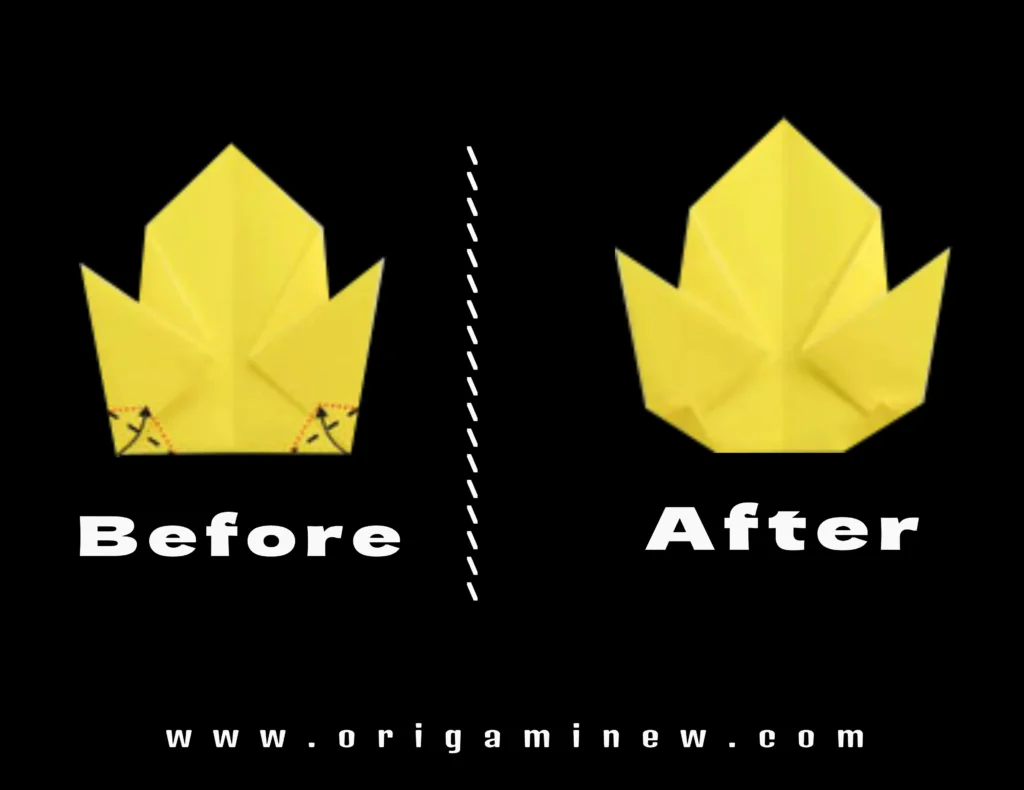
Fold the bottom left and right corners upward slightly to create the chicken’s adorable chubby cheeks.
MISTAKE #8: Overlooking the subtle folds
These small folds add character and dimension. They should be subtle—just enough to suggest the rounded shape of a chicken’s face without overwhelming the design.
Step 9: Form the Forehead
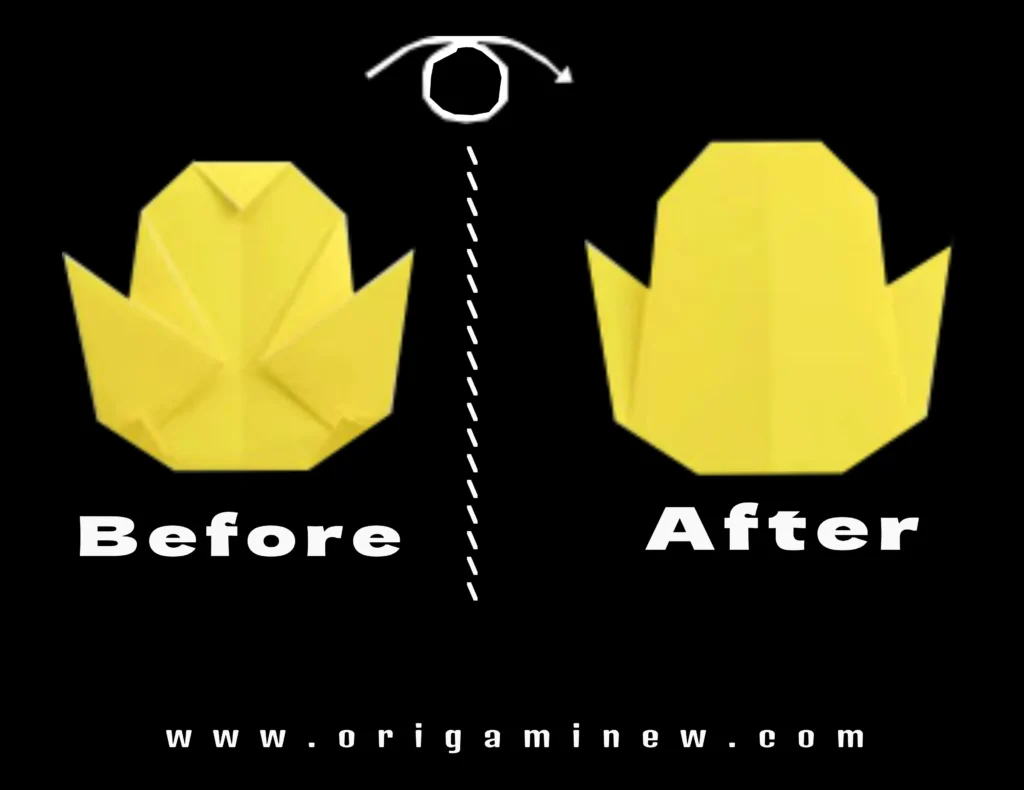
Fold the top point downward slightly to create the chicken’s forehead, completing the rounded shape of the head.
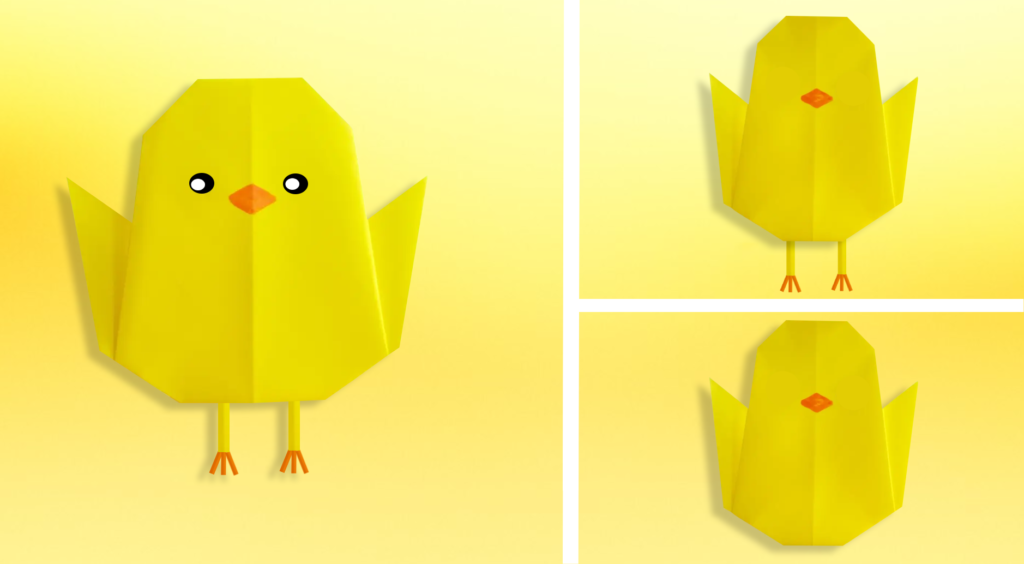
Step 10: Add Personality
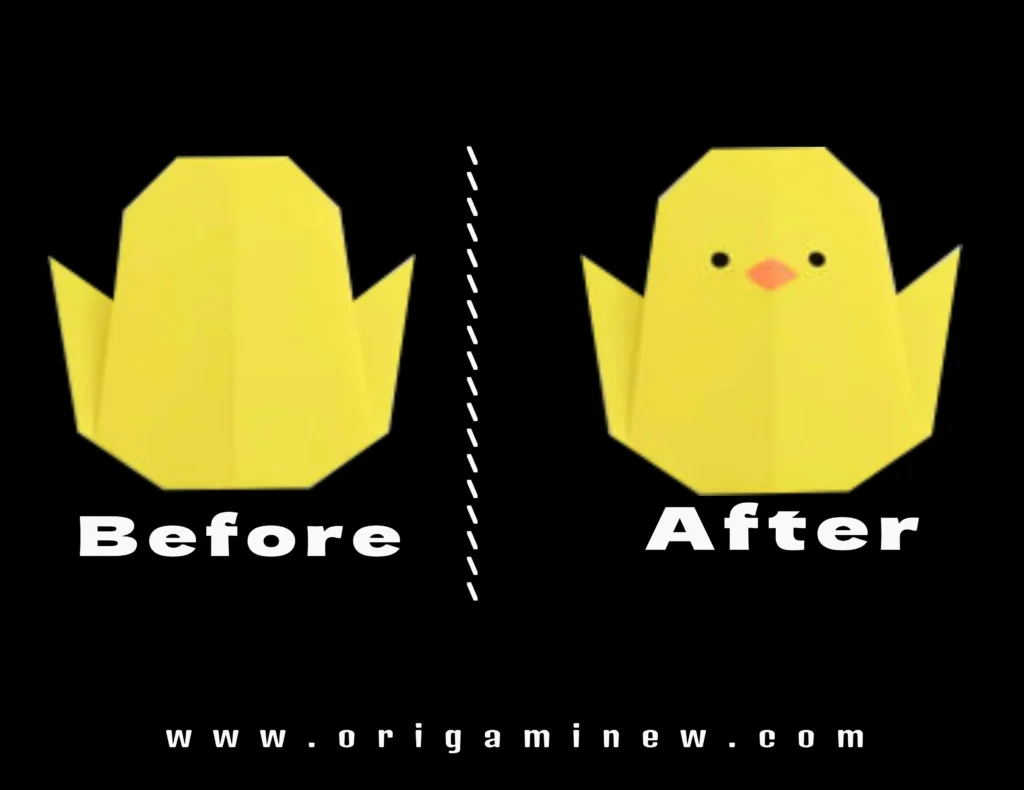
Flip the paper over to reveal your yellow chicken face, then use markers to add eyes, a beak, and any expressions you desire.
MISTAKE #9: Overcomplicating the facial features
Simple is better here—small dots for eyes and a tiny triangle for a beak are usually sufficient. Many beginners try to draw elaborate facial features that end up looking cluttered.
Congratulations! You’ve now completed your origami chicken. This cute and lovely creation is perfect for decorations, greeting cards, or as a simple display of your paper-folding skills.
Beyond the Basic Chicken
Once you’ve mastered this design, consider exploring other origami animals that require less than 10 steps, like an easy origami penguin. The techniques you’ve learned here will serve as a foundation for many other origami projects.
Troubleshooting Tips
If your chicken still doesn’t look right:
- Check that your initial folds are precise and well-creased
- Ensure your paper quality is appropriate for origami
- Take your time with each fold—origami rewards patience
- Practice makes perfect—don’t be discouraged if your first attempt isn’t flawless
Have you tried making this origami chicken? What was your biggest challenge? Share in the comments below!