
Introduction: Satisfy your sweet tooth with this delightful origami cupcake that looks good enough to eat! This charming paper dessert features a textured wrapper and decorative frosting top, all created from a single square sheet. Perfect for birthday decorations, party favors, or just for fun, this project brings bakery charm to paper crafting. Follow these ten simple steps to fold your own irresistible paper cupcake.
Step-by-Step Origami Cupcake Instructions:
Step 1: Start with Diamond Position For Origami Cupcake
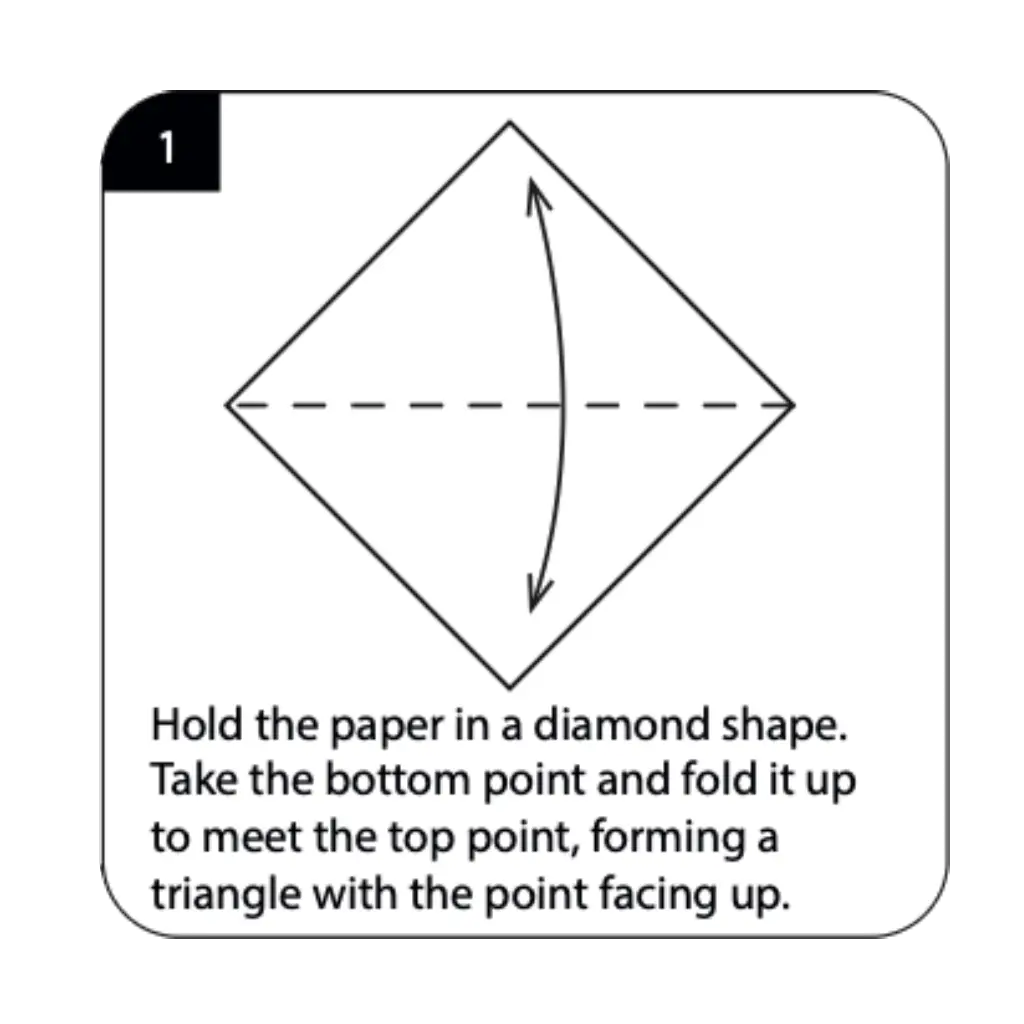
Hold your square paper in a diamond shape and take the bottom point, folding it up to meet the top point to form a triangle. This creates the basic triangular foundation with the point facing upward, establishing the framework for your cupcake. Ensure the edges align perfectly for a symmetrical result that will translate into a balanced cupcake design. This diamond-to-triangle transformation is a fundamental technique in origami basics used for countless projects.
Step 2: Create the Frosting Line For Origami Cupcake
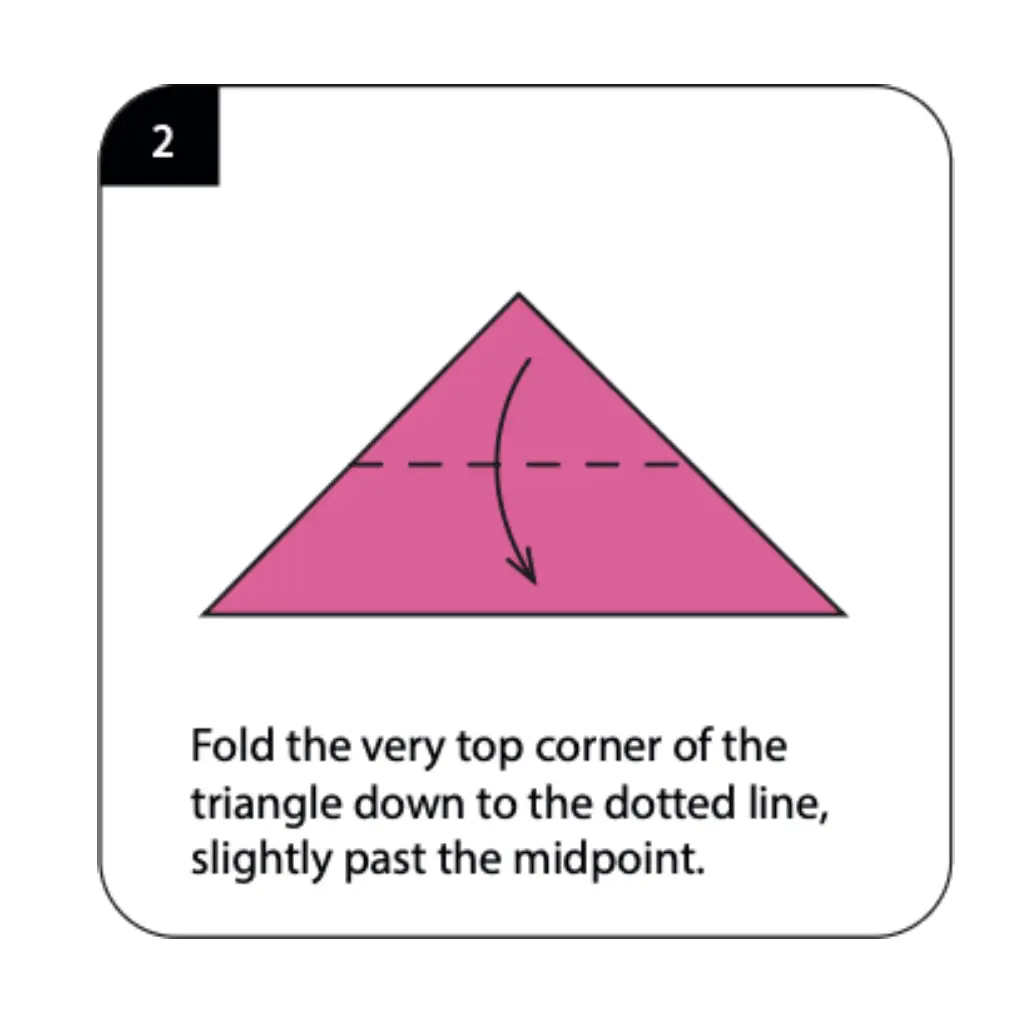
Fold the very top corner of the triangle down to the dotted line, positioning it slightly past the midpoint of the triangle. This downward fold begins forming what will become the decorative frosting edge of your cupcake. The placement of this fold determines the proportion between the cupcake wrapper and frosting sections. Precise folding here ensures your origami cupcake has realistic proportions similar to a real bakery treat.
Step 3: Form the Decorative Edge For Origami Cupcake
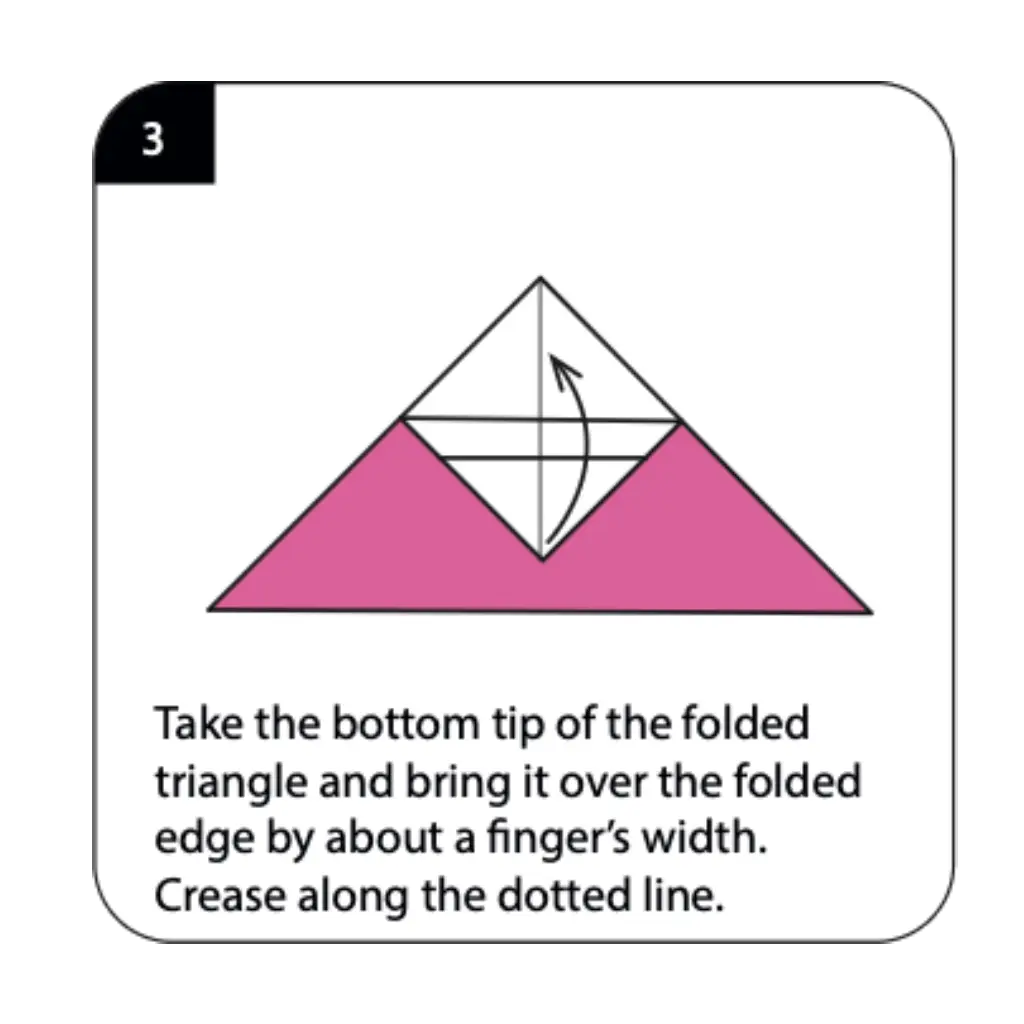
Take the bottom tip of the folded triangle and bring it over the folded edge by about a finger’s width, creasing along the dotted line. This creates a layered effect that adds dimension to your cupcake’s frosting area. The overlapping fold mimics the way real frosting peaks over the edge of a cupcake wrapper. This detail is what makes your paper creation recognizable as a cupcake rather than a simple geometric shape.
Step 4: Fold Back for Texture For Origami Cupcake
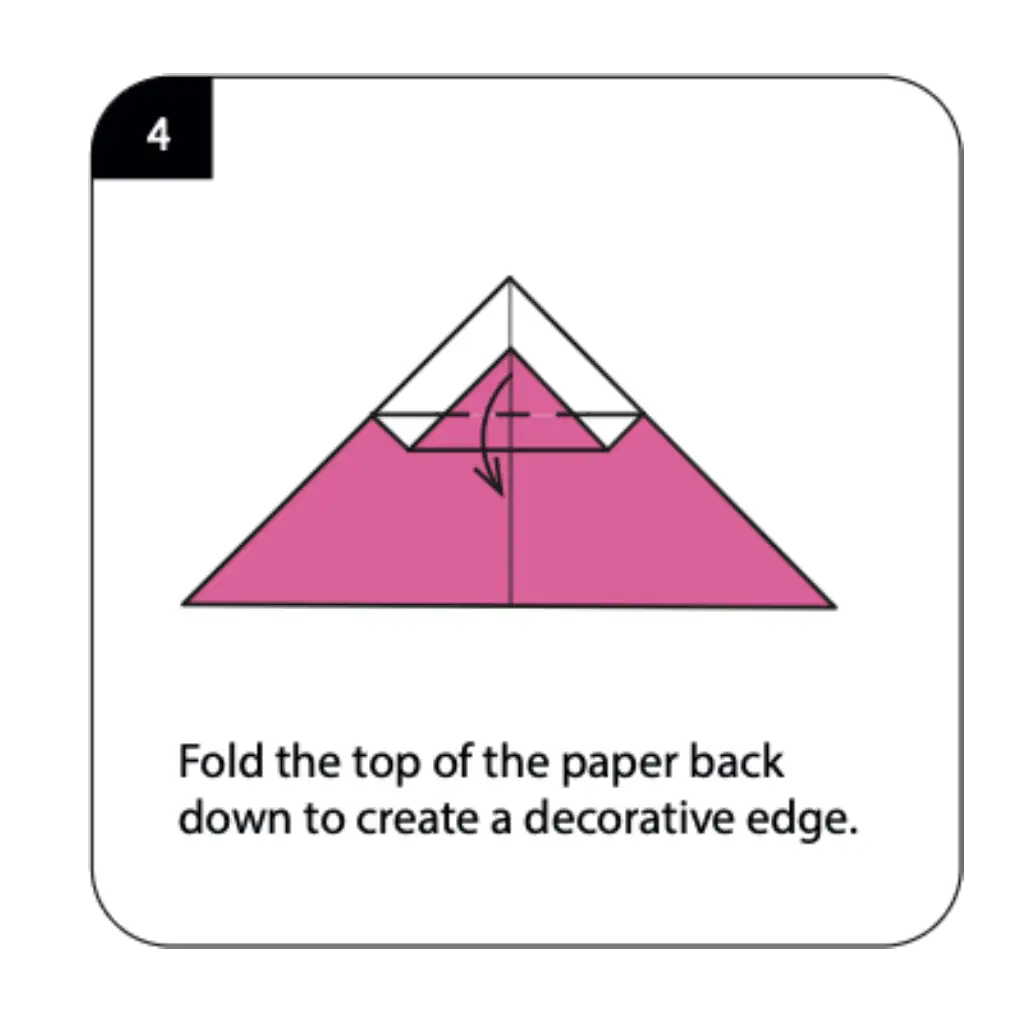
Fold the top of the paper back down to create a decorative edge that represents the textured frosting swirls. This backward fold adds visual interest and creates the illusion of piped frosting on your paper cupcake. The zigzag pattern formed by this fold captures the essence of decorated cupcakes found in bakeries. This texturing technique elevates your project beyond simple creative origami to realistic paper food art.
Step 5: Add Central Definition For Origami Cupcake

Make a fold along the dotted line as shown to add definition to the center of your cupcake design. This fold helps establish the three-dimensional quality of your cupcake and prepares it for the shaping steps. The central crease provides structural support while adding to the realistic appearance of your paper dessert. Careful attention to this fold ensures your cupcake maintains its shape when displayed.
Step 6: Shape the Wrapper Sides

Flip the figure over and fold in both left and right corners along the dotted lines to form the base of the cupcake wrapper. These inward folds create the tapered shape characteristic of real cupcake liners or wrappers. The angle of these folds determines how wide or narrow your cupcake base appears. This shaping technique is similar to methods used in decorative origami food models.
Step 7: Secure the Bottom Point
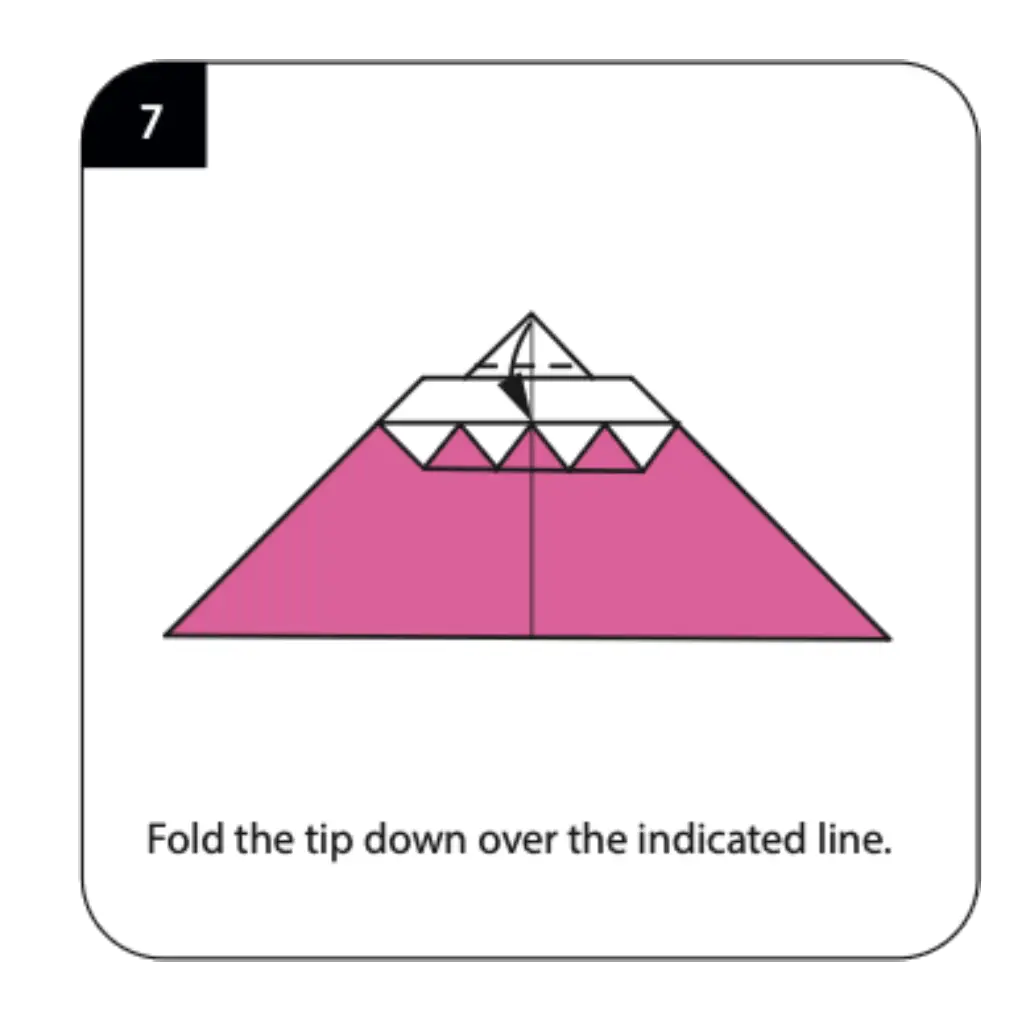
Fold the tip down over the indicated line to create a flat bottom for your cupcake to stand on. This fold tucks away excess paper and provides stability for your finished creation. The clean bottom edge allows your origami cupcake to sit properly on a surface for display. This finishing technique ensures your cupcake looks polished from every angle.
Step 8: Refine the Base Shape For Origami Cupcake
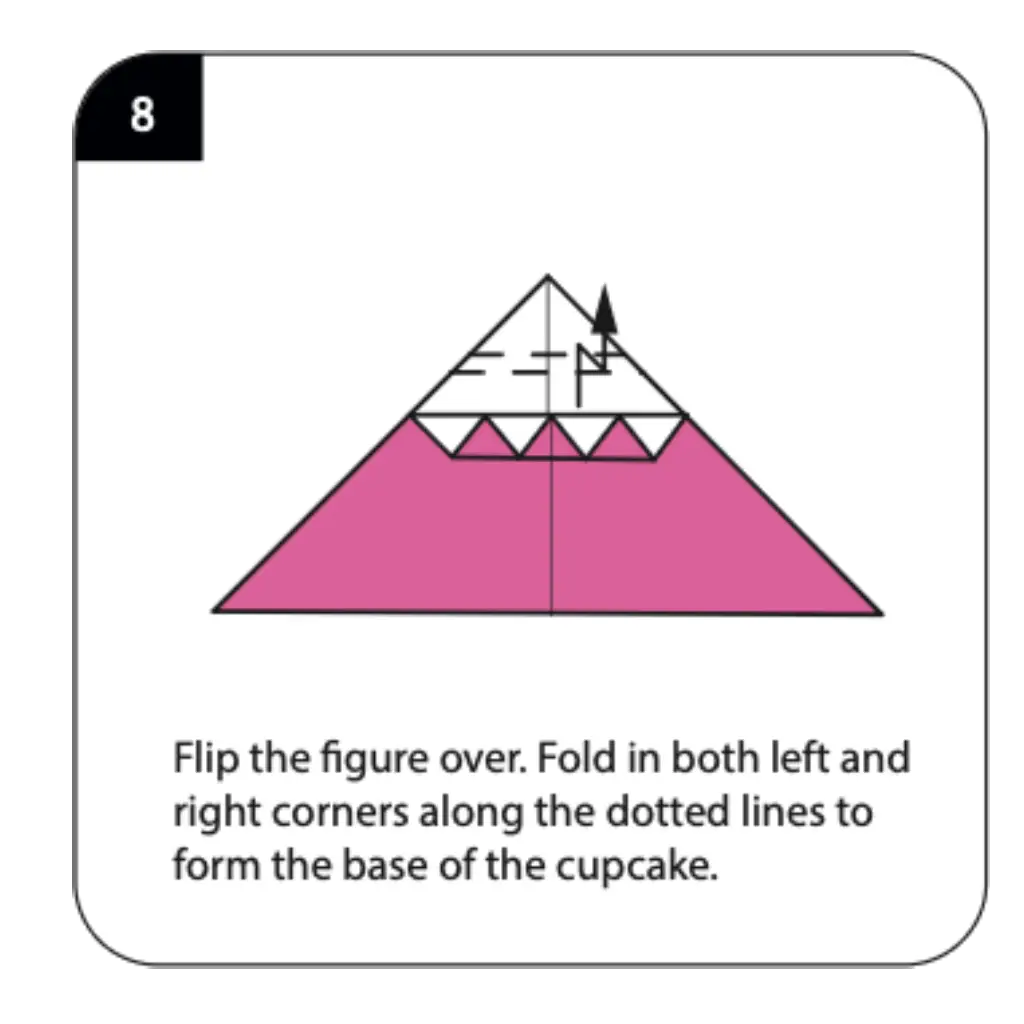
Flip the figure over again and fold in both left and right corners along the new dotted lines to further refine the cupcake base. These additional folds create the pleated texture reminiscent of paper cupcake liners. The multiple layers add authenticity to your design while ensuring structural integrity. This detailed folding mimics the corrugated texture of real cupcake wrappers.
Step 9: Add Dimensional Curve
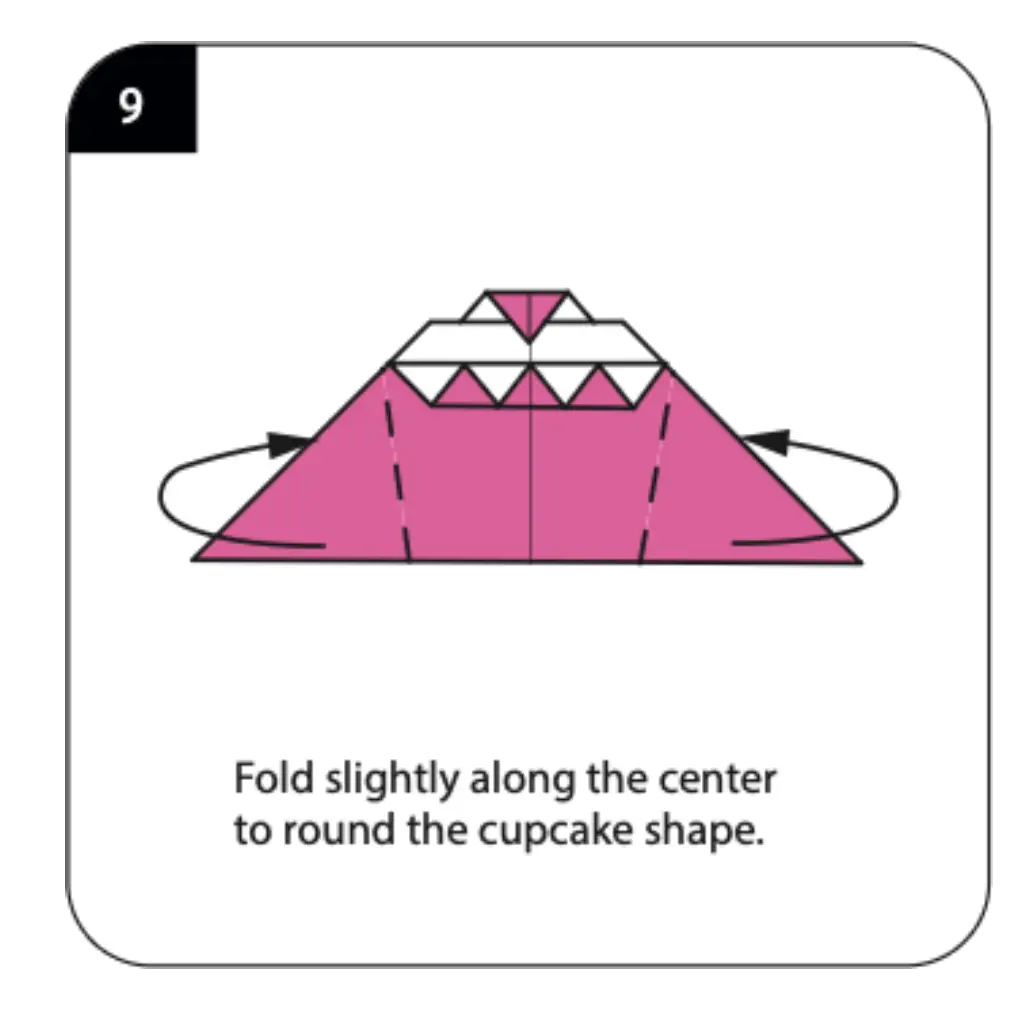
Fold slightly along the center to round the cupcake shape, giving it a more realistic three-dimensional appearance. This gentle curve transforms your flat folds into a rounded form that better represents an actual cupcake. Be careful not to crease too sharply, as you want a soft curve rather than a hard fold. This subtle shaping is what distinguishes quality paper food crafts from basic geometric origami.
Step 10: Complete Your Sweet Creation
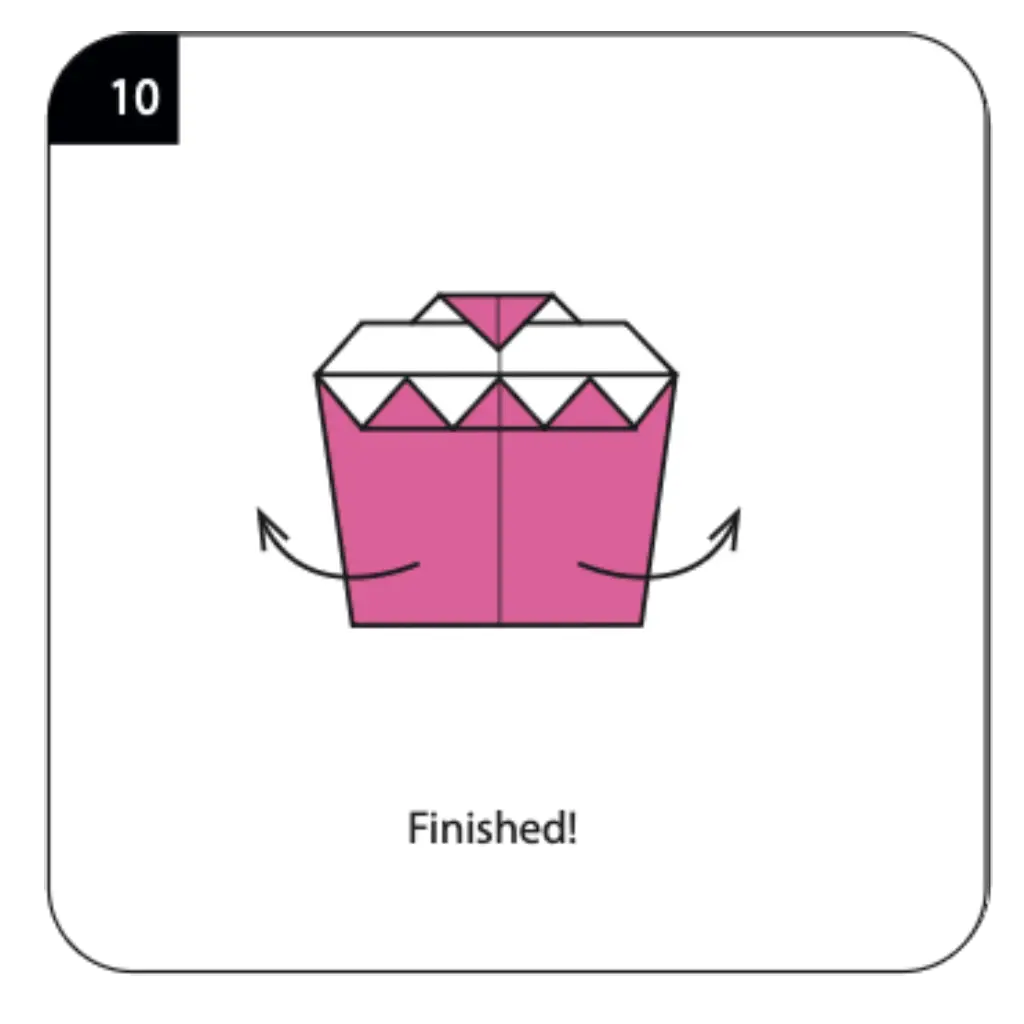
Your origami cupcake is now finished and ready to delight! The completed design features a textured wrapper base topped with decorative frosting details. Stand your cupcake upright to appreciate the full three-dimensional effect of your folding work. This charming paper dessert makes perfect decorations for parties, gift toppers, or additions to other paper craft displays.
Conclusion: You’ve successfully created an adorable origami cupcake that captures all the sweetness of a real bakery treat! This delightful paper dessert showcases how simple folds can create realistic food replicas. Try making cupcakes in different colors to create a whole paper bakery display. With practice, you’ll be folding these sweet treats quickly enough to decorate an entire party!
