
Introduction
The origami eagle represents one of the most majestic and challenging bird models in paper folding, capturing the powerful presence and distinctive silhouette of this iconic raptor. This advanced tutorial guides you through creating a sophisticated paper eagle that showcases the bird’s characteristic hooked beak, powerful wings, and regal posture through complex folding techniques. With ten detailed steps involving inside folds, step folds, and precise shaping, this project demands patience and skill while delivering impressive results. The finished model displays the unmistakable features that make eagles symbols of strength and freedom worldwide.
Step-by-Step Instructions
Step 1: Create the Foundation Structure For Origami Eagle
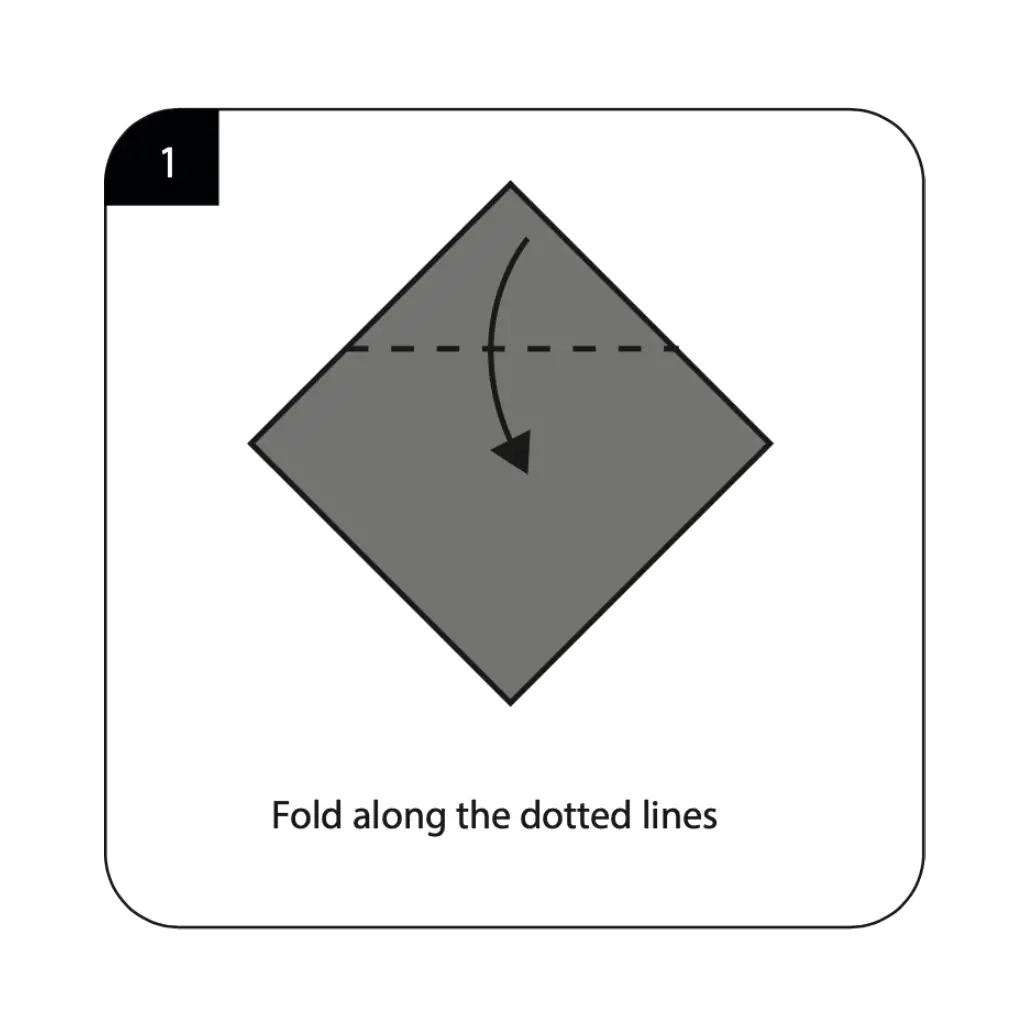
Begin with a square sheet of paper, preferably gray or brown to represent the eagle’s natural coloring. Fold along the dotted lines as shown in the diagram to establish the basic reference framework for your eagle construction. These initial folds create the fundamental structure that will guide all subsequent folding and ensure proper proportions in your finished bird of prey. The precision of these foundation folds is crucial for achieving the powerful, majestic appearance characteristic of eagles and their impressive anatomy. Take care to make each fold sharp and well-defined, creating the roadmap that will transform your flat square into a three-dimensional raptor.
Step 2: Prepare for Advanced Construction For Origami Eagle
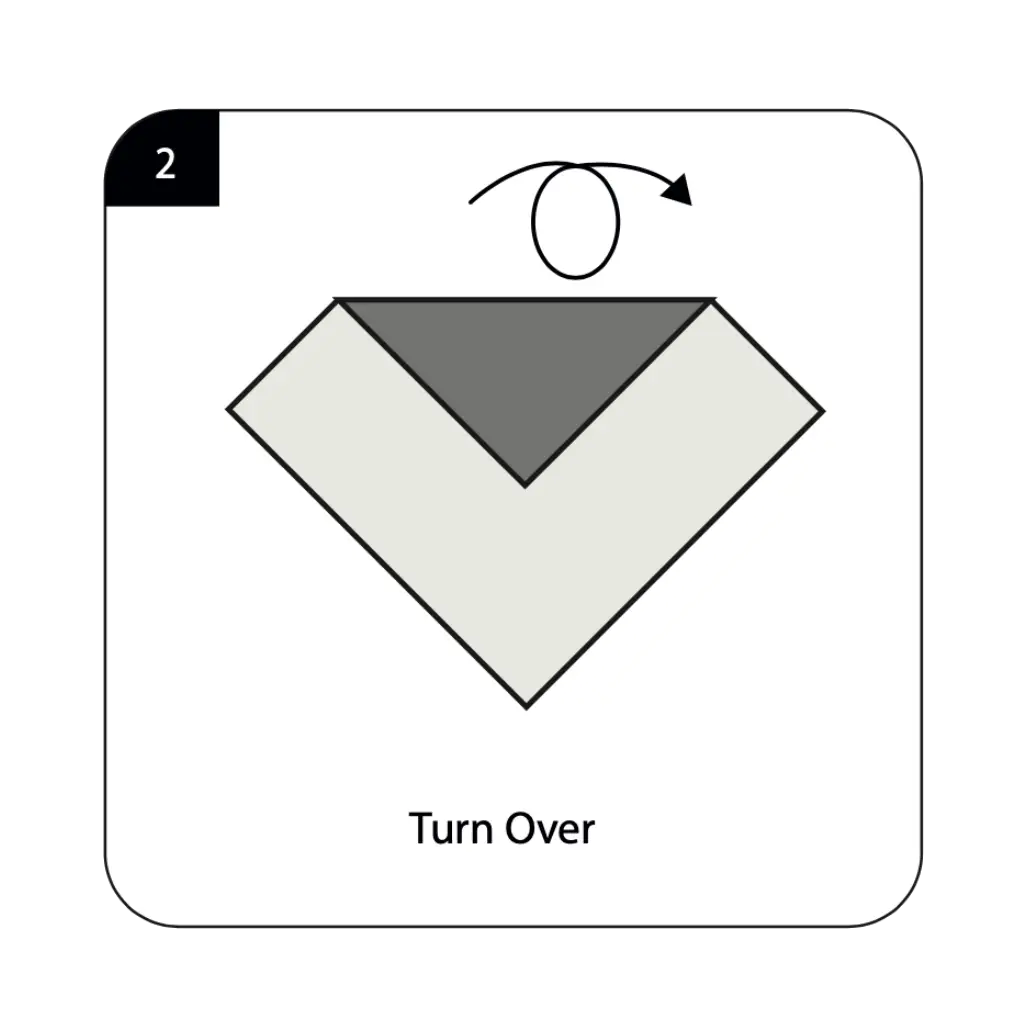
Turn over your partially folded model as instructed to access the reverse side for the next phase of construction work. This reorientation is essential for proper development of your eagle’s complex structure and allows access to fold lines needed for creating the bird’s distinctive features. Handle the model carefully during this transition to preserve the integrity of your foundation folds and maintain the established proportions. The reverse side provides the working surface needed for the advanced techniques that will create your eagle’s characteristic head, wings, and body structure.
Step 3: Establish the Wing Framework For Origami Eagle
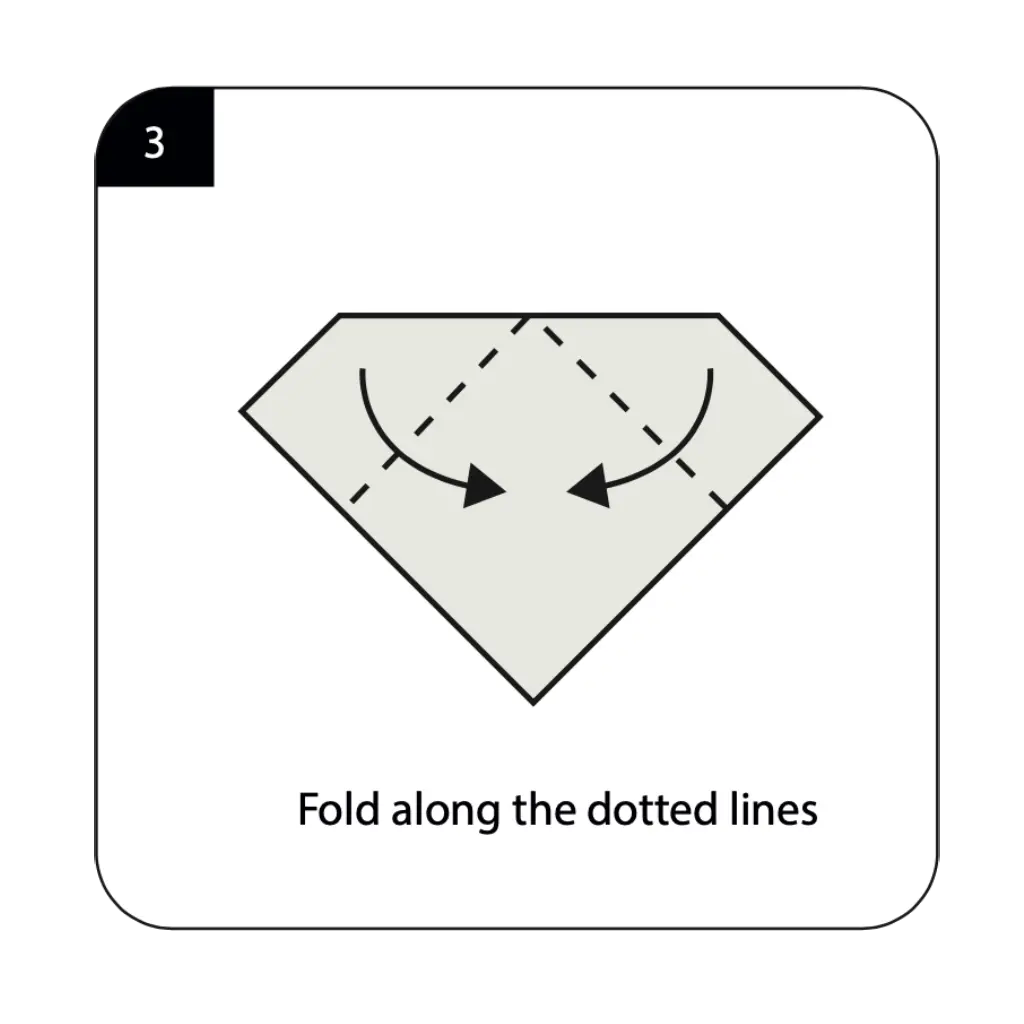
Fold along the dotted lines as indicated to begin creating the framework for your eagle’s powerful wings and body structure. These strategic folds establish the proportional relationships between different parts of your bird and create the foundation for the eagle’s impressive wingspan. The accuracy of these wing-defining folds directly affects the majesty and recognizability of your finished eagle model. Work carefully to ensure these folds align with the existing structure while creating the broad, powerful wing shape that distinguishes eagles from other birds of prey.
Step 4: Define the Body Proportions For Origami Eagle
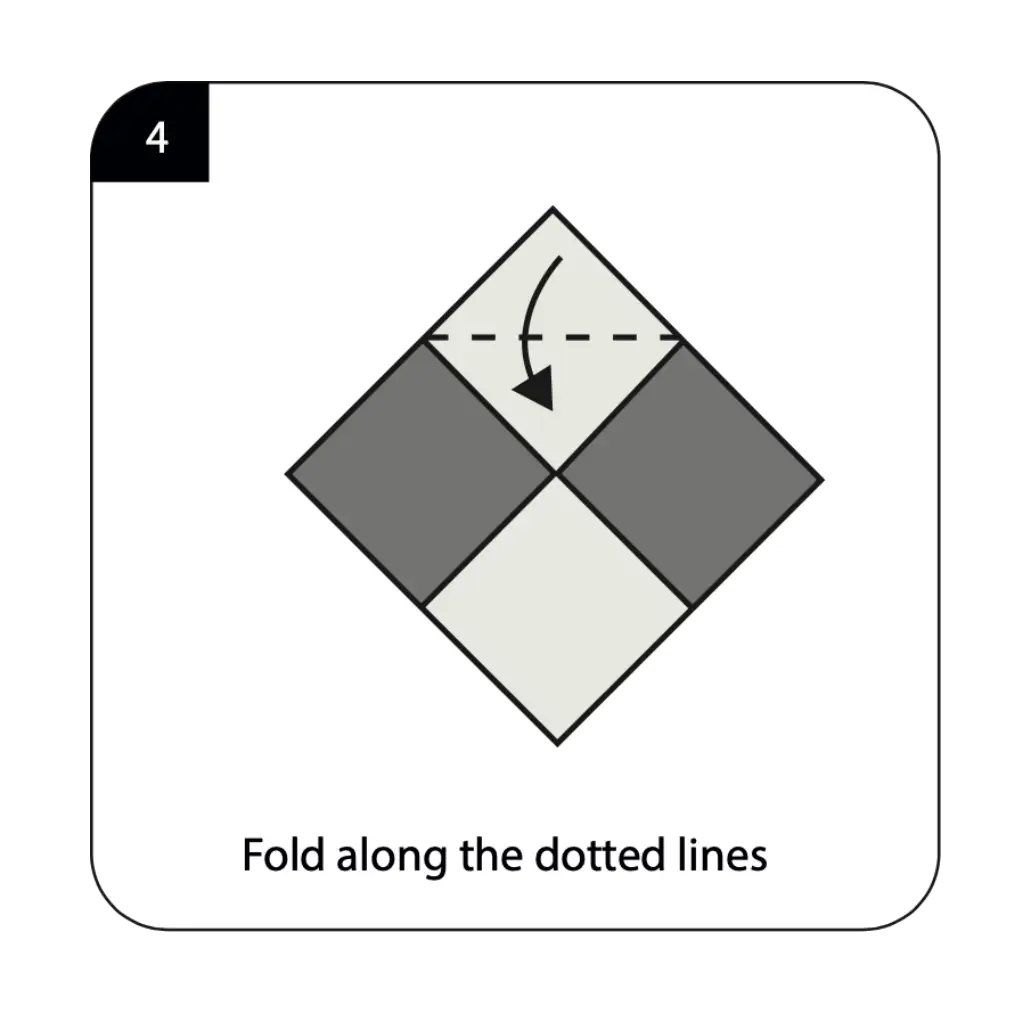
Execute additional folds along the dotted lines to further refine your eagle’s body structure and establish the characteristic proportions of this powerful raptor. These shaping folds continue developing the distinctive form that makes eagles instantly recognizable, particularly their robust body and proud posture. The careful execution of these body-defining folds creates the foundation for the eagle’s most impressive features, including the powerful chest and streamlined profile. This step demonstrates how strategic folding can capture both physical form and the commanding presence that defines eagles as apex predators.
Step 5: Create the Advanced Wing Structure For Origami Eagle

Perform a step-fold along the dotted line as shown, using this advanced technique to create the complex wing geometry needed for your eagle’s impressive flight apparatus. The step-fold adds important dimensional elements while establishing the layered wing structure characteristic of large birds of prey. This technical fold requires careful manipulation of multiple paper layers simultaneously while maintaining the integrity of your established eagle structure. The successful execution of this step-fold significantly enhances the three-dimensional quality and realistic wing appearance of your origami eagle model.
Step 6: Refine the Wing Details For Origami Eagle
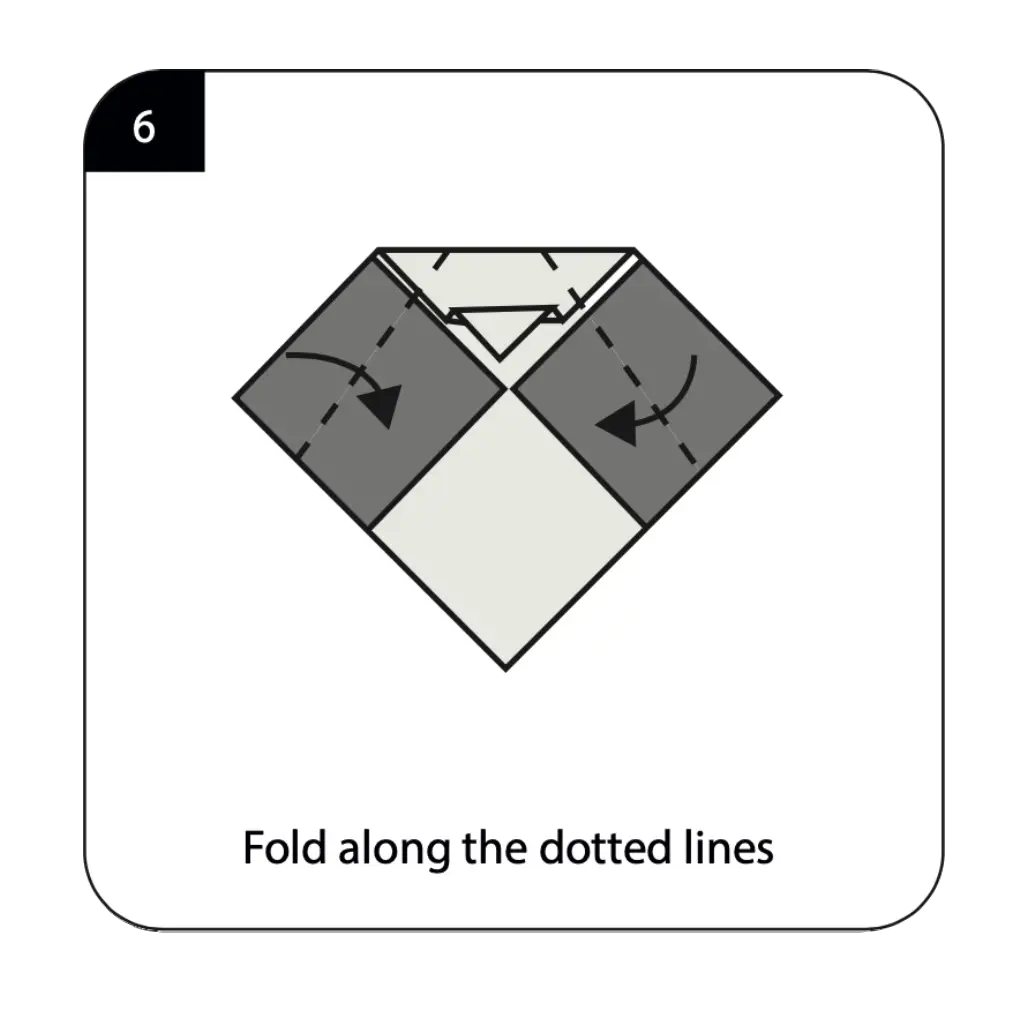
Fold along the dotted lines as indicated to add final definition to your eagle’s wing structure and create the detailed feather patterns that enhance realism. These refinement folds enhance the dimensional quality of the wings while establishing the proper angles and curves that characterize eagle wing anatomy. The strategic positioning of these folds affects the overall flight posture and majesty of your finished eagle model. This step continues building the sophisticated wing structure that distinguishes this advanced model from simpler bird designs, creating the impressive wingspan that makes eagles such commanding figures.
Step 7: Shape the Central Body For Origami Eagle
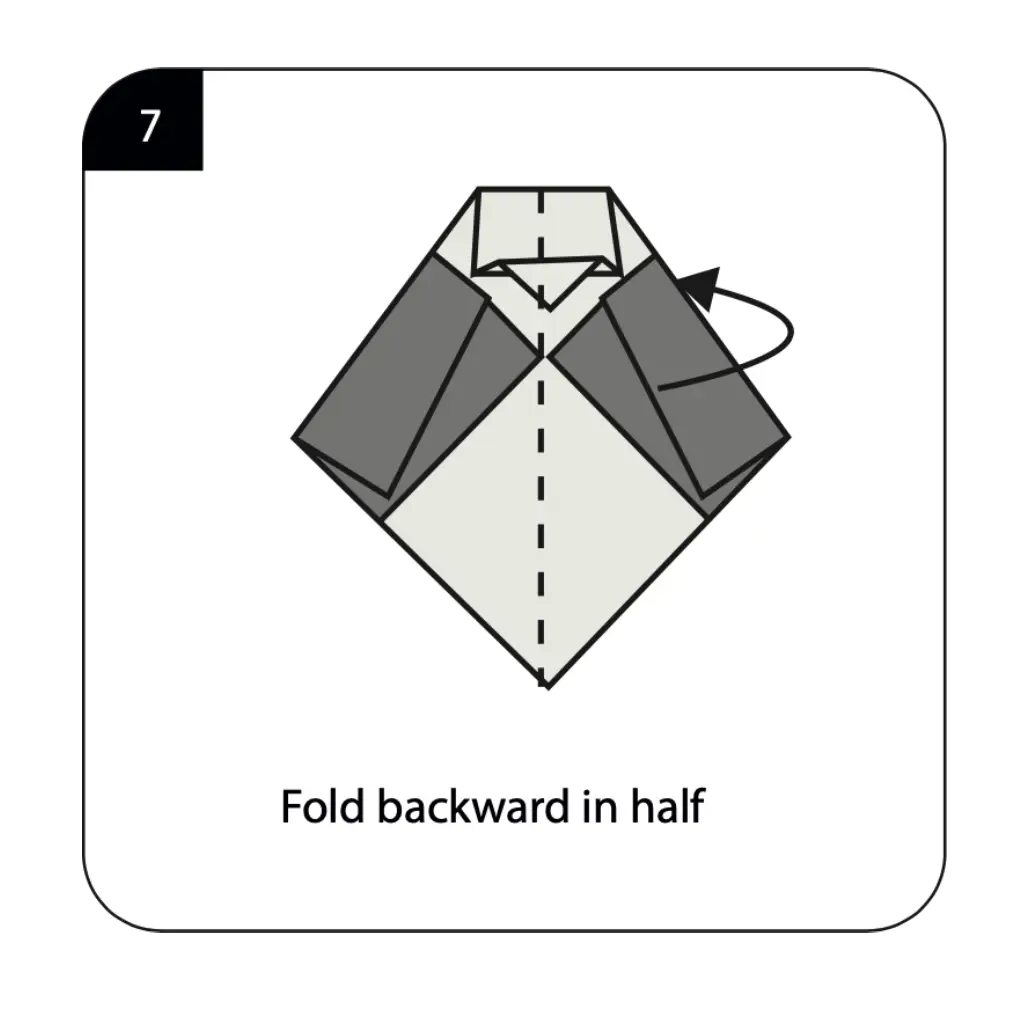
Fold backward in half as shown to establish the three-dimensional body structure that will serve as the foundation for your eagle’s final majestic form. This crucial fold transforms your flat construction into a dimensional model with the depth and volume needed to represent this powerful bird of prey. The precision of this backward fold affects both the stability and the impressive appearance of your finished origami eagle. This step completes the basic three-dimensional transformation and prepares your model for the detailed head and tail shaping that will complete the eagle’s distinctive appearance.
Step 8: Create the Head Structure For Origami Eagle

Execute an inside fold along the dotted line to begin forming the eagle’s distinctive head and the characteristic hooked beak used for tearing prey. This advanced technique requires careful manipulation of the paper layers to create the curved, powerful head shape characteristic of raptors. The precision of this inside fold significantly impacts the recognizability of your finished model, as the distinctive head profile is crucial for identifying eagles. This step transforms your basic bird form into a clearly identifiable eagle through the creation of its most distinctive facial features and predatory characteristics.
Step 9: Define the Beak and Face For Origami Eagle
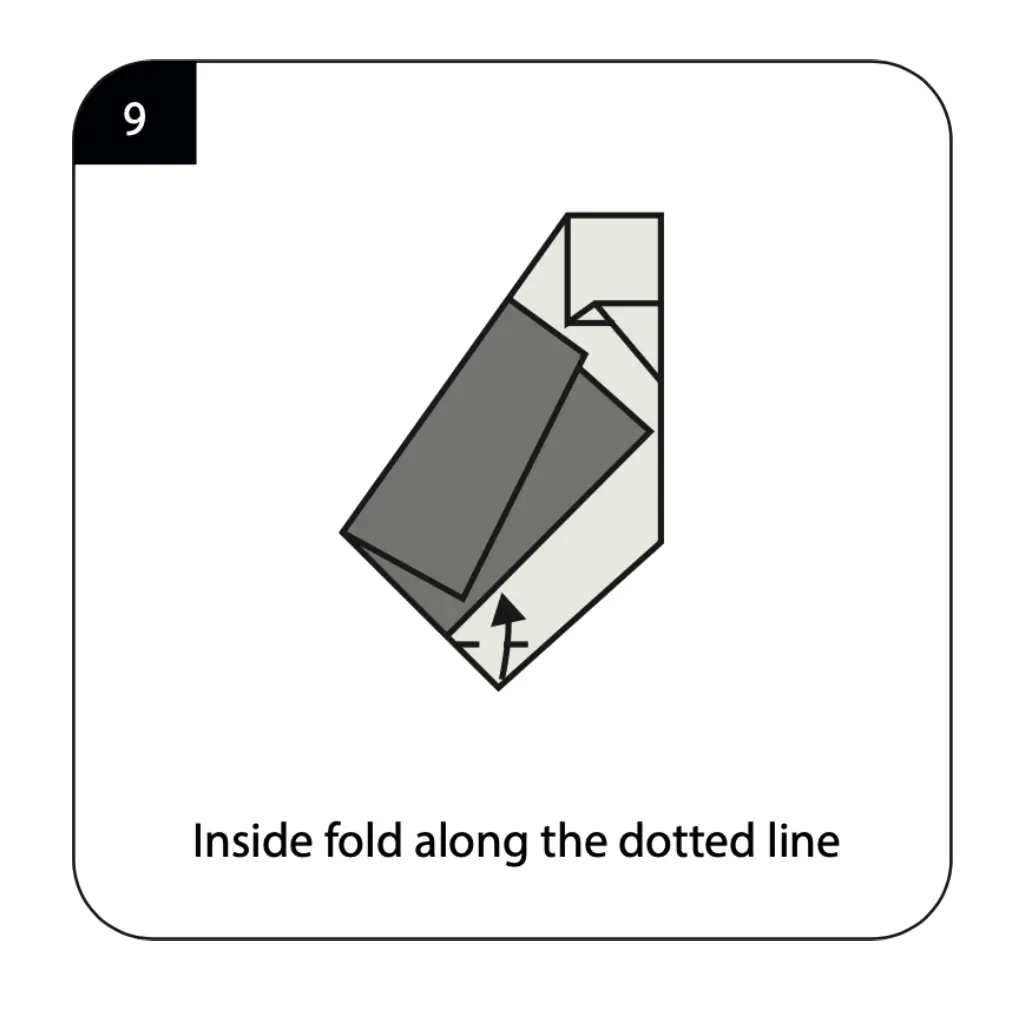
Perform another inside fold along the dotted line to refine the eagle’s head shape and create the sharp, hooked beak that distinguishes these powerful hunters. This detailed fold requires precise manipulation to achieve the proper beak proportions and facial structure that make eagles instantly recognizable as apex predators. The careful execution of this beak-forming fold contributes significantly to the fierce, majestic character of your origami eagle. This step demonstrates how advanced folding techniques can capture the specialized anatomical features that make different bird species unique and immediately identifiable.
Step 10: Complete Your Origami Eagle
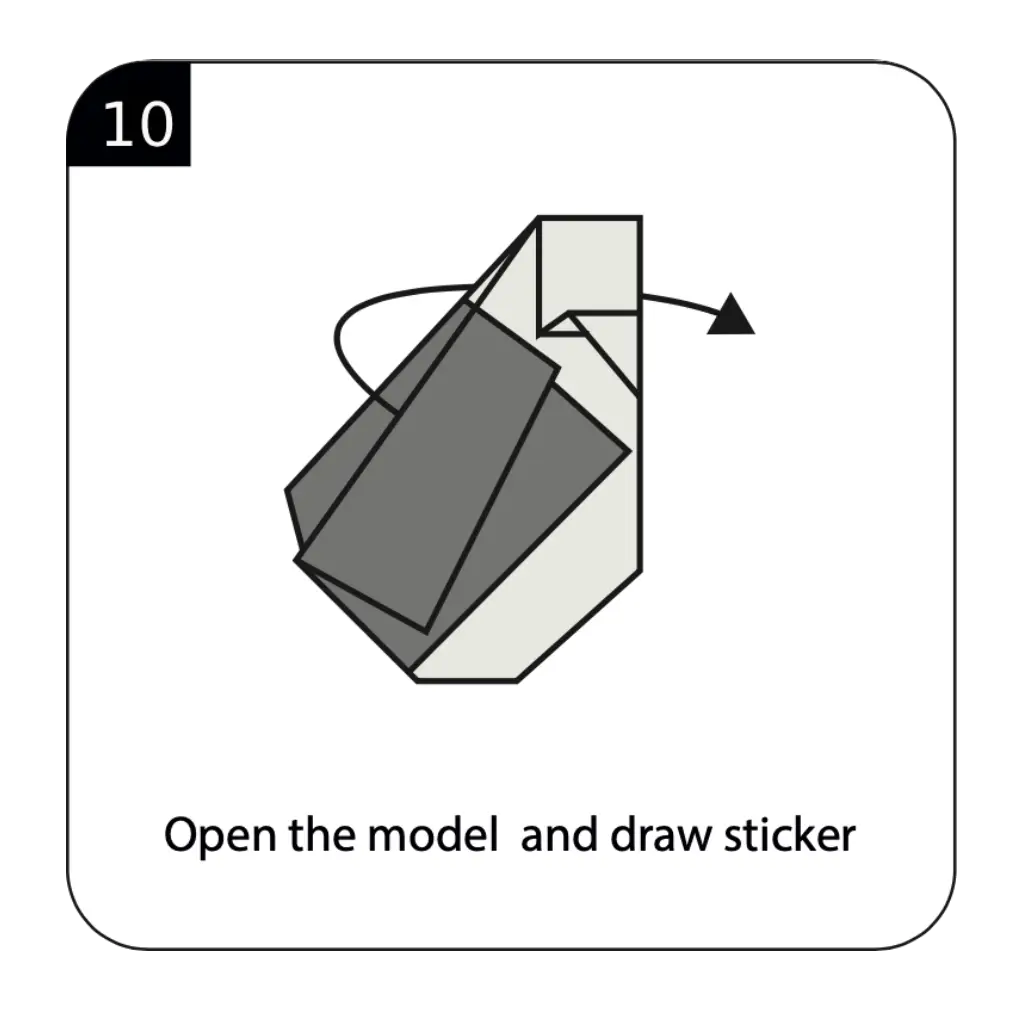
Open the model and add stickers or draw features to bring your eagle to life with eyes, additional beak details, and any markings that enhance its realistic appearance. This creative finishing phase allows you to add the specific details that make your origami clearly identifiable as a majestic eagle, including the penetrating gaze and fierce expression. The addition of simple facial features dramatically transforms your geometric paper creation into a lifelike bird of prey with personality and presence. Your completed origami eagle now combines advanced paper folding techniques with artistic expression, ready to soar into displays about wildlife, serve as an educational tool for learning about raptors, or simply command attention as a stunning representation of one of nature’s most powerful and revered birds.
Conclusion
Your origami eagle demonstrates mastery of advanced folding techniques while capturing the majestic presence of one of nature’s most powerful raptors. This sophisticated paper model embodies both the physical strength and regal bearing that makes eagles symbols of freedom and power across cultures worldwide. The complex techniques you’ve mastered—including inside folds, step folds, and dimensional shaping—represent significant origami skills that open doors to the most challenging designs. Your completed eagle serves as both an impressive artistic achievement and a testament to the advanced paper engineering possible through dedicated practice and precise execution.
- “Master prerequisite techniques in our Origami Basics for Beginners before attempting this advanced eagle.”
- “Explore more majestic birds in our Origami Animals Collection, featuring hawks, owls, and other raptors.”
- “Discover more challenging projects in our Creative Origami Gallery for expert folders.”
- “Display your eagle with other impressive models using our Decorative Origami Guide.”
- “Create mountain habitats with Origami Flowers representing alpine vegetation.”
- “Build entire raptor collections with Modular Origami Projects techniques.”
