
Introduction: Discover how to create a functional origami envelope using just a square piece of paper and basic folding techniques. This practical design is perfect for handmade cards, love notes, or small gifts, adding a personal touch to your correspondence. No glue or tape needed – the clever folding pattern creates a secure closure naturally. Follow these seven straightforward steps to craft your own elegant paper envelope.
Step-by-Step Simple Envelope Instructions:
Step 1: Create Foundation Creases For Origami Envelope
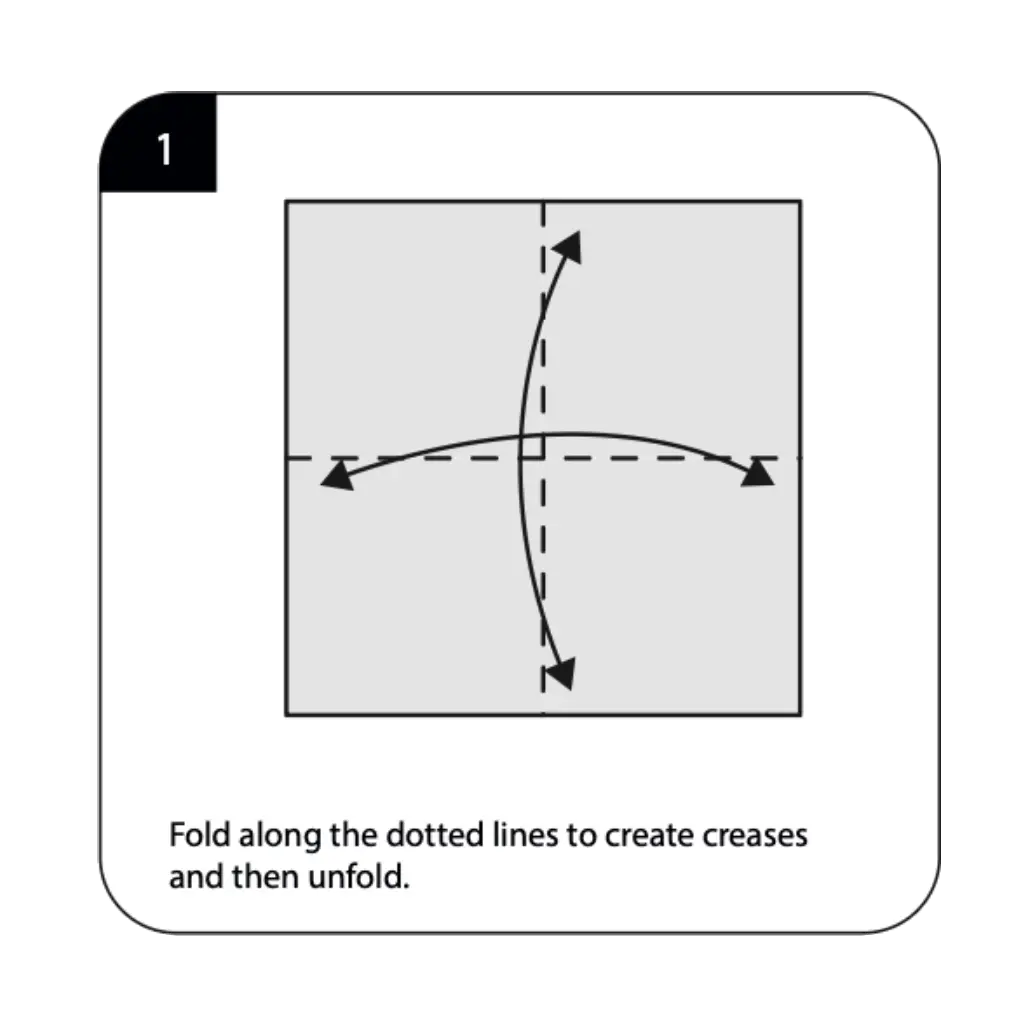
Start with a square sheet of origami paper with the plain side facing up, then fold along both diagonal dotted lines to create X-shaped creases. These initial folds serve as essential guidelines that will help you achieve perfect symmetry in your envelope design. After making each diagonal fold, unfold the paper completely to reveal the crease pattern. These foundational marks are crucial techniques taught in origami basics and ensure your envelope folds align properly.
Step 2: Fold the Bottom Edge For Origami Envelope
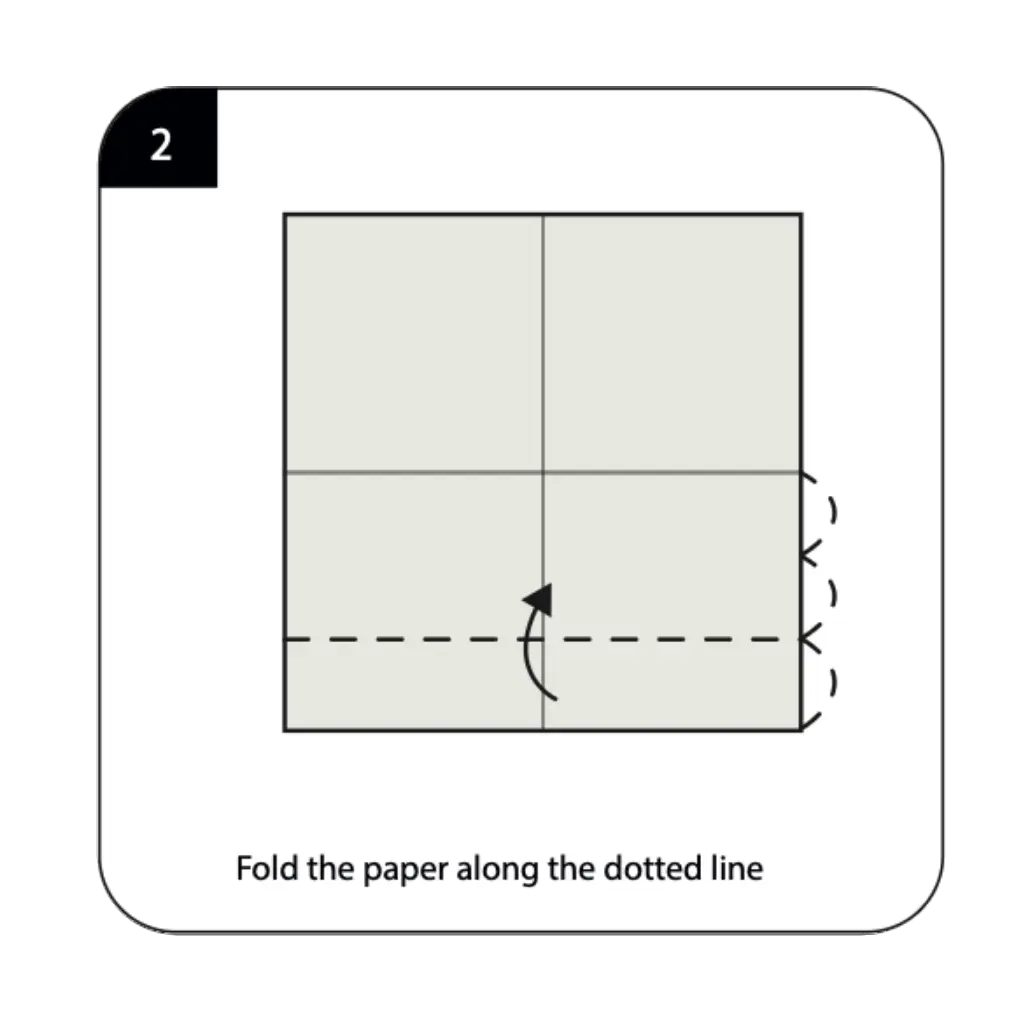
Fold the paper along the horizontal dotted line near the bottom, bringing the lower edge up to create the envelope’s base. This fold determines the depth of your envelope pocket and should be made with precision for a professional appearance. Press firmly along the crease to ensure it holds its shape when handling letters or cards. The exact placement of this fold affects the final proportions of your simple envelope design.
Step 3: Create the Side Sections
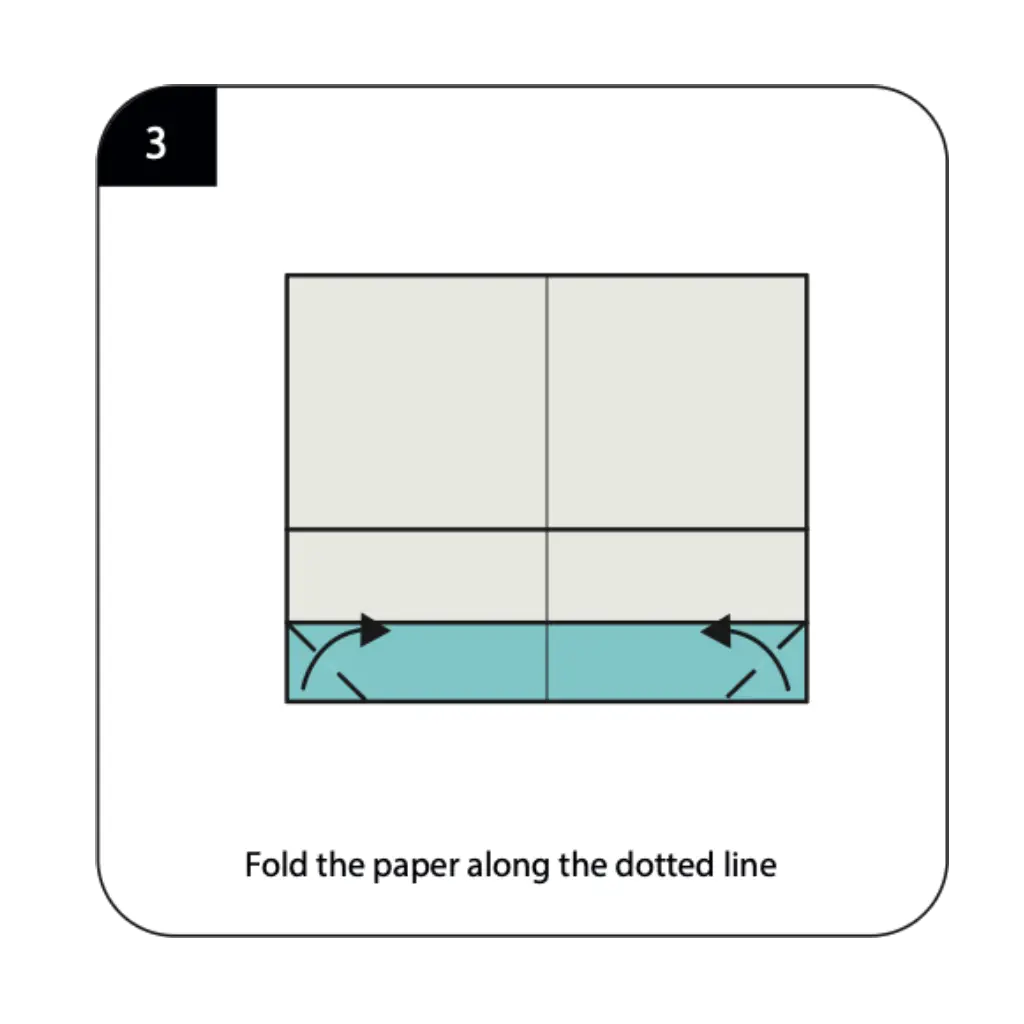
Fold the paper along the next dotted line, bringing in the sides to begin forming the envelope’s characteristic shape. This step starts transforming your flat paper into a three-dimensional pocket that can hold contents securely. The side folds should align with your previous creases to maintain symmetry and create clean edges. This folding technique is similar to methods used in creative origami projects that require functional elements.
Step 4: Complete the Side Folds
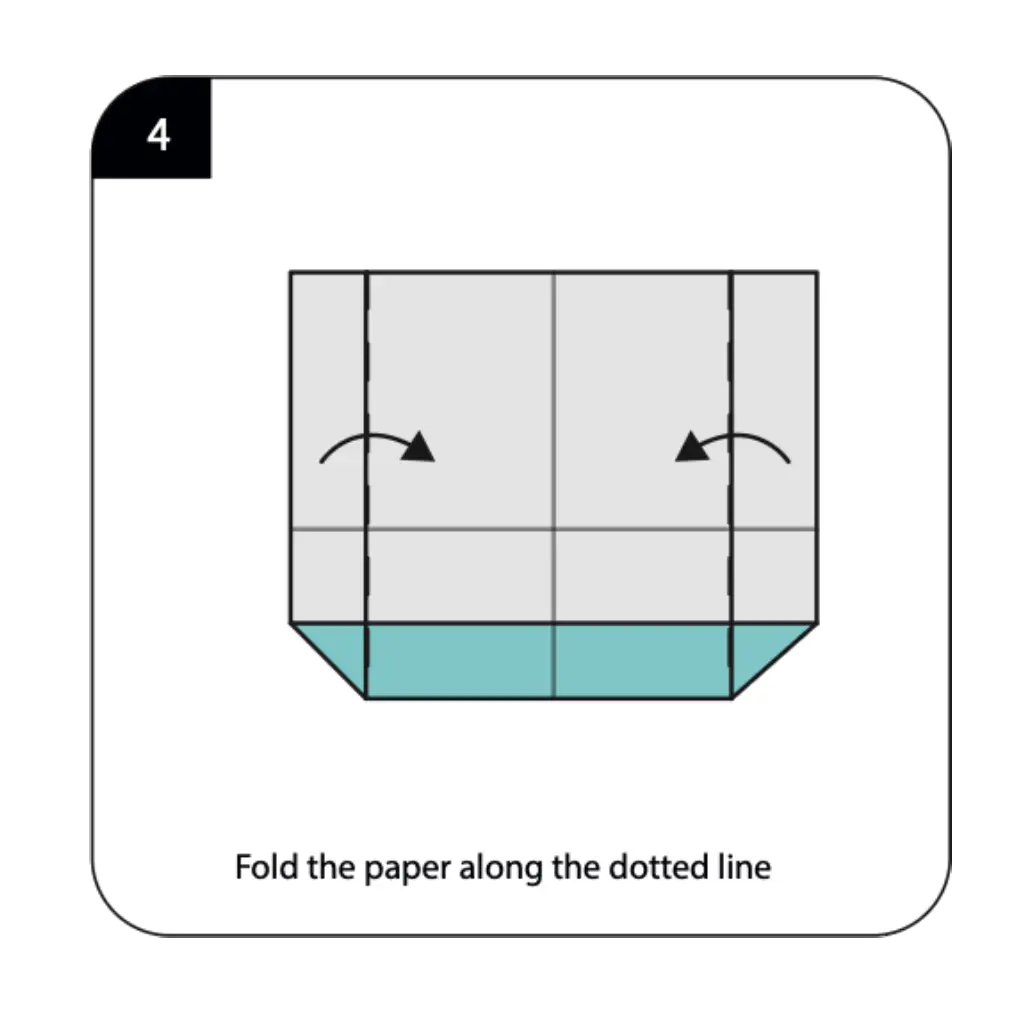
Continue folding along the indicated dotted lines to bring both side edges toward the center of your envelope. These folds create the side walls of your envelope and determine how much space you’ll have inside for contents. Ensure the edges meet precisely in the middle or slightly overlap for the most secure closure. The accuracy of these folds is what makes your origami envelope both beautiful and functional.
Step 5: Shape the Top Flap
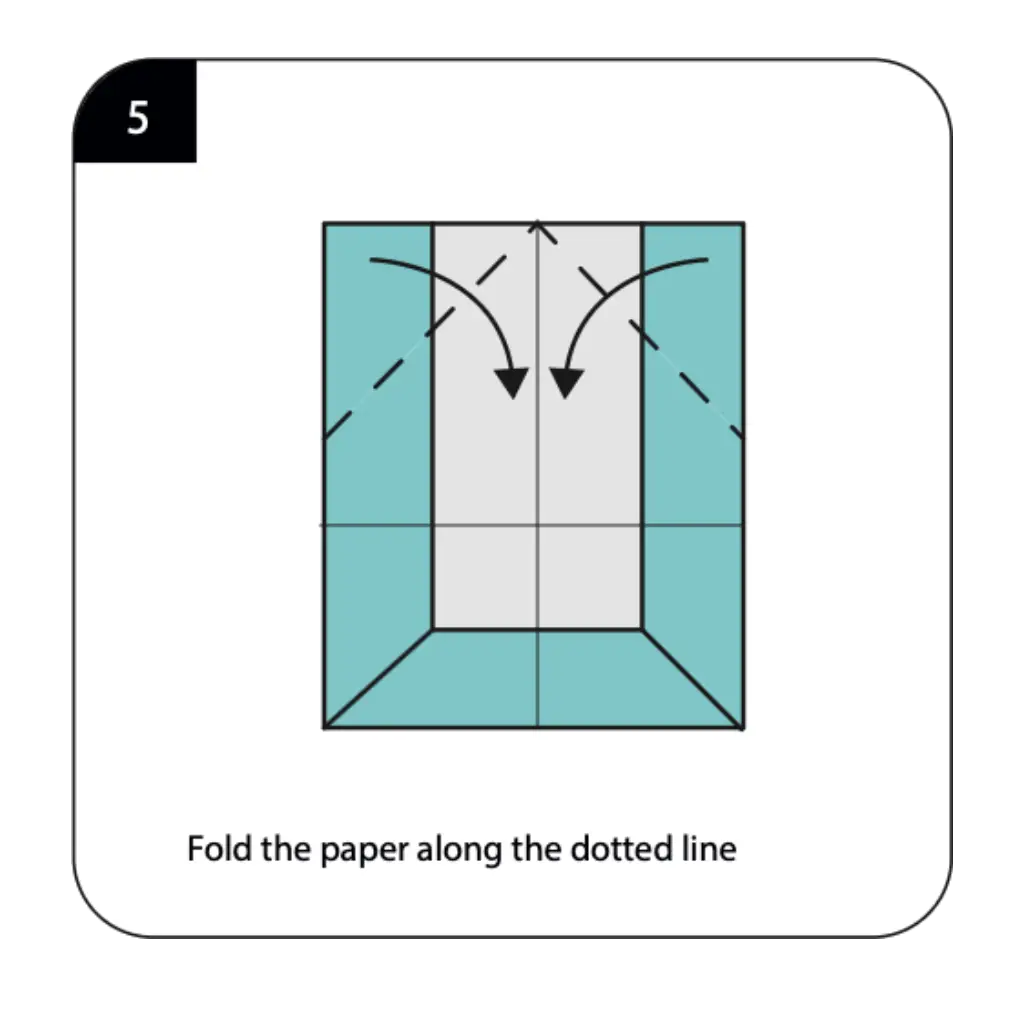
Fold the upper portion of the paper along the dotted line to create the envelope’s closing flap. This triangular or rectangular flap will tuck into the bottom section to seal your envelope without any adhesive. The angle and size of this flap should complement the overall proportions of your envelope design. This self-locking mechanism is what makes origami envelopes so elegant compared to traditional decorative origami that’s purely ornamental.
Step 6: Secure the Closure
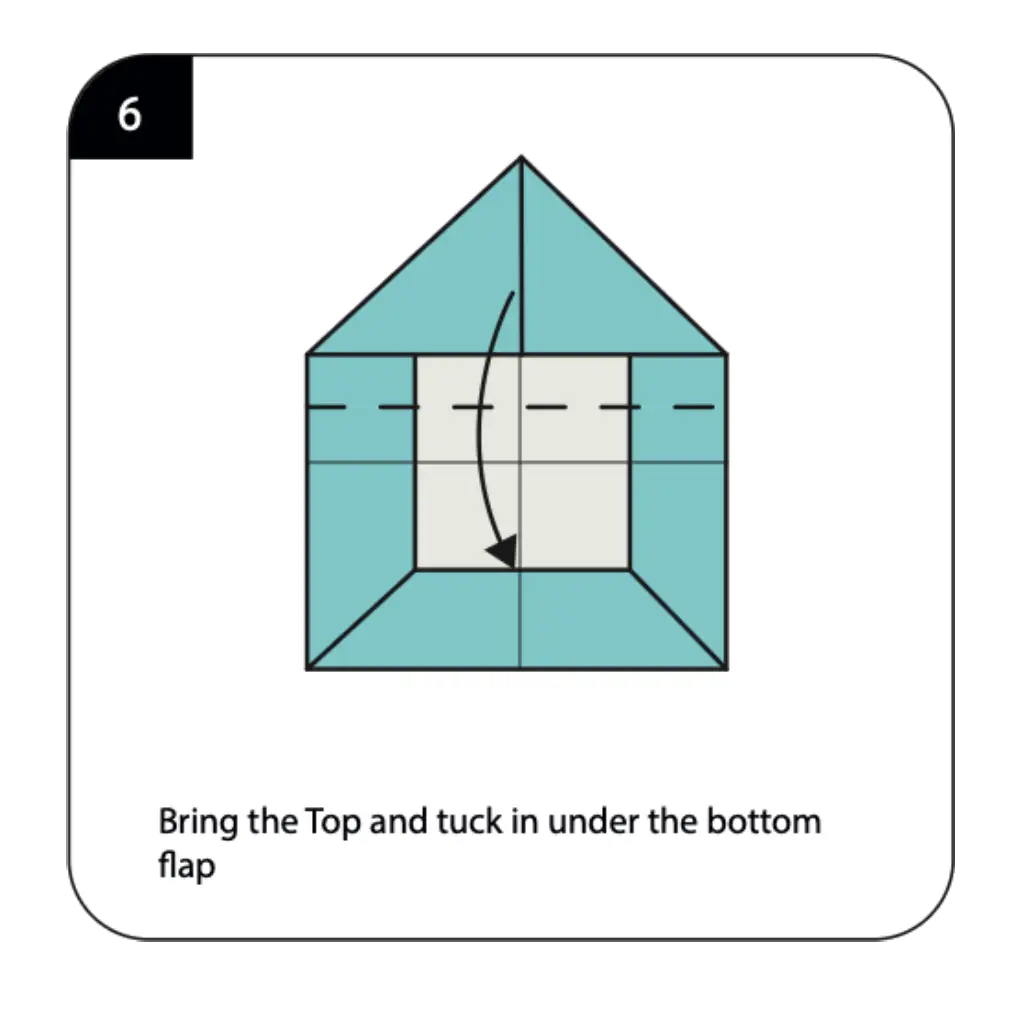
Bring the top flap down and carefully tuck it under the bottom flap to create a secure closure for your envelope. This interlocking design ensures your contents stay safely inside while maintaining the envelope’s clean appearance. Slide the flap in smoothly, making sure not to crease or damage the paper during insertion. The tuck-in closure is a hallmark of well-designed origami envelopes and demonstrates the ingenuity of paper folding.
Step 7: Final Adjustments
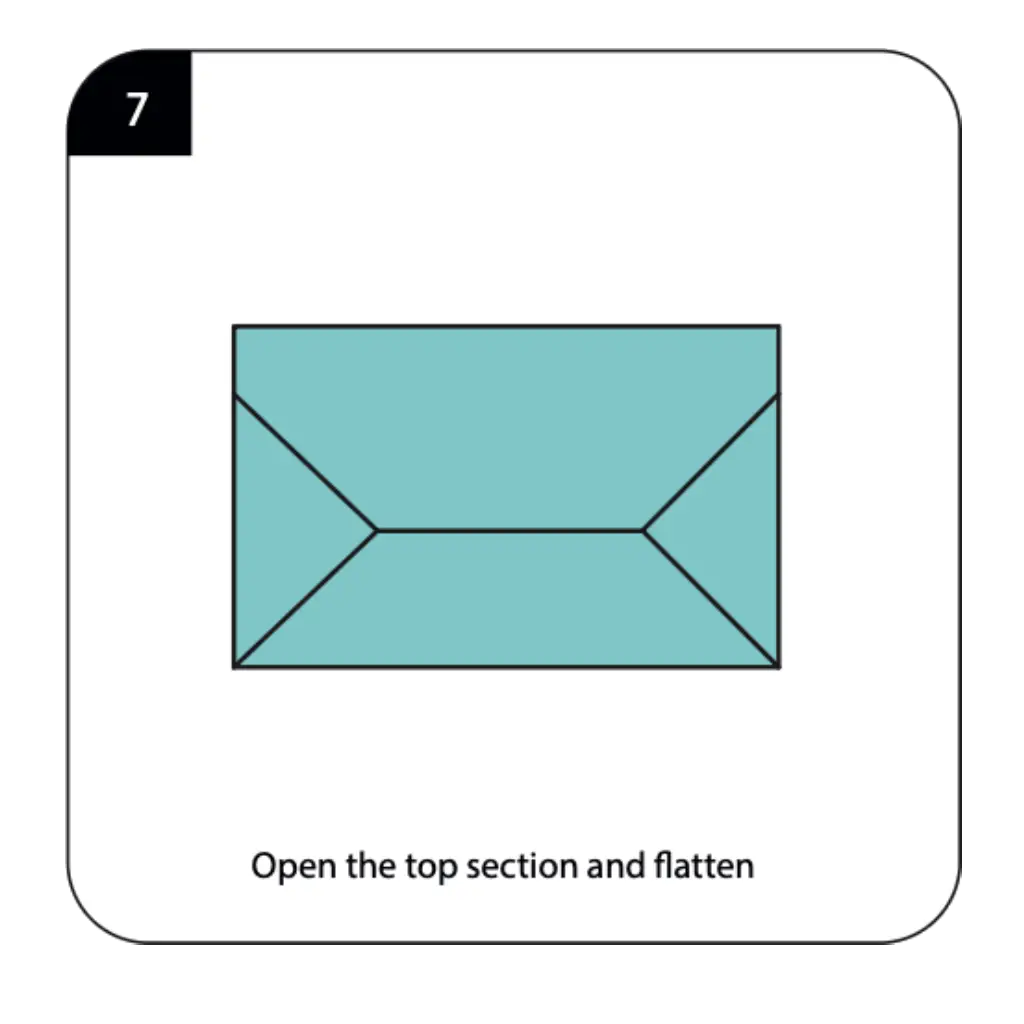
Open the top section slightly and flatten all edges to perfect your envelope’s shape and ensure it lies flat. Make any necessary adjustments to the corners and edges for a crisp, professional appearance. Your completed simple envelope is now ready to hold letters, cards, or small flat gifts. This practical origami creation combines form and function in a way that makes everyday correspondence more special.
Conclusion:
You’ve successfully created a beautiful and functional origami envelope using nothing but paper and precise folding techniques. This simple envelope design is perfect for adding a handmade touch to birthday cards, thank you notes, or special messages. Try using decorative paper or adding embellishments to customize your envelopes for different occasions. With practice, you’ll be folding these elegant envelopes quickly and confidently for all your correspondence needs.
