
Introduction
The origami fan stands as one of the most practical and elegant projects in paper folding, offering “easy folding for all ages” while creating a functional accessory that’s both beautiful and useful. This beginner-friendly tutorial transforms a simple square of paper into a working fan that opens and closes like traditional hand fans used for cooling and ceremony. With just ten straightforward steps, you’ll create an impressive paper fan that combines the artistry of origami with genuine functionality. Whether for hot summer days, theatrical performances, or decorative displays, this origami fan delivers both aesthetic appeal and practical cooling relief.
Step-by-Step Instructions
Step 1: Create the Foundation Crease For Origami Fan

Start with a square of origami paper placed diagonally with the colored side facing up as specified in the instructions. Fold the paper in half to create a strong central crease, then fold it back to establish the primary reference line for your fan construction. This initial fold creates the fundamental guideline that ensures proper symmetry and proportions throughout the fan-making process. The precision of this foundation crease is crucial for achieving a well-balanced fan that opens and closes smoothly when completed. Take care to align the edges perfectly and create a sharp, clean fold that will serve as the backbone for all subsequent construction steps.
Step 2: Form the Center Structure For Origami Fan

Fold the paper to meet the center line as shown in the diagram, bringing both edges toward the crease created in Step 1. These parallel folds establish the width of your fan’s handle and create the layered structure that will provide strength and stability to your finished accessory. The accuracy of these center-meeting folds directly affects both the appearance and functionality of your completed origami fan. Work carefully to ensure both sides are folded at identical distances from the center line, creating the balanced proportions that will make your fan comfortable to hold and use for cooling purposes.
Step 3: Create the Initial Handle Shape For Origami Fan

Fold along the dotted line as indicated to begin forming the distinctive triangular shape that will become your fan’s handle section. This important fold starts transforming the flat rectangular construction into the more complex geometry needed for a functional fan design. The precision of this angled fold affects how well your fan will balance in your hand and how comfortable it will be to use. This step begins establishing the characteristic fan silhouette by creating the narrow handle area that contrasts with the wide, spreading top section that will provide the cooling surface.
Step 4: Shape the Handle Foundation For Origami Fan
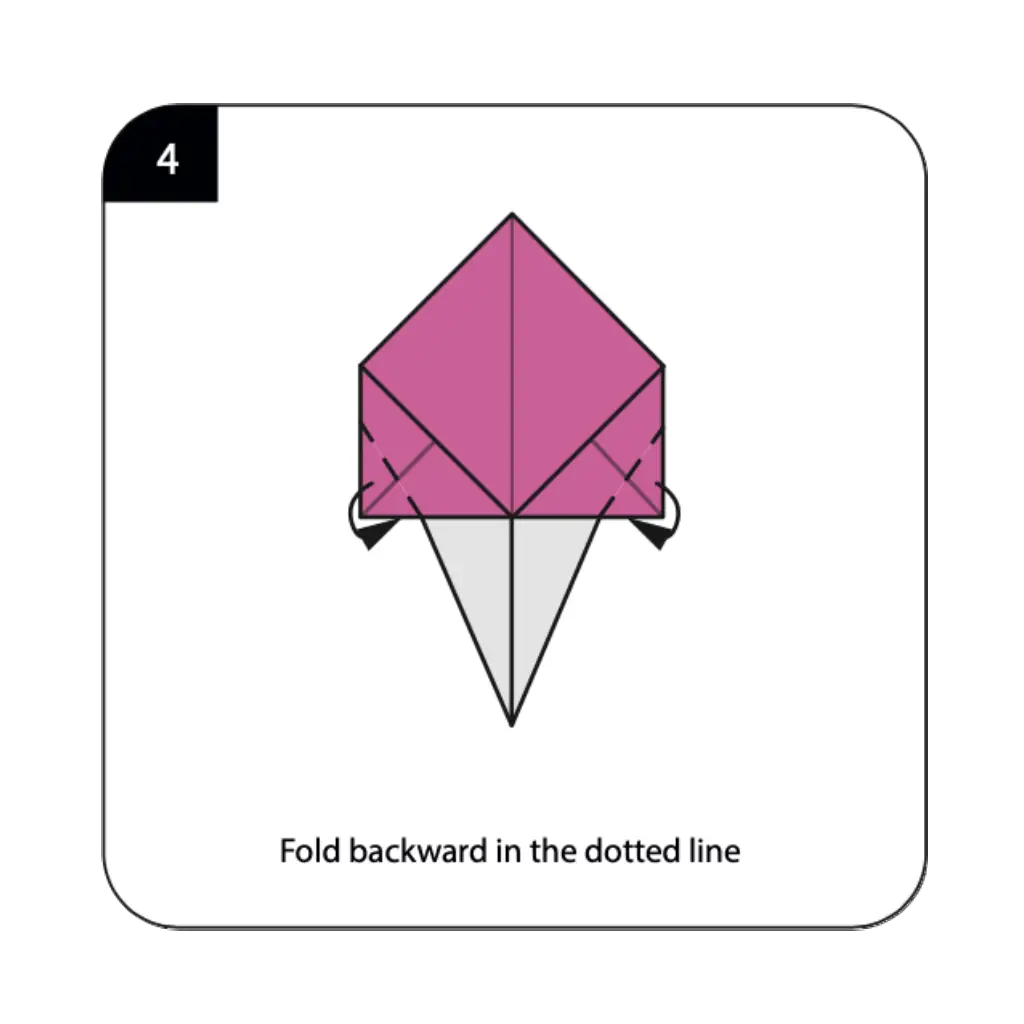
Fold backward along the dotted line as shown to continue developing the handle structure and create the dimensional quality that will distinguish your origami fan from simple flat designs. This backward fold adds depth and begins establishing the three-dimensional aspects of your fan while maintaining the structural integrity needed for practical use. The careful execution of this fold affects how well your fan will maintain its shape during use and storage. This step demonstrates how strategic backward folding can create the ergonomic handle design that makes your paper fan comfortable and effective for actual cooling purposes.
Step 5: Define the Fan Body For Origami Fan
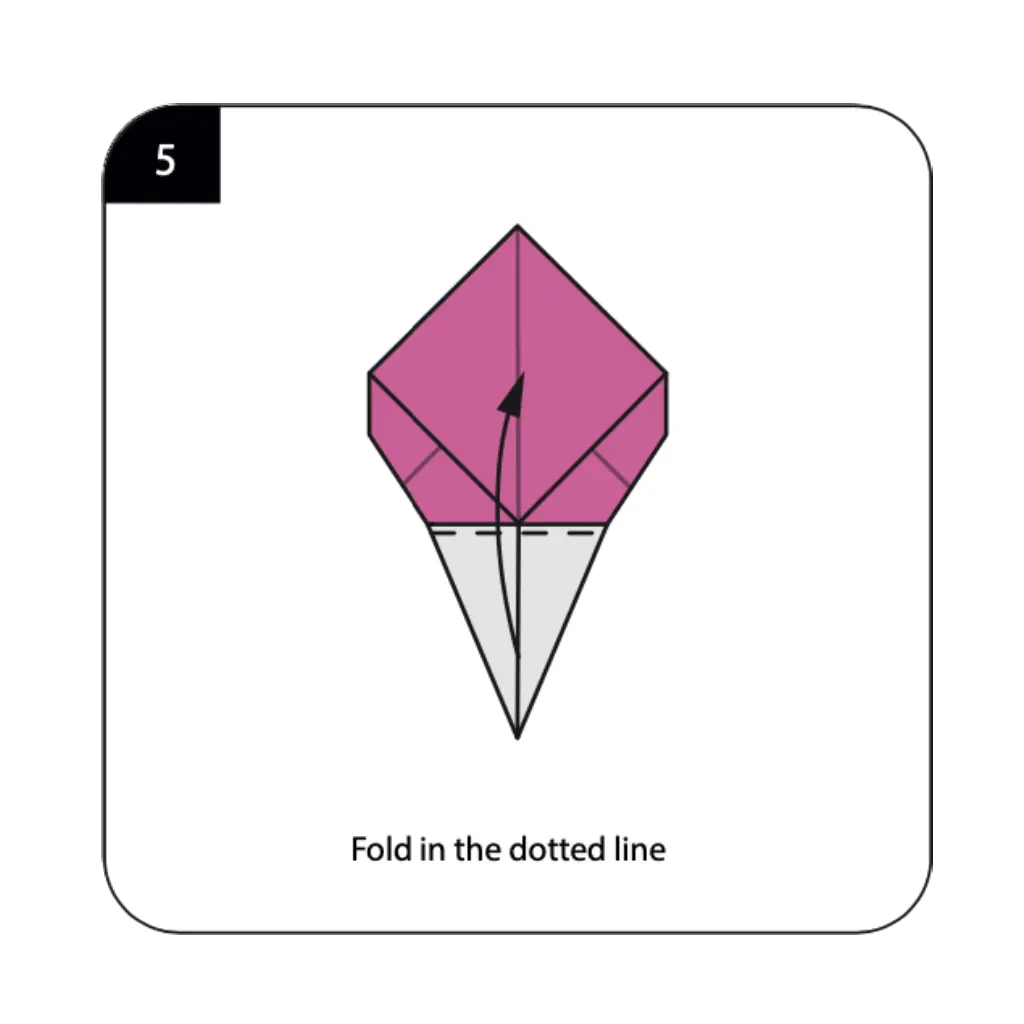
Fold along the dotted line as indicated to further refine your fan’s body structure and establish the characteristic proportions between the handle and the spreading top section. These shaping folds continue developing the distinctive form that makes fans instantly recognizable, particularly the transition from narrow handle to wide cooling surface. The careful execution of these body-defining folds creates the foundation for the fan’s most important functional elements, including the broad surface area needed for effective air movement. This step demonstrates how strategic folding can capture both the visual appeal and practical functionality that define traditional hand fans.
Step 6: Create the Spreading Mechanism For Origami Fan
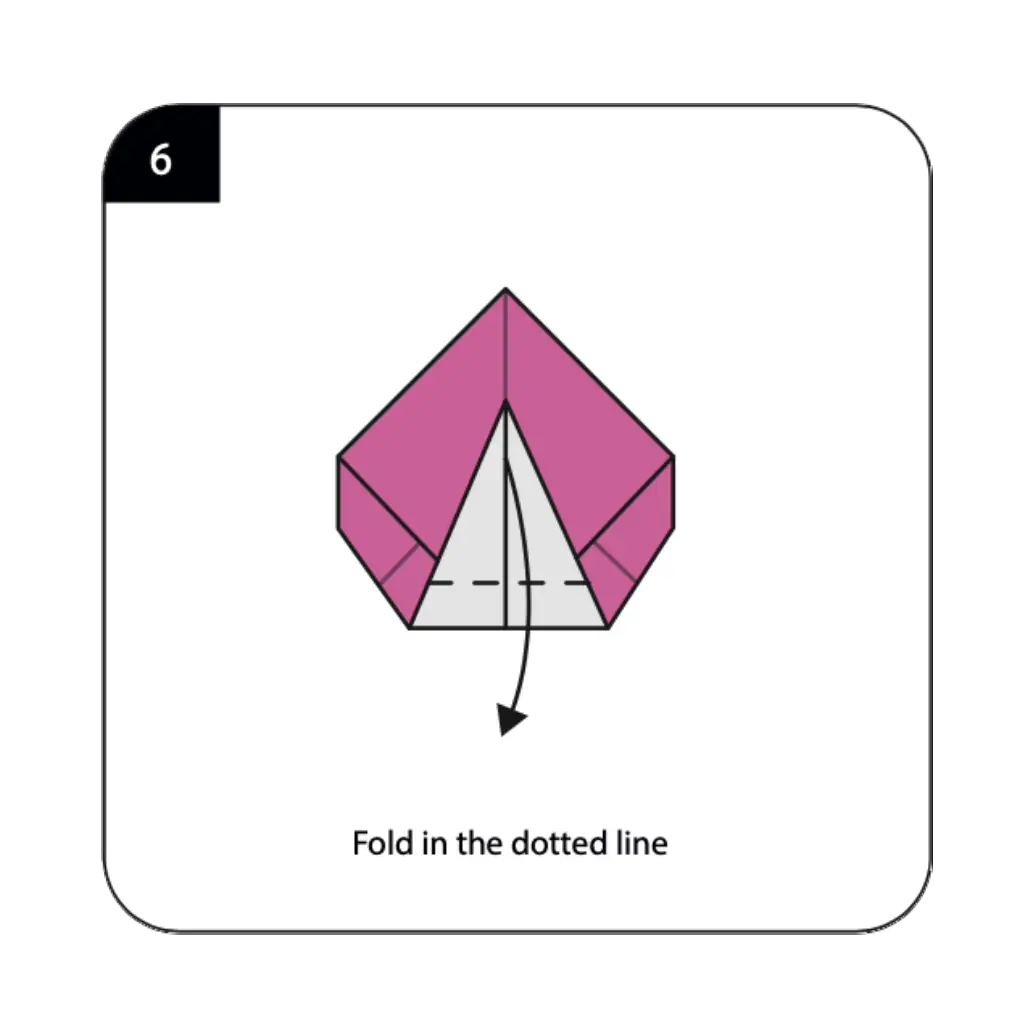
Fold along the dotted line as shown to begin creating the mechanism that will allow your fan to open and spread into its characteristic wide cooling position. This important fold establishes the hinge-like structure that enables your fan to transform from a compact closed form to an open, functional cooling device. The precision of this spreading fold directly affects how smoothly your fan will operate and how effectively it will provide cooling air circulation. This step begins the transformation from a static paper model to a working fan that can actually be used for practical cooling and air movement.
Step 7: Establish the Opening Structure
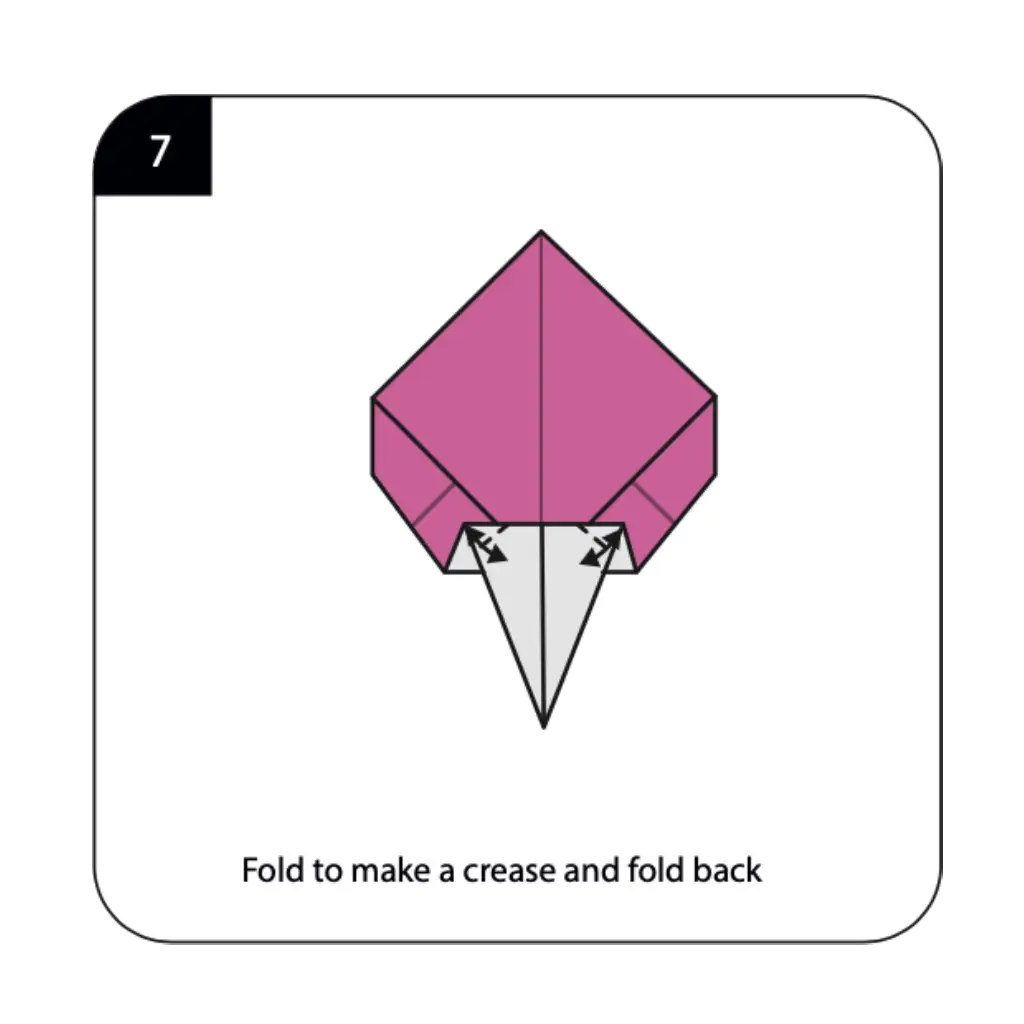
Fold to create a crease and fold back as indicated, creating the flexible joint structure that allows your fan to open and close repeatedly without tearing. This crease-and-return technique establishes the memory fold that enables your fan to spring back to its closed position when not in use. The careful execution of this reversible fold determines the longevity and functionality of your origami fan during regular use. This step demonstrates how origami engineering can create moving parts and functional mechanisms within paper constructions, transforming static art into practical accessories.
Step 8: Form the Spreading Surface
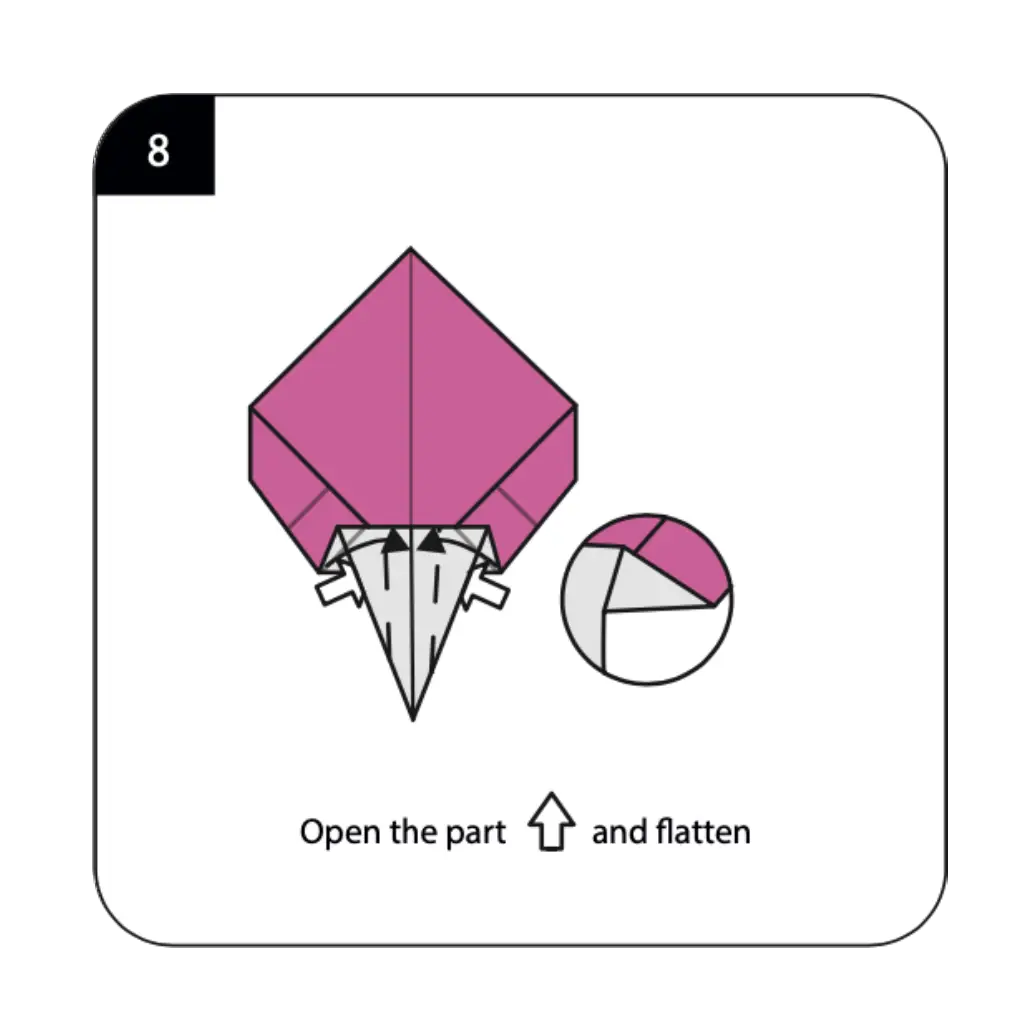
Open the designated section and flatten it as shown in the diagram, creating the broad surface area that will catch and move air when your fan is in use. This opening and flattening technique creates the wide, curved surface that gives fans their characteristic cooling effectiveness. The gentle manipulation required for this step demonstrates how careful handling can transform folded paper into functional surfaces suitable for practical applications. Work slowly and deliberately during this opening process to achieve the smooth, even surface that will provide optimal air movement when your fan is used for cooling.
Step 9: Complete the Handle Structure
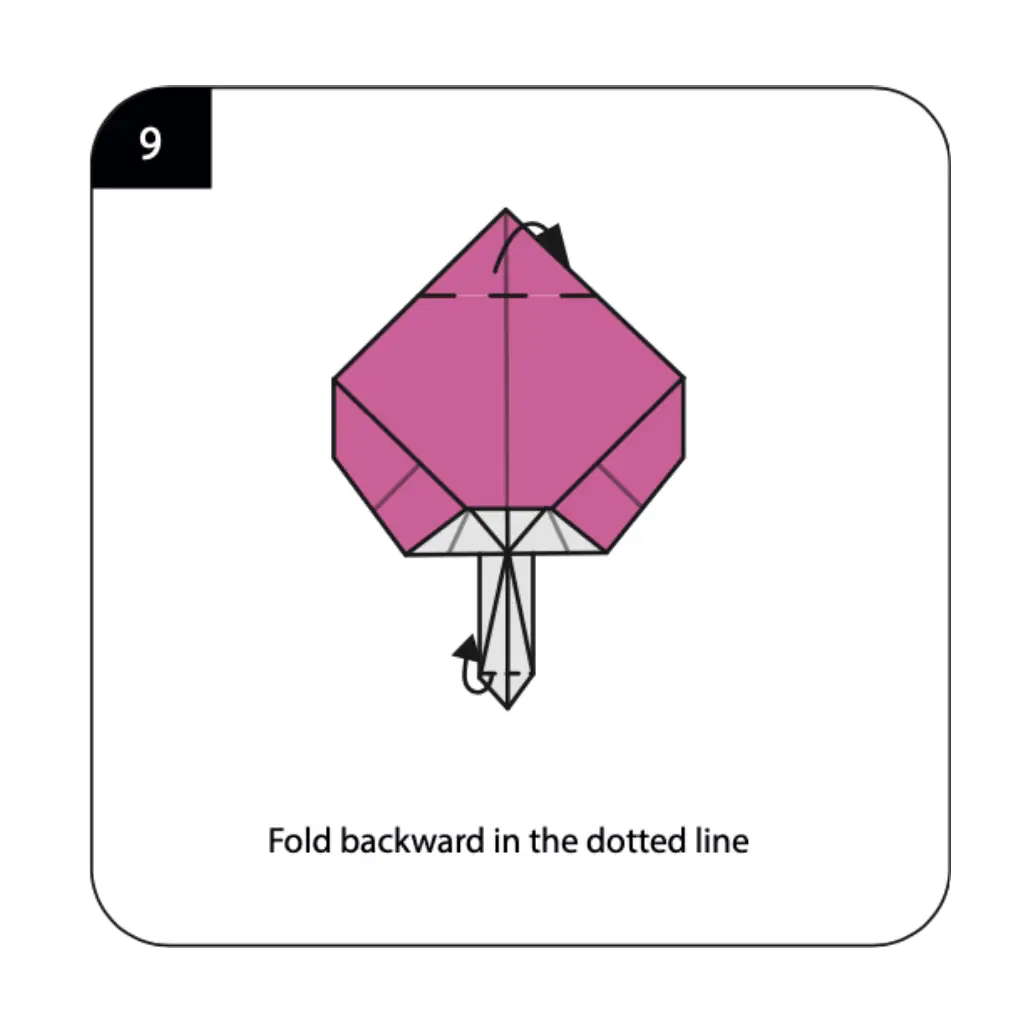
Fold backward along the dotted line as indicated to finalize the handle design and create the comfortable grip section that makes your fan easy to hold and operate. This final handle fold ensures that your fan will be comfortable to use for extended periods while providing the structural stability needed for regular operation. The precision of this handle-completing fold affects both the comfort and effectiveness of your finished origami fan. This step demonstrates how attention to ergonomic details can make the difference between a decorative model and a truly functional accessory that provides practical cooling relief.
Step 10: Finalize Your Origami Fan
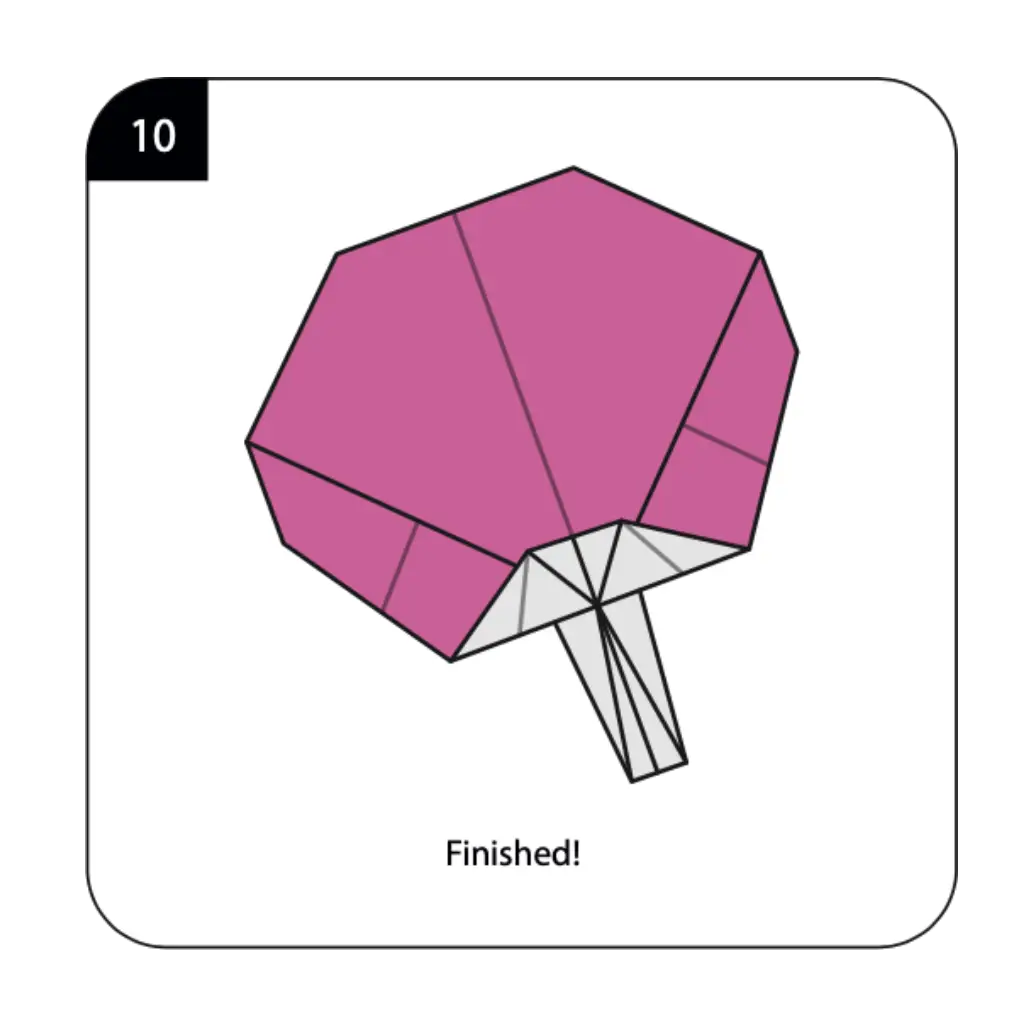
Your origami fan is now complete and ready for use as both a cooling device and an elegant accessory! Make any final adjustments to ensure the fan opens and closes smoothly and the handle feels comfortable in your hand. The finished model should display the characteristic fan silhouette with a narrow handle and broad, spreading top section that effectively moves air when waved. Your handcrafted paper fan now combines the artistry of origami with genuine functionality, ready to provide cooling relief on hot days, serve as a theatrical prop, or simply demonstrate how paper folding can create practical accessories that enhance daily life through both beauty and utility.
Conclusion
Your origami fan demonstrates how traditional paper folding can create genuinely functional accessories that serve practical purposes while showcasing artistic skill. This elegant cooling device combines the beauty of origami with real-world utility, proving that paper crafts can be both decorative and useful in daily life. The fundamental techniques you’ve mastered—including precise creasing, dimensional shaping, and mechanical joint creation—build valuable skills for more complex functional origami projects. Whether used for cooling, decoration, or demonstration, your handcrafted fan represents the perfect marriage of traditional craft techniques and practical modern applications.
- “Master fundamental techniques in our Origami Basics for Beginners before creating your functional fan.”
- “Explore more practical projects in our Creative Origami Collection featuring useful and artistic designs.”
- “Create themed displays with origami butterflies from our Origami Animals Collection for summer garden scenes.”
- “Display your fans artistically using ideas from our Decorative Origami Guide for home accents.”
- “Complement your cooling fan with paper Origami Flowers for complete summer decorations.”
- “Make matching fan sets using techniques from our Modular Origami Projects for special occasions.”
