
Introduction: Discover the art of folding a charming origami flask that captures the essence of a classic bottle shape using just paper. This eight-step tutorial guides you through creating a three-dimensional paper flask perfect for display or as a unique gift container. Whether you’re new to paper folding or expanding your repertoire, this project combines simple techniques with impressive results. Let’s transform a flat square into an elegant miniature flask that showcases the magic of origami.
Step-by-Step Origami Flask Instructions:
Step 1: Start with Diamond Orientation For Origami Flask
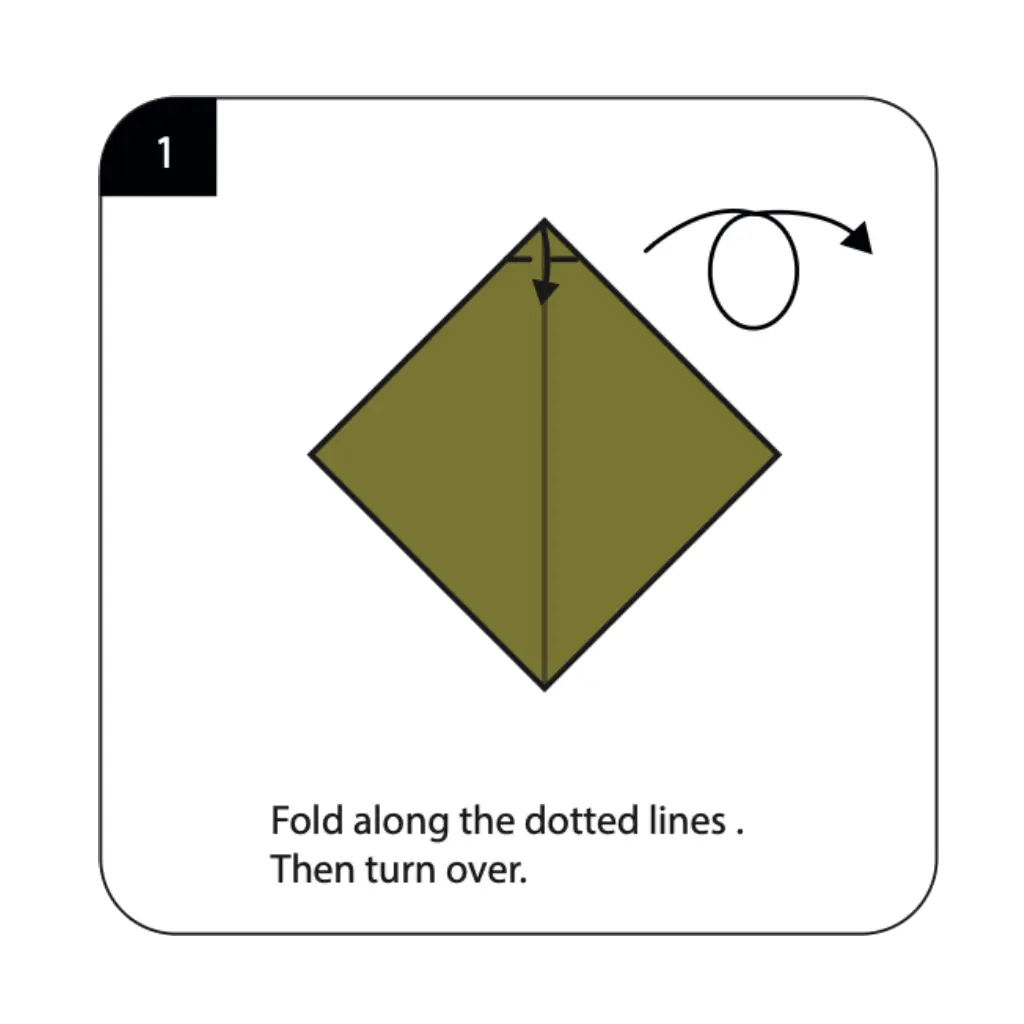
Position your square paper in a diamond shape with one corner pointing toward you, then fold along the horizontal and vertical dotted lines shown. These initial folds create the center guidelines that will help you achieve perfect symmetry throughout the folding process. Turn the paper over after making these creases to prepare for the next transformation. This diamond orientation is a fundamental starting position used in many origami basics projects.
Step 2: Create the Flask’s Neck Foundation For Origami Flask
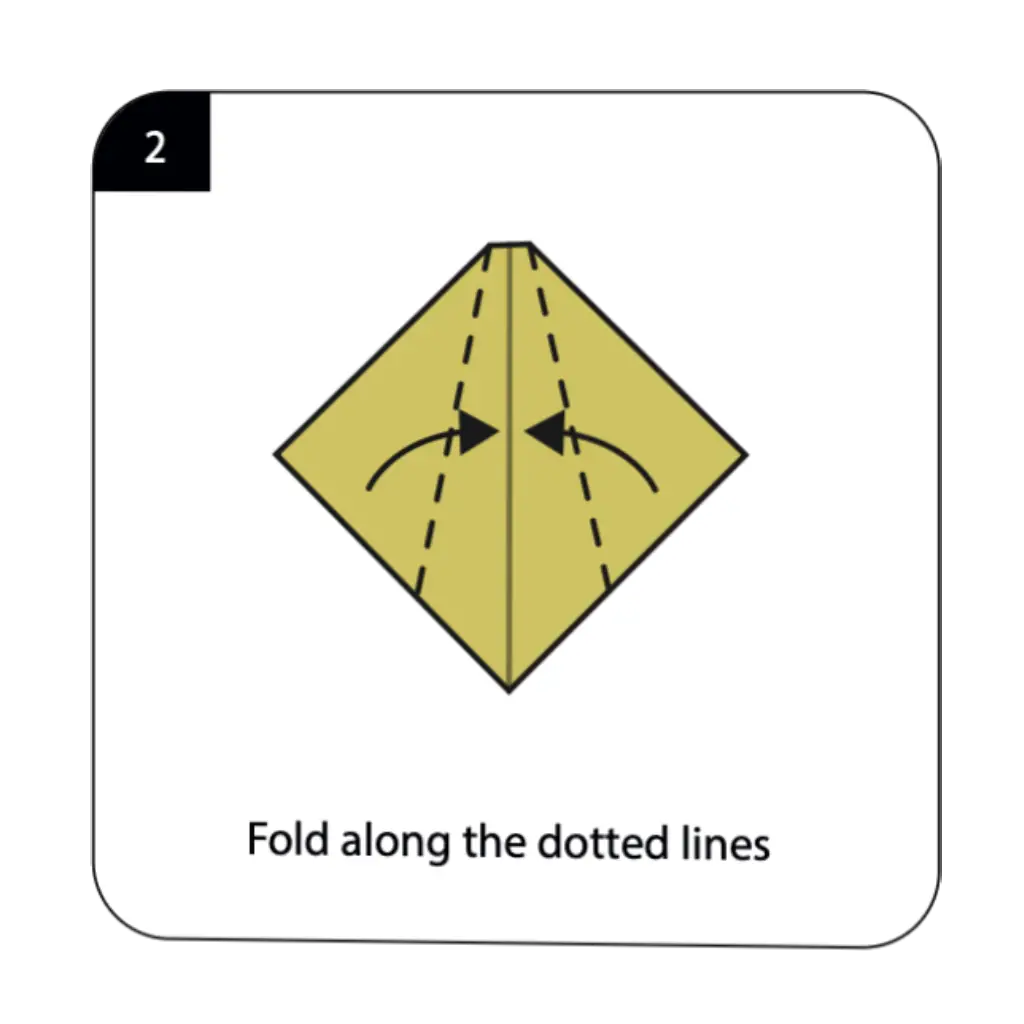
Fold the paper along the new set of dotted lines that appear after your initial folds, bringing the side corners toward the center. These folds begin shaping what will become the narrow neck of your origami flask, creating the characteristic bottle silhouette. Ensure your folds are precise and sharp, as they determine how realistic your final flask will appear. The accuracy of these early steps is crucial for achieving the proper proportions between the flask’s body and neck.
Step 3: Turn and Refine the Shape For Origami Flask
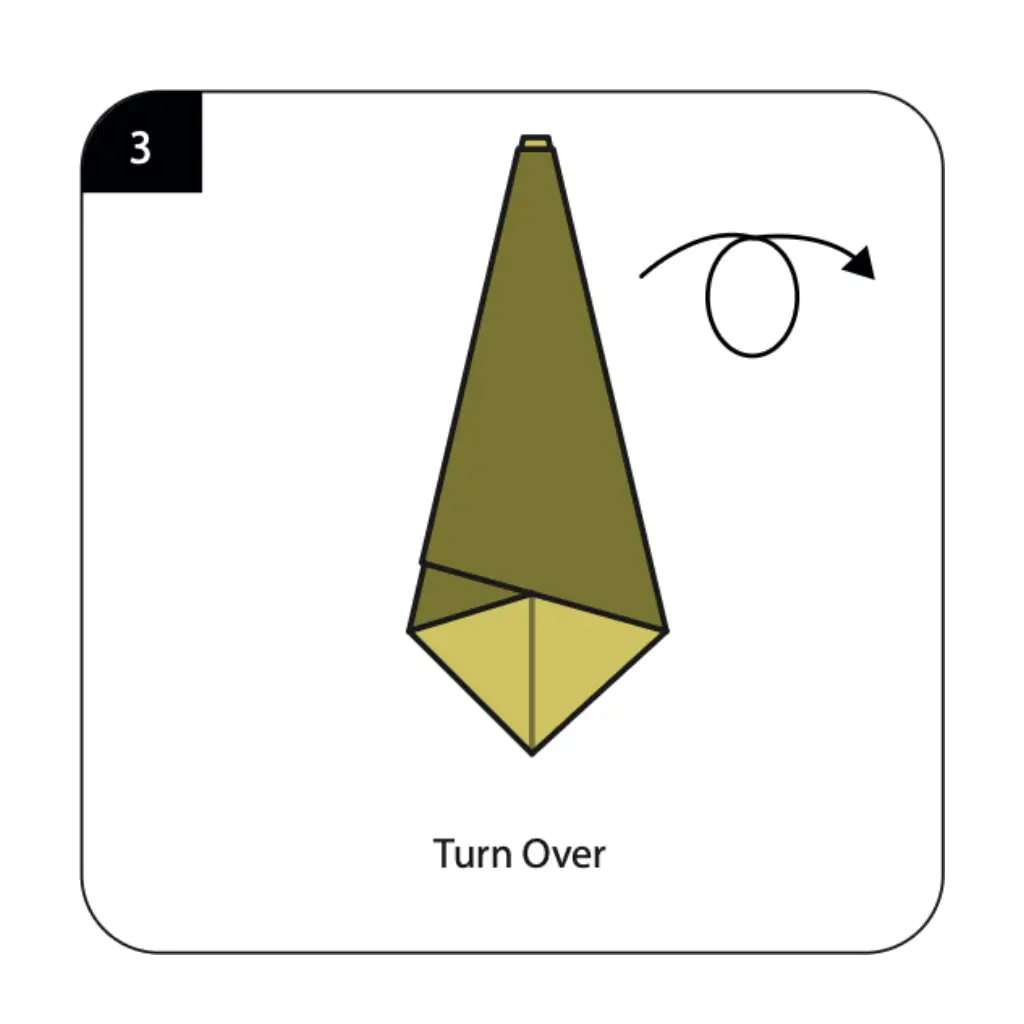
Flip your model over to reveal a new folding pattern that will further define your flask’s form. At this stage, you’ll notice the paper beginning to take on a more three-dimensional quality as the layers build upon each other. The turn-over action allows you to work on the opposite side while maintaining the integrity of your previous folds. This alternating technique is common in intermediate creative origami designs that require depth and dimension.
Step 4: Master the Zig-Zag Technique For Origami Flask
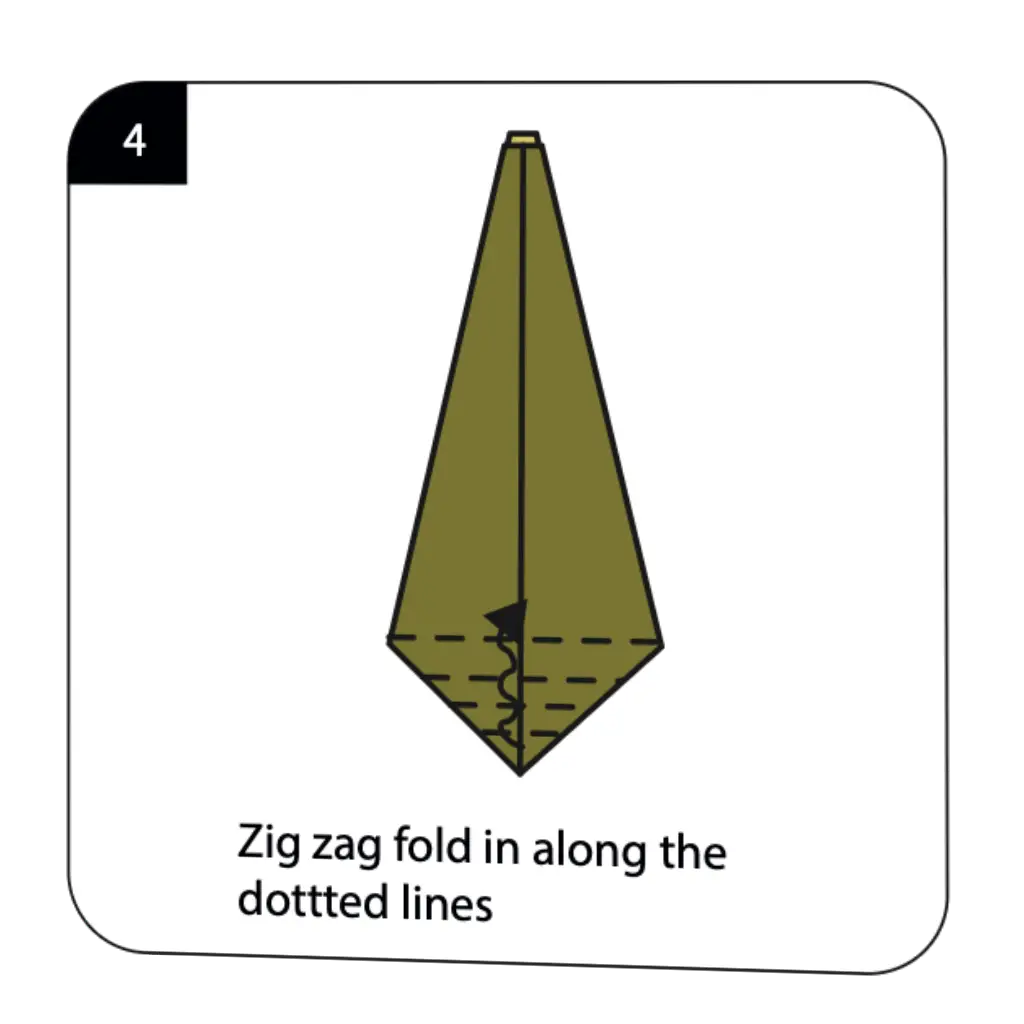
Execute a zig-zag fold along the indicated dotted lines, alternating between mountain and valley folds to create an accordion-like effect. This technique adds structural stability to your flask while creating the visual texture that distinguishes the neck from the body. The zig-zag pattern requires patience and precision, folding each section carefully to maintain even spacing. This folding method is essential for creating the flask’s characteristic tapered neck that makes it instantly recognizable.
Step 5: Flip and Continue Shaping For Origami Flask
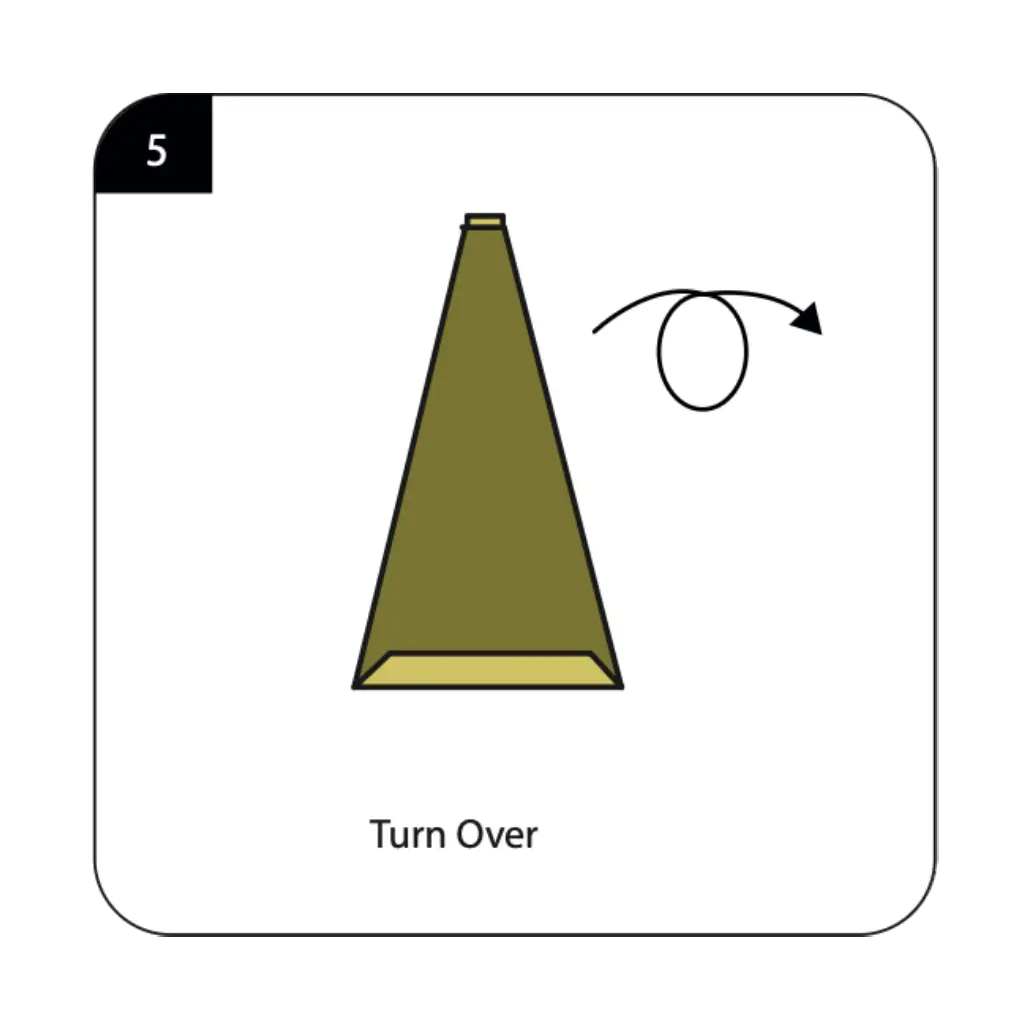
Turn your model over once again to access the next set of folds that will refine your flask’s proportions. This step focuses on narrowing the upper portion while maintaining the wider base, creating the classic bottle shape. Work slowly to ensure the paper doesn’t tear at the stress points where multiple folds converge. The careful manipulation during this phase transforms your flat folds into the beginnings of a three-dimensional decorative origami piece.
Step 6: Define the Flask Body For Origami Flask
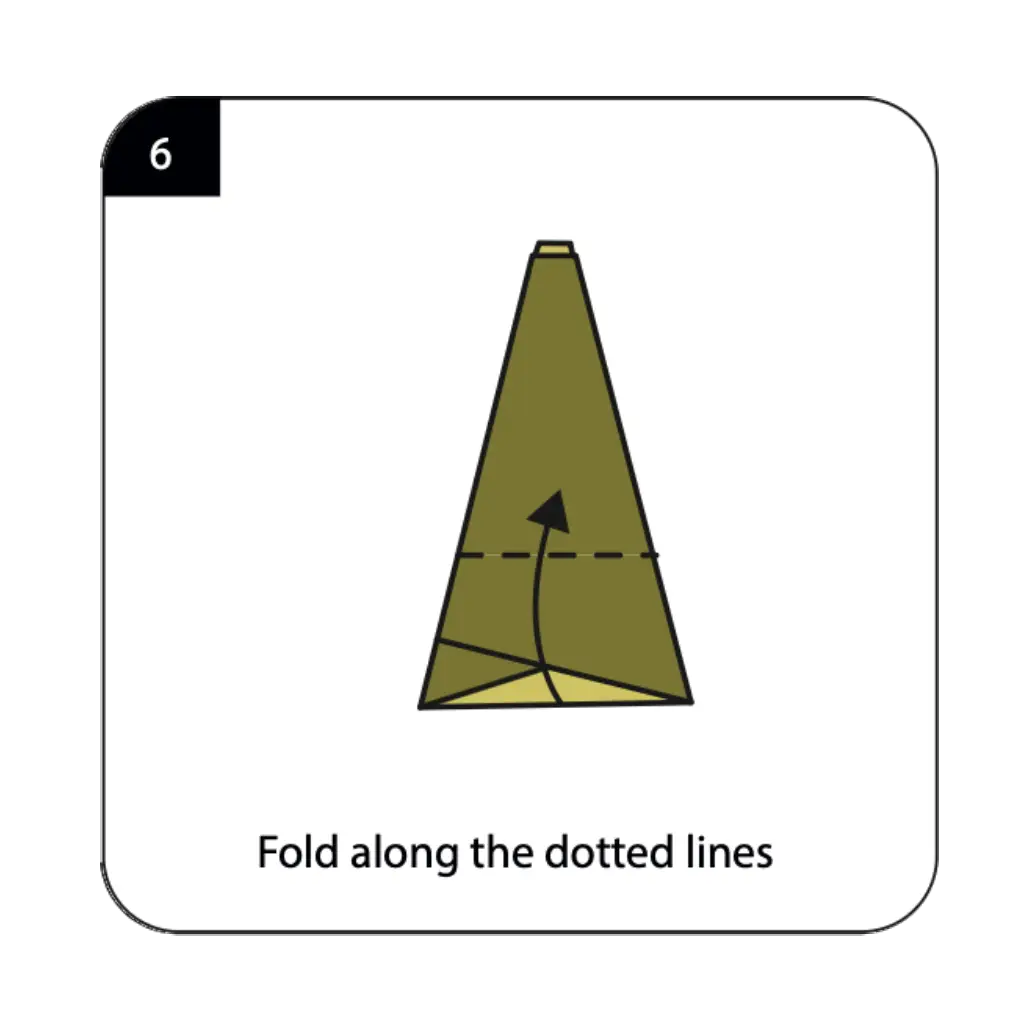
Fold along the dotted lines to establish the final contours of your flask’s body, creating clean edges and a stable base. These folds lock the previous layers in place while adding the finishing touches to the bottle’s silhouette. Pay attention to keeping both sides symmetrical for a professional-looking result that stands properly. The precision of these folds determines whether your flask will have the elegant proportions of a real bottle.
Step 7: Create the Base with Backward Folds
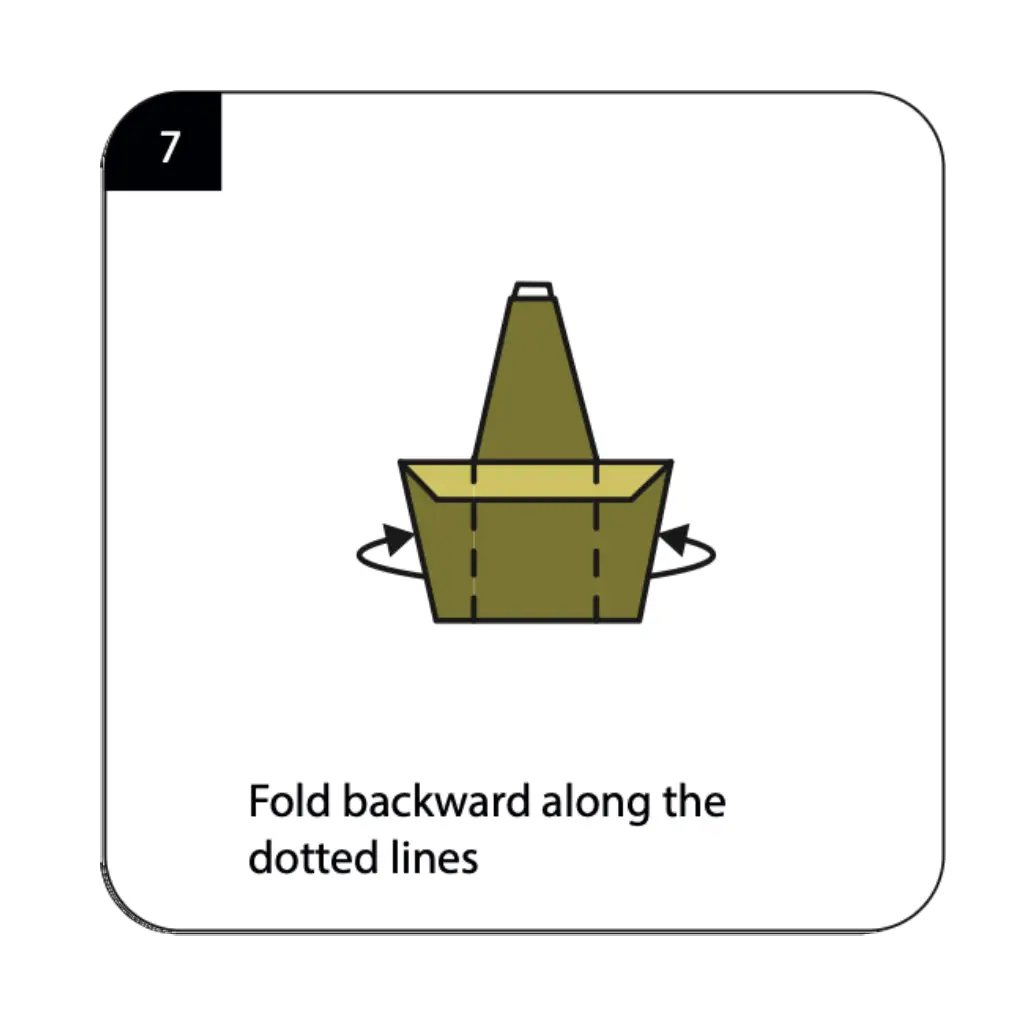
Fold backward along the indicated dotted lines to form the flask’s flat bottom, allowing it to stand upright independently. This reverse folding technique creates a stable foundation while maintaining the illusion of a rounded bottle base. The backward folds tuck excess paper neatly inside, creating clean lines and a polished appearance. This finishing technique is similar to methods used in advanced modular origami where multiple pieces must fit together perfectly.
Step 8: Complete Your Origami Flask
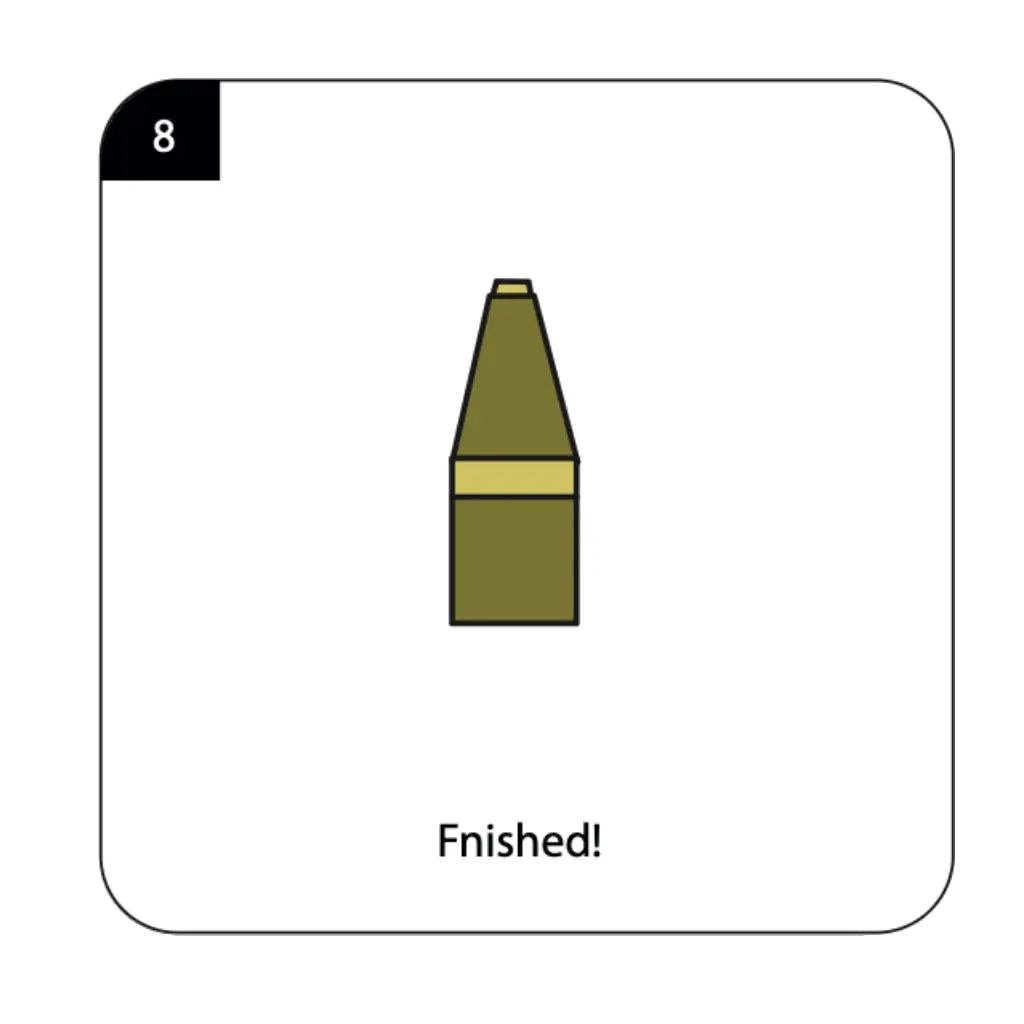
Make the final adjustments to ensure all folds are crisp and the flask maintains its intended shape without assistance. Your finished origami flask should display a clear distinction between the narrow neck and wider body, mimicking a real bottle’s proportions. Gently shape the model with your fingers if needed to achieve the perfect bottle silhouette. Stand your completed flask upright and admire how simple paper folding techniques can create such an elegant three-dimensional form.
Conclusion: Congratulations on creating your own origami flask using just paper and traditional folding techniques! This charming paper bottle makes an excellent decoration, gift container for small items, or addition to your origami collection. Try experimenting with different paper colors and sizes to create a whole set of decorative flasks. With practice, you’ll be able to fold this unique design quickly and even teach others this delightful paper craft.
