
Introduction:
Welcome to the fundamental world of origami bases! This comprehensive tutorial focuses on the origami frog base—one of the most versatile foundation structures in the Japanese art of paper folding. Mastering this essential base opens the door to creating countless origami models, from the beloved jumping frog to elegant water lilies and advanced animal designs. The frog base serves as a crucial stepping stone between basic folds and more complex origami creations, making it an indispensable technique for folders of all levels. While seemingly simple, this base contains the geometric precision that makes origami such a fascinating art form. Each fold builds upon previous ones, creating a structured foundation that can be transformed into diverse models. Whether you’re a beginner learning origami fundamentals or an experienced folder looking to refresh your technique, this step-by-step guide breaks down the frog base into manageable stages with clear visuals and detailed instructions. Grab a square sheet of origami paper, and let’s begin mastering this essential origami building block!
Detailed Step Descriptions:
STEP 1: STARTING WITH A SQUARE
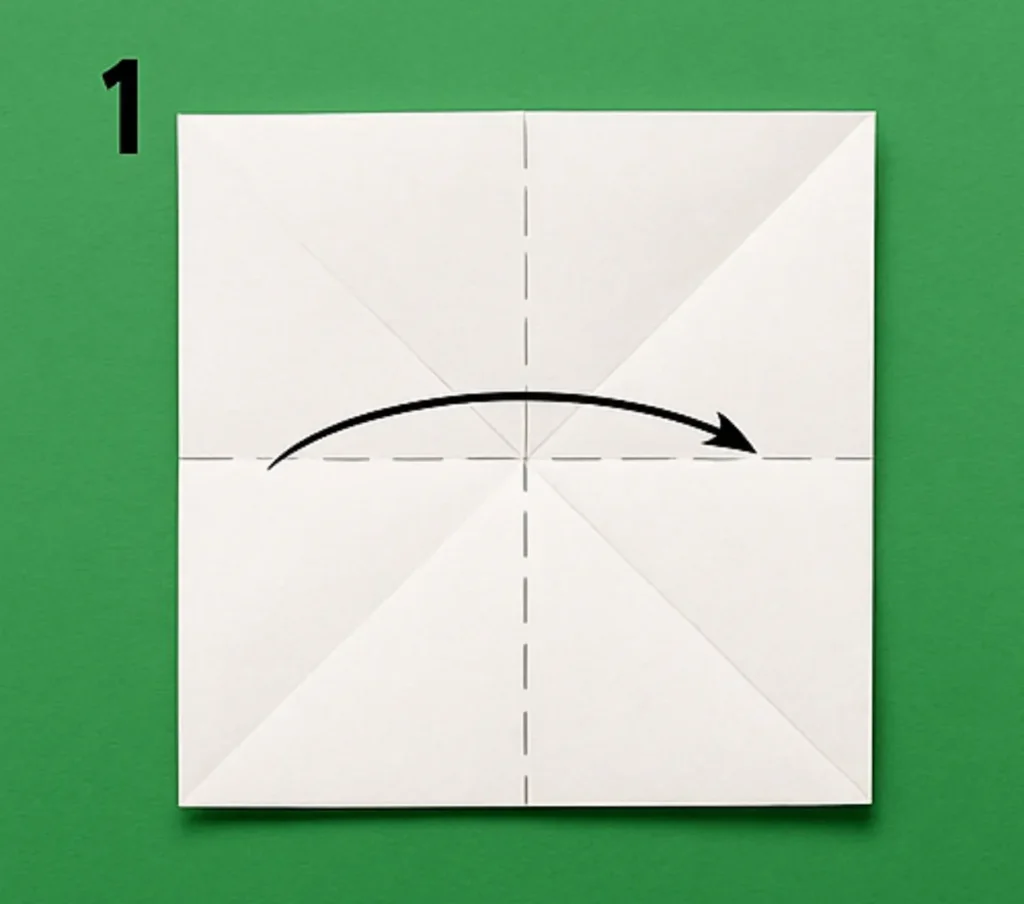
Begin with a perfectly square sheet of origami paper on a flat surface. The quality and precision of your square directly impacts the success of your origami frog base creation. Professional origami artists recommend using paper that holds creases well for this fundamental base structure. Traditional origami bases like the frog base always begin with this simple square, which will transform through geometric folding.
STEP 2: FOLDING THE FIRST CORNERS
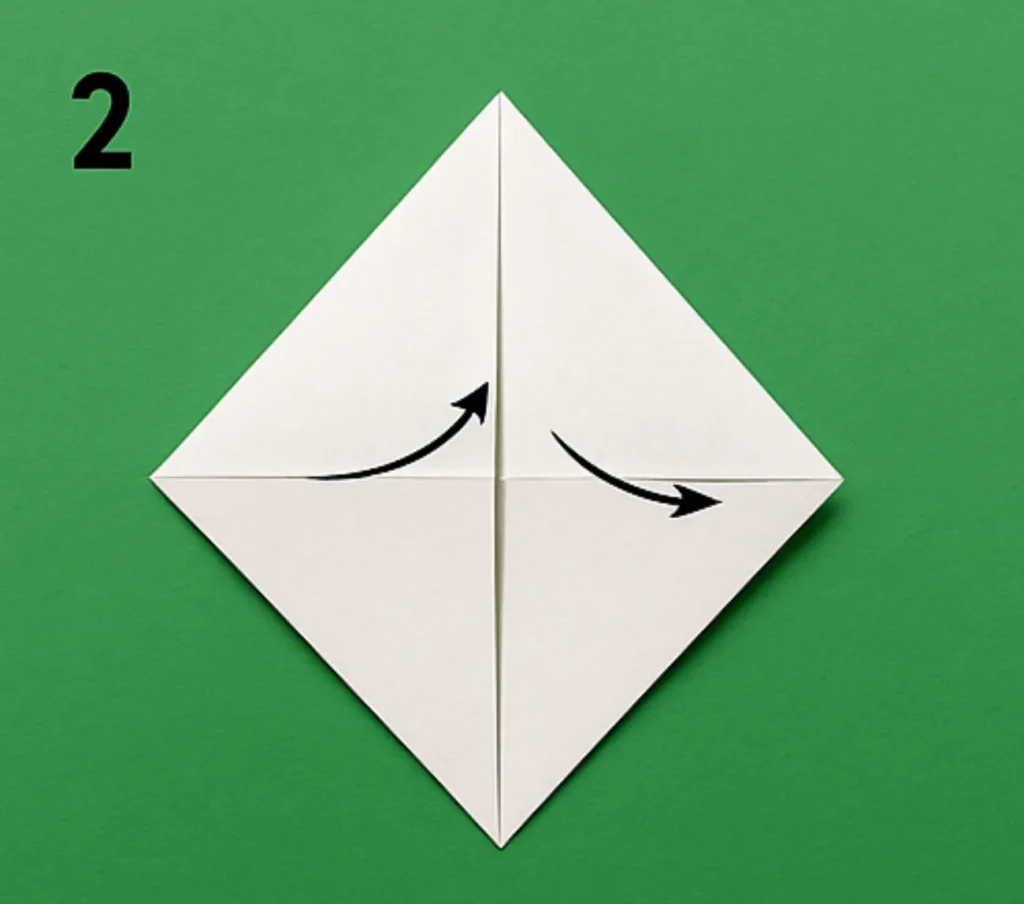
Fold two opposite corners of your square inward along the dotted lines as indicated by the arrows. These initial diagonal folds establish the fundamental symmetry needed for a properly structured origami frog base. Expert folders emphasize making these folds precise and sharp, as they form the foundation for all subsequent folding. After completing these folds, your paper should begin taking a diamond shape with two corners folded inward.
STEP 3: FOLDING THE REMAINING CORNERS

Repeat the same diagonal folding technique with the remaining two corners, following the dotted guidelines. This symmetric folding creates the balanced structure that makes the frog base so versatile for various origami models. Japanese origami masters consider this step crucial for establishing the proper proportions in your frog base. Ensure all four corners are folded with equal pressure and alignment for a stable foundation for your origami creations.
STEP 4: CREATING THE PRELIMINARY FOLD
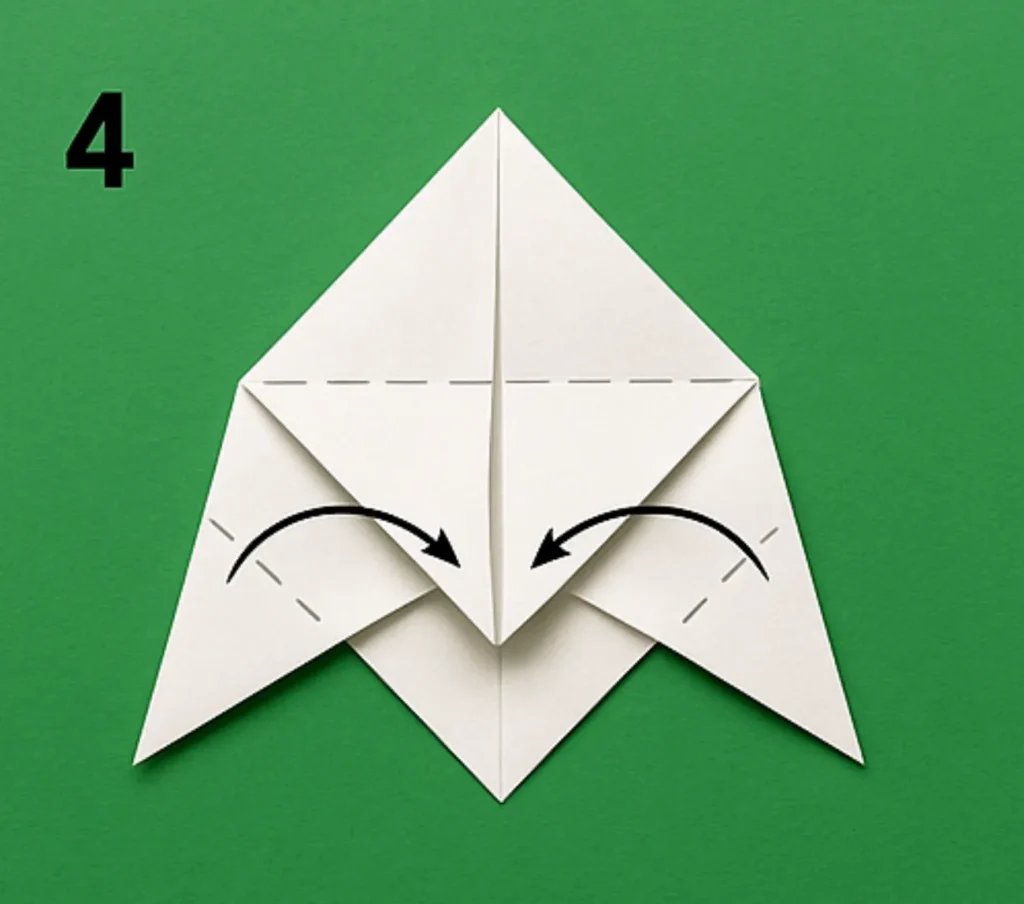
Fold the pointed flaps inward toward the center as indicated by the curved arrows. This pivotal step begins transforming the flat folded paper into the three-dimensional structure of the frog base. Popular origami jumping frog tutorials build upon this precise folding pattern to create their interactive designs. Apply even pressure when creating these folds to ensure your origami frog base will be stable and well-proportioned.
STEP 5: CONTINUING THE INWARD FOLDS
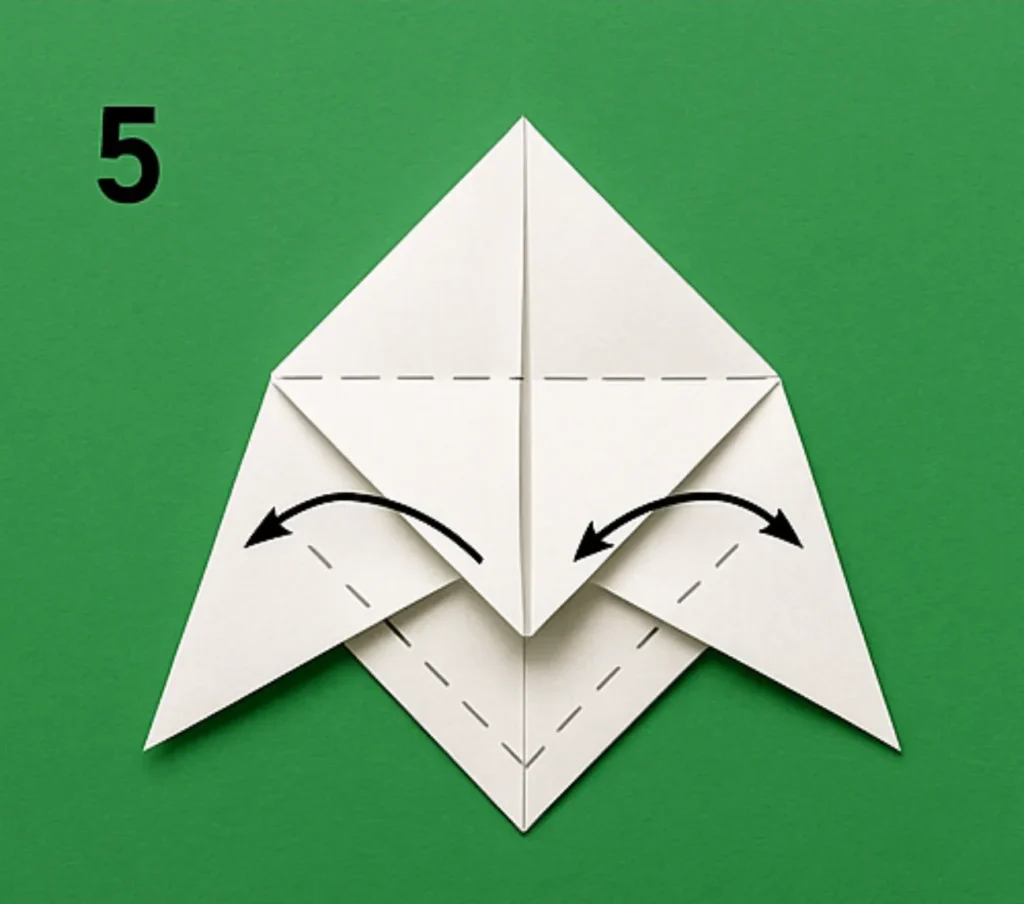
Continue folding the remaining flaps inward following the same pattern shown by the directional arrows. This systematic folding technique builds the distinctive layered structure that characterizes the origami frog base. Traditional origami bases require this methodical approach to create stable foundations for more complex models. The symmetry established in this step is essential for ensuring your frog base can be successfully transformed into various designs.
STEP 6: COMPLETING THE FROG BASE
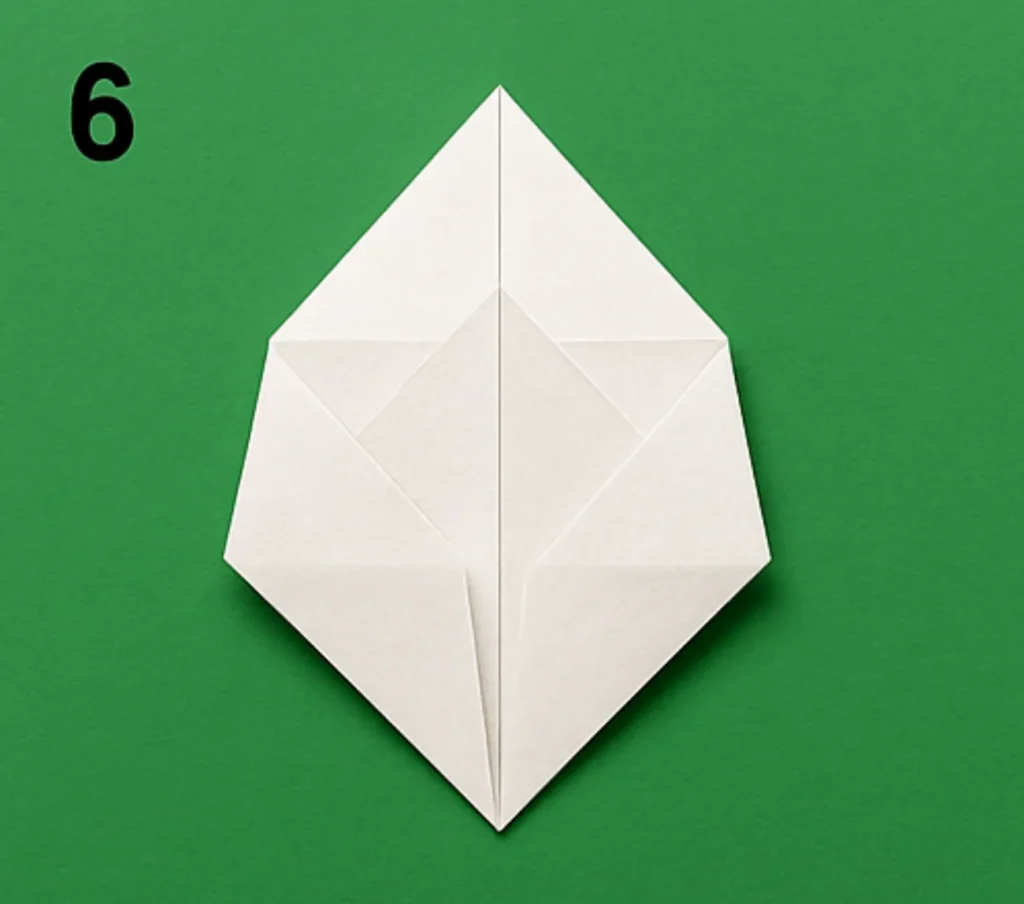
Finalize your origami frog base by ensuring all folds are sharp and the structure is properly squared. The completed frog base should display the characteristic diamond shape with multiple layers at the center. This versatile foundation is now ready to be transformed into jumping frogs, water lilies, or numerous advanced origami models. Master origami artists consider this base one of the most important building blocks in traditional Japanese paper folding.
Conclusion:
Congratulations on mastering the essential origami frog base! This fundamental structure represents an important milestone in your paper folding journey. By learning this versatile base, you’ve acquired a key building block that serves as the foundation for countless origami creations—from the classic jumping frog to advanced models. The geometric principles and folding techniques you’ve practiced are transferable to many other origami patterns, enhancing your overall paper folding skills. The frog base demonstrates how simple squares of paper can be transformed through precise folding to create three-dimensional structures with remarkable functionality. As you continue exploring origami, you’ll discover how this base can be modified and expanded upon to create increasingly complex designs. We encourage you to practice this frog base until it becomes second nature, allowing you to focus on the creative transformations that make origami such a rewarding art form. Happy folding!
- Complete guide to origami bases → Explore all essential origami foundation structures including bird base, waterbomb base, preliminary base, and more.
- Create a jumping origami frog using the frog base → Apply your new frog base skills to craft the classic interactive jumping frog model that’s perfect for beginners.
- Advanced models using the frog base → Discover sophisticated origami creations that build upon the frog base, including water lilies, frogs, and animals.
- Best papers for practicing origami bases → Learn which paper types provide the best results when practicing fundamental origami structures like the frog base.
- Understanding origami base variations → Explore how traditional bases like the frog base can be modified to create unique and innovative origami designs.
