
Introduction:
Welcome to our fun origami glasses tutorial! This delightful paper craft project teaches you how to create wearable paper sunglasses that make perfect props for photos, playtime, or party favors. What makes this origami design special is its combination of simplicity and functionality—with just seven straightforward steps, you’ll transform a square sheet of paper into recognizable glasses complete with frames and temple arms. Unlike many decorative origami projects, these paper glasses serve a practical purpose as costume accessories or pretend play items. The light blue paper shown creates a cool summer sunglasses look, though any color works wonderfully—try black for classic shades or bright colors for a fun party vibe. Whether you’re planning activities for a children’s party, creating classroom crafts, or looking for a quick origami project to entertain kids, these paper glasses offer a perfect blend of ease and enjoyment. No special materials or complex folding techniques required—just follow our clear instructions to create your own paper eyewear!
Detailed Step Descriptions:
STEP 1: FOLDING THE INITIAL CREASE ORIGAMI GLASSES
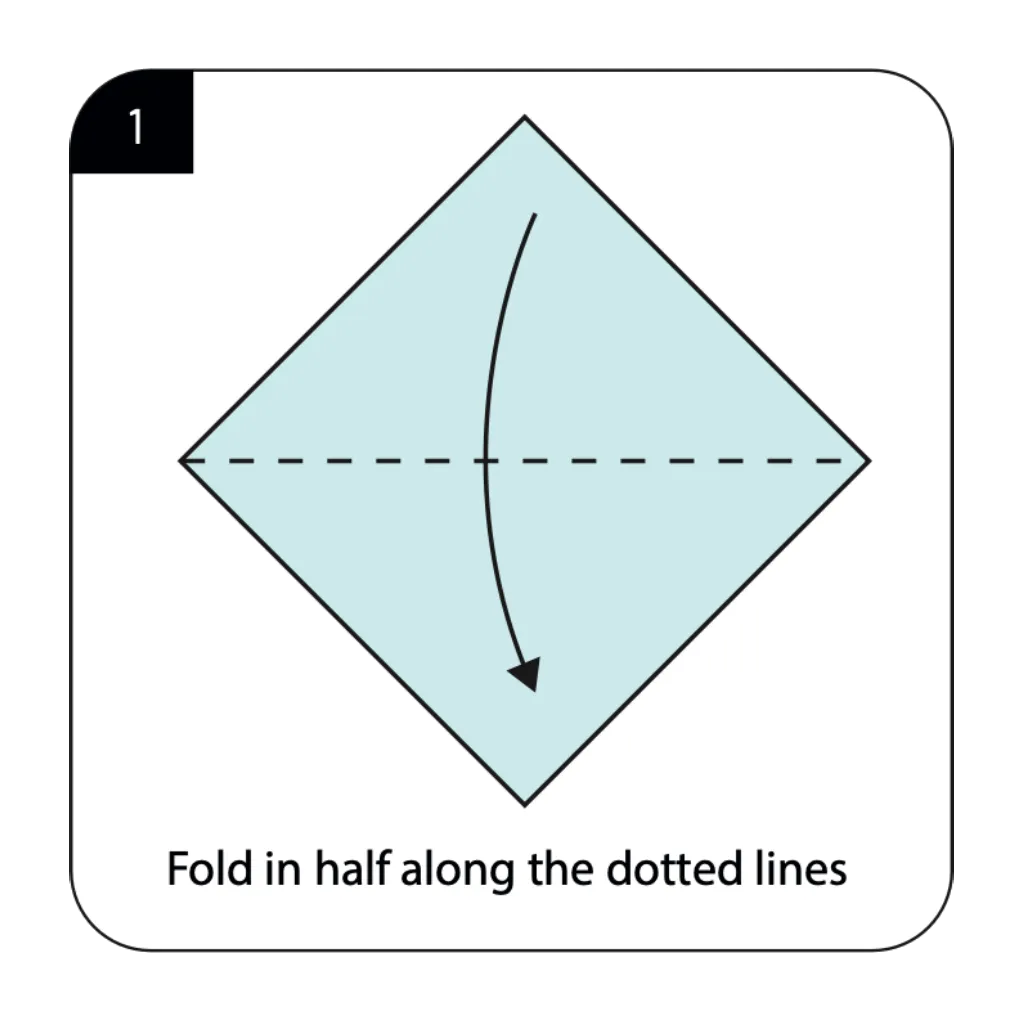
Begin your origami glasses by folding the square paper in half along the dotted line to create a central crease. This foundational fold establishes the horizontal axis that defines the top and bottom halves of your glasses. Simple origami projects for kids always start with these basic reference lines for proper structure. After making a firm crease, unfold the paper completely to reveal the guideline for subsequent folding steps.
STEP 2: CREATING THE TRIANGULAR BASE
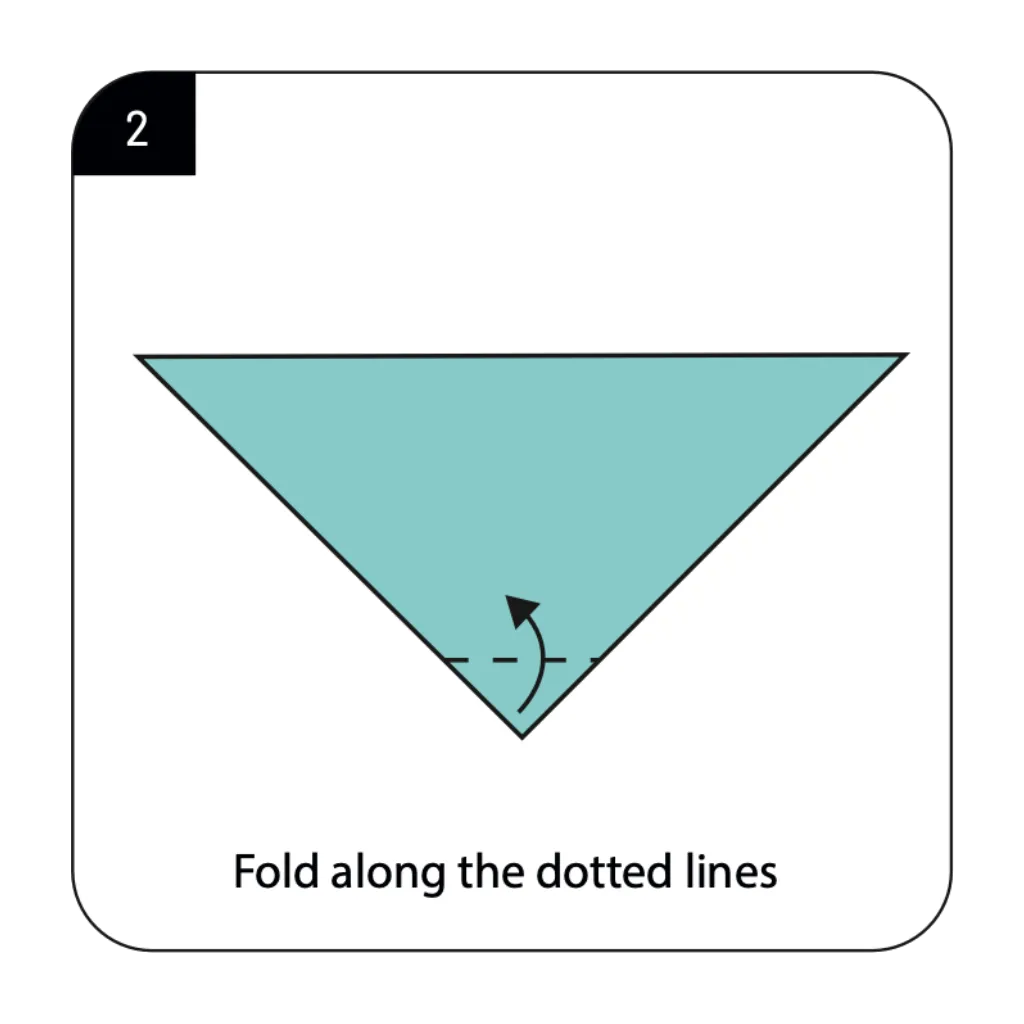
Fold the paper along the dotted line as shown, bringing the bottom corner up to form a triangle. This fold creates the basic triangular structure that will transform into the distinctive glasses shape. Paper sunglasses tutorials emphasize this step as crucial for establishing proper proportions. The completed triangle serves as the foundation from which all other elements of your glasses will develop.
STEP 3: ROLLING UP THE FRONT EDGE ORIGAMI GLASSES
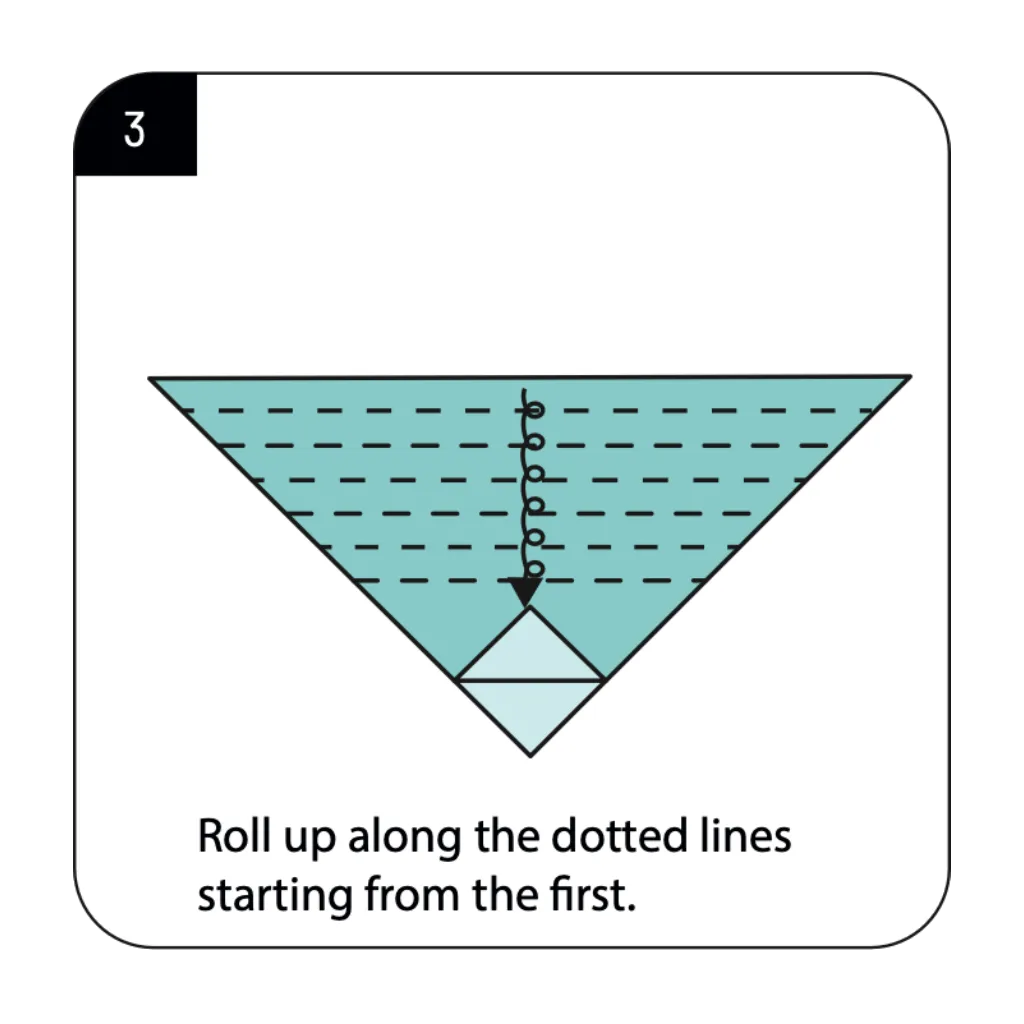
Roll up the paper along the multiple dotted lines starting from the first line at the bottom of the triangle. This specialized rolling technique creates the thickness needed for the front frame of your origami glasses. DIY paper glasses projects utilize this multiple fold approach to create stability in the final product. Each fold should be parallel to the previous one, creating a neat, accordion-like series of creases.
STEP 4: FORMING THE FIRST TEMPLE ARM
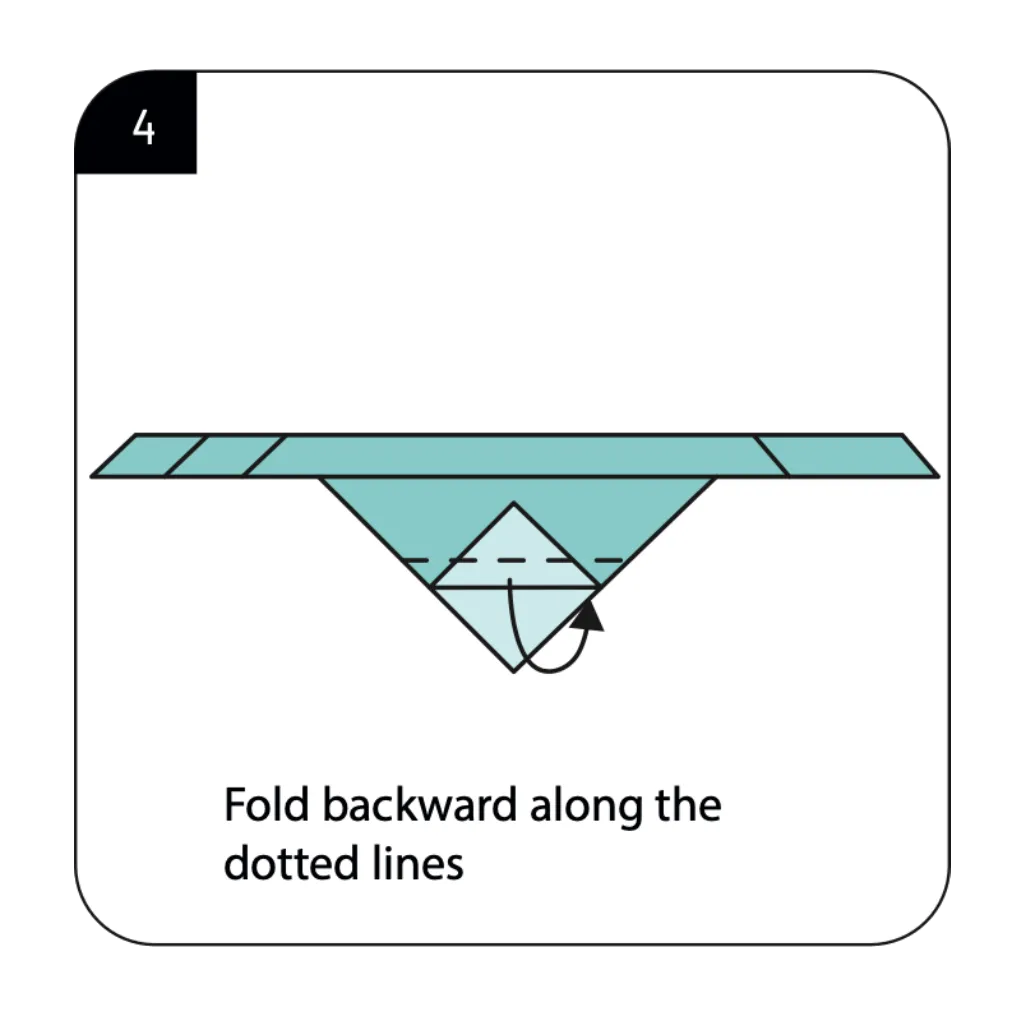
Fold backward along the dotted lines to begin creating one of the temple arms (side pieces) of your glasses. This strategic fold starts transforming your flat model into the three-dimensional eyewear structure. Origami costume props require these precise angle folds to create realistic wearable accessories. The backward direction of the fold ensures the arms will extend outward properly from the frames.
STEP 5: FORMING THE SECOND TEMPLE ARM
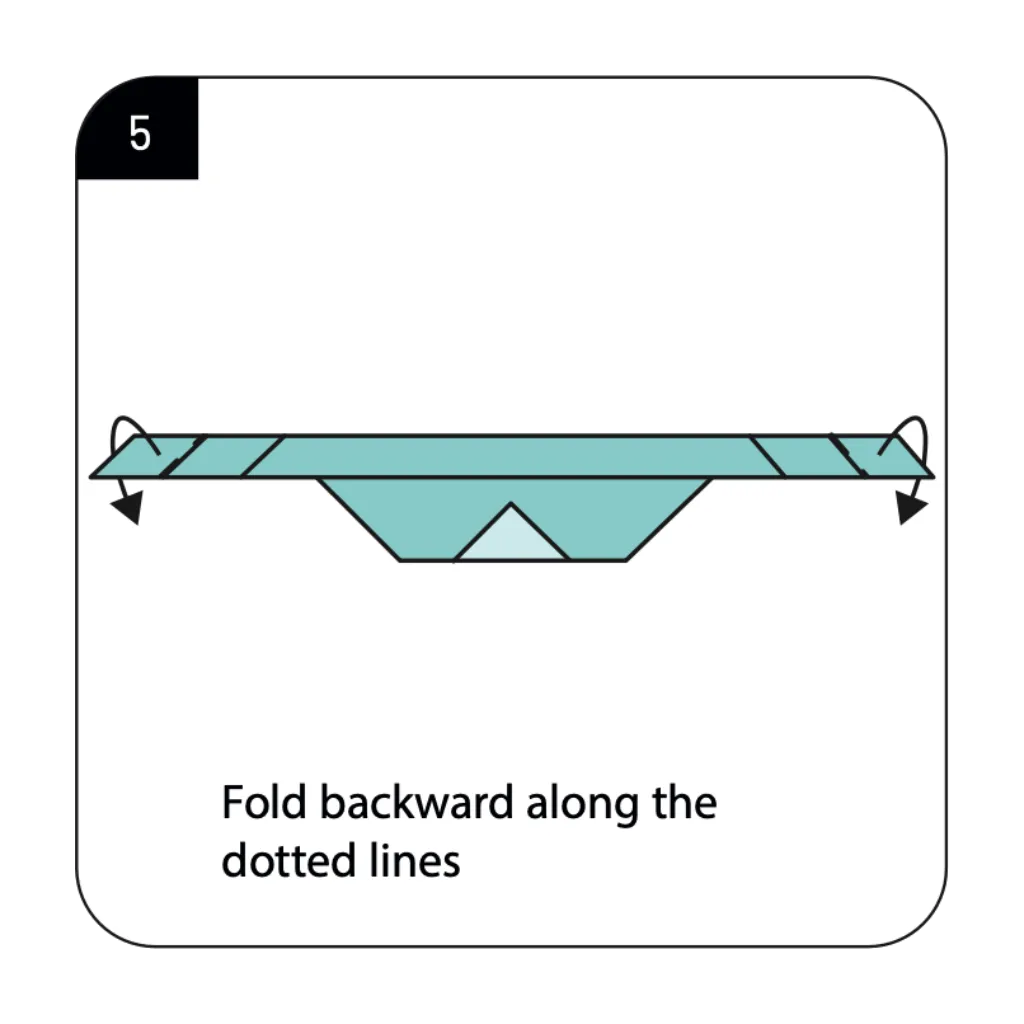
Create another backward fold along the dotted lines on the opposite side to form the second temple arm. This mirrored fold ensures your origami glasses will have symmetrical sides for a balanced appearance. Easy paper crafts for parties benefit from these matching elements that create recognizable objects. The precision of this fold directly affects how well your finished glasses will look when displayed.
STEP 6: REFINING THE TEMPLE ARMS
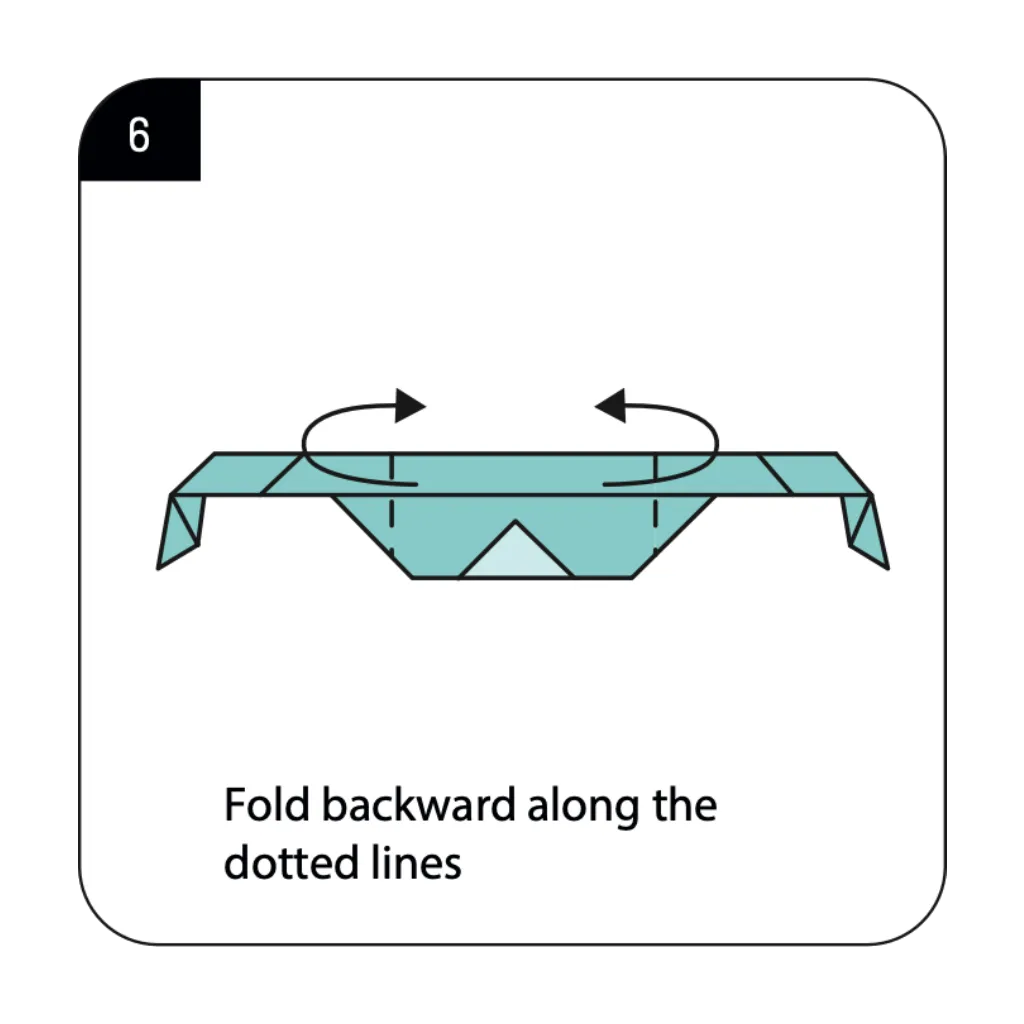
Fold backward along the dotted lines to create the final shape and angle of both temple arms. This detailed adjustment positions the arms at the proper angle to mimic real glasses or sunglasses. Creative origami projects often feature these finishing touches that transform simple shapes into recognizable items. The inward curve of the fold helps the arms sit naturally as they would on wearable eyewear.
STEP 7: COMPLETING YOUR ORIGAMI GLASSES
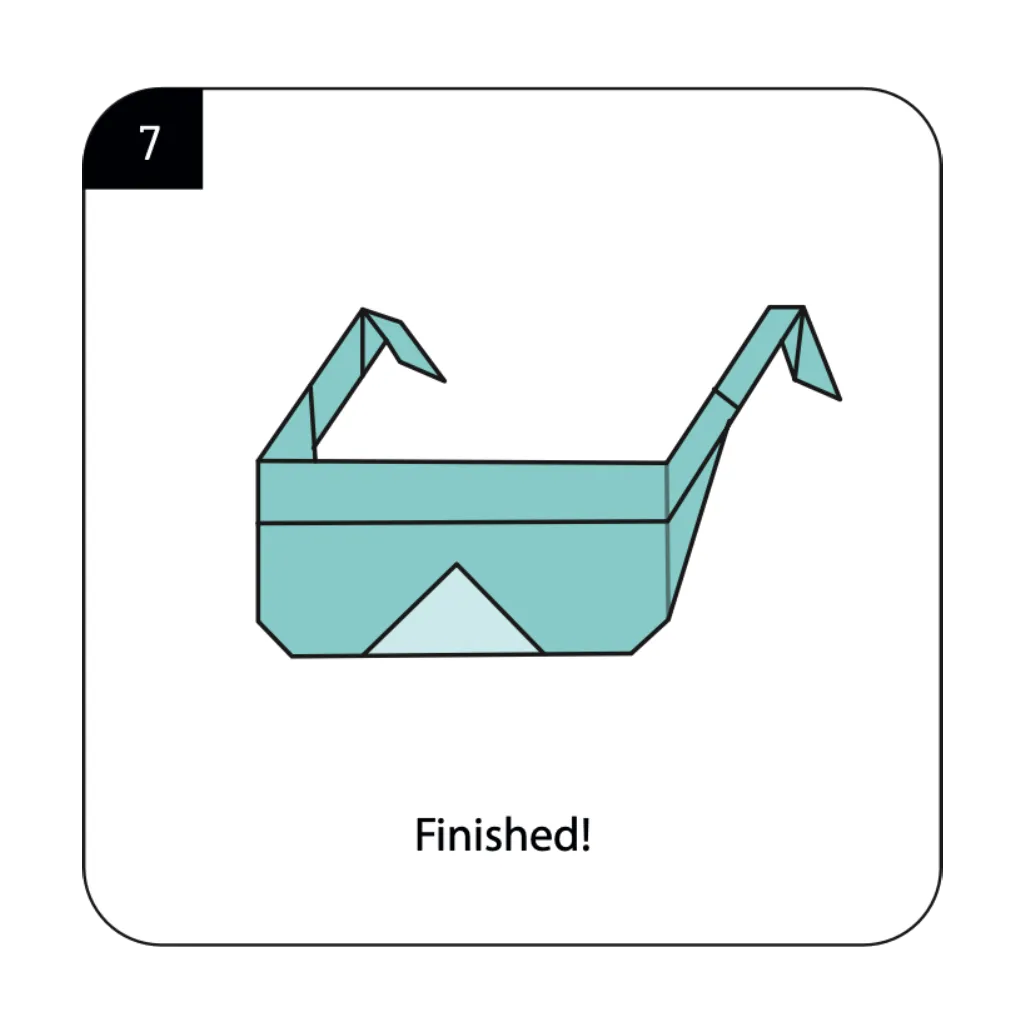
Your origami glasses are now finished and ready to be used as a fun costume prop or decoration! The completed glasses feature a recognizable frame with extending temple arms resembling real eyewear. Kids’ origami crafts like these paper sunglasses provide both entertainment and creative satisfaction. The simple design allows for customization—you can draw lens patterns or decorate with markers for personalized glasses.
Conclusion:
Congratulations on creating your origami glasses! Through seven straightforward steps, you’ve transformed a simple square of paper into fun, recognizable eyewear that can be used in countless creative ways. These paper glasses demonstrate how origami can create not just decorative items but functional props for play and parties. Your completed glasses make perfect photo booth accessories, costume elements, party favors, or imaginative play items for children. The techniques you’ve learned—precise folding, rolling multiple creases, and creating three-dimensional structures—build valuable skills for future origami projects. We encourage you to experiment with different paper colors and sizes to create various styles of glasses, from classic sunglasses to novelty eyewear. Consider adding your own creative touches like drawing lenses, adding glitter, or attaching small paper decorations to personalize your creation. Share your origami glasses with friends or use them as unique party favors that will delight guests of all ages!
- Explore more wearable origami projects → Discover paper craft accessories including hats, masks, rings, and other fun costume elements you can make and wear.
- Origami party favor ideas → Find creative paper folding projects perfect for parties, including decorations, games, and take-home gifts.
- Easy origami for kids → Browse child-friendly projects that develop fine motor skills while creating fun, recognizable objects.
- Beginner origami techniques → Master fundamental folding methods used in this glasses tutorial and other simple origami projects.
- Origami costume props collection → Create a complete costume accessory set with paper bow ties, crowns, wands, and other playful items.
