
Introduction
The origami heart represents one of the most cherished and meaningful projects in paper folding, perfectly described as “beginner-friendly for Valentine’s Day” and ideal for expressing love and affection through handmade artistry. This simple tutorial transforms a basic square of paper into the universal symbol of love, making it perfect for romantic occasions, greeting cards, or heartfelt gifts. With just seven straightforward steps, you’ll create a charming paper heart that captures the essence of this timeless symbol while building fundamental origami skills. Whether for Valentine’s Day, anniversaries, or simply to show someone you care, this origami heart offers both emotional meaning and creative satisfaction.
Step-by-Step Instructions
Step 1: Create the Foundation Triangle For Origami Heart
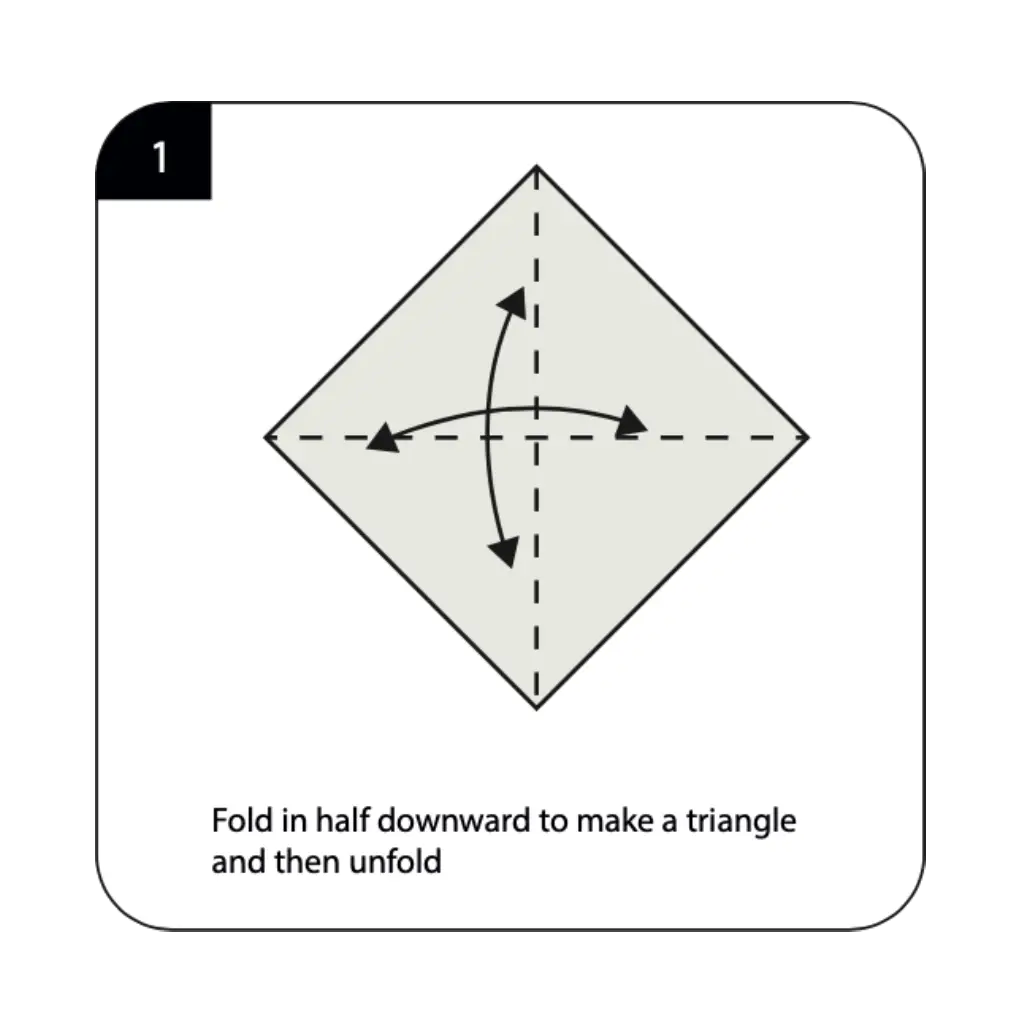
Start with a square of origami paper placed diagonally with the non-colored (white) side facing up as specified in the instructions. Fold the paper in half downward to create a triangle, then unfold to establish the primary reference crease for your heart construction. This initial fold creates the fundamental guideline that ensures proper symmetry and proportions throughout the heart-making process. The precision of this foundation crease is crucial for achieving a well-balanced heart shape that displays the characteristic romantic symbolism. Take care to align the edges perfectly and create a sharp, clean fold that will serve as the central axis for all subsequent shaping steps.
Step 2: Begin the Heart Shape For Origami Heart
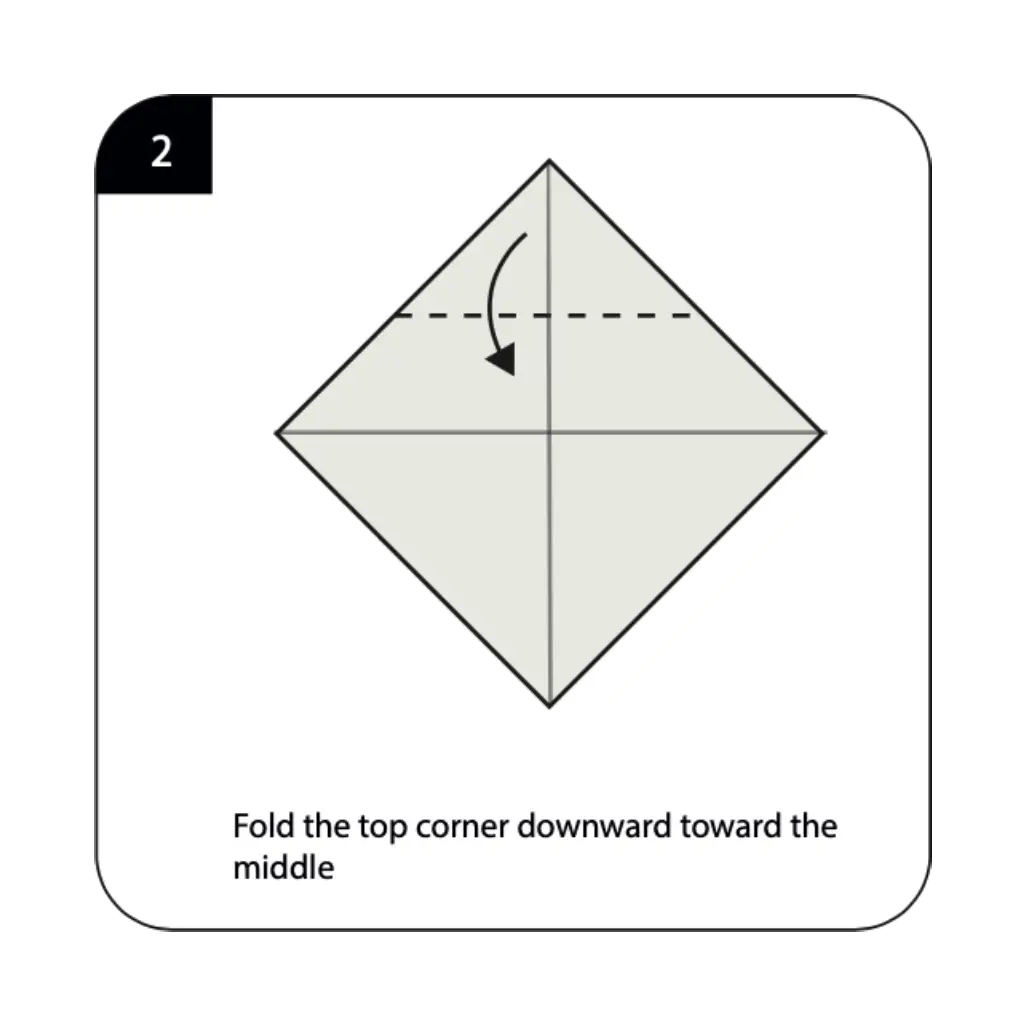
Fold the top corner downward toward the middle as shown in the diagram, beginning to create the distinctive pointed bottom of your heart shape. This important fold starts transforming the diamond orientation into the characteristic heart silhouette that makes this symbol instantly recognizable. The angle and position of this downward fold directly affect the overall proportions and romantic appeal of your finished heart. This step begins establishing the heart’s most distinctive feature—the pointed bottom that contrasts with the curved, rounded top sections that will be created in subsequent steps.
Step 3: Form the Upper Heart Structure For Origami Heart
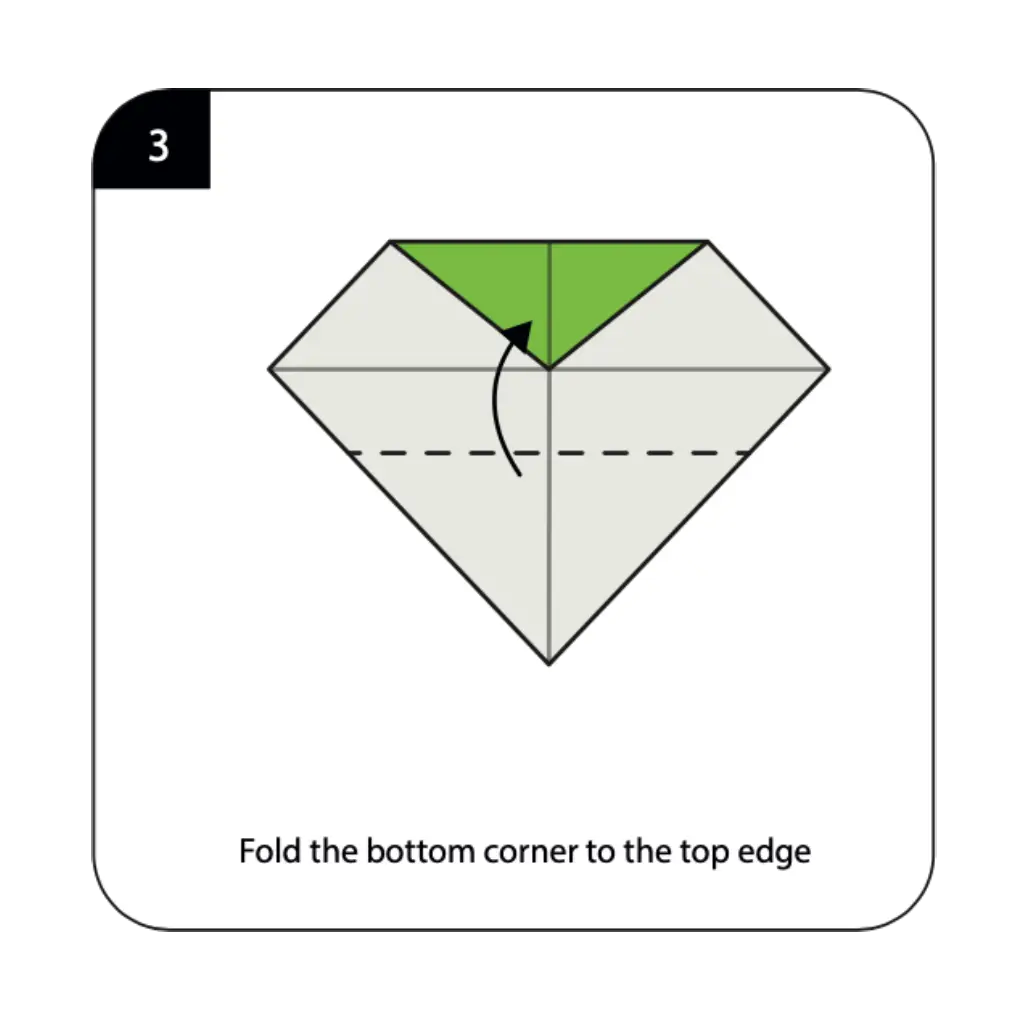
Fold the bottom corner to the top edge as indicated, creating the upper portion of your heart and establishing the basic proportional framework. This fold transforms the pointed diamond shape into the foundation for the heart’s characteristic rounded top sections. The precision of this upward fold affects how well your heart will display its romantic symbolism and emotional appeal. This step continues the geometric transformation that converts a simple square into the beloved shape associated with love, affection, and deep emotional connection across cultures worldwide.
Step 4: Create the Heart’s Base For Origami Heart
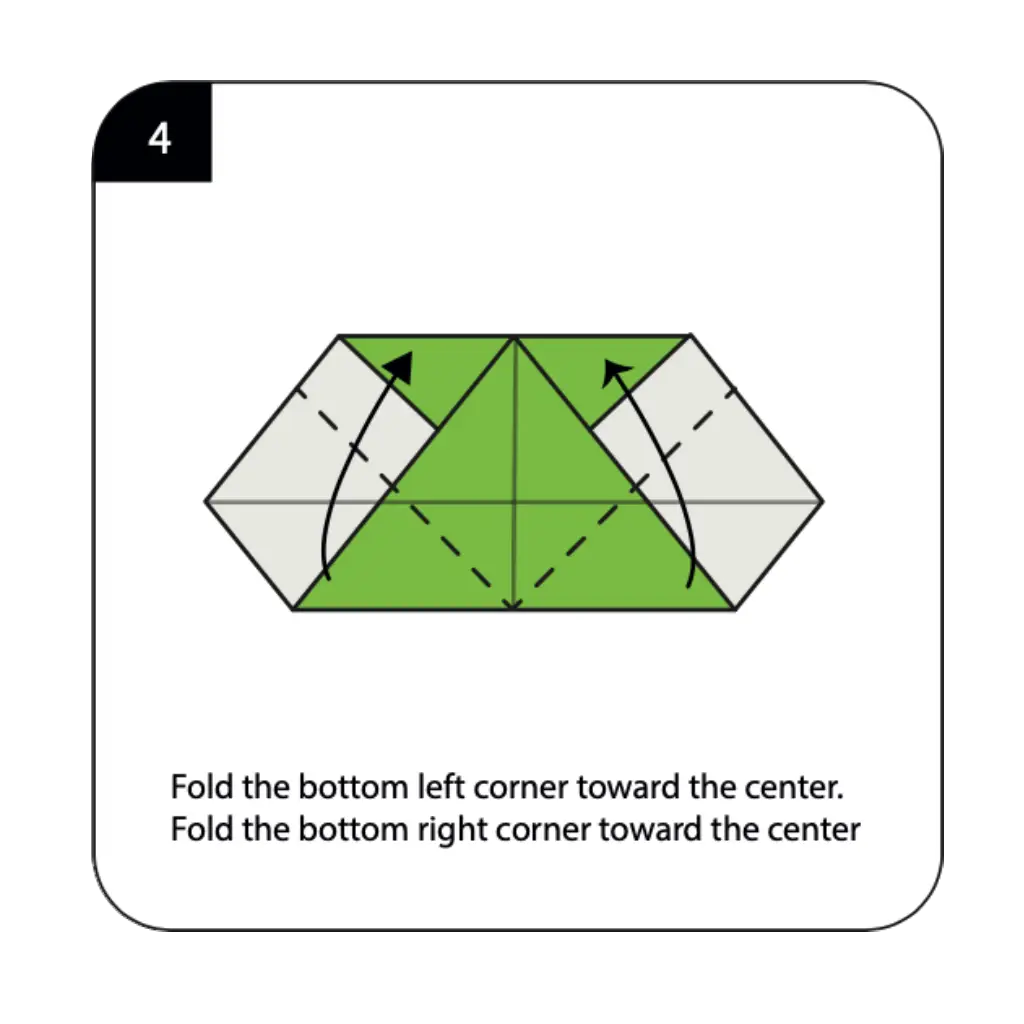
Fold the bottom left corner toward the center, then fold the bottom right corner toward the center as shown in the diagram. These symmetrical corner folds create the stable base structure that will support your heart’s distinctive shape while forming the pointed bottom characteristic of heart symbols. The accuracy of these converging folds ensures that your heart displays proper symmetry and balance. This step demonstrates how strategic corner folding can create the geometric precision needed to represent abstract concepts like love through the universal language of symbolic shapes.
Step 5: Shape the Heart’s Sides For Origami Heart
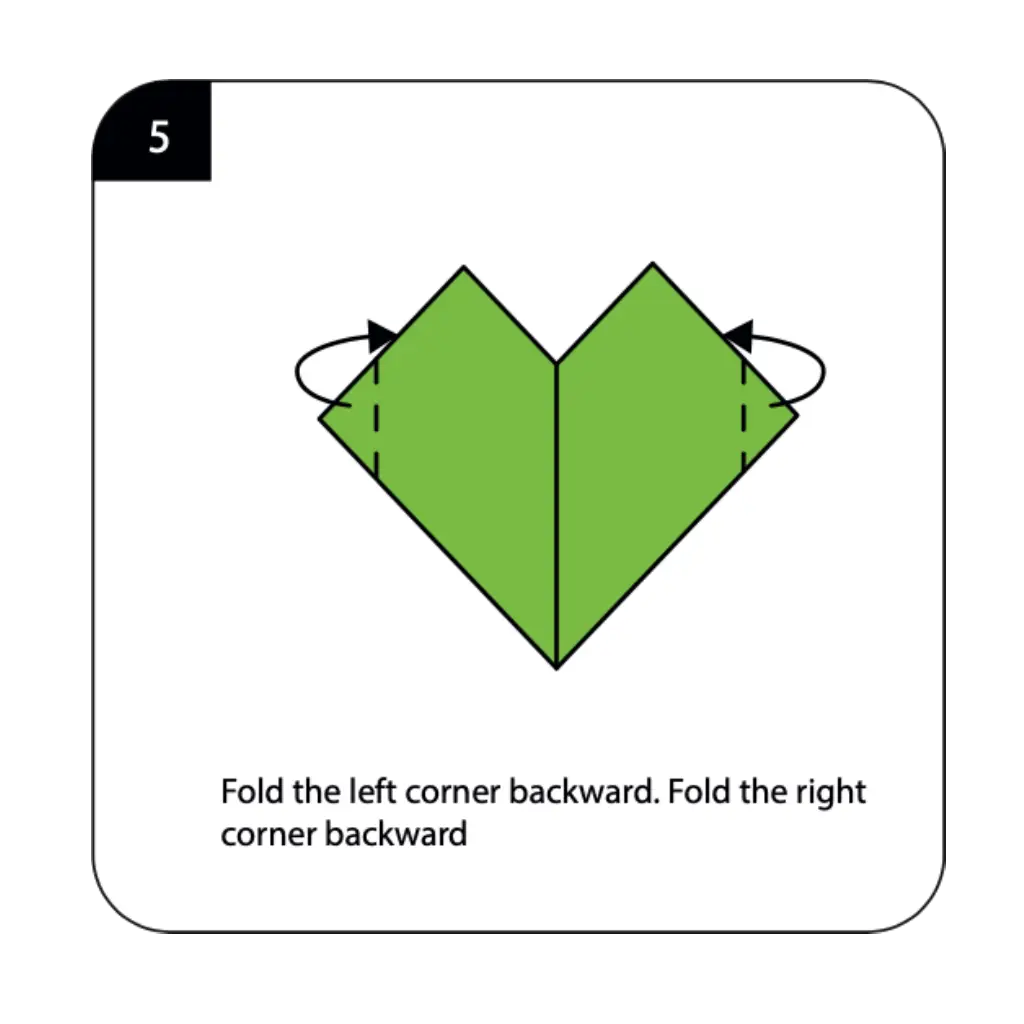
Fold the left corner backward, then fold the right corner backward as indicated to create the side curves that give your heart its characteristic romantic silhouette. These backward folds soften the angular edges and begin creating the gentle curves associated with the heart symbol’s emotional warmth. The careful execution of these side-shaping folds determines how well your heart captures the tender, romantic qualities associated with this beloved symbol. This step transforms the geometric construction into a more organic, emotionally appealing form that resonates with viewers on an emotional level.
Step 6: Complete the Heart Top
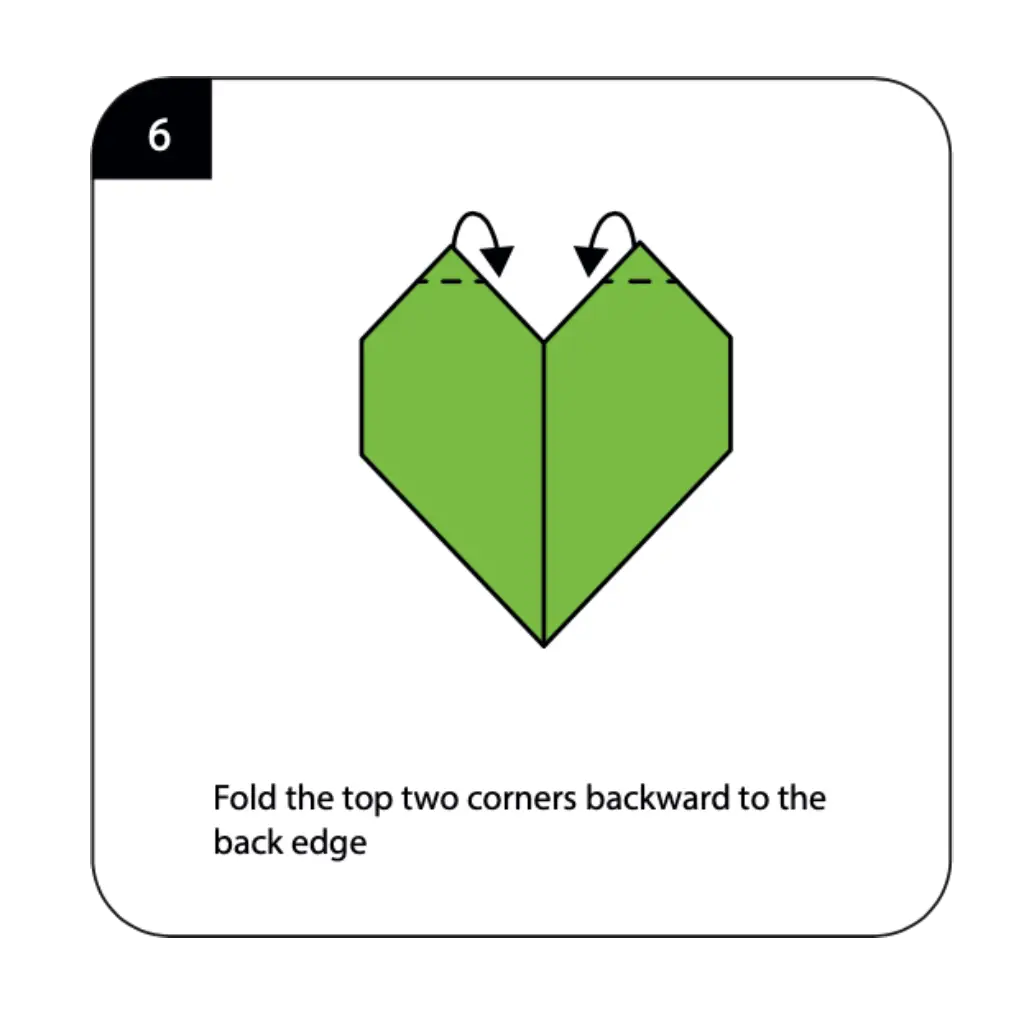
Fold the top two corners backward to the back edge as shown, creating the distinctive rounded lobes that form the upper portion of your heart shape. These final shaping folds create the characteristic double-curved top that makes hearts instantly recognizable as symbols of love and affection. The precision of these top corner folds significantly impacts the romantic appeal and symbolic effectiveness of your finished heart. This step completes the transformation from abstract geometric form to the universally recognized symbol of love, emotion, and human connection.
Step 7: Finalize Your Origami Heart
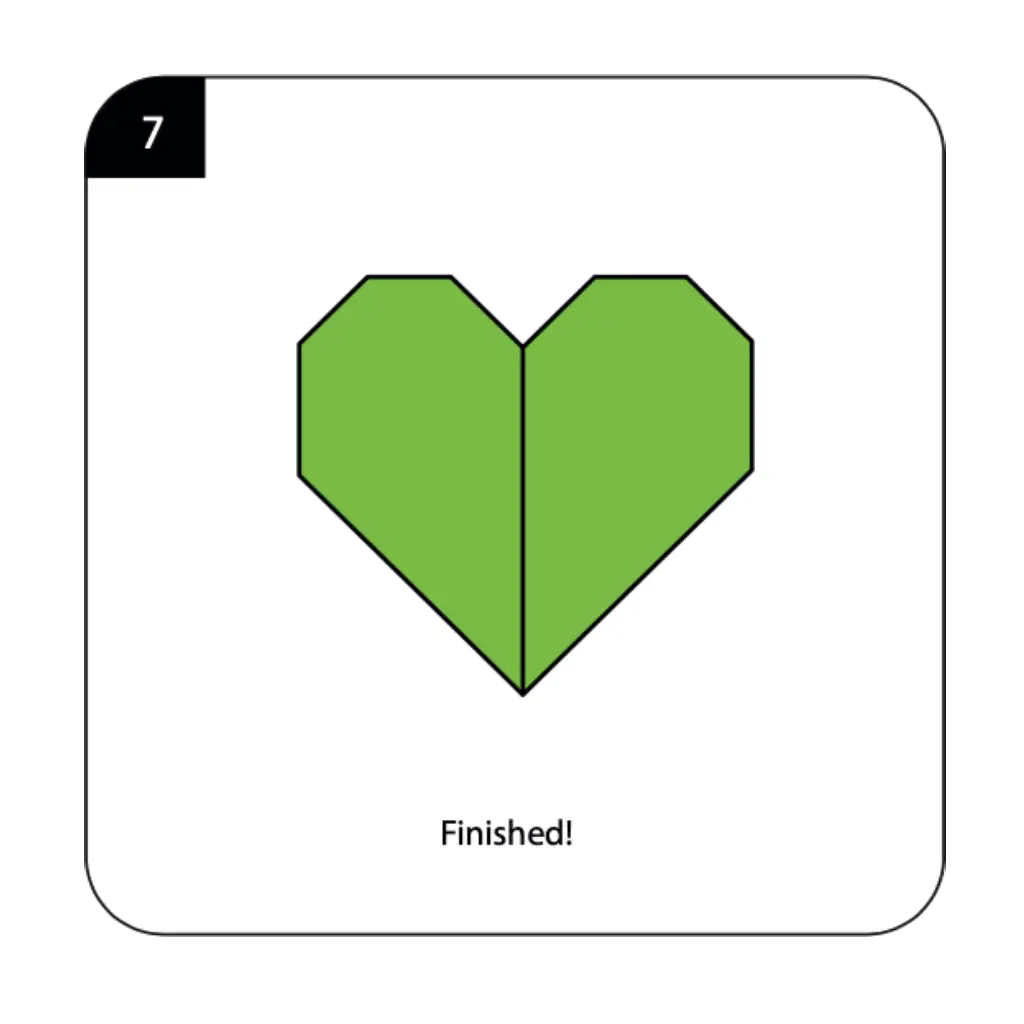
Your origami heart is now complete and ready to convey messages of love, affection, and care to someone special! Make any final adjustments to ensure the heart displays proper symmetry and the characteristic shape that makes this symbol so meaningful across cultures. The finished model should clearly show the distinctive heart silhouette with its pointed bottom and rounded double-lobed top. Your handcrafted paper heart now embodies both the technical precision of origami and the emotional power of one of humanity’s most cherished symbols, ready to serve as a romantic gift, greeting card decoration, or simply as a beautiful expression of love and caring created through the timeless art of paper folding.
Conclusion
Your origami heart demonstrates how simple paper folding can create powerful symbols that communicate deep emotions and meaningful connections between people. This charming romantic creation combines the accessibility of basic origami techniques with the universal appeal of love’s most recognizable symbol. The fundamental skills you’ve practiced—including precise creasing, symmetrical folding, and shape transformation—provide excellent preparation for more complex origami projects. Whether given as a gift, used in decorations, or kept as a personal reminder, your handcrafted heart represents the perfect fusion of artistic skill and emotional expression.
- “Build foundational skills with our Origami Basics for Beginners before creating your romantic heart.”
- “Design complete love scenes with romantic animals from our Origami Animals Collection like swans and doves.”
- “Explore more romantic projects in our Creative Origami Gallery for Valentine’s Day celebrations.”
- “Create stunning displays with ideas from our Decorative Origami Guide for special occasions.”
- “Add romantic Origami Flowers like roses and lilies to complement your hearts.”
- “Make multiple hearts for impressive arrangements using our Modular Origami Projects techniques.”
