
Introduction:
Transform a simple square of paper into an elegant origami lantern with this beginner-friendly tutorial. This classic Japanese paper craft creates a three-dimensional decorative piece perfect for celebrations, home decor, or meditation spaces. With just five straightforward folds, you’ll master this traditional design that has delighted crafters for generations. No special tools needed – just paper, patience, and these clear instructions.
Step-by-Step Origami Lantern Instructions:
Step 1: Create the Foundation with Initial Folds For Origami Lantern
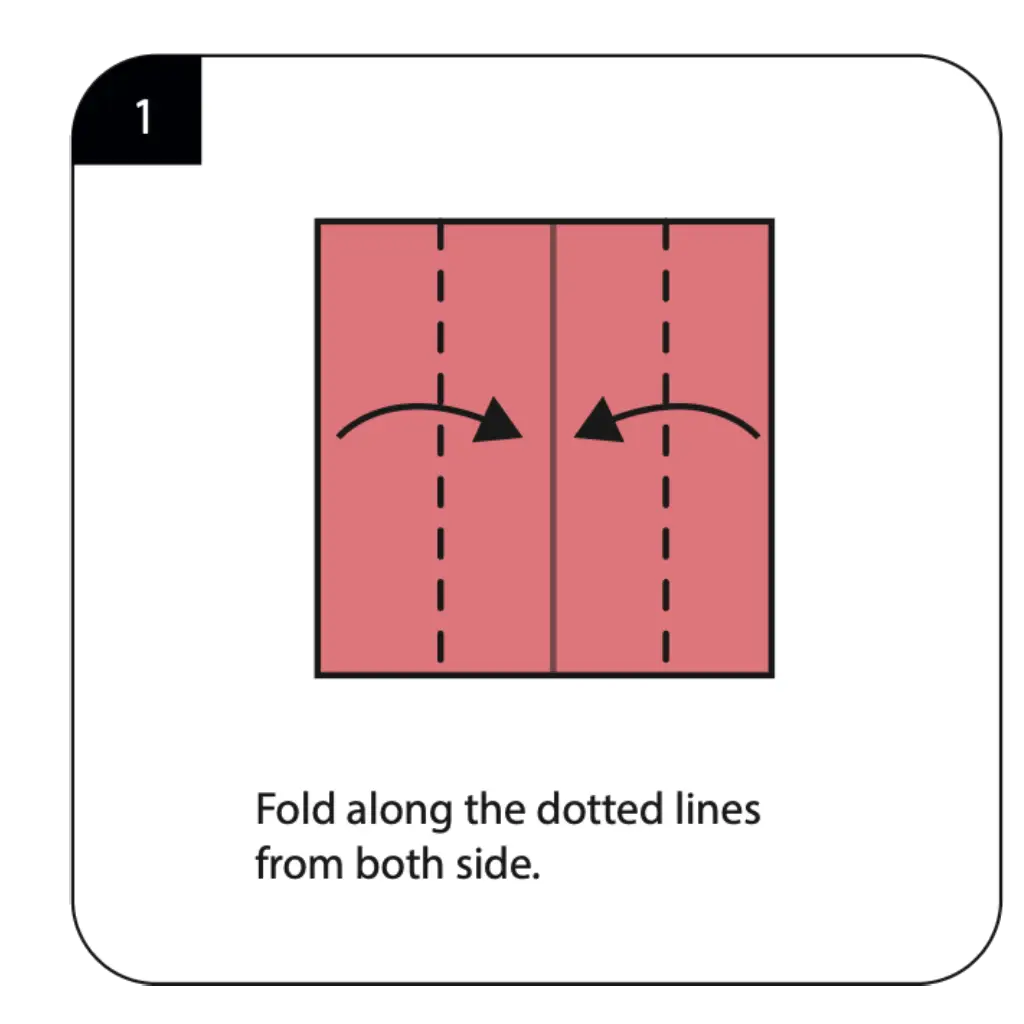
Begin with a square sheet of origami paper, colored side facing down, and fold it precisely along both vertical dotted lines shown in the diagram. These initial valley folds divide your paper into equal thirds, creating the fundamental structure for your paper lantern. Make sharp, clean creases by running your fingernail along each fold, as these guidelines will determine the final shape of your origami creation. This foundational step is crucial for achieving the symmetrical appearance that makes traditional origami basics so visually appealing.
Step 2: Add Horizontal Folds for Dimensional Structure For Origami Lantern

Rotate your paper 90 degrees and fold along the horizontal dotted lines from all four sides, creating a grid pattern with your previous folds. These perpendicular creases intersect with your vertical folds, forming the framework that will allow your flat paper to transform into a three-dimensional lantern. Press firmly on each fold to ensure they hold their shape when you begin the assembly process. The precision of these folds directly impacts how well your finished decorative origami piece will stand and maintain its lantern shape.
Step 3: Shape the Lantern Body For Origami Lantern
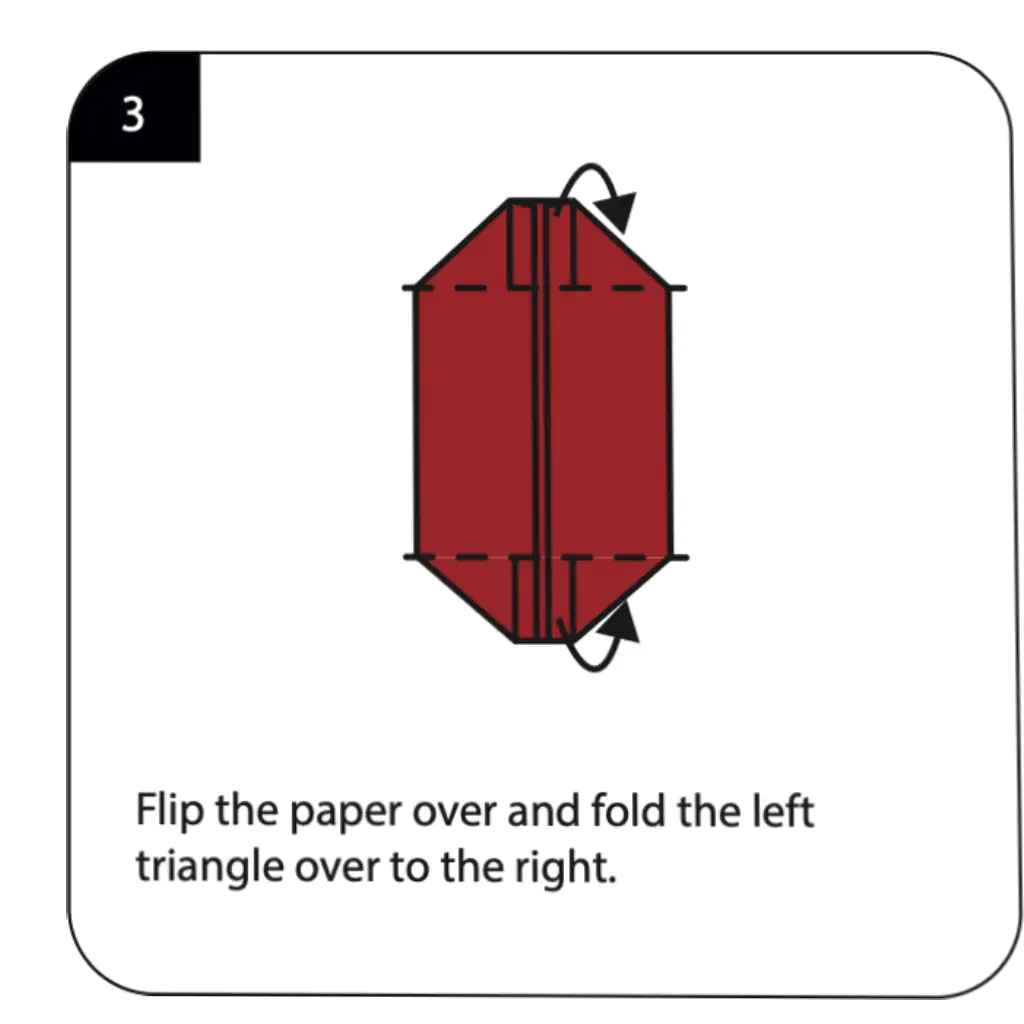
Flip your paper over to the opposite side and carefully fold the left triangle section over to meet the right edge, following the diagonal fold lines. This crucial step begins transforming your flat folded square into the cylindrical shape characteristic of traditional paper lanterns. The triangular flaps created by this fold will eventually tuck inside to secure the lantern’s form. Pay attention to aligning the edges perfectly, as this determines whether your origami lantern will have a professional, polished appearance.
Step 4: Complete the 3D Formation For Origami Lantern
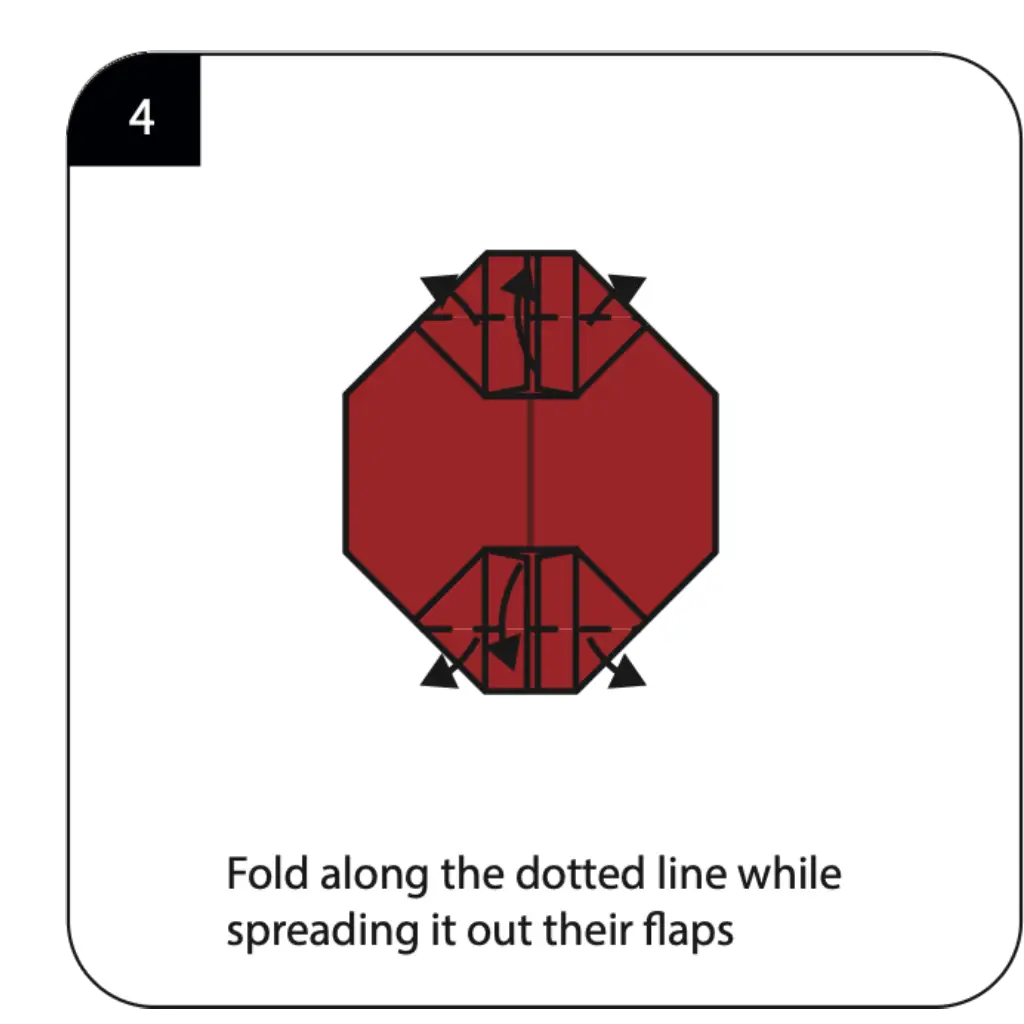
Continue folding along the remaining dotted lines while gently spreading out the flaps to create the lantern’s distinctive octagonal shape. This step requires careful manipulation as you encourage the paper to curve and form the three-dimensional structure. Work slowly around each section, allowing the pre-creased lines to guide the paper naturally into its intended form. The transformation from flat to dimensional is where origami truly becomes magical, similar to advanced modular origami techniques.
Step 5: Final Assembly and Finishing Touches For Origami Lantern
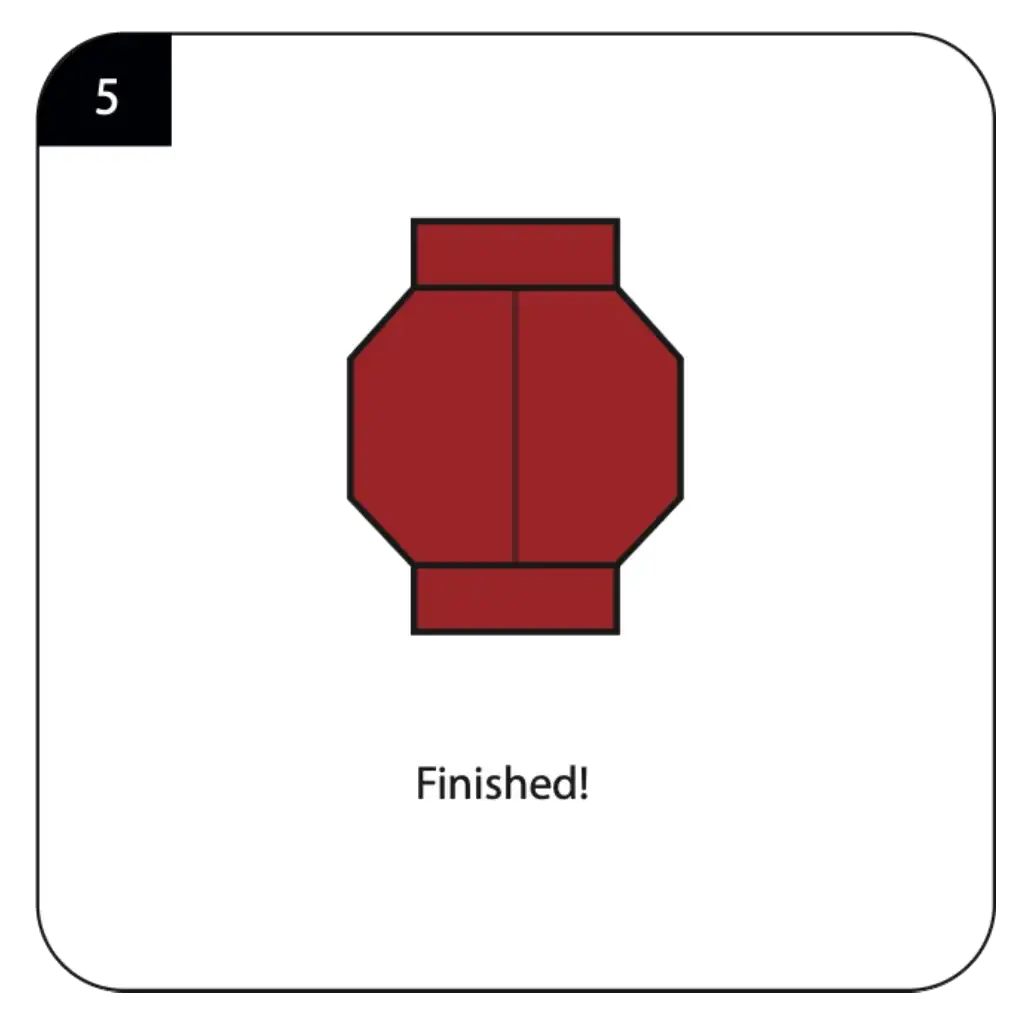
Tuck the remaining flaps into their corresponding slots to lock the lantern shape in place, creating a stable, freestanding decoration. Gently adjust the top and bottom openings to ensure they’re evenly shaped and the lantern sits flat on a surface. Your completed origami lantern should display clean lines and symmetrical proportions, ready to serve as a beautiful centerpiece or hanging ornament. This versatile design can be scaled up or down depending on your paper size, making it perfect for creating matching sets.
Conclusion:
You’ve successfully created a stunning origami lantern using just paper and patience – a testament to the elegance of traditional Japanese paper folding. This timeless design makes wonderful decorations for parties, meditation spaces, or seasonal celebrations. Try experimenting with different paper colors, patterns, and sizes to create unique variations of this classic design. With practice, you’ll fold these beautiful lanterns in minutes, adding handmade charm to any space.
