
Introduction
Origami, the ancient Japanese art of paper folding, brings joy to crafters of all ages. Among the most beloved animal origami designs is the origami lion, or “Origami Leo” – a charming paper creation that captures the majestic essence of the king of the jungle in a cute, accessible form. This beginner-friendly project requires only a single sheet of square paper and about 15 minutes of your time. Whether you’re folding with children, teaching art classes, or simply enjoying a mindful crafting moment, this origami lion tutorial will guide you through each precise fold to create your very own paper Leo. Follow our detailed instructions below to transform a simple square into a delightful origami lion that will impress friends and family alike!
Step-by-Step Instructions
Step 1: Create the Base Fold For Origami Leo
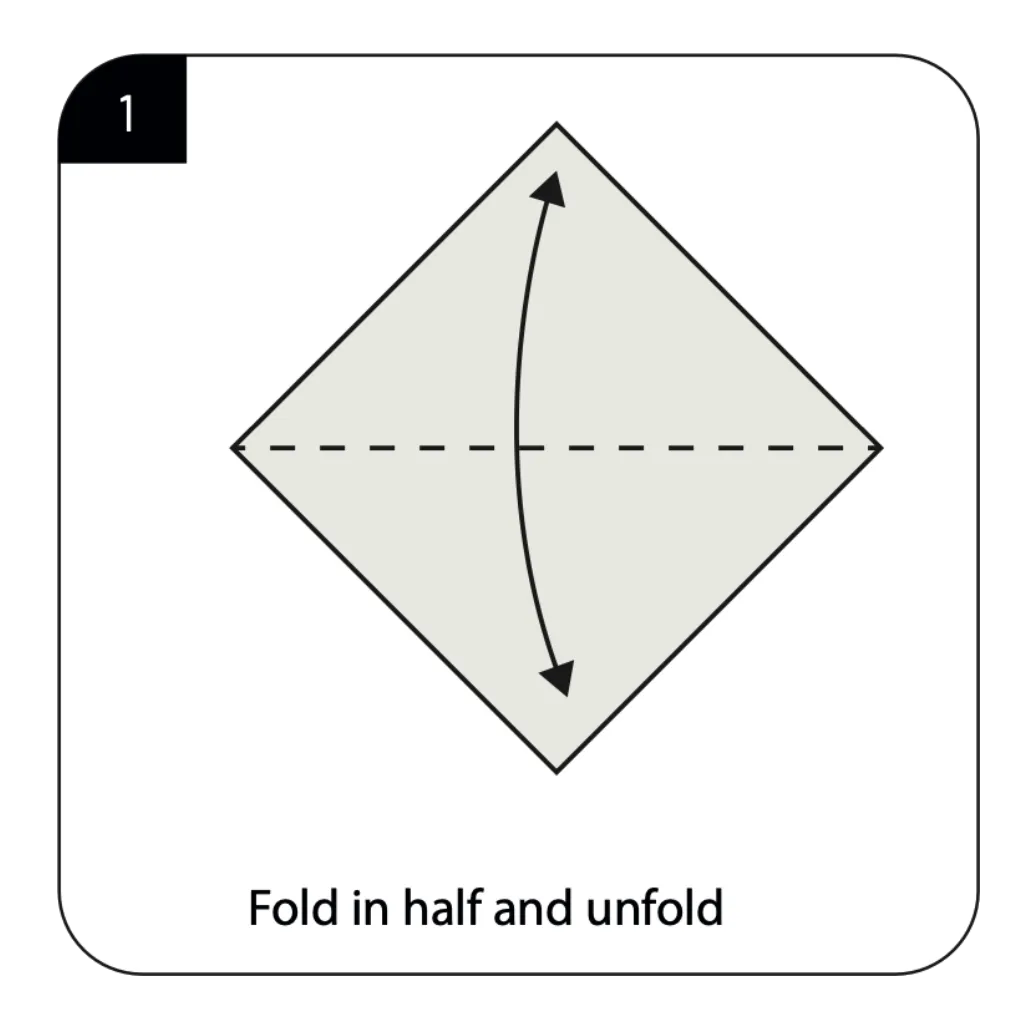
Start with a square piece of origami paper, colored side down. Fold the paper in half diagonally to create a crease, then unfold completely. Repeat with the other diagonal to create an X crease pattern. This establishes the center point and gives your paper structural memory for future folds. The precise creases you make now will ensure your origami lion looks professional and well-defined when completed.
Step 2: Form the Initial Triangle For Origami Leo
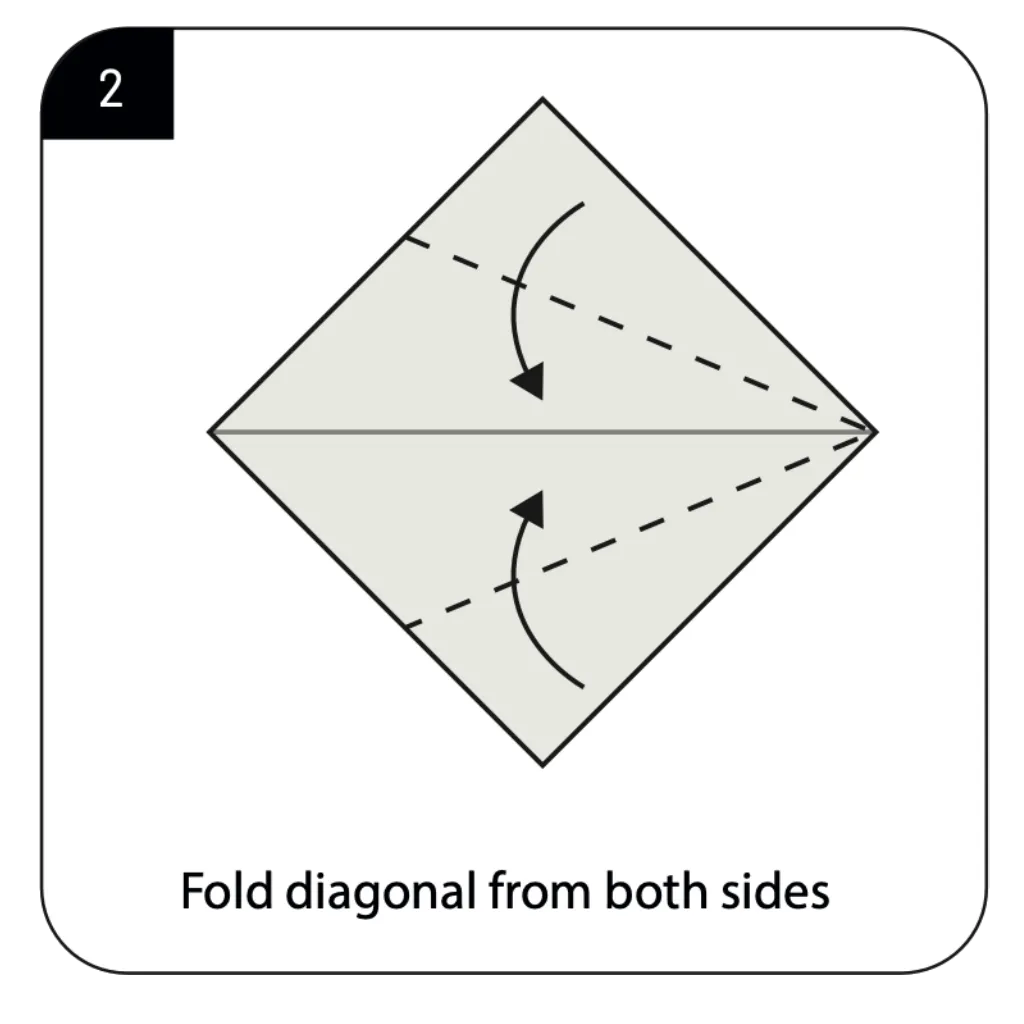
Position your square paper like a diamond with points at top, bottom, and sides. Fold both left and right corners inward to meet at the center crease, creating a symmetrical kite shape. Make sure the edges align perfectly along the center crease for a clean fold. Press firmly along each fold line to create sharp creases, which will make subsequent folding steps easier and more precise.
Step 3: Create the First Backward Fold For Origami Leo
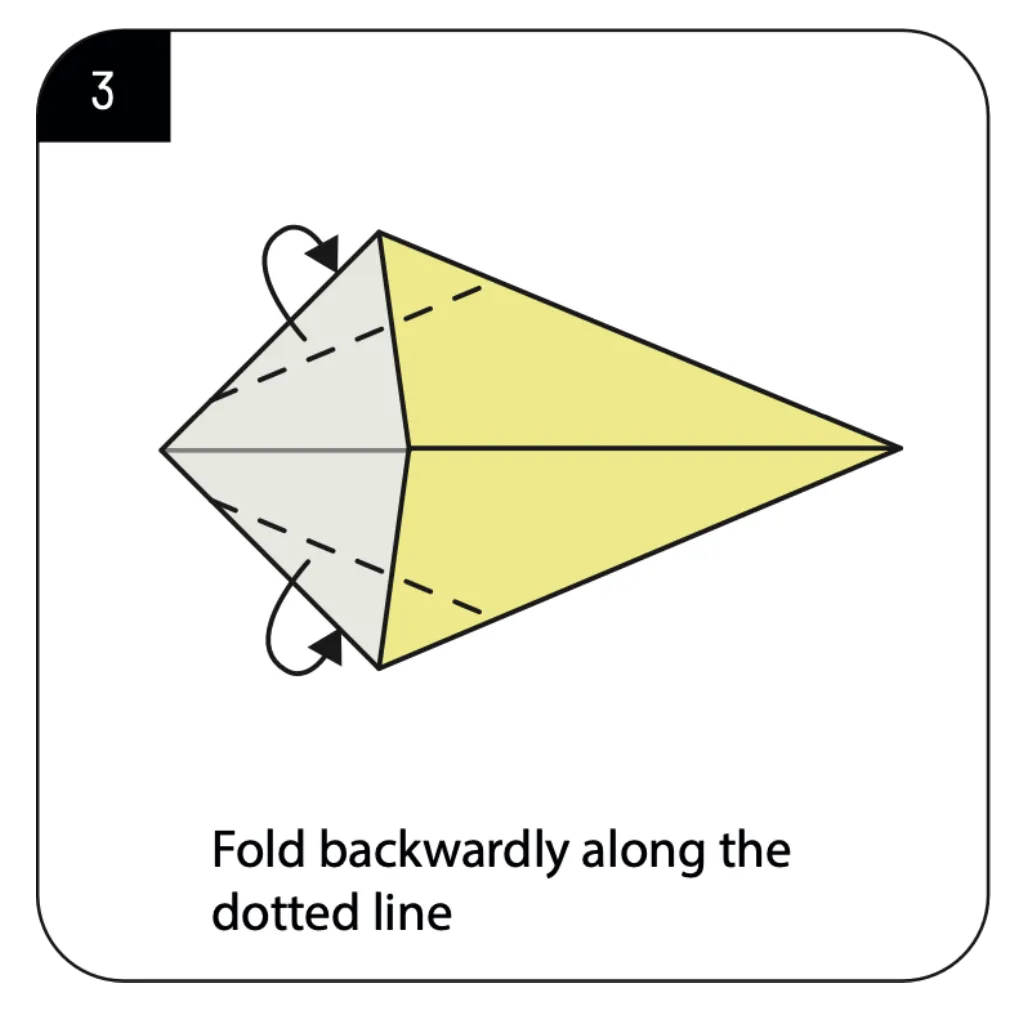
Take the top layer of the triangle and fold it backward along the dotted line as shown in the diagram. This creates the foundation for the lion’s face structure. Ensure this fold is made with precision as it affects the appearance of the final origami lion. The yellow portion in the diagram represents the part that will eventually form the lion’s body.
Step 4: Make the Reverse Fold For Origami Leo

Perform a reverse fold along the dotted line by folding the paper half inward and underneath. This technique creates dimension and begins to form the three-dimensional aspects of your origami lion. The reverse fold requires careful manipulation of the paper, folding it against the original crease direction. This step begins to define the structure of the lion’s head.
Step 5: Pull Up the Inner Fold For Origami Leo

Gently pull up the inside layer along the indicated dotted line, creating a triangular peak. This fold forms the basic shape of the lion’s face and muzzle. Work slowly and carefully during this step, as it requires precise finger placement and gentle manipulation of the paper layers. The emerging structure will begin to resemble the distinctive features of a lion.
Step 6: Open the Face Forward For Origami Leo
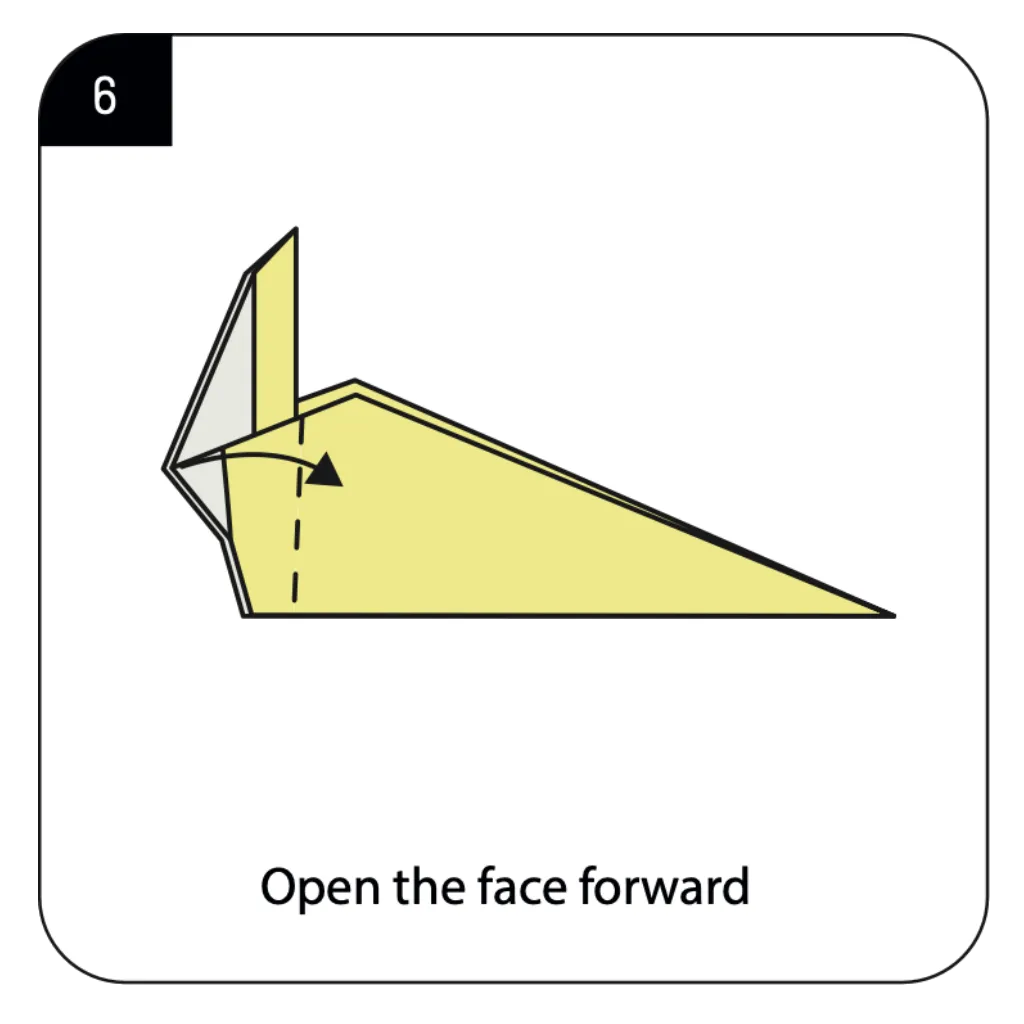
Carefully open and push forward the face section, creating the lion’s muzzle and front facial structure. This three-dimensional fold adds character to your origami lion. Use your fingertips to gently shape the face into position, ensuring the folds remain crisp and well-defined. The face should now be clearly distinguishable from the body portion.
Step 7: Shape the Lion’s Mane For Origami Leo

Spread out the tips of each triangle at the top of the structure to create the lion’s distinctive mane. This step adds the characteristic regal appearance that lions are known for. Gently pull each section outward evenly to create a balanced, symmetrical mane. The careful shaping of these triangular sections significantly enhances the recognizable lion features.
Step 8: Define the Neck Region
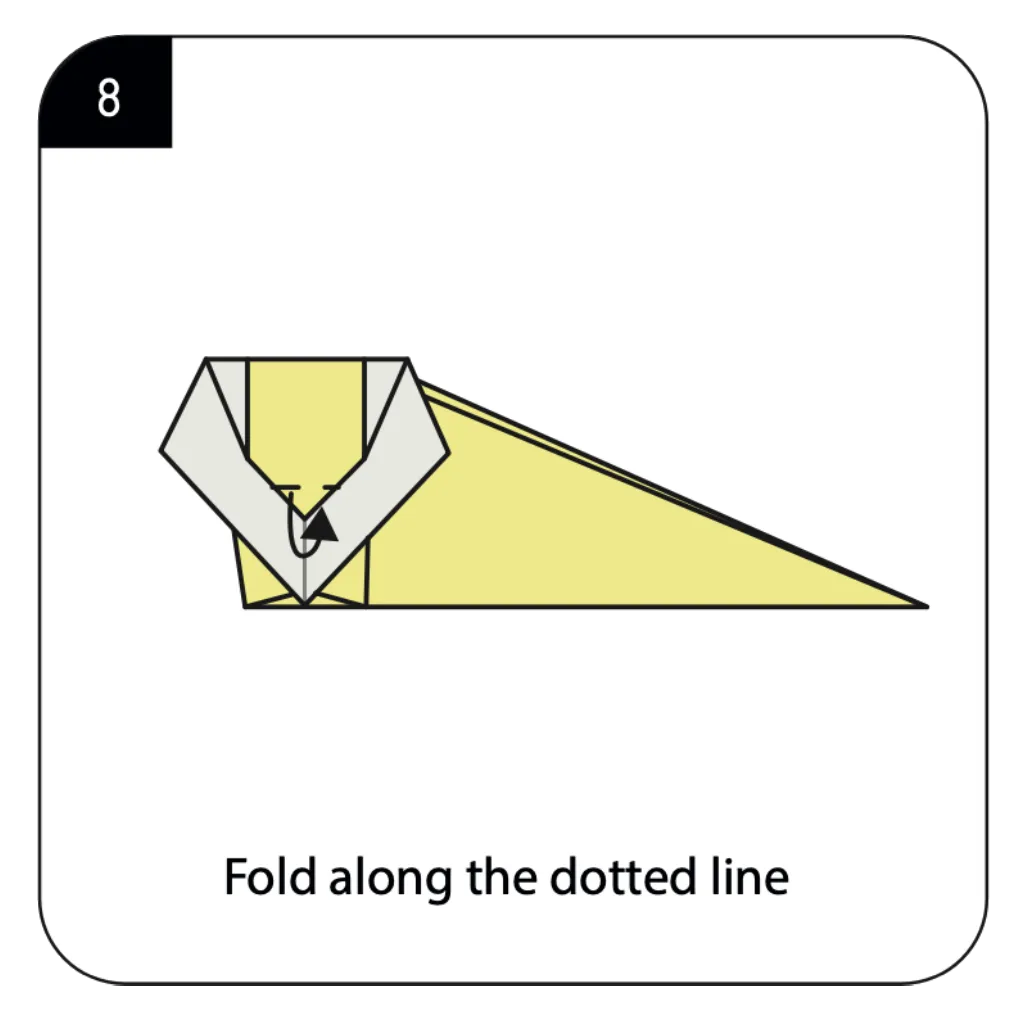
Fold along the dotted line as indicated to create definition between the lion’s mane and body. This fold helps establish the proper proportions of your origami lion. Press firmly to create a sharp crease that clearly separates the head from the body. The distinct neck region gives your origami lion a more realistic and properly proportioned appearance.
Step 9: Form the Body Structure
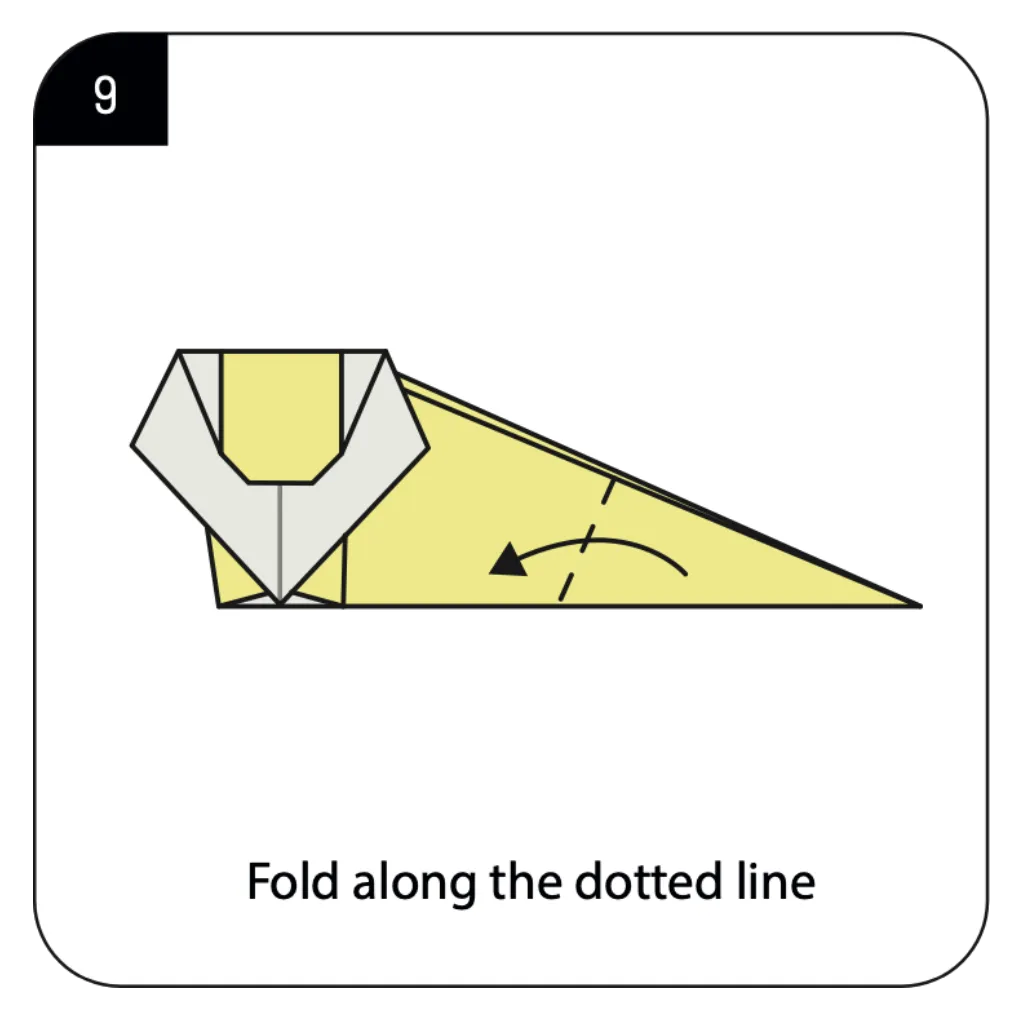
Create another fold along the dotted line to begin shaping the lion’s body section. This fold helps define the torso of your origami lion. Ensure this fold is parallel to the previous one for a uniform appearance. The yellow section now begins to take the recognizable shape of a lion’s body, with distinct head and torso regions.
Step 10: Create the Hind Section
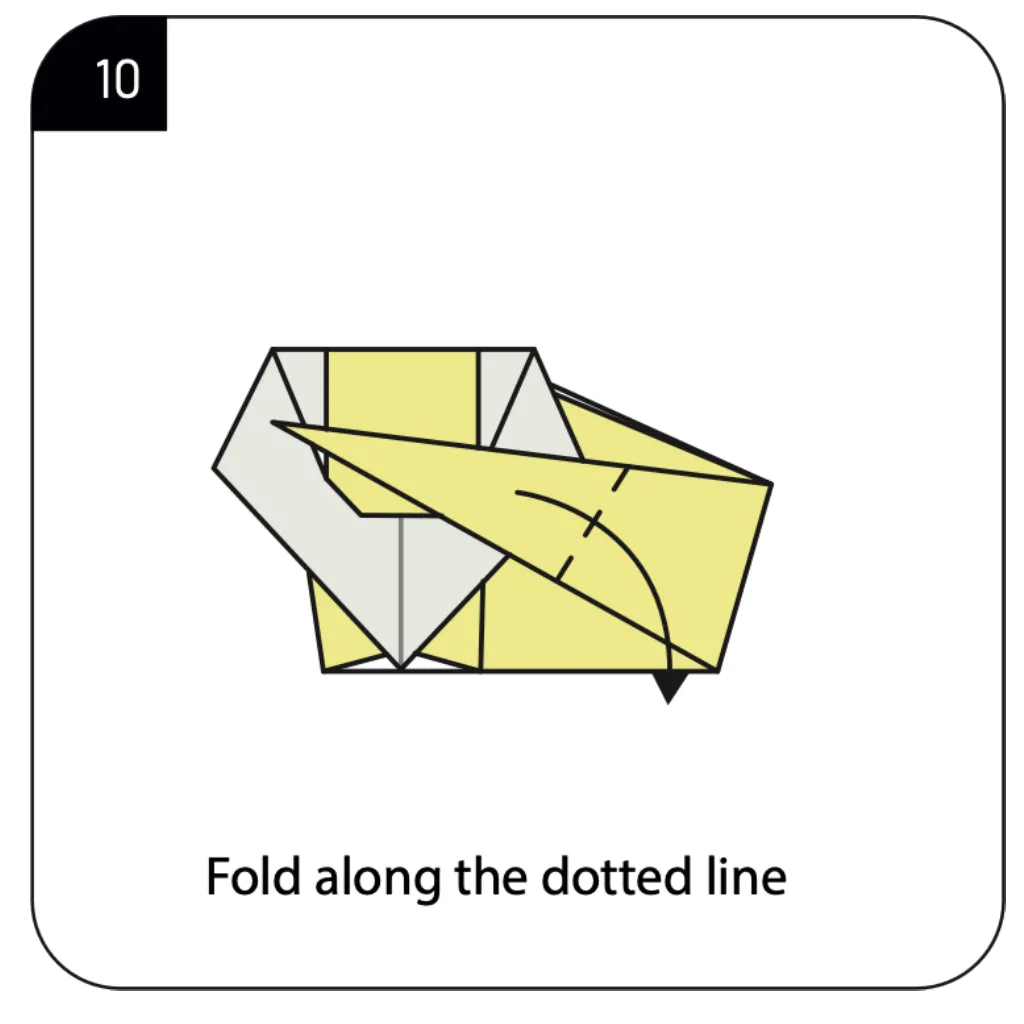
Make another precise fold along the indicated dotted line to create the rear portion of the lion’s body. This fold adds depth to your origami creation and begins to define the hindquarters. The body continues to take shape with this important structural fold. Your origami lion is now developing its full three-dimensional form.
Step 11: Complete the Tail
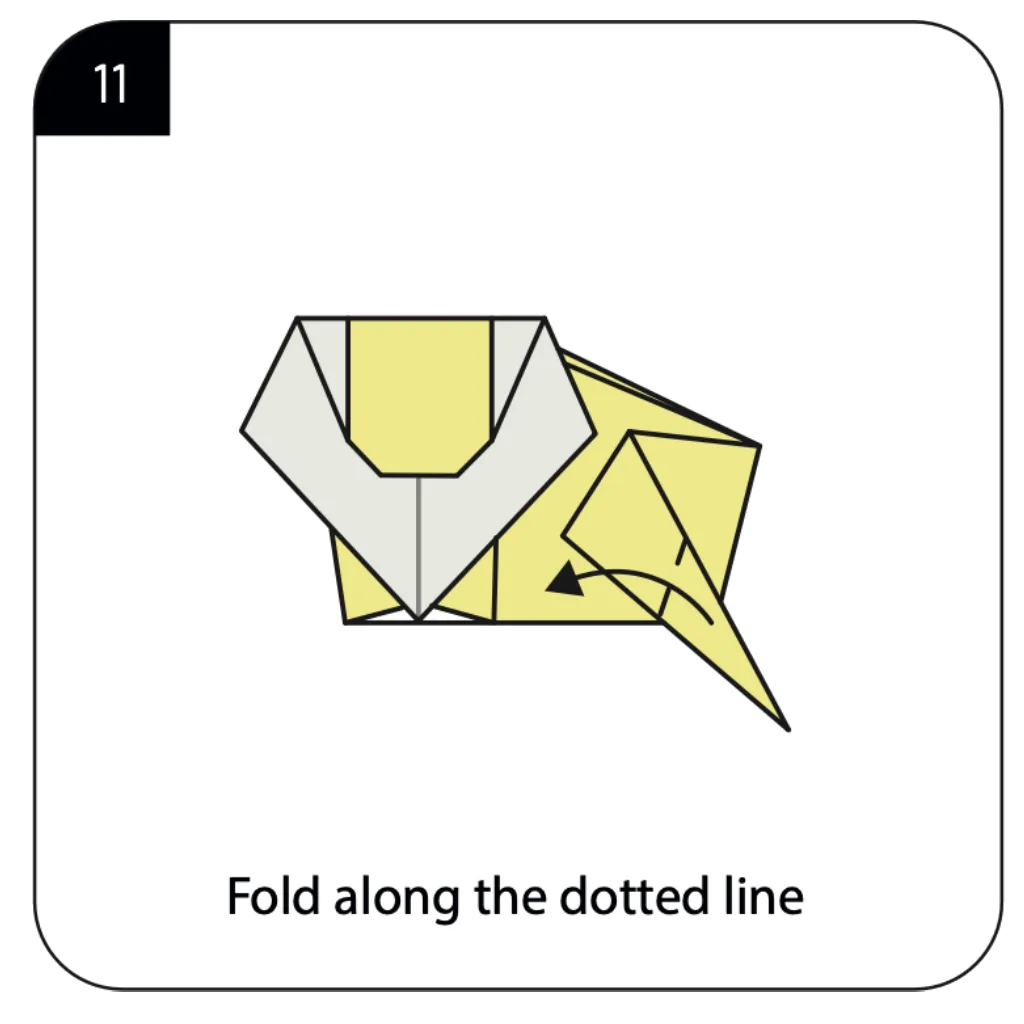
Perform the final fold along the dotted line to create the lion’s tail, completing your origami Leo. This last detail adds the finishing touch to your paper lion. The tail should fold neatly into position, giving your origami creation its characteristic leonine silhouette. Stand back and admire your completed origami lion, with its distinctive mane, body, and tail all clearly defined!
Conclusion
Congratulations on completing your origami Leo! This charming paper lion brings together simple folding techniques to create a delightful representation of the king of the jungle. The beauty of origami lies not just in the finished creation, but in the mindful journey of transformation—from a humble square of paper to an expressive animal figure. This origami lion makes a wonderful decoration, gift, or educational project that introduces the joy of paper folding to crafters of all ages. Remember that practice makes perfect in origami, so don’t be discouraged if your first attempt isn’t flawless. Each fold teaches patience and precision, skills that improve with every paper creation. We hope this tutorial has inspired you to explore more origami animals and share the joy of this ancient art form with others!
- “For more animal origami tutorials, check out our Origami Zoo Collection.”
- “New to paper folding? Learn the basic techniques in our Origami for Beginners “
- “Discover more cat-inspired designs in our Feline Origami Series.”
- “Looking for more kid-friendly origami? Browse our Easy Origami Animals collection.”
- “Find the perfect paper for your origami lion in our Origami Paper Guide.”
