
Introduction:
Welcome to the concluding part of our origami maple leaf tutorial! This final section completes your beautiful paper maple leaf creation by adding the essential finishing touches that bring authenticity to this iconic autumn symbol. The maple leaf, with its distinctive pointed lobes and elegant stem, represents the beauty of fall foliage and serves as a powerful cultural symbol, especially in Canada. What makes this origami design special is its realistic appearance—the finished leaf captures the characteristic shape and structure of maple leaves found in nature, complete with a delicate stem. This continuation guide picks up where the basic leaf formation left off, focusing on perfecting the stem and finalizing the three-dimensional aspects that make your paper creation truly lifelike. The warm golden-yellow paper shown creates a perfect autumn appearance, though red paper would create a striking Canadian maple look, or green for a summery feel. Whether you’re creating fall decorations, teaching children about seasonal changes, or preparing Canadian-themed crafts, these final steps will complete your origami maple leaf with professional refinement!
Detailed Step Descriptions:
STEP 1: CREATING THE STEM FOLD FOR ORIGAMI MAPLE LEAF
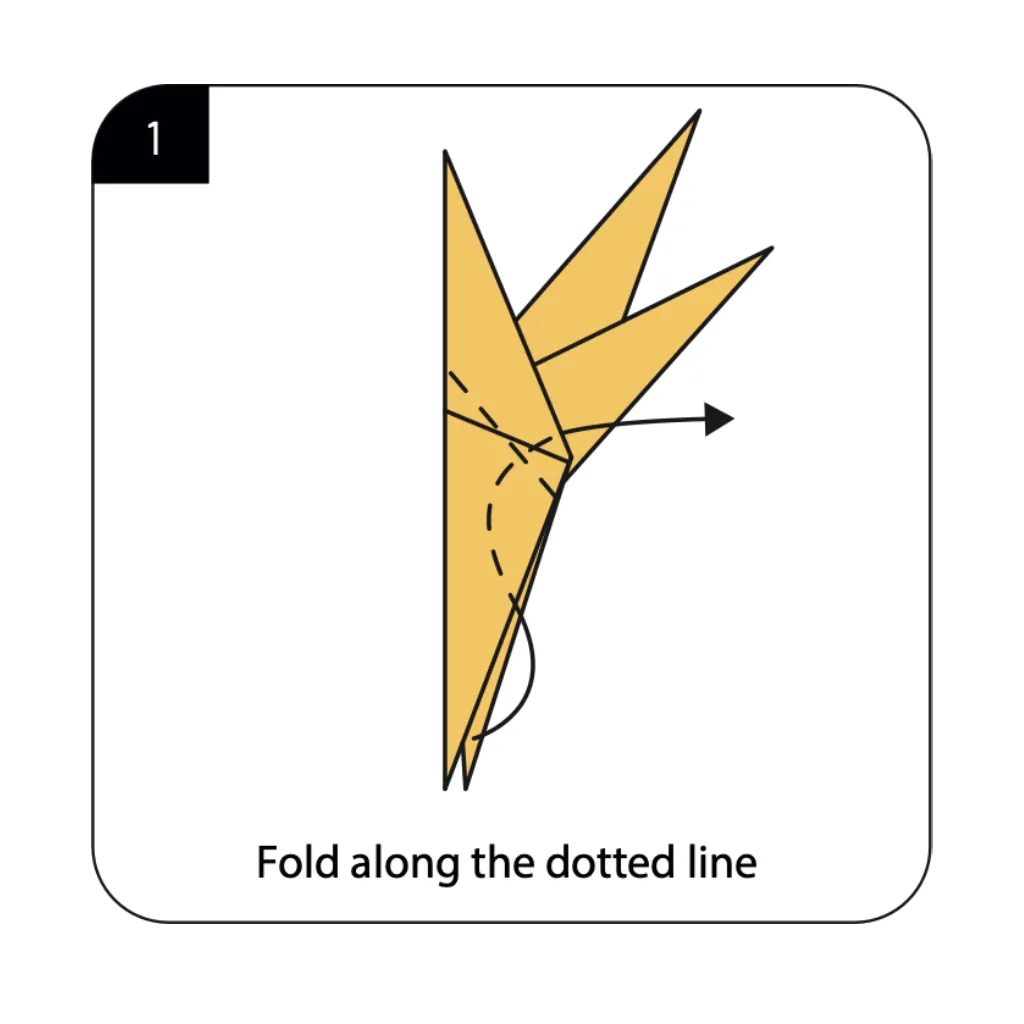
Begin the final phase of your origami maple leaf by folding along the dotted line to initiate the stem formation. This precise fold transforms the previously shaped leaf structure by adding the essential stem element. Fall origami crafts rely on these detailed features to create naturalistic representations of autumn foliage. The fold should be executed with care to ensure the stem extends gracefully from the leaf body at the correct angle.
STEP 2: EXECUTING THE REVERSE FOLD FOR ORIGAMI MAPLE LEAF
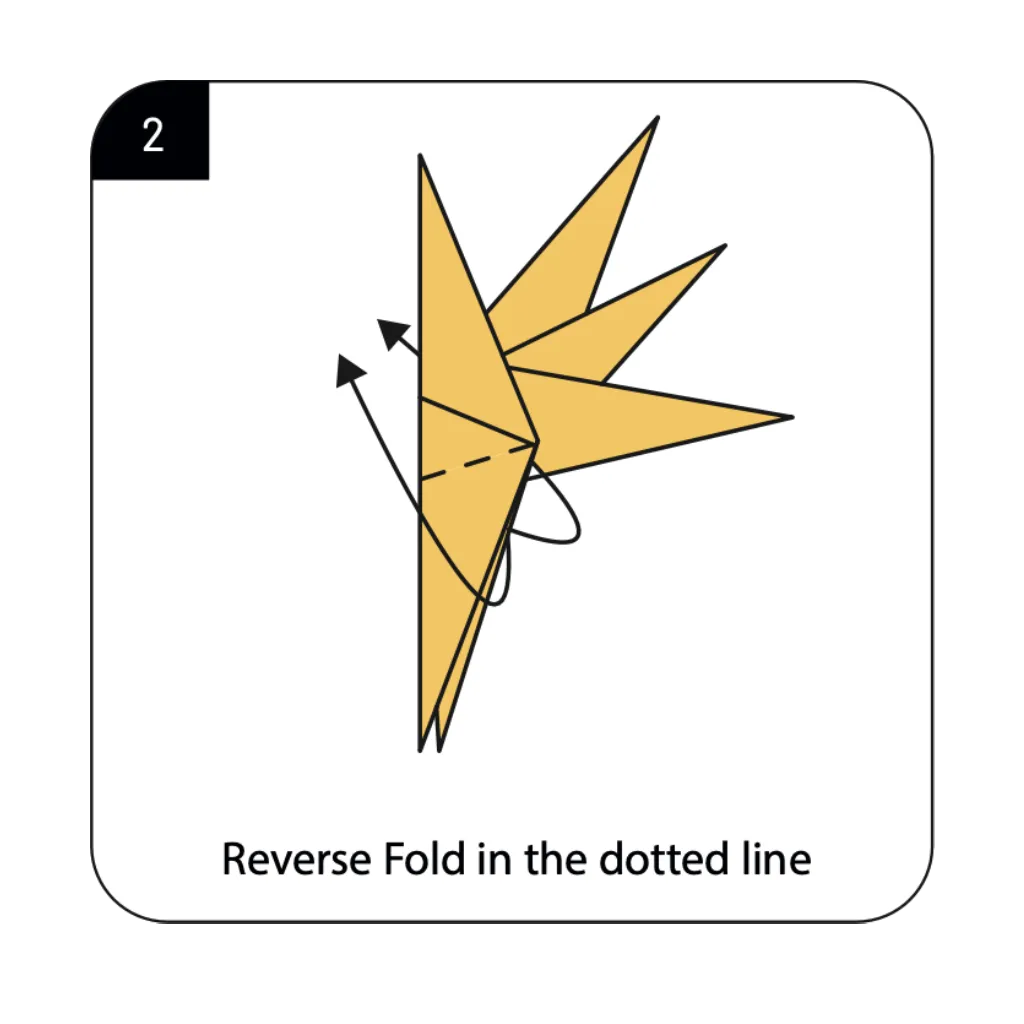
Create a reverse fold along the dotted line to further define and strengthen the maple leaf’s stem structure. This sophisticated folding technique adds three-dimensional quality and stability to your paper stem. Autumn leaf origami designs utilize reverse folds to create the natural contours found in real maple leaves. The directional nature of this fold ensures your stem maintains proper alignment with the leaf portion while adding realistic taper.
STEP 3: INSERTING THE HANDLE FOR ORIGAMI MAPLE LEAF
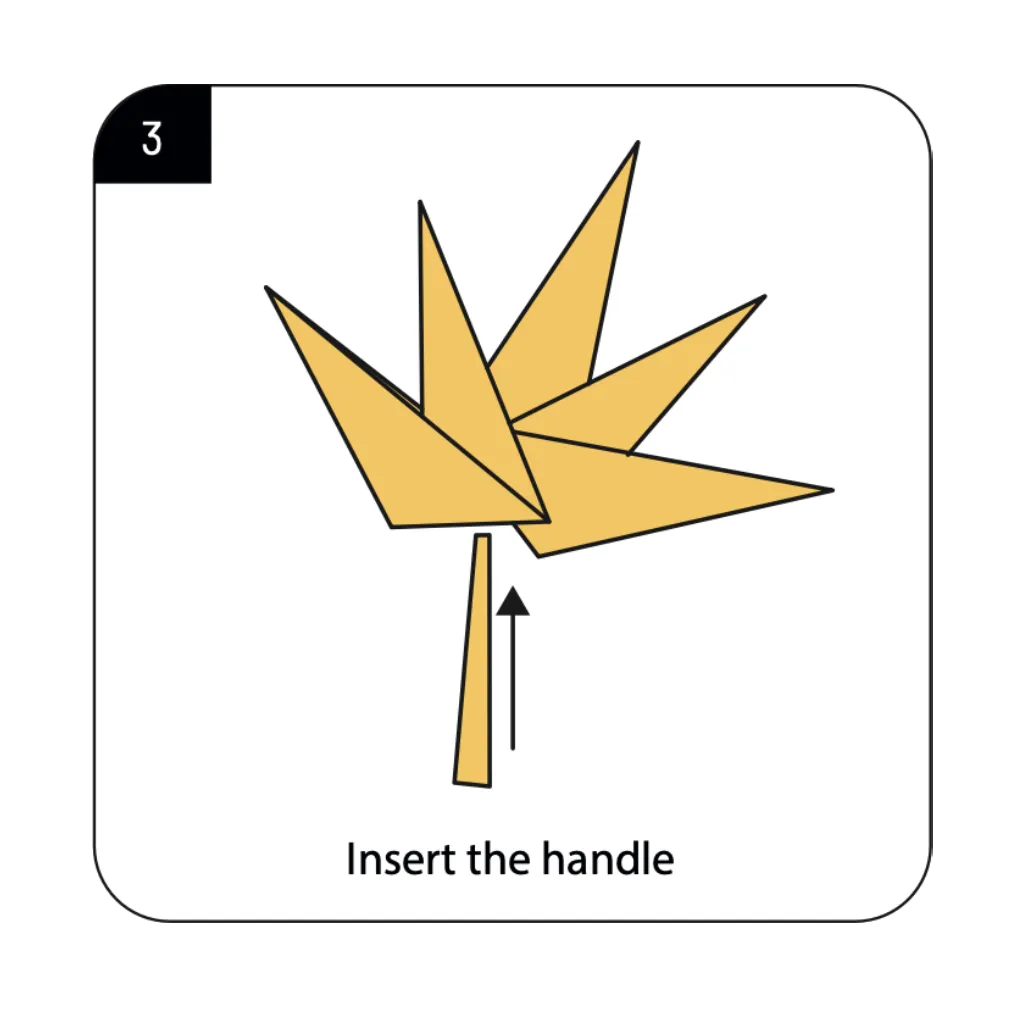
Gently insert the newly created handle (stem) into its final position to complete your origami maple leaf. This final adjustment secures all previous folds while positioning the stem for optimal display. Canadian maple leaf origami projects emphasize this finishing touch that transforms a decorative model into a realistic botanical creation. Your completed maple leaf now displays all the characteristic features: distinctive pointed lobes, natural proportions, and an elegant stem.
Conclusion:
Congratulations on completing your beautiful origami maple leaf! Through these final three essential steps, you’ve added the perfect finishing touches to transform your paper creation into a realistic botanical representation. Your completed maple leaf showcases the distinctive pointed lobes and elegant stem that make this iconic symbol of autumn instantly recognizable. This versatile origami model serves countless decorative purposes: scattered across tables for fall gatherings, hung as ornaments, arranged in paper bouquets, or used as unique gift toppers. The techniques you’ve mastered—precision folding, reverse folds, and structural insertion—provide valuable skills for creating more complex origami nature designs. The maple leaf’s cultural significance, particularly as Canada’s national symbol, makes this a meaningful craft project year-round, though it’s especially appropriate for autumn celebrations and Canadian holidays. We hope this tutorial has inspired you to continue exploring seasonal origami projects that celebrate the beauty of nature through the art of paper folding!
- Explore our complete fall origami collection → Discover more autumn-themed paper crafts including acorns, pumpkins, and other seasonal decorations.
- Origami nature designs → Create beautiful paper representations of leaves, flowers, trees, and other botanical elements with our step-by-step guides.
- Canadian-themed origami projects → Find maple leaf variations, beavers, moose, and other Canadian symbols perfect for national celebrations.
- Seasonal decoration origami ideas → Browse paper folding projects for all seasons, with special emphasis on autumn and fall-themed crafts.
- Master advanced leaf-folding techniques → Learn specialized folding methods for creating various leaf types, including maple, oak, ginkgo, and more.
