
Introduction: Transform a simple square of paper into a playful origami monster complete with sharp teeth and googly eyes. This beginner-friendly project is perfect for kids and adults who want to create fun, spooky decorations for Halloween or any time. Using basic folding techniques, you’ll craft a charming paper creature that’s sure to bring smiles. Let’s dive into this creative paper folding adventure and bring your monster to life!
Step-by-Step Origami Monster Instructions:
Step 1: Start with Diamond Position For Origami Monster
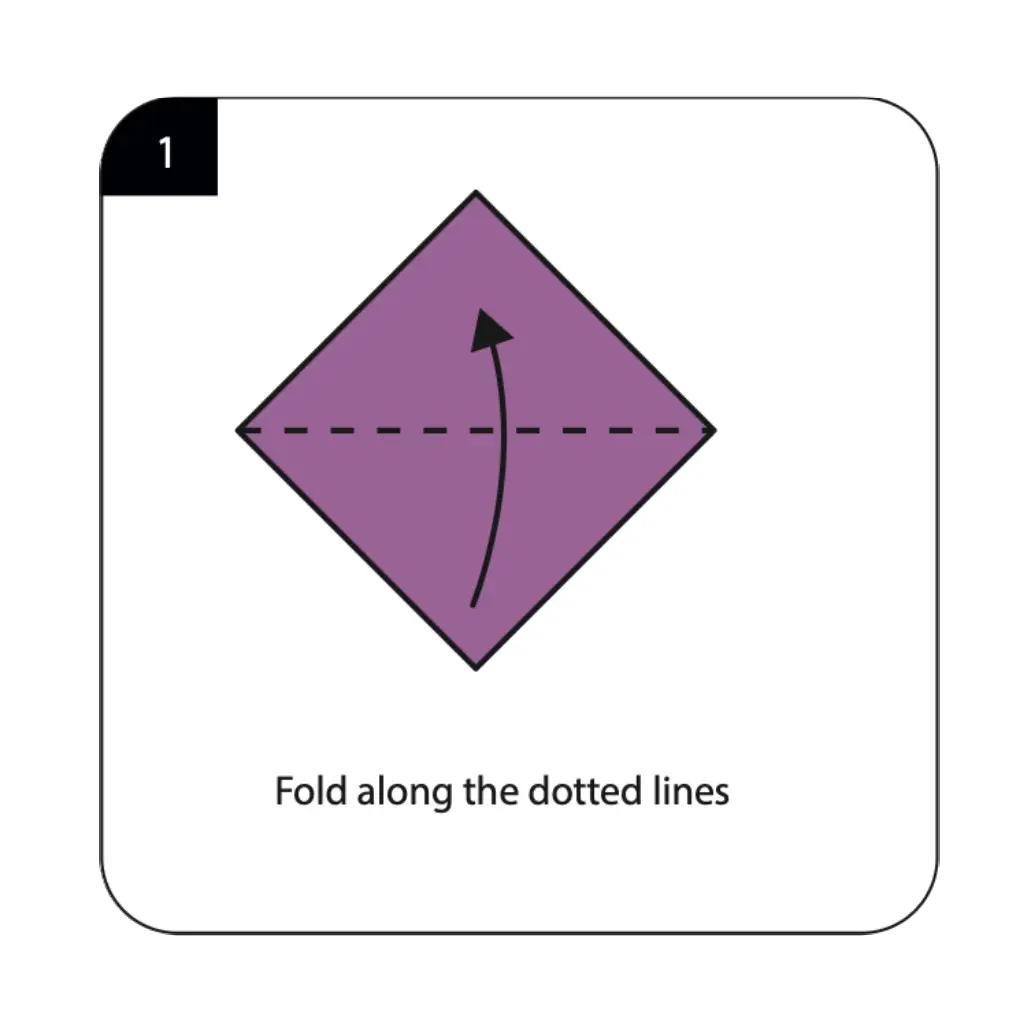
Begin by placing your square paper in a diamond orientation with one corner pointing toward you, then fold along the horizontal and vertical dotted lines. These initial creases create the foundation for your monster’s face and establish the symmetry needed for a balanced design. Make each fold crisp and precise, as these guidelines will determine how well your monster’s features align. This diamond base is a fundamental starting point used in many origami basics projects.
Step 2: Create the Triangle Base For Origami Monster
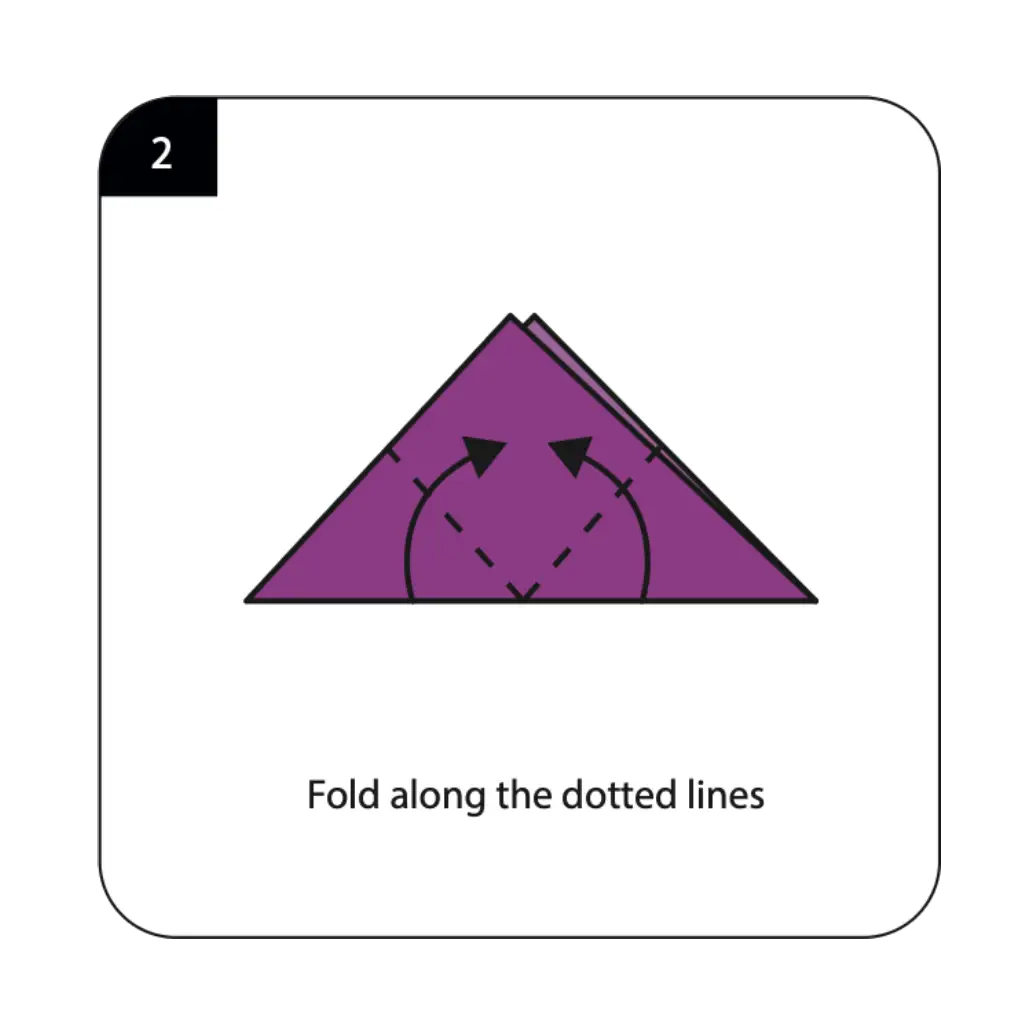
Fold your diamond shape along the indicated dotted lines to transform it into a triangle, which will become your monster’s head. This folding action brings the side corners together, creating a more compact form that’s easier to work with. Ensure the edges align perfectly to maintain symmetry in your monster’s face. The triangular shape provides the perfect canvas for adding personality and features to your paper creature.
Step 3: Form the Monster’s Jaw For Origami Monster
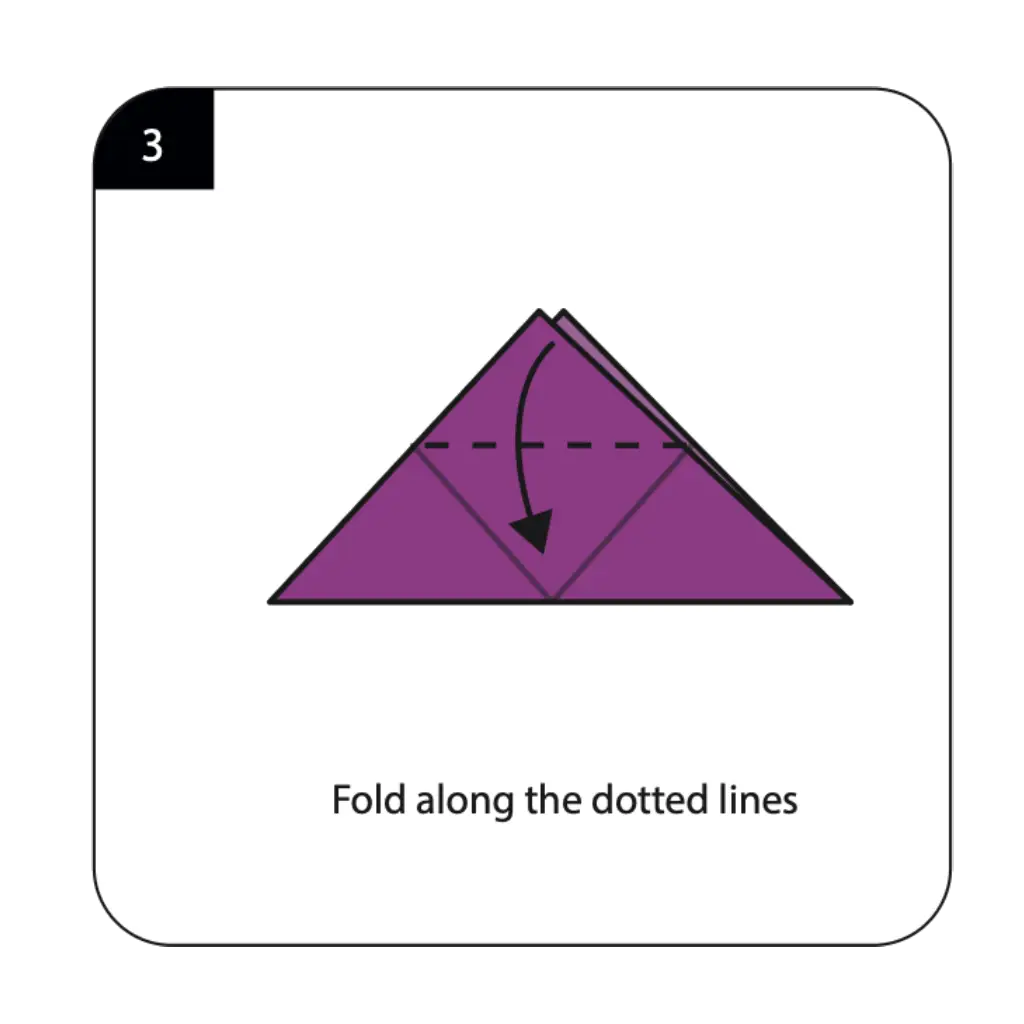
Continue folding along the new set of dotted lines to begin shaping what will become your monster’s mouth and jaw area. These folds create layers that add dimension to your monster’s face, setting up the structure for the teeth you’ll add later. Press firmly on each crease to ensure they hold their position throughout the remaining steps. This layering technique is essential for creating the three-dimensional quality that makes origami animals come alive.
Step 4: Open Out to Form Triangle For Origami Monster
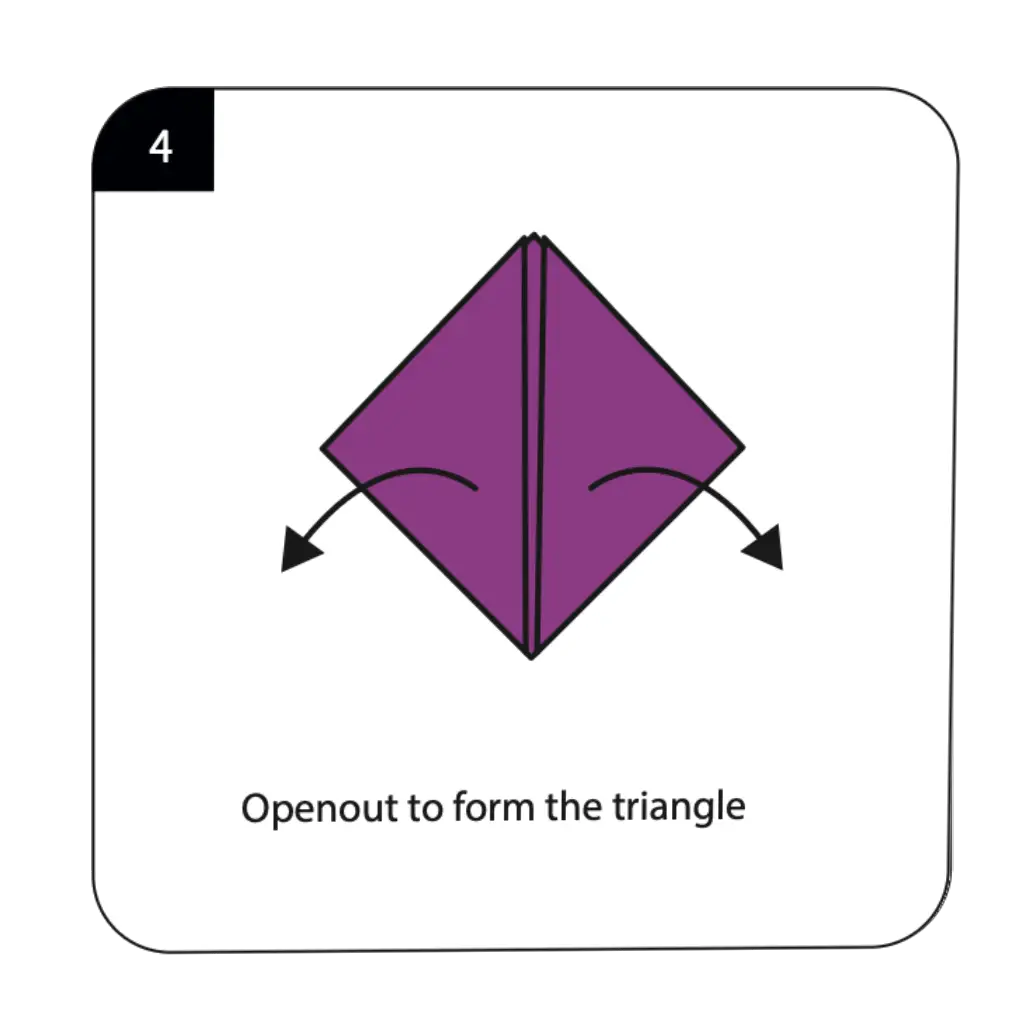
Carefully open out portions of your folded paper to form specific triangular sections that will define your monster’s facial features. This step requires gentle manipulation as you separate layers while maintaining the integrity of your previous folds. The opening technique creates pockets and angles that give your monster depth and character. This dimensional transformation is what distinguishes flat paper crafts from engaging creative origami sculptures.
Step 5: Fold Up for Teeth Details
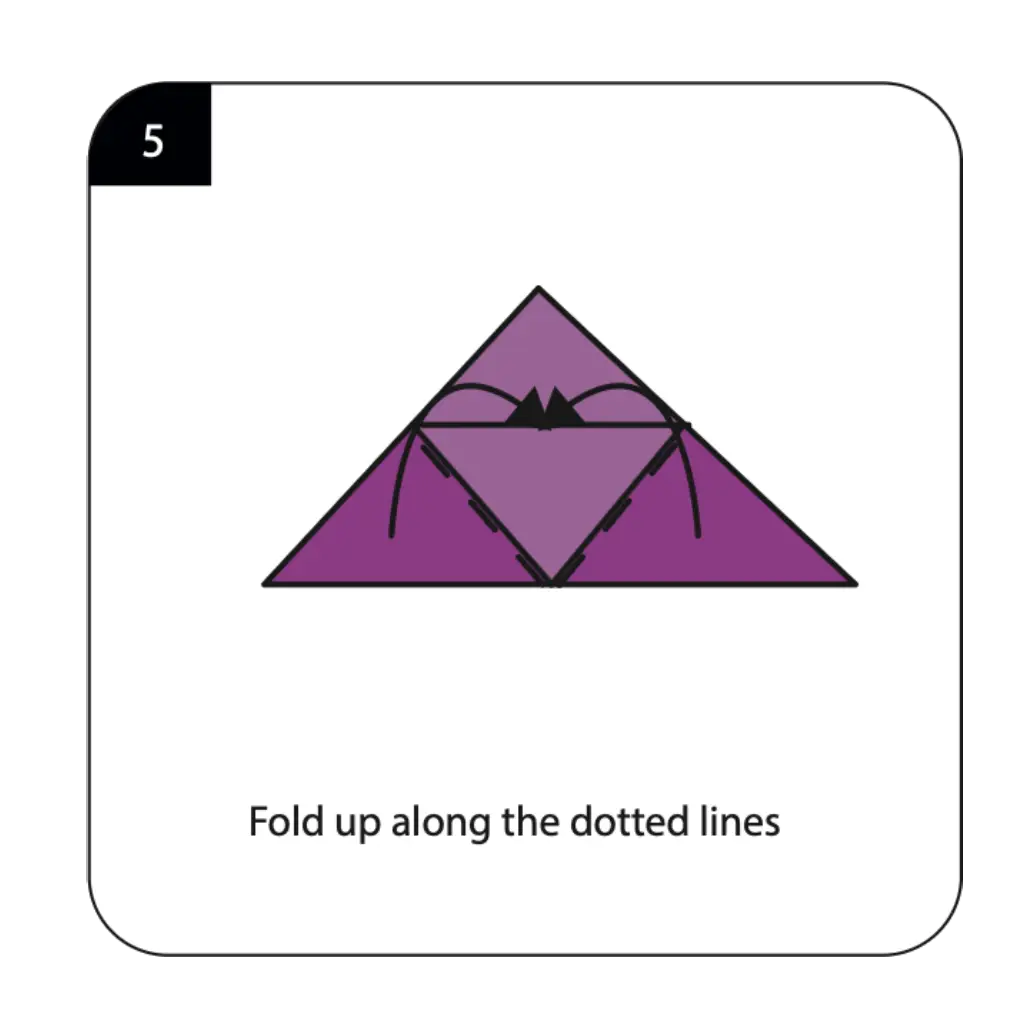
Fold up along the indicated dotted lines to create the zigzag pattern that forms your monster’s fearsome teeth. These upward folds create a row of triangular points that instantly transform your creation from cute to delightfully scary. Space the teeth evenly for the most impressive effect, ensuring each point is sharp and well-defined. The addition of teeth is what makes this design stand out among other simple origami faces and characters.
Step 6: Draw or Apply the Final Features

Complete your origami monster by drawing eyes and adding any stickers or decorative elements to bring personality to your creation. Position the eyes above the teeth to create an expressive face that can be cute, scary, or silly depending on your artistic choices. You can use markers, crayons, or googly eye stickers to customize your monster’s appearance. These finishing touches transform your folded paper into a unique decorative origami piece perfect for display or play.
Conclusion: Congratulations on creating your very own origami monster with its distinctive teeth and expressive eyes! This fun project demonstrates how simple folds can produce entertaining characters that spark imagination and creativity. Try making a whole family of monsters using different colored papers and varying the expressions for each one. With practice, you’ll be folding these playful creatures in minutes, perfect for parties, decorations, or just for fun!
