
Introduction
The origami nut represents a delightful and unique project that brings the charm of autumn harvests and natural food items into the world of paper folding. This beginner-friendly tutorial transforms a simple square sheet into a recognizable acorn or nut complete with its characteristic cap and textured shell. With just seven straightforward steps, you’ll create an adorable paper nut that’s perfect for seasonal decorations, Thanksgiving displays, or nature-themed craft projects. Whether for autumn celebrations, educational activities about forest ecosystems, or simply as a charming decorative accent, this origami nut offers both simplicity and seasonal appeal.
Step-by-Step Instructions
Step 1: Create the Foundation Grid For Origami Nut

Begin with a square sheet of paper, preferably brown or tan to represent the natural coloring of real nuts. Fold along the dotted lines to create reference creases, then unfold completely to establish the framework for your nut construction. These initial folds create the fundamental structure that will guide all subsequent folding and ensure proper proportions in your finished nut. The precision of these foundation creases is crucial for achieving the balanced, natural appearance characteristic of acorns and similar nuts. Take care to make each fold sharp and well-defined, creating the roadmap that will transform your flat square into a three-dimensional autumn treasure.
Step 2: Establish the Basic Structure For Origami Nut

Fold along the dotted line as shown in the diagram to begin creating the basic form of your origami nut. This horizontal fold establishes the fundamental division between the nut’s cap and body sections, creating the proportional framework that makes nuts instantly recognizable. The accuracy of this structural fold directly affects the realistic appearance and charm of your finished paper nut. This step begins transforming your flat square into the distinctive shape that captures the essence of autumn’s bounty and the natural world’s geometric beauty.
Step 3: Prepare for Detailed Shaping For Origami Nut
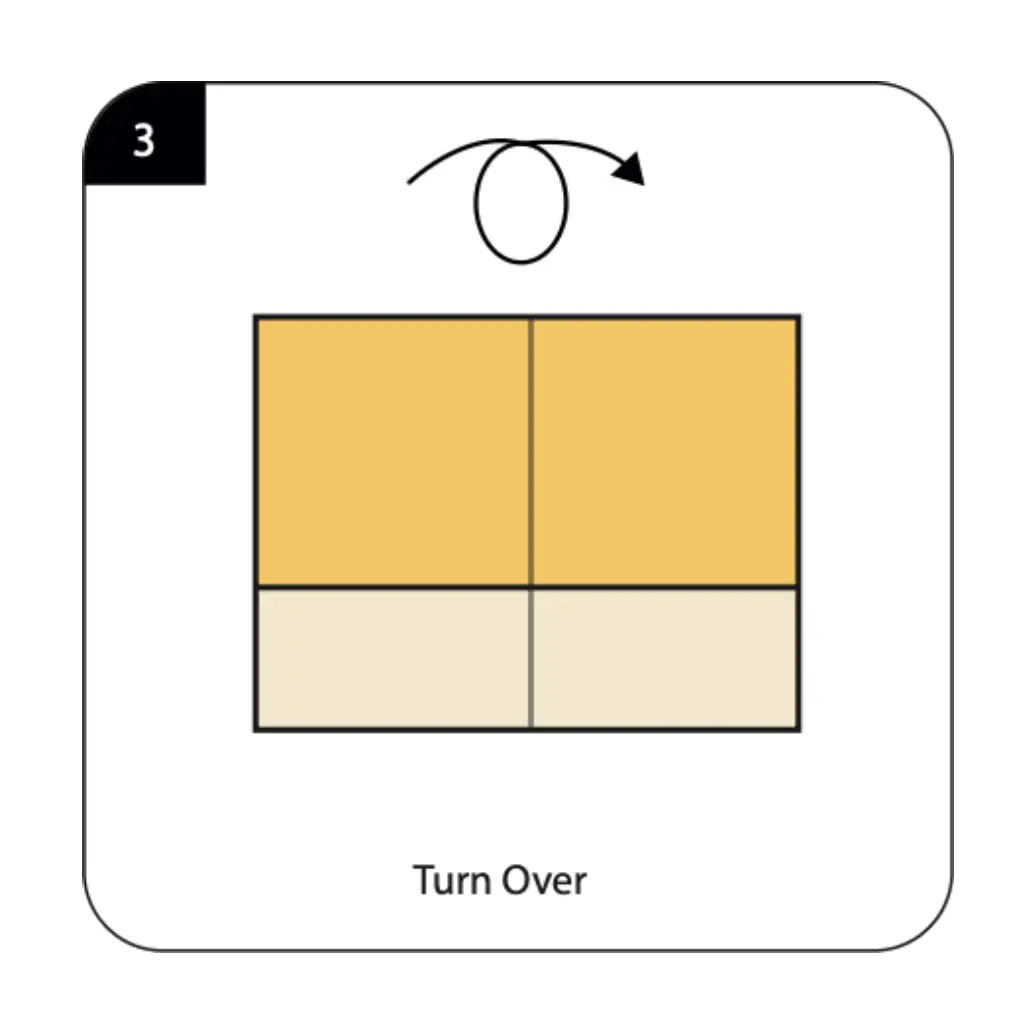
Turn over your partially folded model as instructed to access the reverse side for the next phase of construction work. This reorientation is essential for proper development of your nut’s layered structure and allows access to the fold lines needed for creating the characteristic cap and shell details. Handle the model carefully during this transition to preserve the integrity of your foundation work and maintain the established proportions. The reverse side provides the working surface needed for the detailed shaping that will complete your nut’s transformation from basic geometry to recognizable autumn symbol.
Step 4: Create the Nut Cap Structure
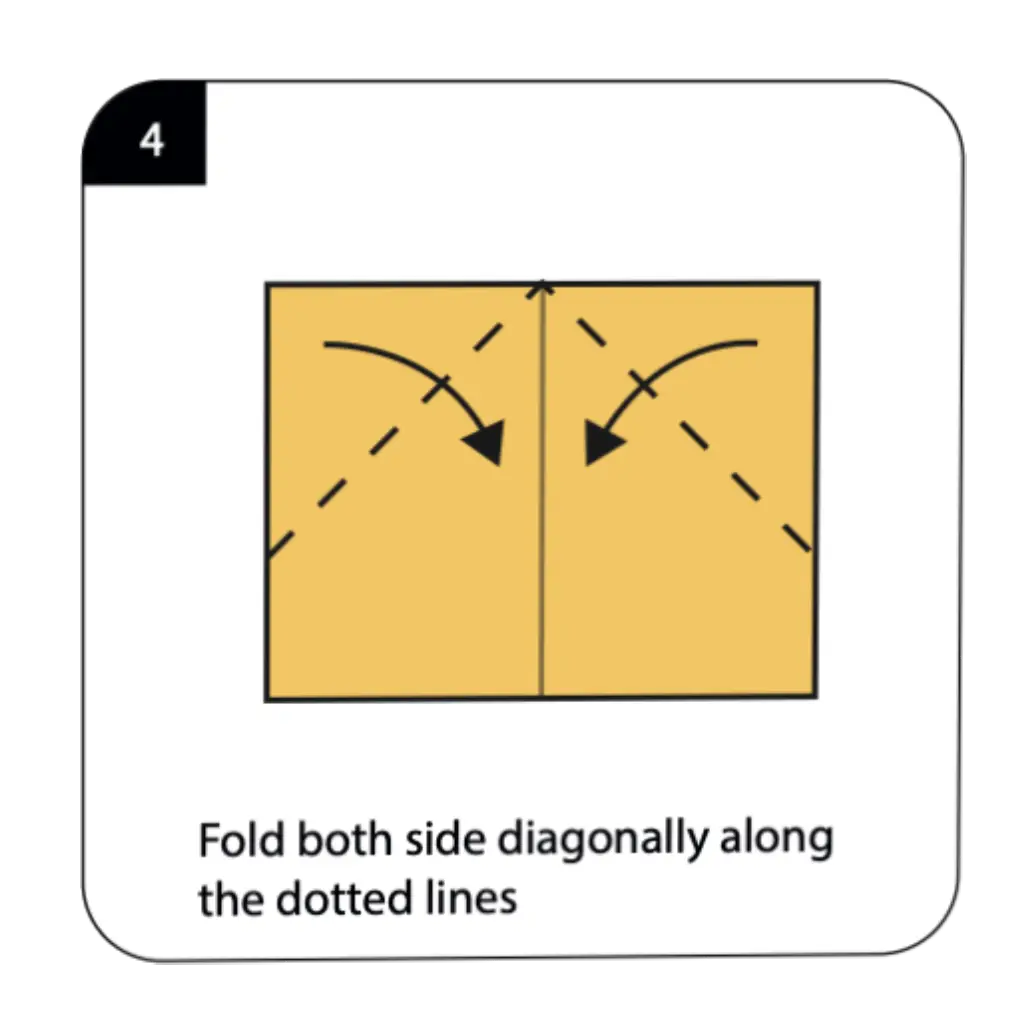
Fold both sides diagonally along the dotted lines as indicated, creating the angular sections that will form your nut’s distinctive cap or cupule. These diagonal folds establish the pointed, overlapping segments that characterize acorn caps and similar nut coverings found in nature. The symmetry and precision of these diagonal folds determine how convincingly your paper nut represents real autumn nuts. This step demonstrates how strategic angular folding can capture the natural textures and protective structures that nuts develop to safeguard their seeds through winter months.
Step 5: Define the Nut Body
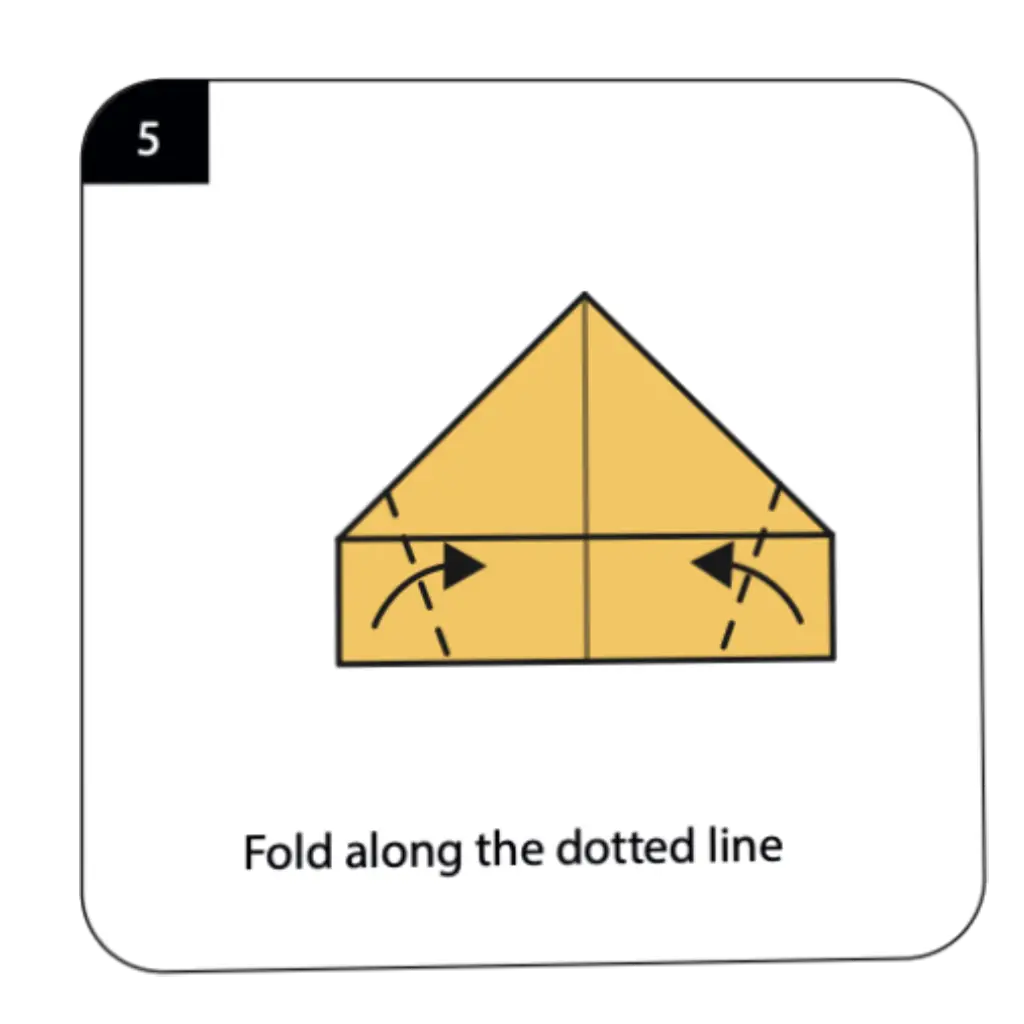
Fold along the dotted line as shown to create clear definition between your nut’s cap and the main body section. This important fold establishes the proportional relationship between these two key components and enhances the realistic appearance of your origami nut. The positioning of this dividing fold affects how well your finished model captures the characteristic proportions of real nuts found in forests and parks. This step continues the transformation from abstract paper geometry to a recognizable representation of nature’s autumn harvest and seasonal abundance.
Step 6: Complete the Basic Form

Turn over your model once again as indicated to access the final surface for completing your nut’s structural development. This reorientation reveals the developing nut shape and prepares your construction for the finishing touches that will complete its transformation. The careful handling during this transition preserves all your detailed folding work while positioning the model for optimal completion. This final positioning ensures that your nut will display its most attractive angle and showcase the geometric precision that makes origami nut representations of natural objects so appealing.
Step 7: Finalize Your Origami Nut

Add stickers or draw texture details to complete your nut’s realistic appearance, creating the spots, lines, and surface patterns that make real nuts so visually interesting. This creative finishing phase allows you to customize your nut’s appearance with the specific markings that distinguish different types of nuts found in nature. The addition of simple surface details dramatically enhances the realism of your paper creation and connects it to the diverse world of seeds and nuts. Your completed origami nut now combines the precision of paper folding with the natural beauty of autumn’s harvest, ready to enhance seasonal displays, serve as educational props for learning about forest ecosystems, or simply bring the charm of nature’s geometric perfection into your home through the timeless art of origami nut.
Conclusion
Your origami nut demonstrates how paper folding can capture the simple beauty of nature’s small treasures while creating charming seasonal decorations. This delightful autumn creation combines basic folding techniques with the universal appeal of natural forms and harvest symbolism. The fundamental skills you’ve practiced—including precise creasing, proportional development, and surface detailing—provide excellent preparation for more complex nature-themed origami projects. Whether used for seasonal displays, educational activities, or simple decoration, your handcrafted nut represents the perfect connection between traditional paper arts and the timeless appeal of natural objects.
- “Master fundamental techniques in our Origami Basics for Beginners before creating your paper nut.”
- “Build autumn forest scenes with woodland creatures from our Origami Animals Collection like squirrels and chipmunks.”
- “Explore more food and nature projects in our Creative Origami Gallery for seasonal crafting.”
- “Create beautiful displays with ideas from our Decorative Origami Guide for autumn celebrations.”
- “Add autumn foliage with Origami Flowers representing fall leaves and seasonal blossoms.”
- “Make entire nut collections using techniques from our Modular Origami Projects for impressive displays.”
