
Introduction: Bring a touch of tropical paradise to your paper crafts with this elegant origami palm leaf design. Perfect for beginners, this project transforms a simple square into a textured leaf with realistic veining patterns. Using just basic folds and a clever zig-zag technique, you’ll create a decorative piece ideal for summer themes or nature displays. Follow these eight straightforward steps to craft your own paper palm frond.
Step-by-Step Origami Palm Leaf Instructions:
Step 1: Begin with Diamond Orientation For Origami Palm Leaf
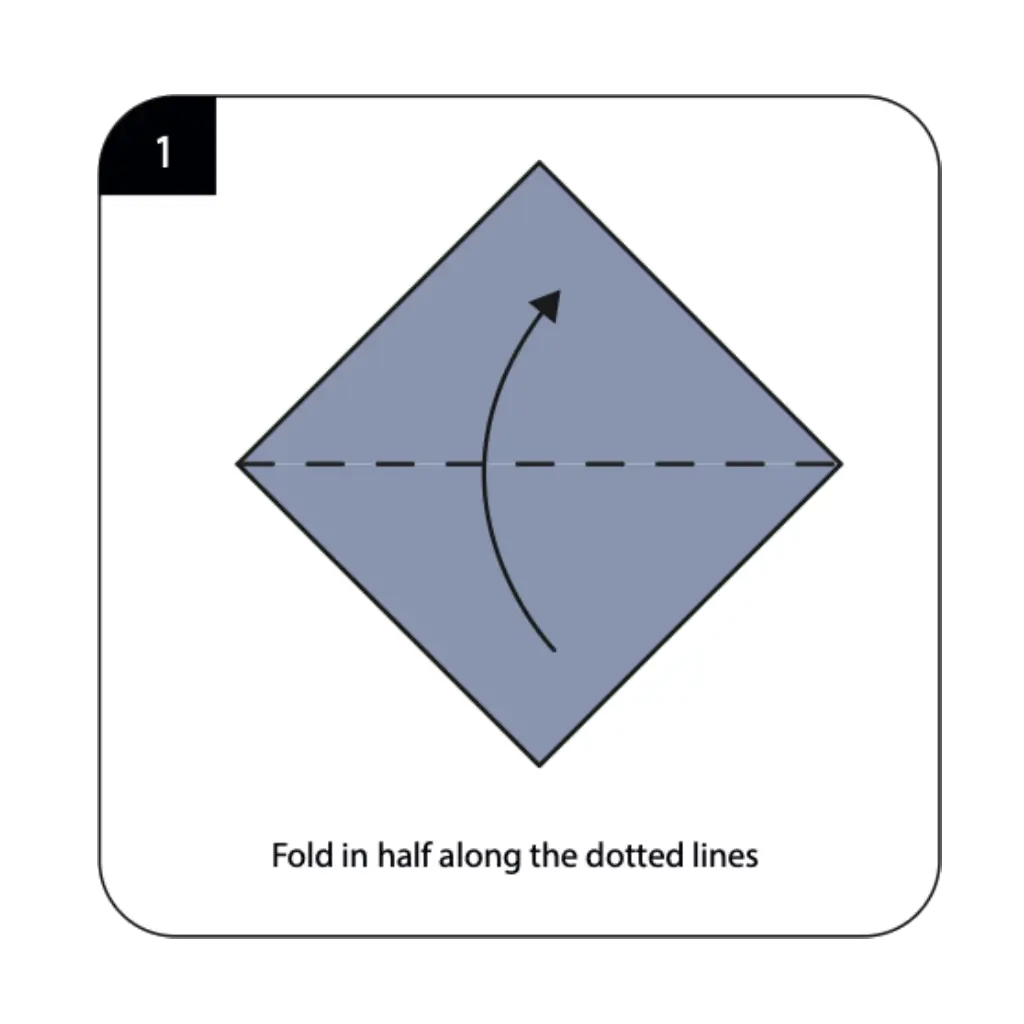
Start with your square origami paper placed diagonally with the colored side facing up, creating a diamond shape. Fold the paper in half along the dotted line, bringing one corner to meet the opposite corner. This initial fold establishes the central vein of your palm leaf and provides the main guideline for subsequent steps. The diamond position is a versatile starting point commonly used in origami basics for creating symmetrical designs.
Step 2: Create the Triangular Base For Origami Palm Leaf
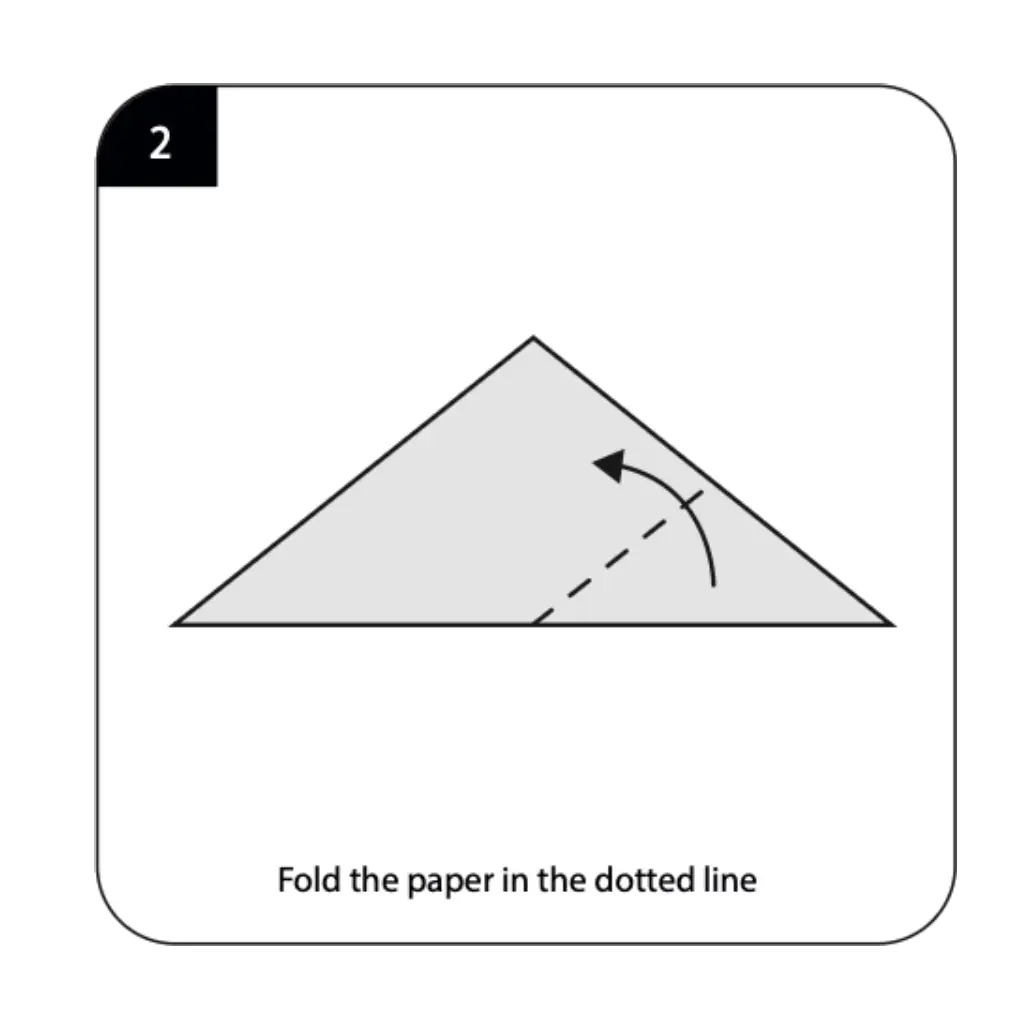
Fold your paper along the indicated dotted line to transform the diamond into a triangular shape. This fold narrows the form and begins establishing the elongated shape characteristic of palm leaves. Ensure the edges align perfectly to maintain symmetry in your finished leaf design. The triangular configuration provides the foundation for the leaf’s tapered appearance and natural proportions.
Step 3: Add Secondary Folds For Origami Palm Leaf

Continue folding along the new dotted lines to add layers and depth to your developing palm leaf. These additional folds create the structural framework that will support the textured pattern in later steps. Press each crease firmly to ensure they hold their position throughout the folding process. This layering technique is essential for achieving the three-dimensional quality found in realistic decorative origami botanical designs.
Step 4: Shape the Leaf Form For Origami Palm Leaf
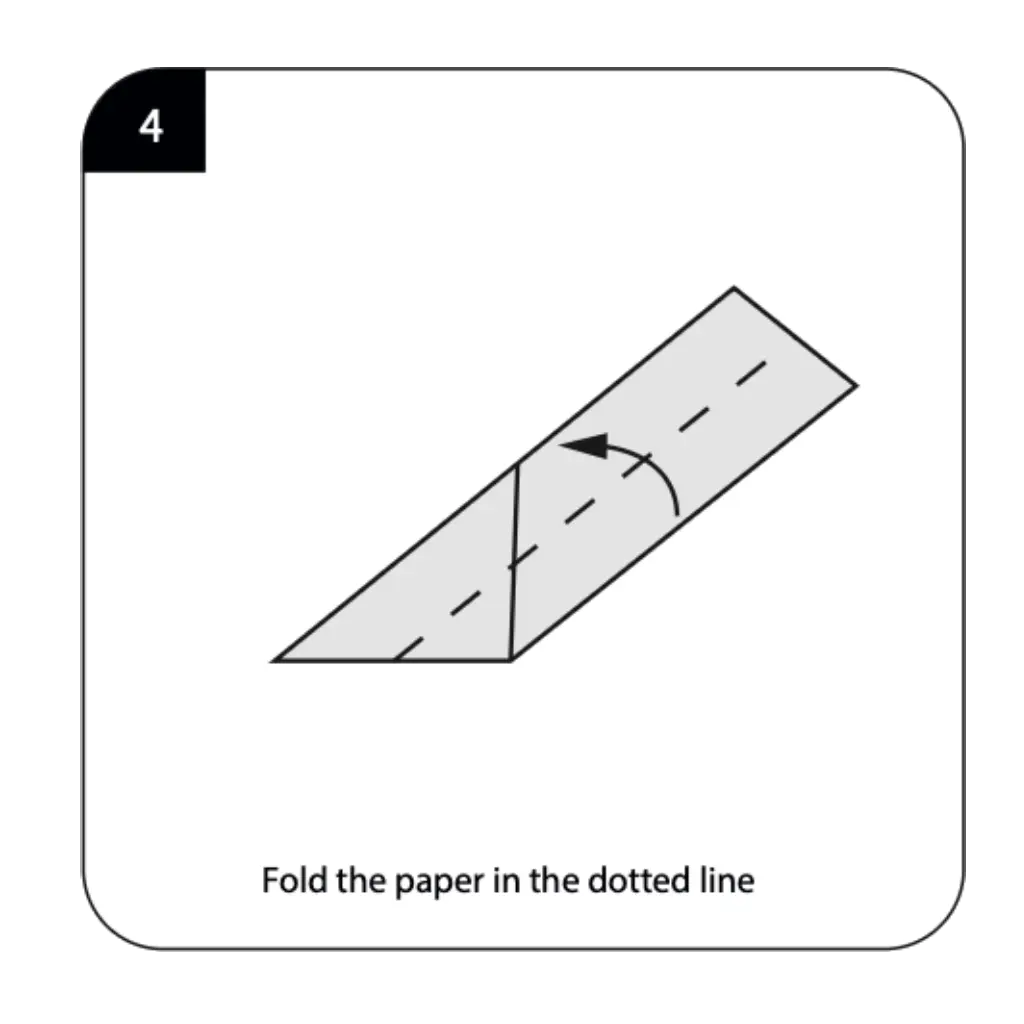
Fold the paper along the dotted line to further refine the leaf’s elongated shape and proportions. This step continues the transformation from a basic geometric form into a recognizable botanical shape. The precision of this fold affects how natural your finished palm leaf will appear. Careful attention to fold placement ensures your leaf maintains the graceful curves characteristic of real palm fronds.
Step 5: Open and Prepare the Model
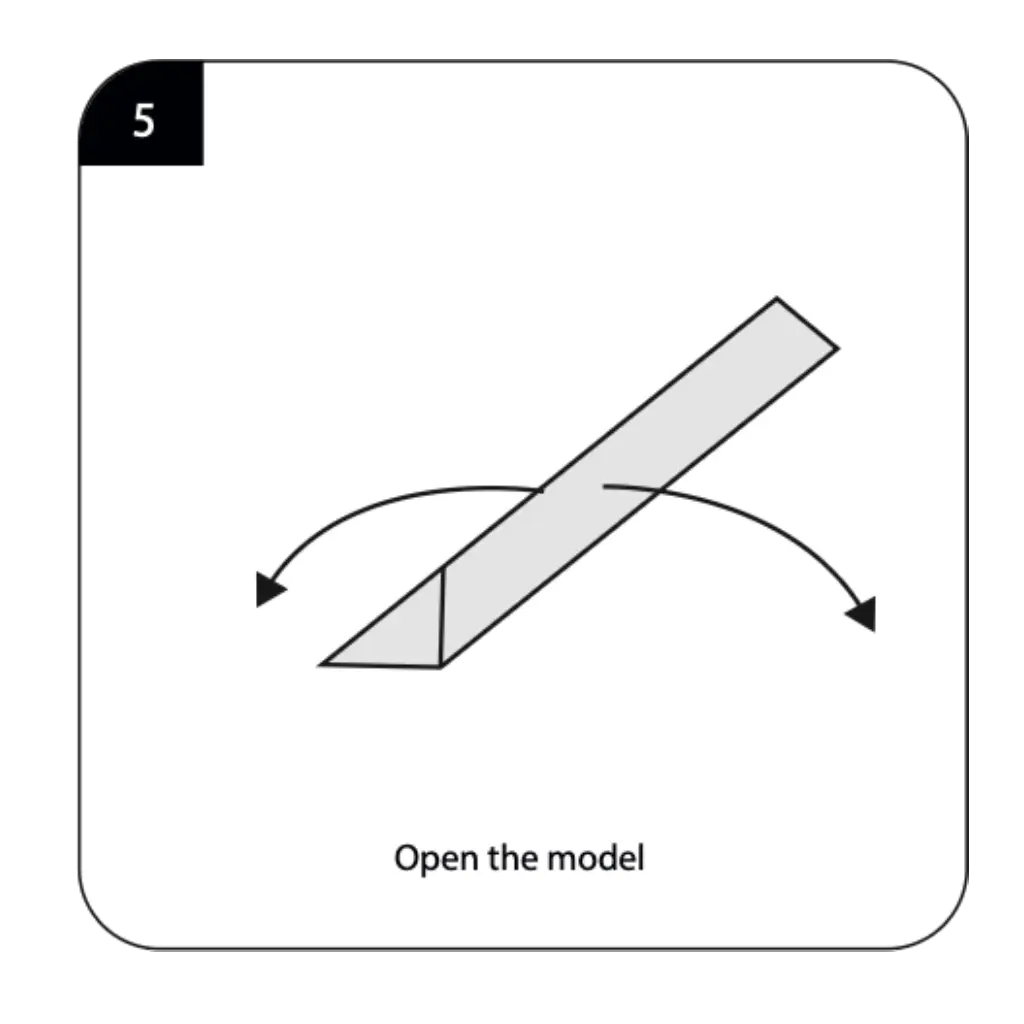
Carefully open the model by separating specific layers as indicated, preparing it for the signature texture folds. This opening action creates the workspace needed for adding the detailed vein pattern that makes palm leaves so distinctive. Handle the paper gently to avoid tearing at the stress points where multiple folds converge. This preparation step is crucial for successful execution of the zig-zag pattern that follows.
Step 6: Create Zig-Zag Texture

Fold zig-zaggily along the dotted lines to create the characteristic pleated texture of palm leaves. This accordion-style folding adds realistic veining and dimension to your leaf, transforming it from flat to lifelike. Space your folds evenly to create a uniform pattern that mimics nature’s design. The zig-zag technique is a hallmark of advanced origami flowers and botanical models.
Step 7: Execute Reverse Folds
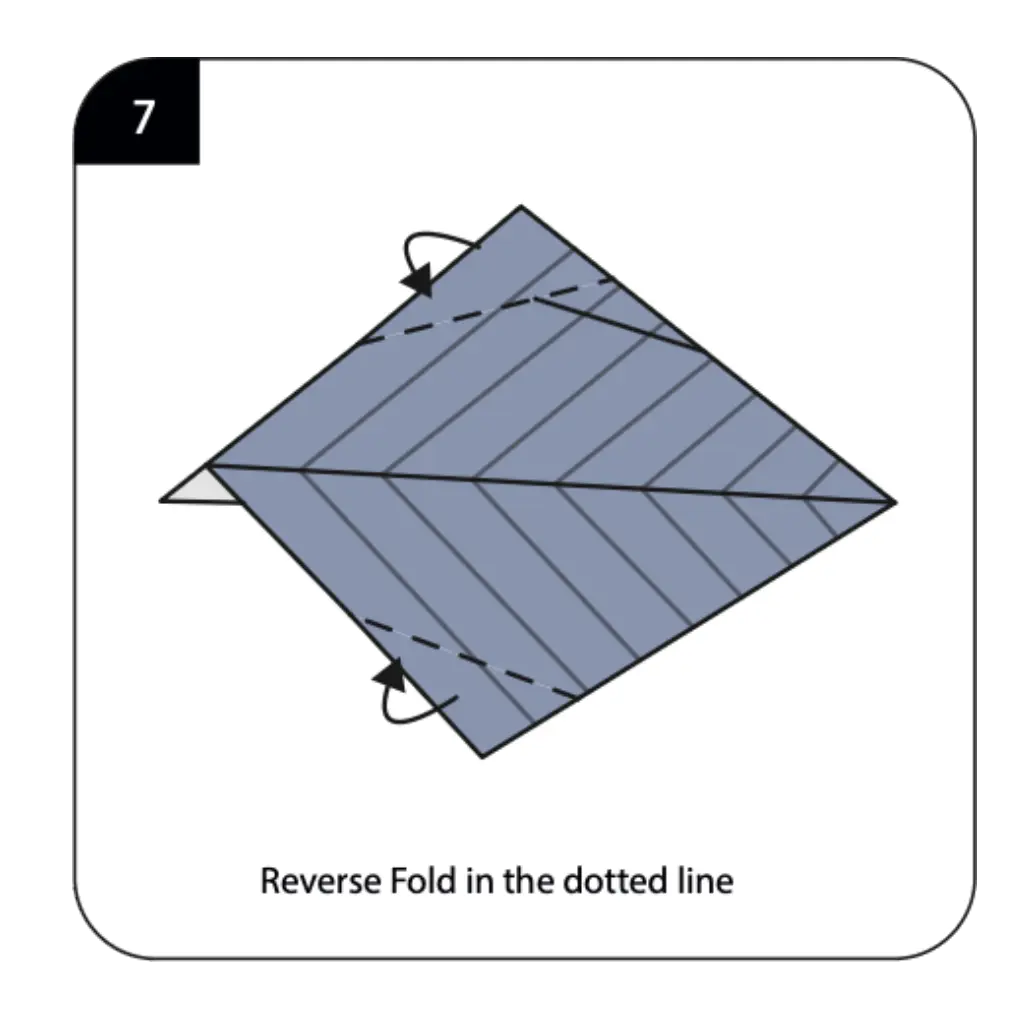
Perform reverse folds along the indicated dotted lines to shape the leaf’s edges and add natural curves. These reverse folds create the gentle undulations found in real palm fronds and prevent your leaf from looking too rigid. The technique involves opening the paper slightly and reversing the fold direction for a more organic appearance. This sophisticated folding method elevates your project beyond simple creative origami to botanical art.
Step 8: Complete Final Reverse Fold
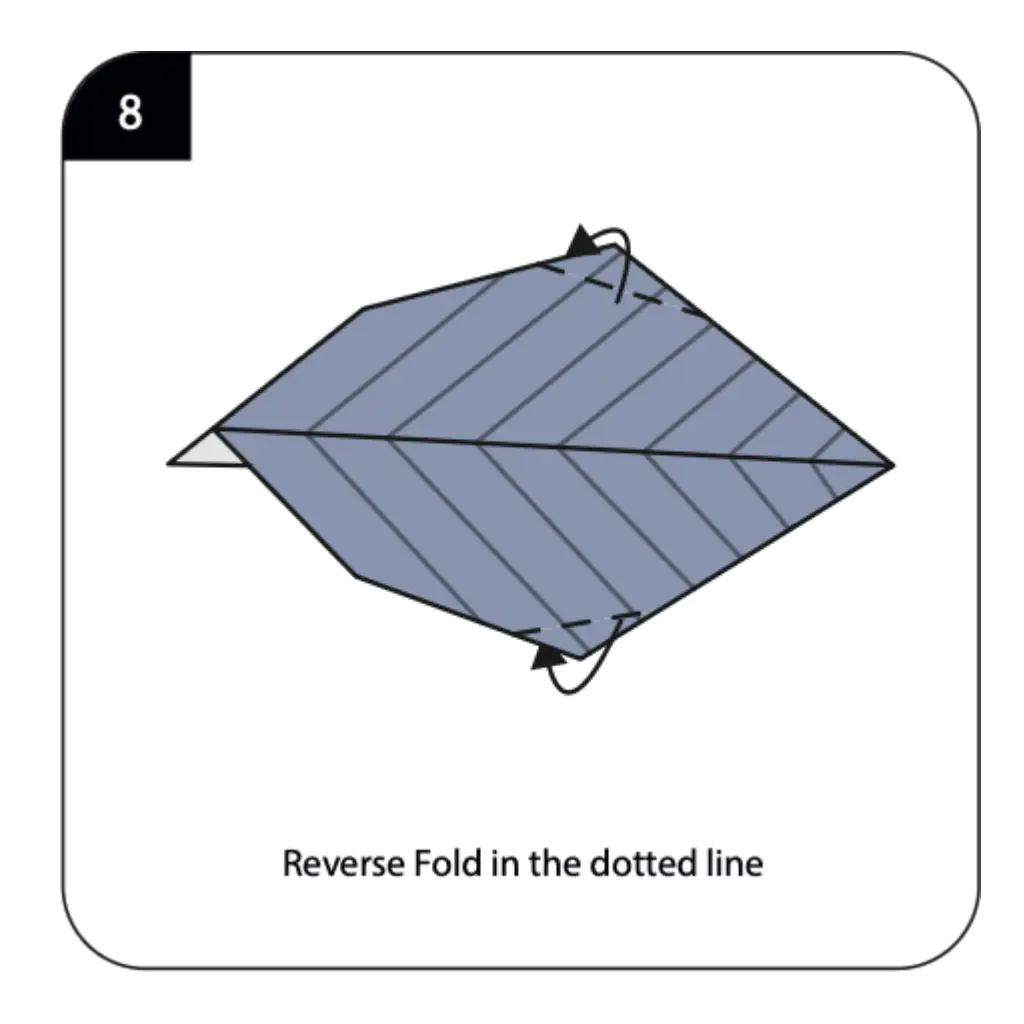
Execute one final reverse fold along the dotted line to perfect your palm leaf’s shape and proportions. This last adjustment ensures your leaf has the proper curvature and sits naturally when displayed. Fine-tune any previous folds if needed to achieve the most realistic appearance. Your completed origami palm leaf now showcases the intricate texture and elegant form of tropical foliage.
Conclusion: You’ve successfully created a stunning origami palm leaf that captures the beauty of tropical nature through paper art. This versatile design works wonderfully for luau decorations, summer crafts, or as part of a paper garden display. Try folding multiple leaves in various shades of green to create a lush tropical arrangement. With practice, you’ll master the zig-zag technique and create even more detailed botanical origami pieces.
