
Introduction
Origami, the ancient Japanese art of paper folding, offers countless creative possibilities, but few designs combine simplicity and functionality as perfectly as the origami paper airplane. This classic paper craft has delighted generations of children and adults alike, serving as many people’s first introduction to both origami and the basic principles of aerodynamics. Unlike more complex origami paper airplane models that focus primarily on aesthetic appeal, the paper airplane delivers the added satisfaction of flight, transforming a simple sheet of paper into something that can soar through the air. This beginner-friendly tutorial breaks down the process of creating a reliable flying paper airplane into just eight straightforward steps, making it accessible to folders of all ages and skill levels. Whether you’re looking for a quick classroom activity, an engaging rainy-day craft for children, or simply want to recapture the joy of watching your handmade creation glide across a room, this simple origami airplane tutorial provides the perfect balance of ease and performance. Follow along as we guide you through creating a paper airplane that not only looks good but also demonstrates impressive flight capabilities with proper throwing technique.
Step-by-Step Instructions
Step 1: Create the Initial Center Fold For Origami Paper Airplane
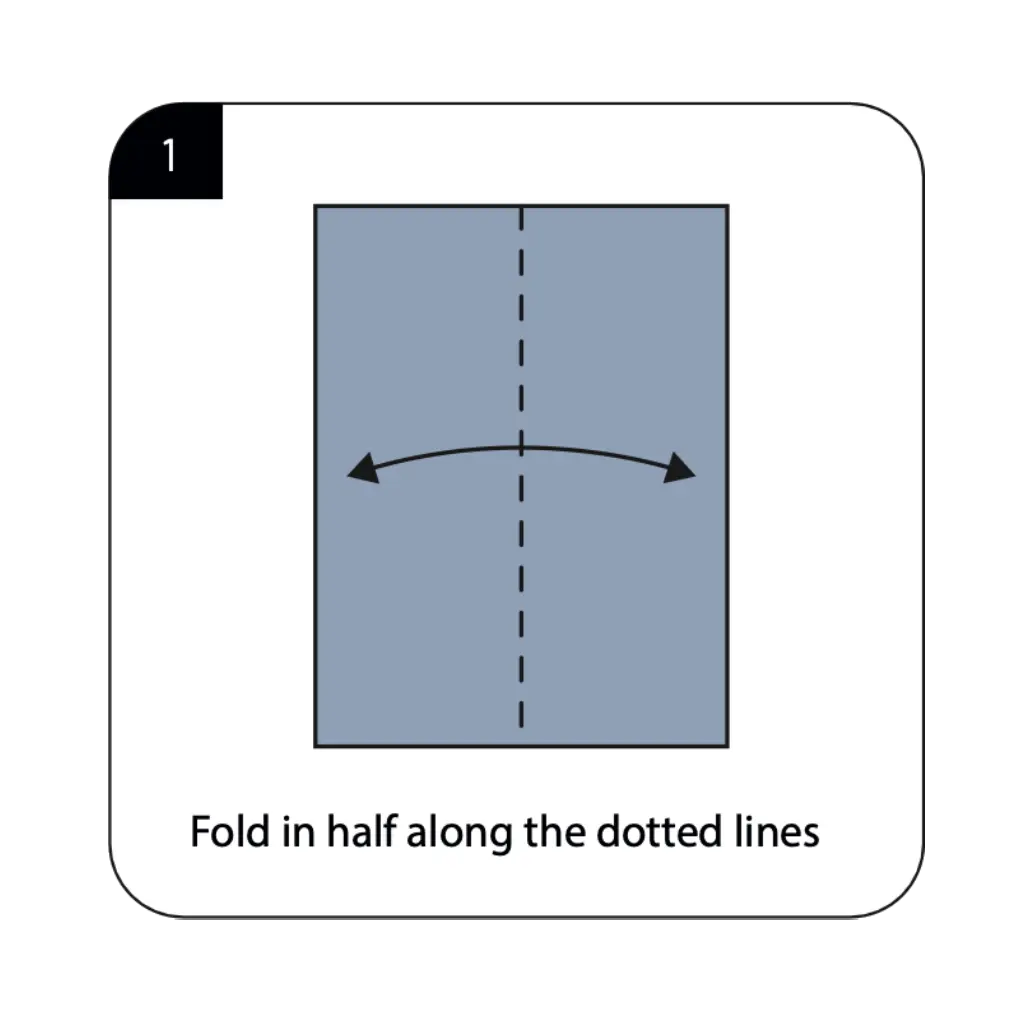
Begin with a rectangular sheet of paper (standard letter or A4 size works perfectly). Fold the paper in half lengthwise along the dotted line, bringing the left edge to meet the right edge, then firmly crease. This fundamental fold establishes the critical center line that will serve as the airplane’s axis of symmetry, ensuring balanced flight performance. The precision of this initial fold significantly impacts how straight your airplane will fly, so take care to align the edges perfectly. This center fold creates the foundation for all subsequent folds and ultimately determines the symmetry and aerodynamic properties of your finished paper airplane.
Step 2: Form the Diagonal Corner Folds For Origami Paper Airplane
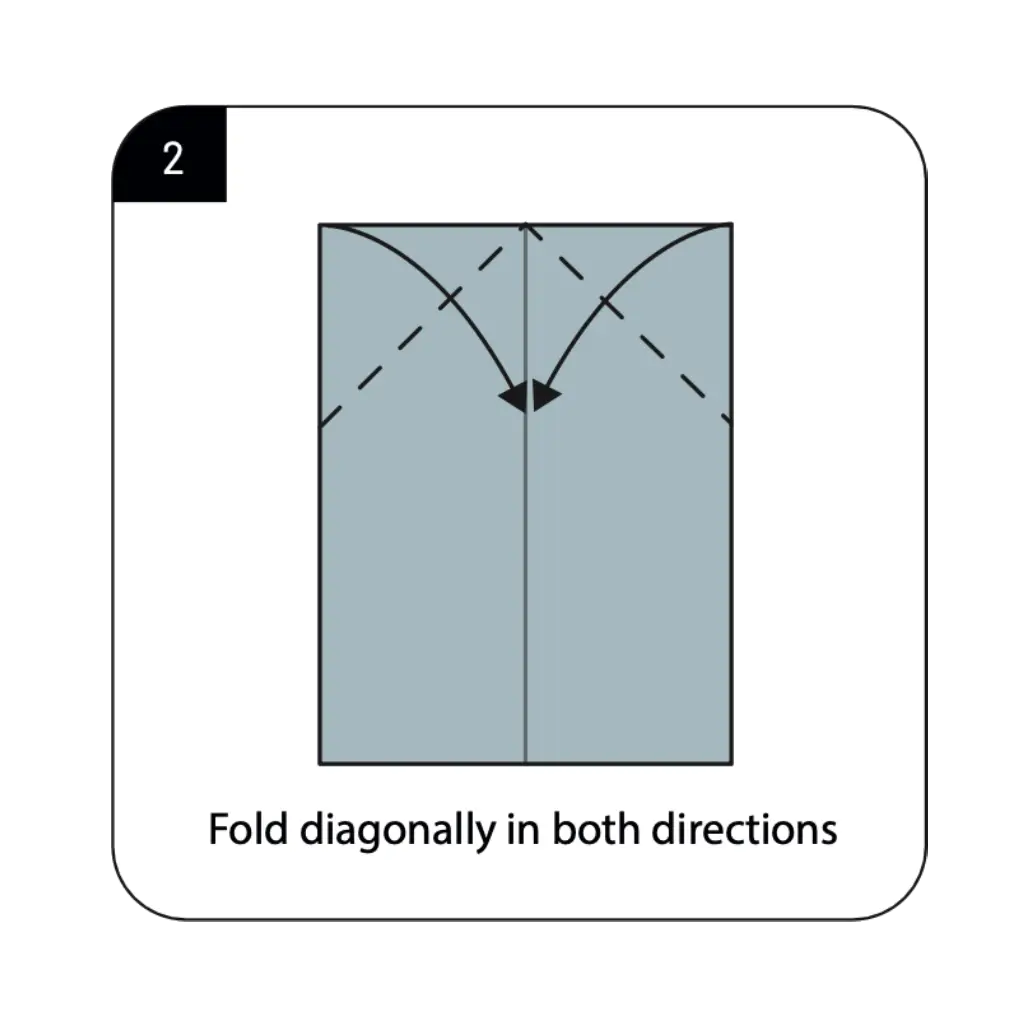
With the paper still folded in half, create diagonal folds in both directions at the top of the rectangle as shown in the diagram. These important corner folds begin establishing the distinctive triangular nose section of your paper airplane. The angle and symmetry of these diagonal folds directly affect your airplane’s flight stability and aerodynamic properties. Ensure both diagonal folds are symmetrical and meet precisely at the center crease for optimal flight performance. These folds transform the rectangular shape into the beginning of the characteristic airplane form, with a pointed front that will slice through the air.
Step 3: Create the First Triangle Fold For Origami Paper Airplane
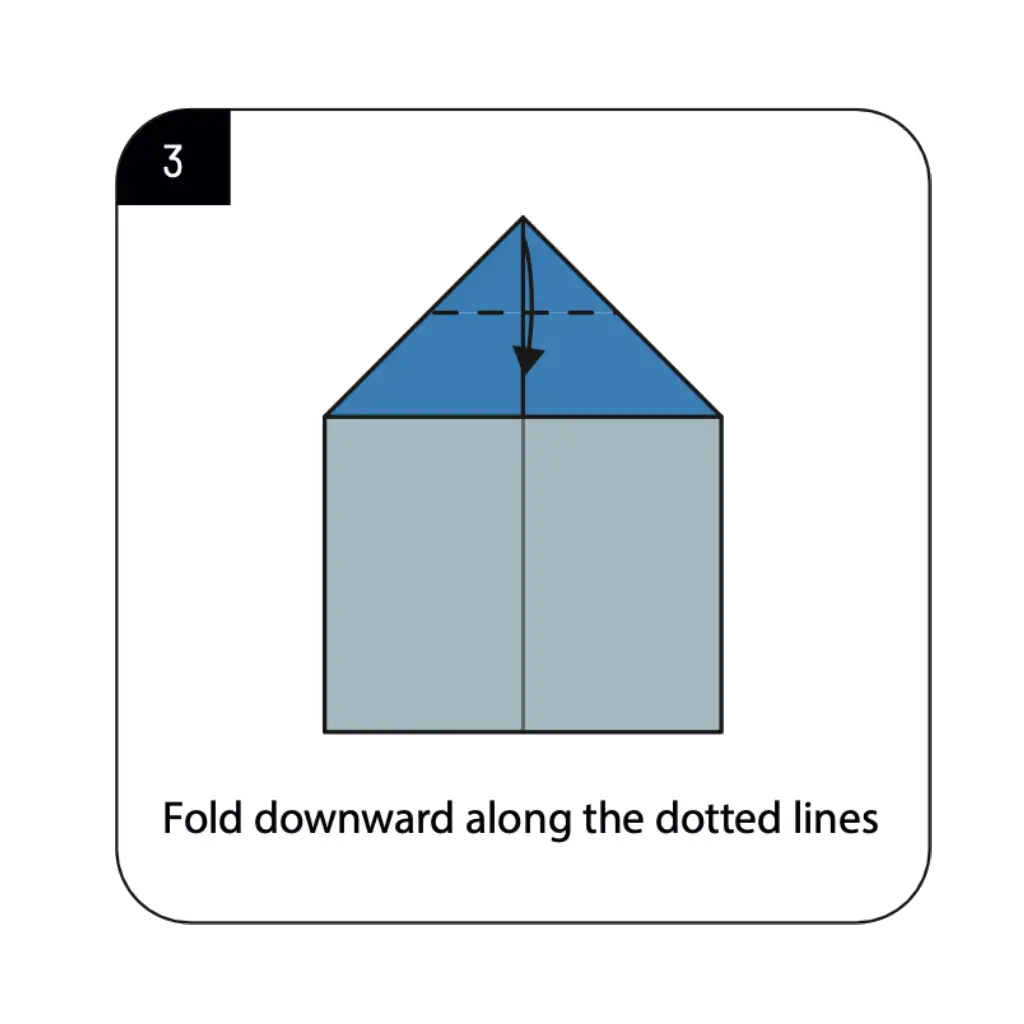
Fold the top triangular section downward along the dotted line as shown, creating a fold that aligns with the bottom edge of the diagonal folds from Step 2. This crucial fold begins defining the nose and body structure of your paper airplane. The accuracy of this fold affects the weight distribution and front profile of your aircraft. Press firmly to create a sharp, well-defined crease that will maintain its shape during flight. This triangular fold establishes the aerodynamic front section that helps your paper airplane cut through the air efficiently during flight.
Step 4: Reinforce the Triangular Structure For Origami Paper Airplane
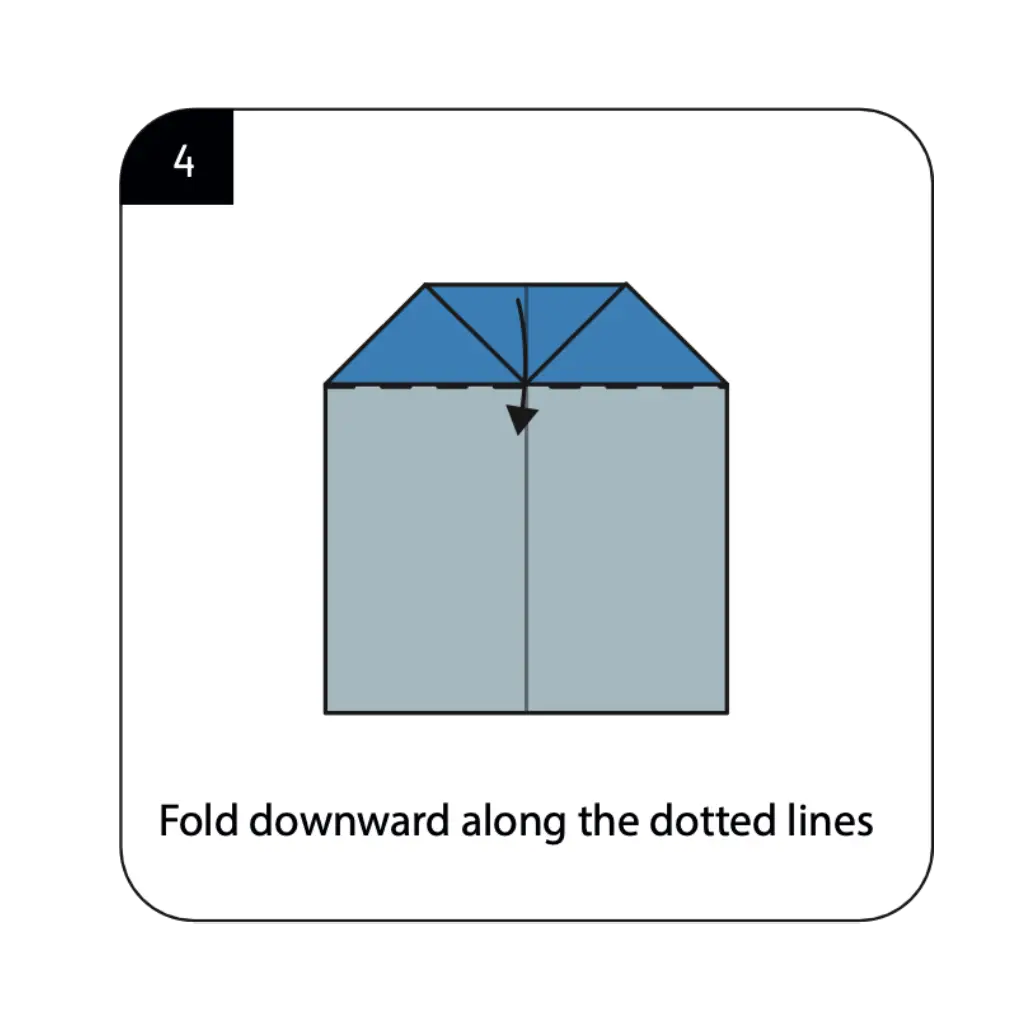
Fold the newly formed triangle downward once more along the dotted line as shown. This second downward fold reinforces the nose structure and adds weight to the front section of your paper airplane. The proper weight distribution created by this fold is essential for stable flight characteristics. The double-layered nose section created by this fold adds durability to the area of the plane that often experiences the most impact when landing. This strengthening fold helps ensure your airplane maintains its shape through multiple flights.
Step 5: Create the Wing Foundation For Origami Paper Airplane
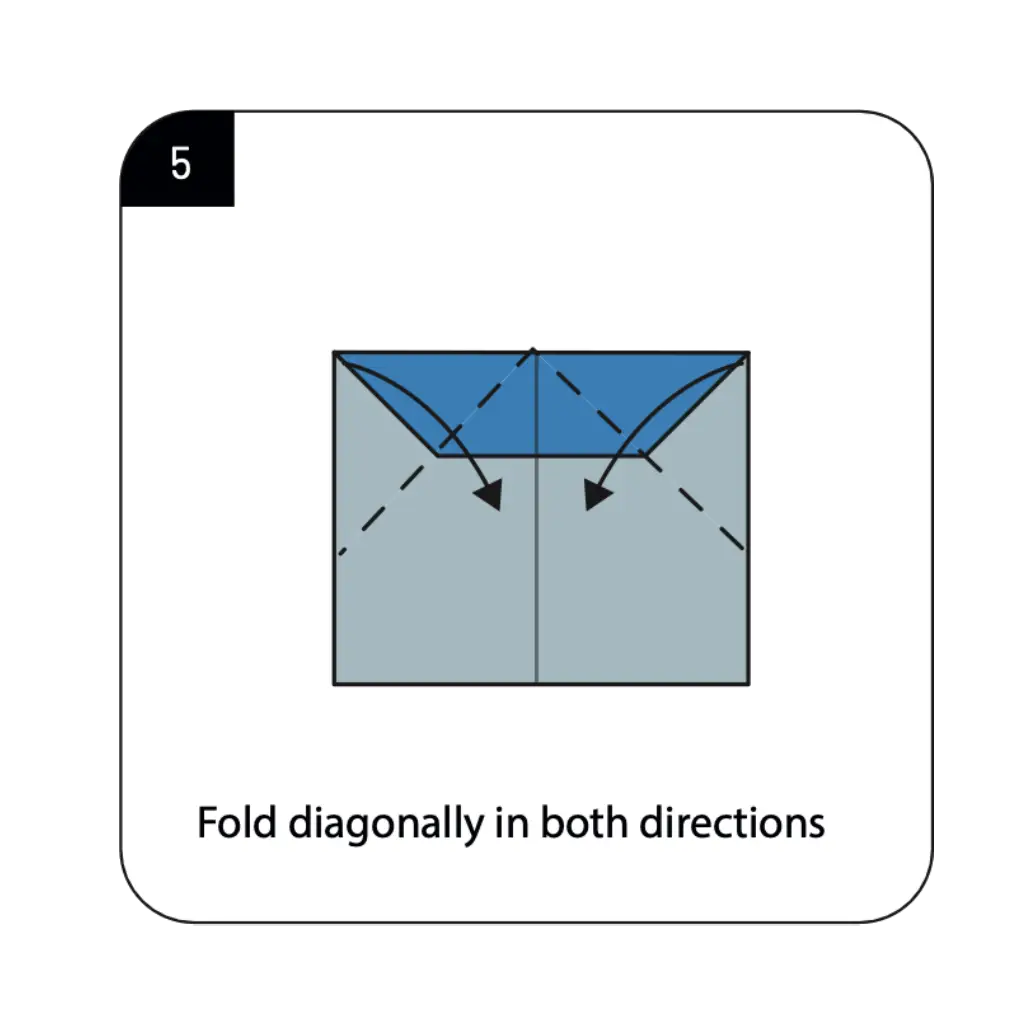
Fold the paper diagonally in both directions as shown in the diagram, establishing creases that will guide the wing formation in subsequent steps. These diagonal reference folds are crucial for creating symmetrical wings that generate equal lift on both sides during flight. The precision of these creases affects how well your airplane’s wings will fold and maintain their position. Though these folds will be unfolded before proceeding to the next step, they create important guidelines that ensure properly aligned wings, which are essential for straight, stable flight.
Step 6: Form the Central Body For Origami Paper Airplane
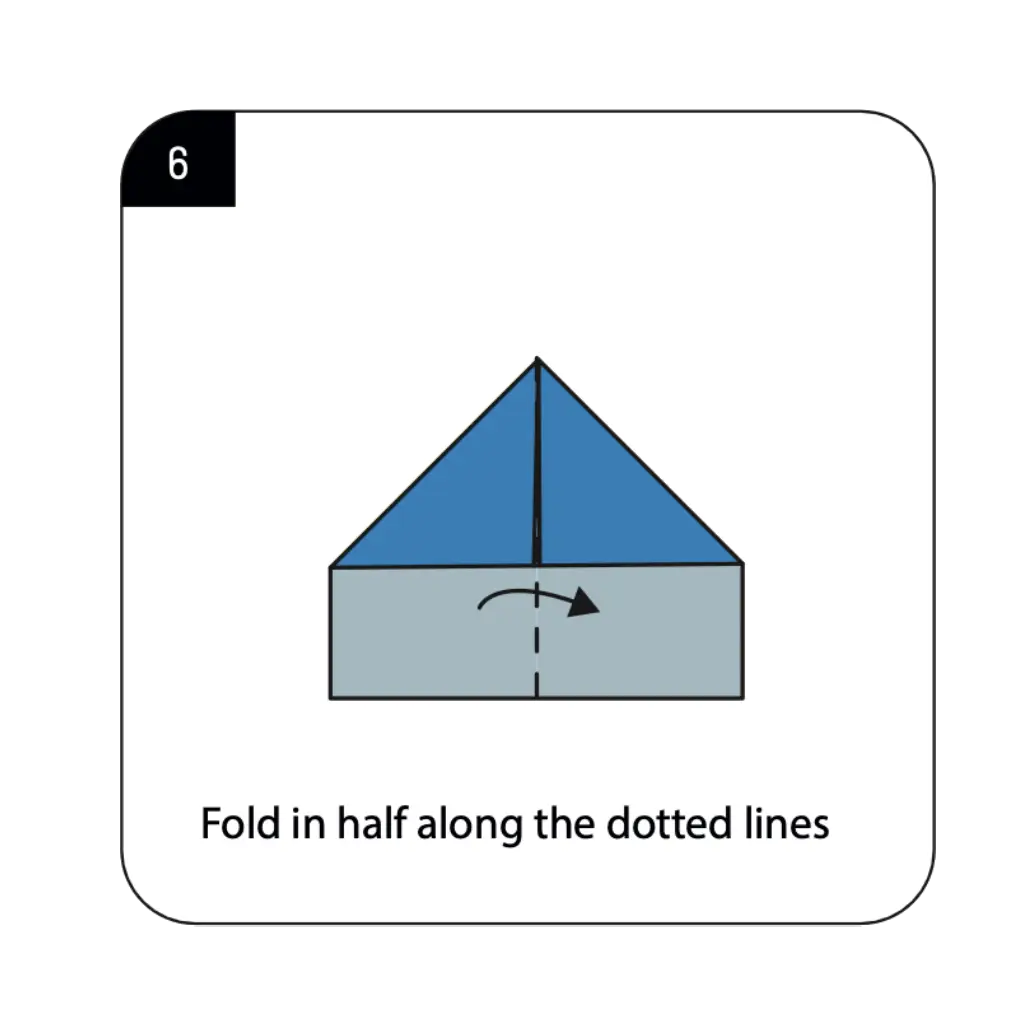
Fold the entire model in half along the center line, reinforcing the original center fold from Step 1. This fold brings together all previous elements and establishes the airplane’s central body structure. The tightness and alignment of this fold directly impact the rigidity and straightness of your paper airplane. Ensure all previous folds are maintained during this step for proper structure and balance in your finished plane. This central fold creates the fuselage of your airplane and prepares the model for the critical wing-forming steps that follow.
Step 7: Create the Wing Structures For Origami Paper Airplane
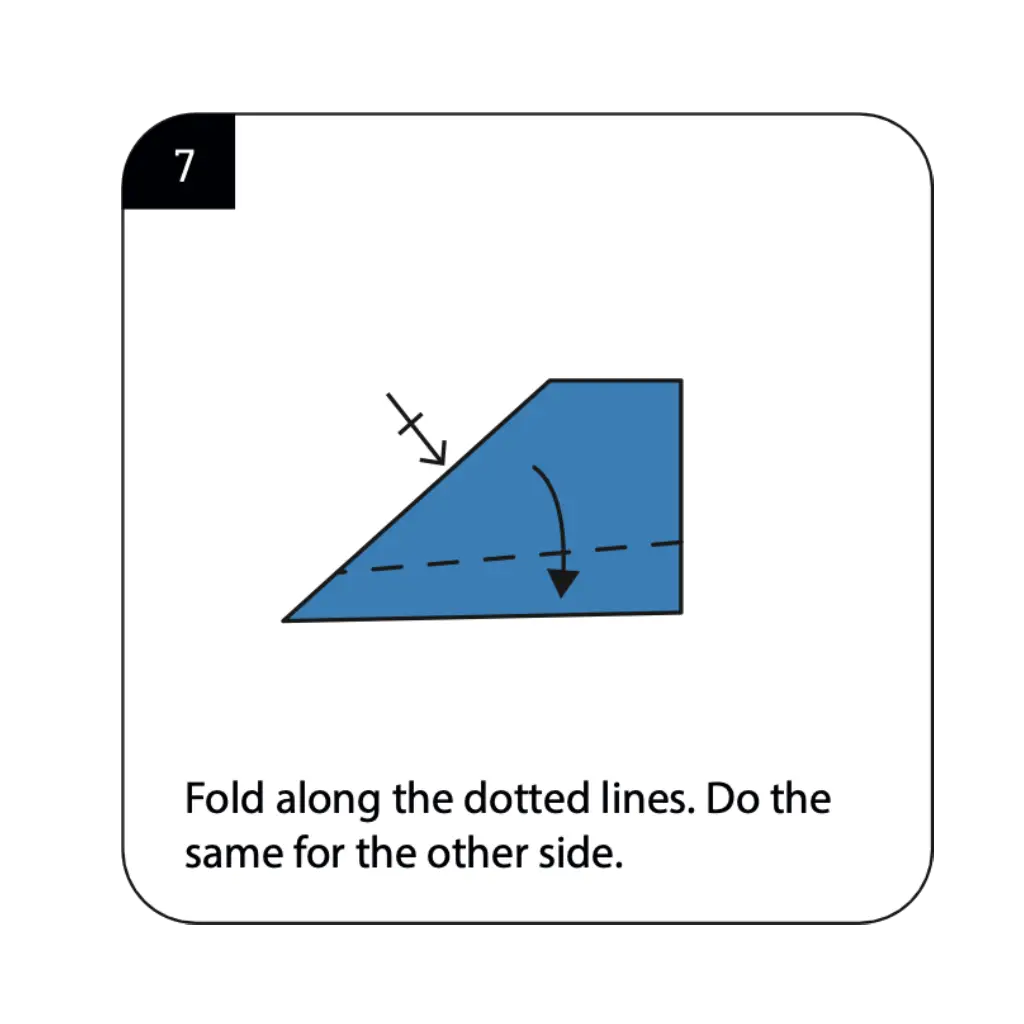
Fold along the dotted lines on one side as shown in the diagram to create the first wing, then repeat the same fold on the opposite side. These wing folds are perhaps the most critical element for successful flight, as they create the aerodynamic surfaces that generate lift. The angle of these wing folds affects your airplane’s flight characteristics—flatter wings for distance, more angled wings for stability. Work carefully to ensure both wings are folded at identical angles for balanced flight that doesn’t veer to one side. These perfectly matched wing folds transform your folded paper from a simple model into a functional flying machine.
Step 8: Complete Your Paper Airplane For Origami Paper Airplane
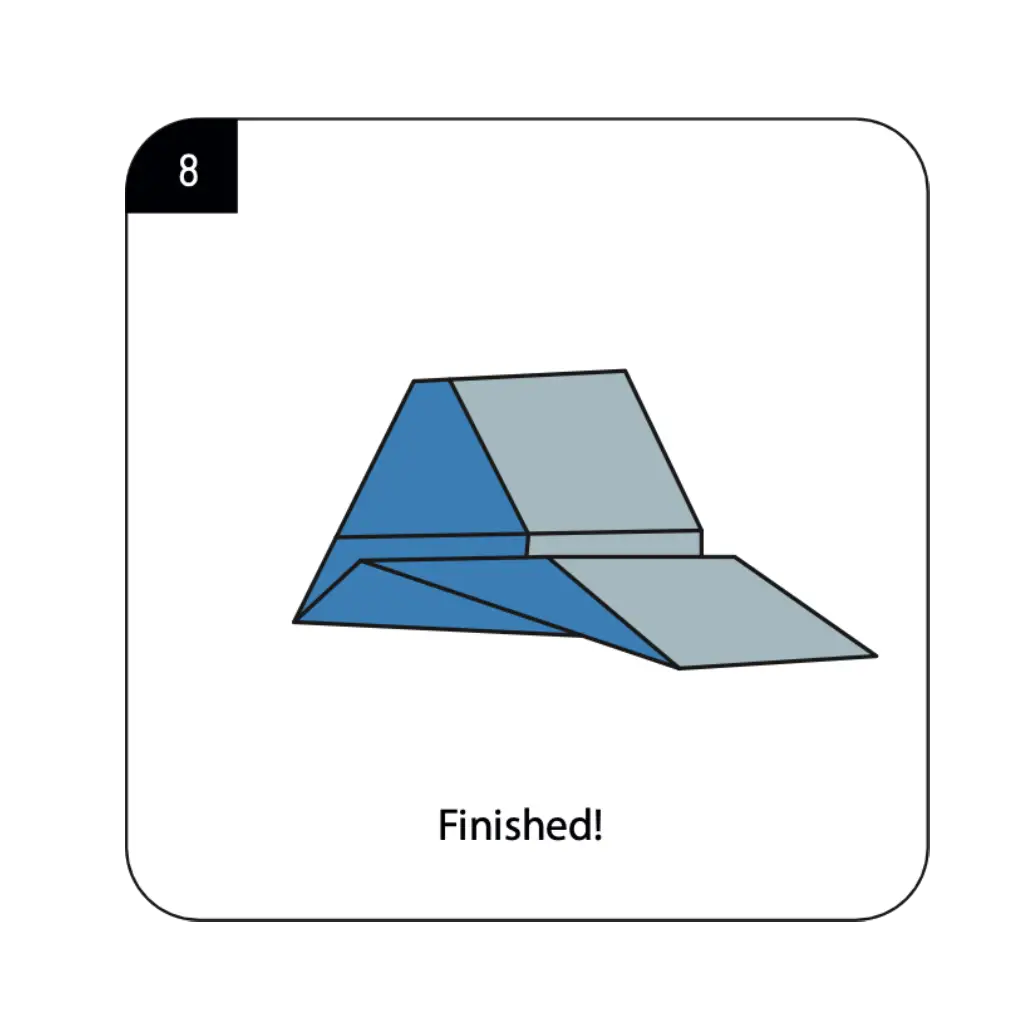
Your origami paper airplane is now complete and ready for flight! Make any final adjustments to ensure wings are even and the nose is tightly folded. The finished airplane features a pointed nose for reduced air resistance, a sturdy central body for stability, and wings positioned at the optimal angle for lift and glide. To launch your plane, hold it gently at the center of the fuselage (the thickest part) and throw with a smooth, forward motion, keeping the nose slightly elevated. Your handcrafted paper airplane will soar through the air, demonstrating how simple folds can create a functional flying model that combines the art of origami paper airplane with basic principles of aerodynamics.
Conclusion
Congratulations on creating your origami paper airplane! This simple yet effective design demonstrates the perfect intersection of art, science, and play that makes paper airplanes a timeless activity enjoyed across generations. From a basic rectangular sheet, you’ve fashioned a flying model that showcases fundamental principles of aerodynamics while providing endless entertainment. The beauty of this origami paper airplane lies not just in its simplicity but in its functionality—each fold serves a purpose in creating a model that truly flies. As you’ve discovered, the precision of your folds directly impacts flight performance, teaching valuable lessons about symmetry, balance, and attention to detail. This basic paper airplane model can serve as a gateway to both more complex origami projects and deeper exploration of flight principles. We hope this tutorial has sparked your interest in paper folding and perhaps inspired you to experiment with modifications to improve distance, speed, or acrobatic capabilities. Remember that practice improves both folding technique and throwing skill—each plane you create will likely fly better than the last as you refine your approach to this classic paper craft.
- “Before starting your paper airplane, learn essential folding techniques in our Origami Basics for Beginnersguide.”
- “Looking for more flying origami models? Explore our Origami Animals Collection featuring birds and flying creatures.”
- “Discover more paper airplanes and flying designs in our Creative Origami Projects section.”
- “Find beautiful ways to display your paper airplanes with our Decorative Origami Ideas for home and classroom.”
- “Create a complete aviation-themed display by adding Origami Flowers as airport decorations for your paper planes.”
- “Learn advanced techniques for creating multiple matching planes using our Modular Origami Guide for impressive fleet displays.”
