
Introduction
Origami, the ancient Japanese art of paper folding, offers endless possibilities for creating stunning representations of the natural world. Among the most majestic and impressive origami bird designs is the peacock—a bird renowned for its spectacular display of colorful tail feathers. This origami peacock tutorial transforms a simple rectangular sheet of paper into an elegant bird with a distinctive fan-shaped tail that captures the essence of a peacock’s magnificent display. Perfect for beginners with some folding experience, this model achieves an impressive resemblance to the real bird while using straightforward techniques that anyone can master with a bit of patience. Unlike more complex bird designs, this peacock model focuses on creating the characteristic fan of tail feathers that makes these birds so recognizable. Whether you’re fascinated by peacocks’ beauty, decorating for special occasions, or simply expanding your origami repertoire, this step-by-step guide will walk you through creating your own paper peacock in just 10 manageable steps. The finished model makes a stunning decoration for home displays, party settings, or as a thoughtful handmade gift that showcases both natural beauty and paper folding craftsmanship.
Step-by-Step Instructions
Step 1: Create the Initial Fold
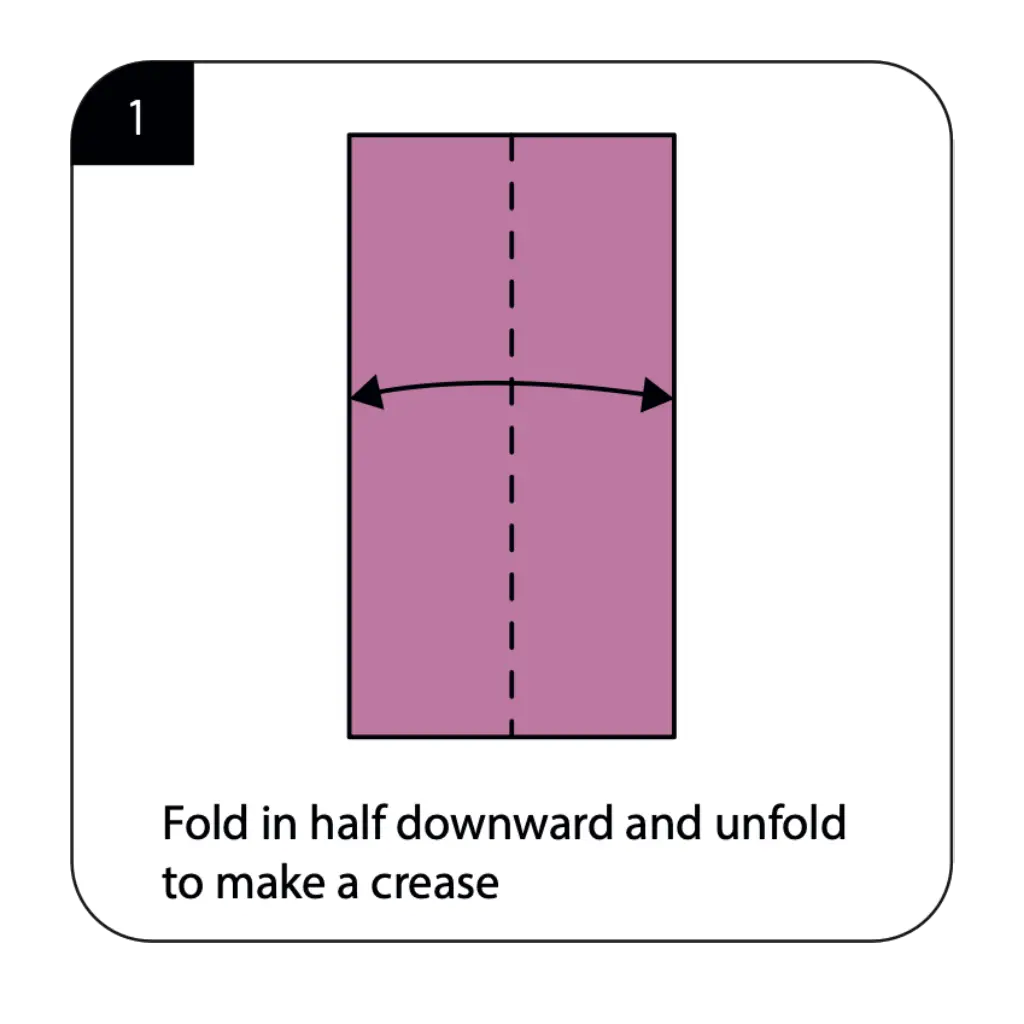
Begin with a rectangular sheet of paper, preferably purple or blue for a realistic peacock appearance. Fold the paper in half downward and unfold to create a horizontal crease line down the center. This initial fold establishes an important reference line that will guide subsequent folds in your origami peacock. The precision of this first crease is crucial, as it affects the symmetry and balance of your finished model. Make sure the edges align perfectly and press firmly to create a sharp, clean crease that will serve as the backbone for your peacock structure.
Step 2: Form the Initial Head Structure
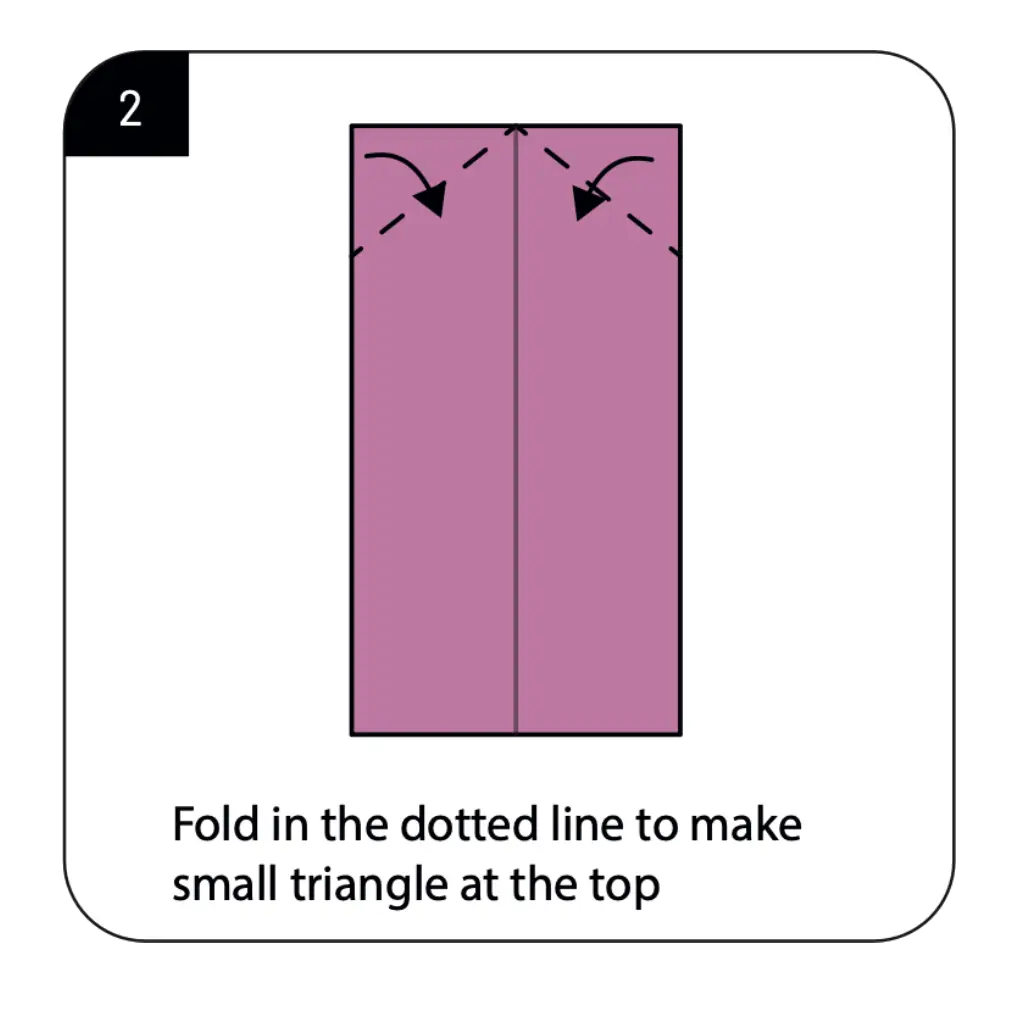
Fold in the top edges diagonally along the dotted lines to create a small triangle at the top of the rectangle. This important fold begins defining the head section of your origami peacock and establishes the narrower upper portion that contrasts with the wider tail area. The accuracy of these diagonal folds affects the proportions and appearance of your finished peacock. Ensure both diagonal folds are symmetrical and meet precisely at the center crease for a balanced, professional-looking origami model that properly represents the peacock’s head shape.
Step 3: Create the Second Head Fold
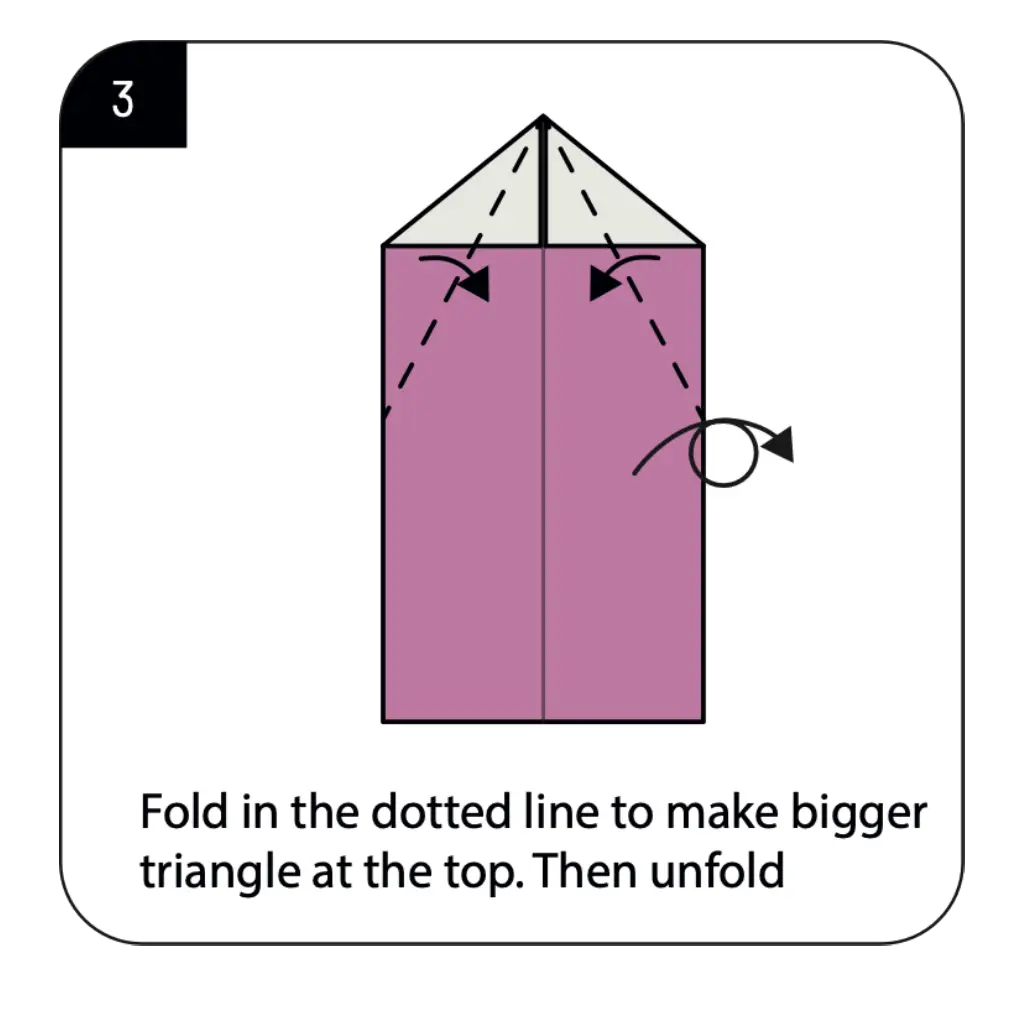
Fold in the top edges along the dotted lines to create a larger triangle at the top, then carefully unfold. This fold establishes additional reference lines for future steps while beginning to define the peacock’s head and neck shape. The precision of these diagonal folds directly impacts the final appearance of your origami peacock’s distinctive silhouette. This step creates important crease lines that will guide later structural folds, particularly for the peacock’s head region, which requires well-defined folds for a realistic appearance.
Step 4: Form the Inside Reverse Fold
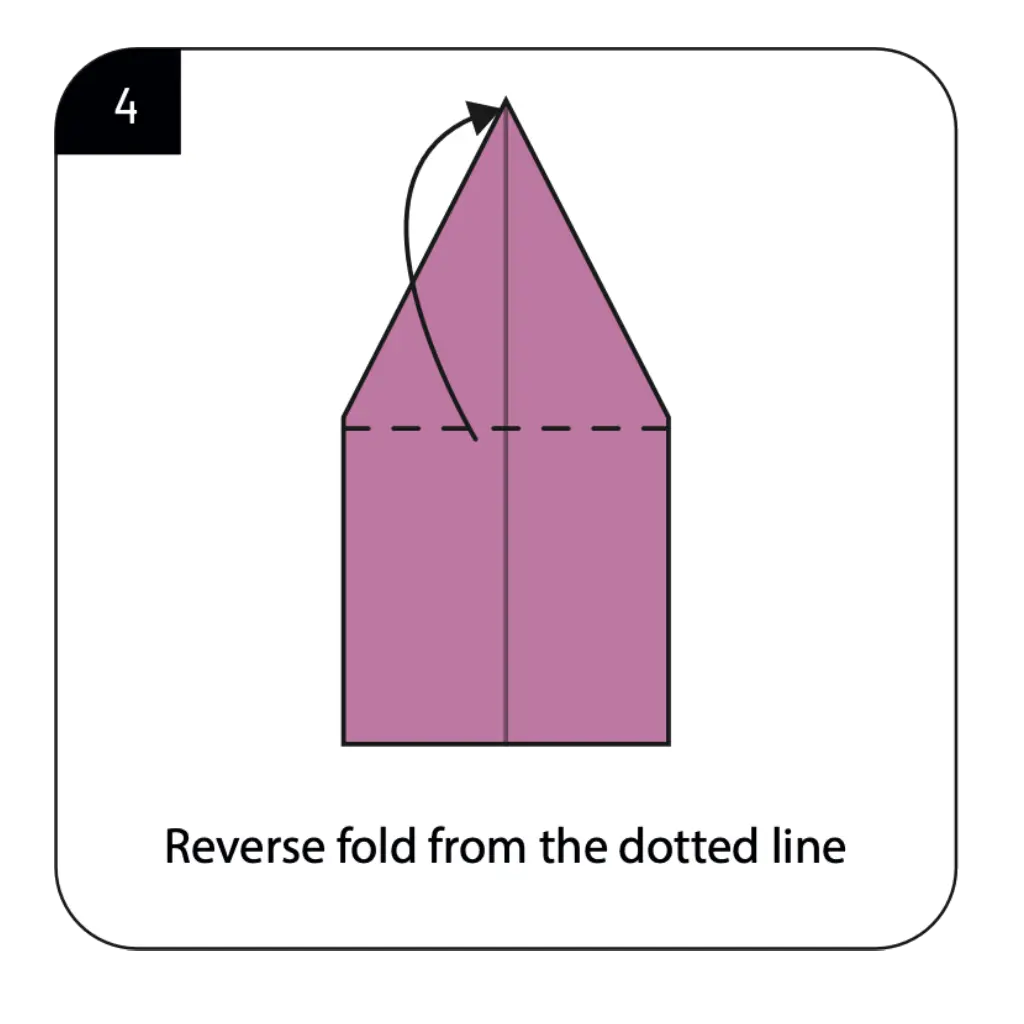
Perform a reverse fold along the dotted line as shown, tucking the paper inside along the creases created in the previous step. This technique creates dimension and begins defining the three-dimensional shape of your peacock’s head. The reverse fold requires carefully opening the top section and folding it inward along existing crease lines. This more advanced folding technique transforms the flat top triangle into a three-dimensional head structure that gives your origami peacock its characteristic profile.
Step 5: Create the Basic Body Structure
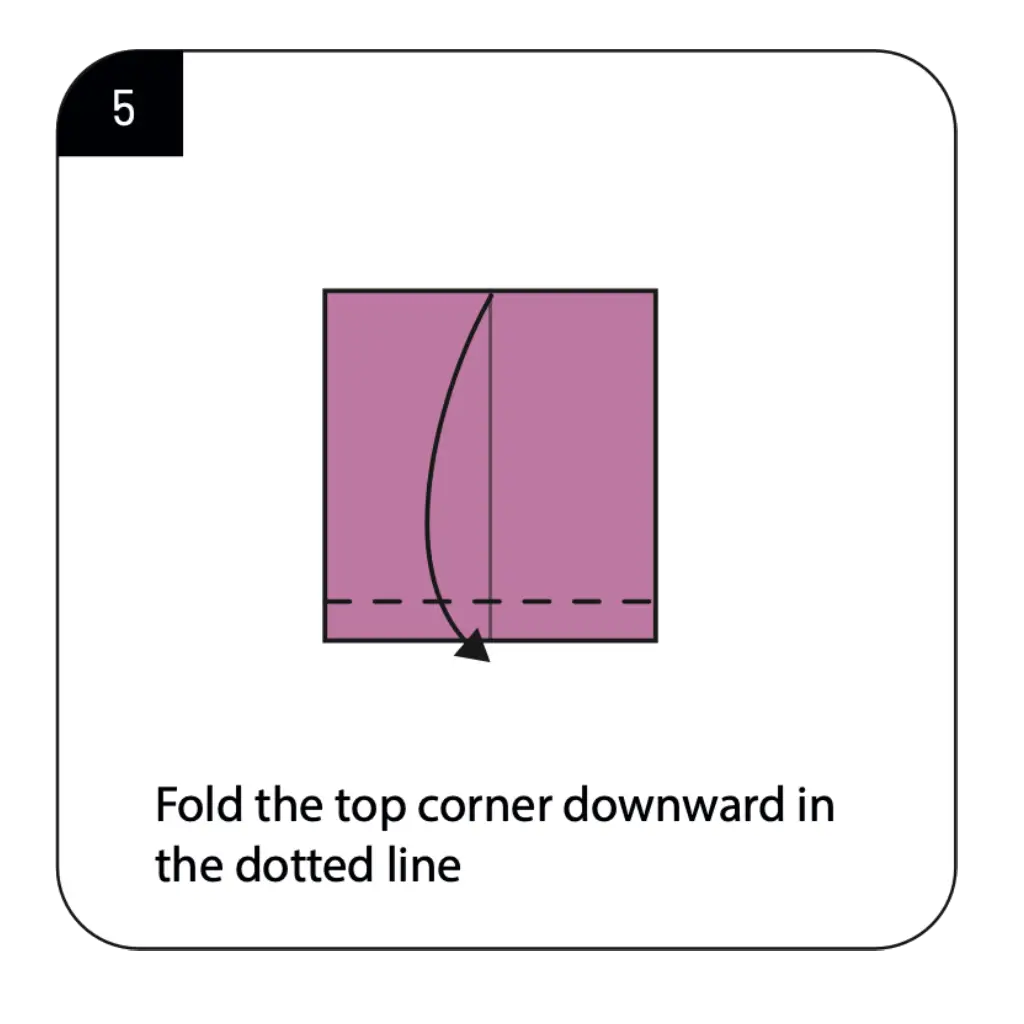
Fold the top corner downward along the dotted line to establish the basic body structure of your peacock. This fold helps define the proportions between the head and body sections of your paper bird. The angle and position of this fold significantly impact the overall silhouette of your origami peacock. This step begins transforming the geometric paper form into a more recognizable bird shape by establishing the downward slope from head to body that characterizes a peacock’s posture.
Step 6: Form the Tail Foundation
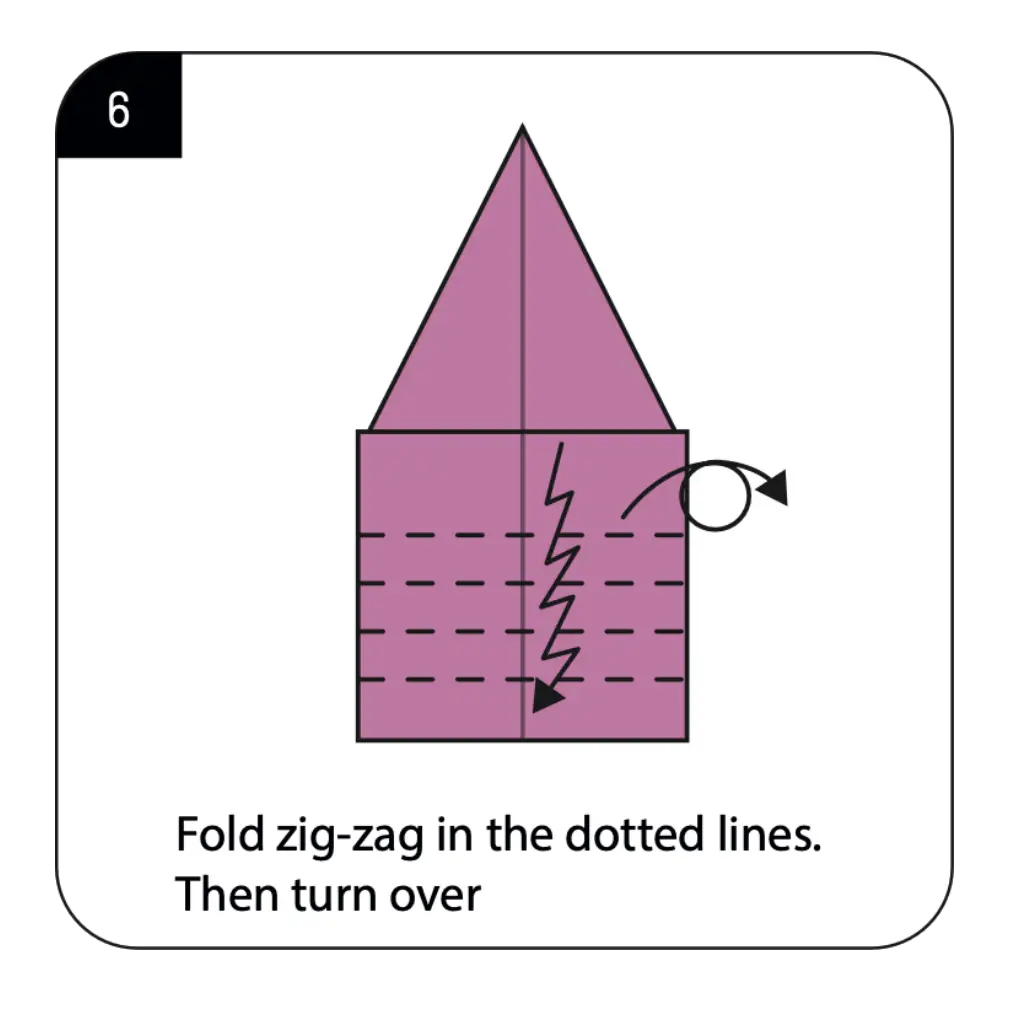
Fold zig-zag along the dotted lines as shown, then turn the model over. These precise accordion-style folds create the foundation for your peacock’s spectacular fan-shaped tail display. The accuracy and consistency of these parallel folds directly affect how impressive your finished peacock’s tail will appear. Work methodically from top to bottom, making sure each fold is crisp and properly aligned. These zig-zag folds introduce the structural pleating necessary for creating the peacock’s distinctive tail feather arrangement.
Step 7: Create the Head Detail

Perform another reverse fold along the dotted line as indicated to refine the head shape of your origami peacock. This detailed fold adds definition to the head and neck region, enhancing the bird-like appearance of your model. The precision of this reverse fold affects how recognizable the head portion of your peacock will be. This step creates the distinctive forward-facing head position that contrasts with the upright tail display, capturing the characteristic posture of a real peacock.
Step 8: Form Additional Dimension
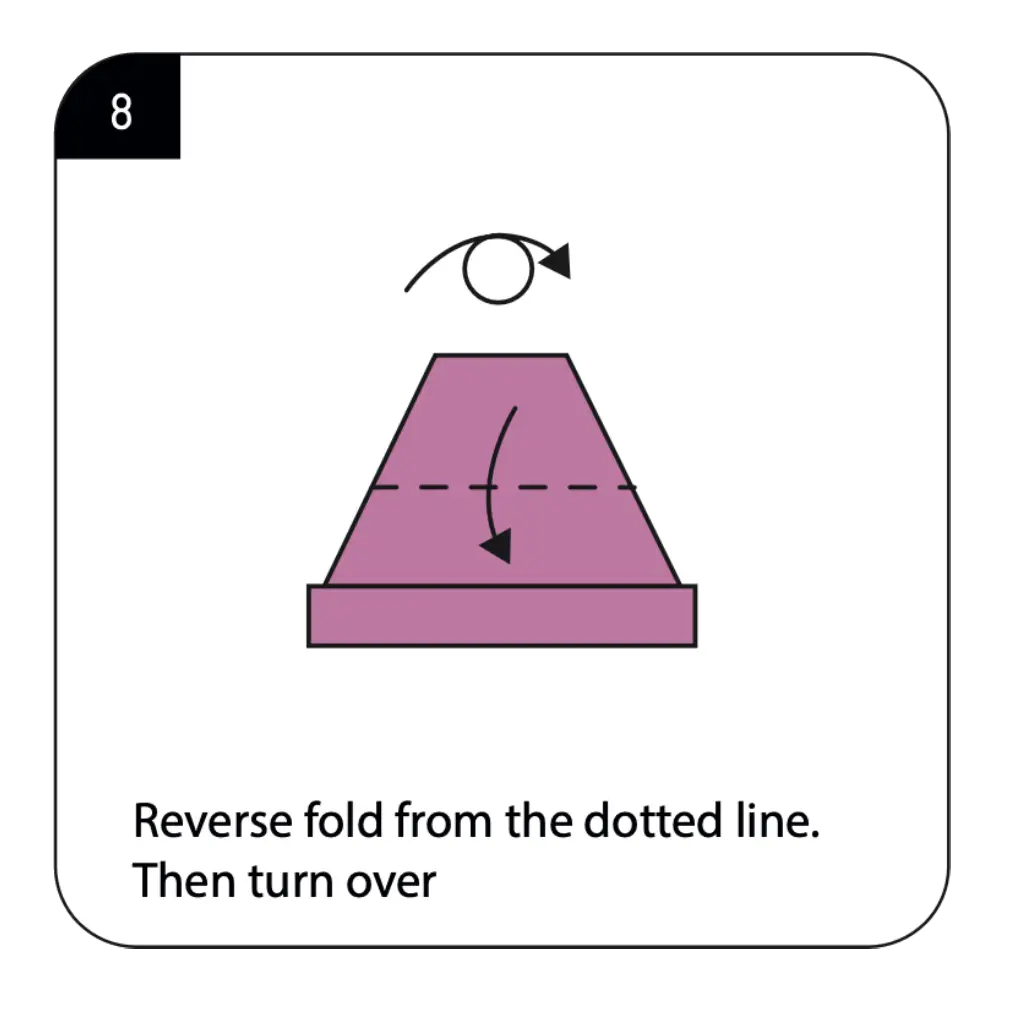
Reverse fold along the dotted line as shown, then turn the model over to prepare for the next steps. This fold adds further definition and dimension to your origami peacock, particularly in the body region. The careful execution of this fold helps establish the three-dimensional quality that makes your paper bird more lifelike. This reverse fold creates important structural changes that prepare your model for the final shaping of the impressive tail display that defines the peacock.
Step 9: Define the Body and Tail Connection
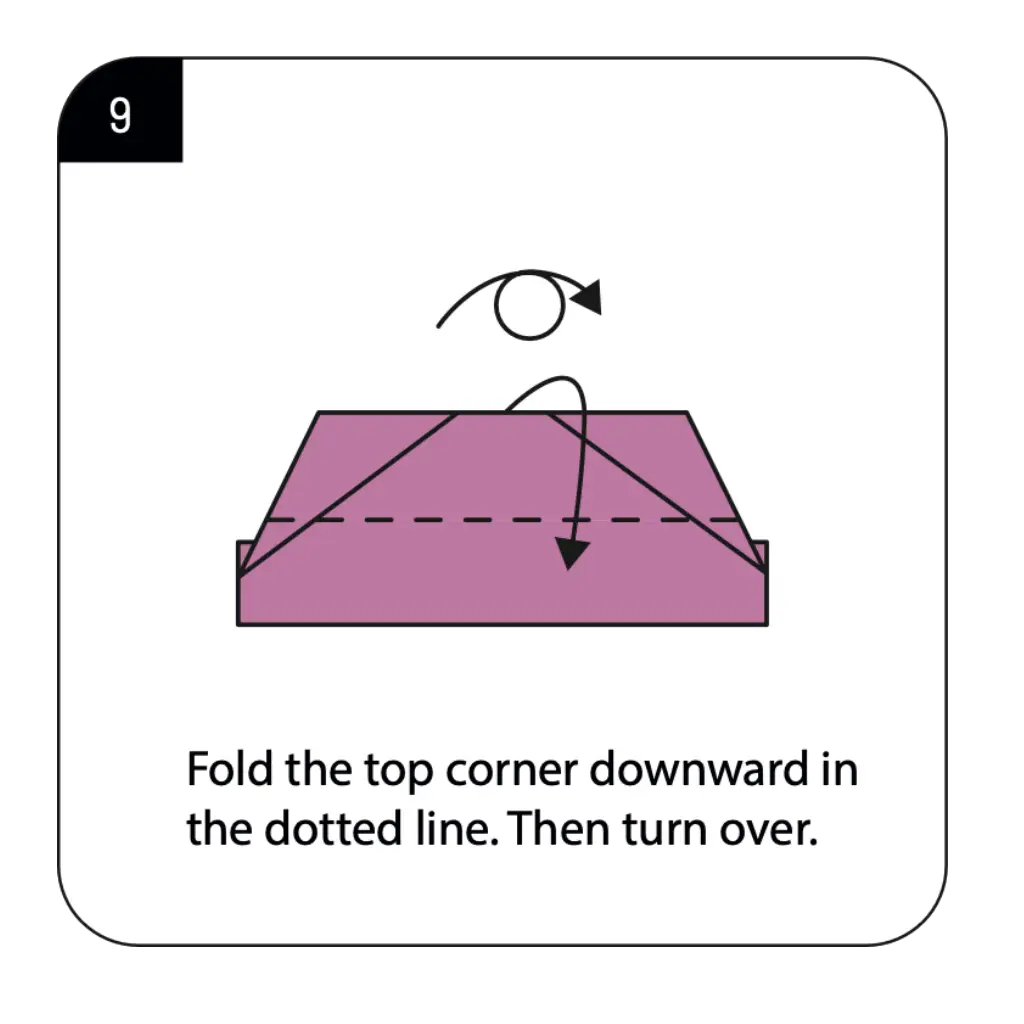
Fold the top corner downward along the dotted line and turn the model over again. This strategic fold establishes the transition between the body and tail sections of your origami peacock. The position and angle of this fold affect the overall proportions and stance of your paper bird. This step continues refining the peacock’s distinctive silhouette while preparing the model for the final tail-spreading step that will complete your origami creation.
Step 10: Complete Your Origami Peacock

Fold the model in half along the center dotted line, then carefully spread the wings outward as shown in the diagram to create the peacock’s magnificent fan tail display. This final step dramatically transforms your model into a recognizable peacock with its characteristic open tail feathers. Take your time with this spreading motion, working gently to avoid tearing the paper while creating the impressive radial pattern. Your origami peacock is now complete, showcasing the bird’s most distinctive feature—its spectacular fan-shaped array of tail feathers displayed in full glory!
Step 11: Create the Spectacular Fan Tail
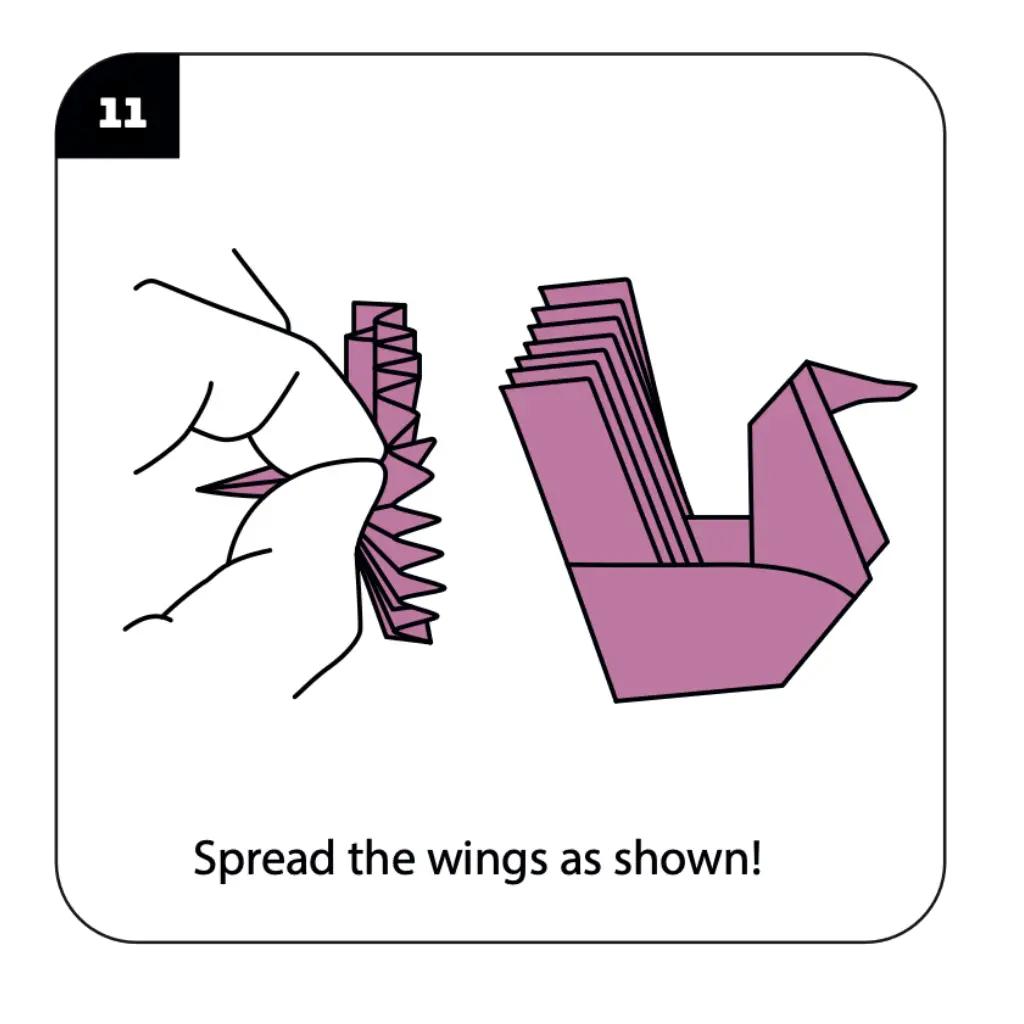
Gently spread the wings outward as shown in the diagram to create the peacock’s magnificent fan-shaped tail display. This final step dramatically transforms your model into a recognizable peacock with its characteristic open tail feathers. Work slowly and carefully, spreading each pleated section evenly to form the radial pattern that mimics a real peacock’s tail display. Take care not to tear the paper as you open the fan structure. Your origami peacock is now complete, showcasing the bird’s most spectacular feature—its impressive array of tail feathers arranged in a beautiful fan shape!
Conclusion
Congratulations on creating your origami peacock! This elegant paper bird captures the most distinctive characteristic of real peacocks—their magnificent fan-shaped tail display—through thoughtful folding techniques and structural design. From a simple rectangular sheet, you’ve crafted a three-dimensional sculpture that represents one of nature’s most spectacular birds in an artistic paper form. The origami peacock showcases how strategic folds can translate complex natural features into an elegant geometric interpretation, combining mathematical precision with artistic expression. Your completed model makes a stunning decoration for special occasions, a beautiful addition to home displays, or a thoughtful handmade gift that celebrates both natural beauty and paper crafting skill. The techniques you’ve learned—including reverse folds, accordion pleating, and three-dimensional shaping—build valuable skills that transfer to many other origami designs. We hope this tutorial has sparked your interest in both paper folding and bird-inspired creations. Remember that practice enhances precision—each peacock you fold will be more refined than the last, allowing you to perfect this impressive paper representation of one of nature’s most magnificent birds.
- “Before starting your origami peacock, learn essential paper folding techniques in our Origami Basics Guide for beginners.”
- “Explore more bird designs in our collection of Origami Animals, including cranes, swans, and parrots.”
- “For more decorative paper designs, check our Creative Origami Projects featuring unique and artistic models.”
- “Looking for display ideas? Browse our Decorative Origami Collection for beautiful ways to showcase your paper creations.”
- “Combine your peacock with origami flowers from our Origami Flowers Gallery to create stunning nature-themed displays.”
- “Create multiple peacocks in different colors using techniques from our Modular Origami Collection for impressive group displays.”
