
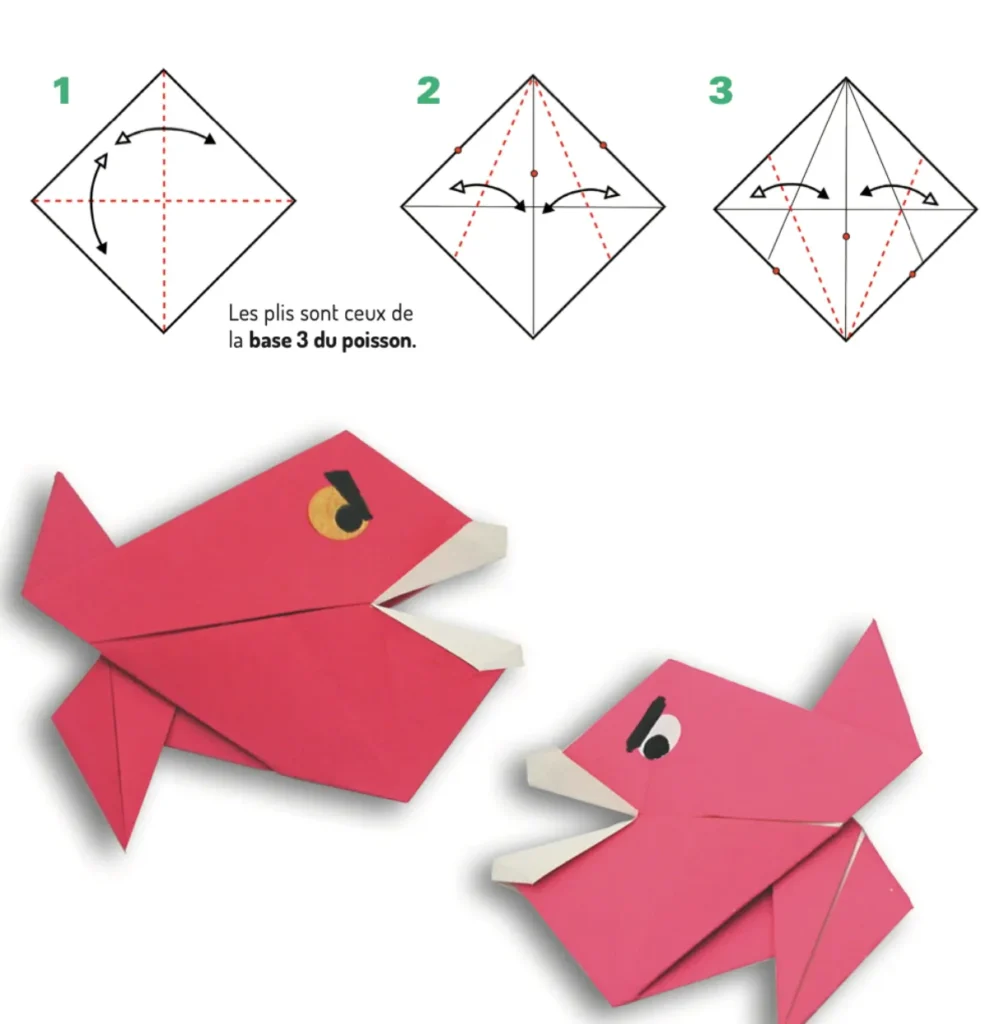
Introduction:
Welcome to the thrilling world of origami piranha fish folding! This step-by-step tutorial will guide you through creating one of the most distinctive predators of the Amazon River using nothing but a square piece of paper. Origami piranha are popular projects for paper folders of all skill levels, combining straightforward techniques with impressive results. The distinctive shape of the piranha—with its triangular head, powerful jaws, and compact body—translates beautifully into the geometric art of paper folding. Whether you’re a beginner looking to expand your origami skills or an experienced folder seeking to add an aquatic predator to your collection, this tutorial breaks down each fold with clear instructions and visuals. Grab your favorite origami paper, preferably in vibrant red or pink to capture the piranha’s aggressive nature, and let’s dive into creating this fascinating paper fish!
Detailed Step Descriptions:
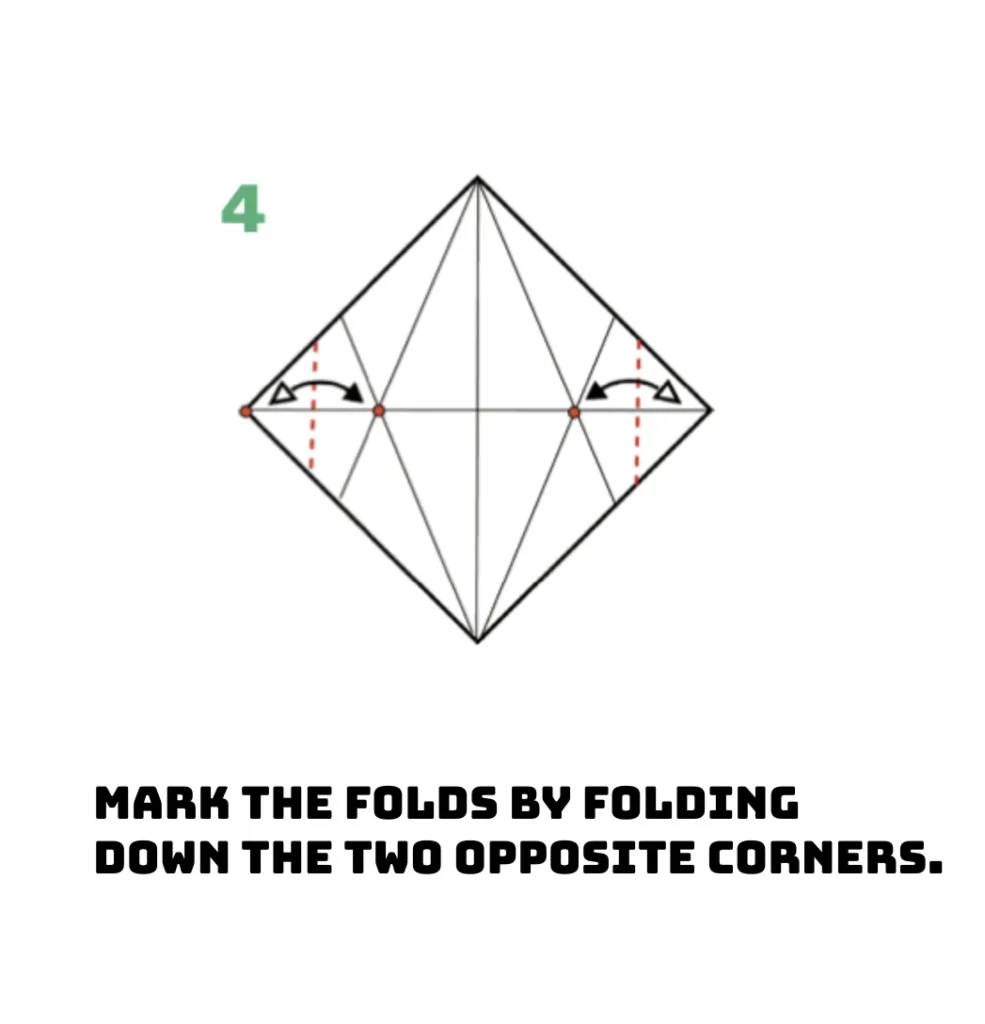
STEP 4: MARKING INITIAL CREASES
Begin your origami piranha by marking the fold lines by folding down the two opposite corners. These preliminary creases establish the fundamental structure for your paper piranha’s distinctive shape. Precise folding at this stage ensures your finished origami fish will have the sharp, angular features piranhas are known for. Use your fingernail to create clean, crisp creases that will serve as guidelines for subsequent folding steps.
STEP 5: CREATING DEFINITIVE FOLD MARKS
Carefully mark the fold lines as shown in the detailed circular diagrams for precision. These strategic creases form the foundation for your origami piranha’s characteristic triangular head shape. Japanese origami masters emphasize the importance of these precise reference points when creating paper fish. Take your time with this step, as these marking folds directly influence your piranha’s final proportions and appearance.

STEP 6: FOLDING THE POINTED TIP
Fold down the point as indicated to begin forming your origami piranha’s distinctive jaw structure. Then repeat steps 2 and 3 on the opposite corner to maintain symmetry in your paper fish design. The sharp angles created here replicate the aggressive profile that makes piranha fish instantly recognizable. Traditional origami fish designs often feature this technique to create predatory features in aquatic paper models.

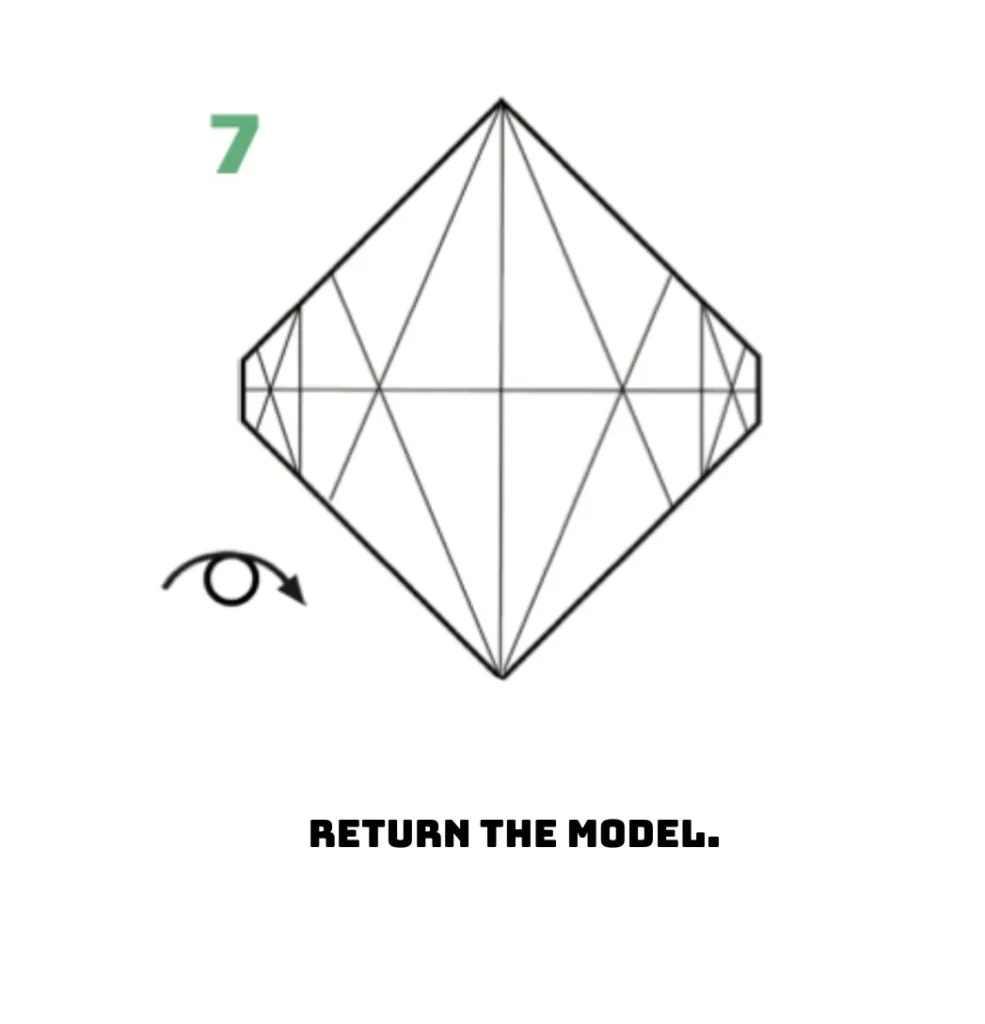
STEP 7: FLIPPING THE MODEL
Turn the entire origami model over to prepare for the next sequence of folds. This reorientation is crucial for developing the three-dimensional aspects of your paper piranha fish. Many popular origami fish tutorials include this flipping step to access different folding planes. Ensure all previous creases remain sharp and well-defined as you carefully flip the model.
STEP 8: SHAPING WITH VALLEY AND MOUNTAIN FOLDS
Form the piranha’s body by implementing precise valley and mountain folds along the marked lines. These contrasting fold types create the dimensional structure that gives your origami piranha its lifelike shape. The dotted pink lines indicate critical folding points that define your paper fish’s characteristic profile. Advanced origami techniques like these transform flat paper into the recognizable three-dimensional fish form.

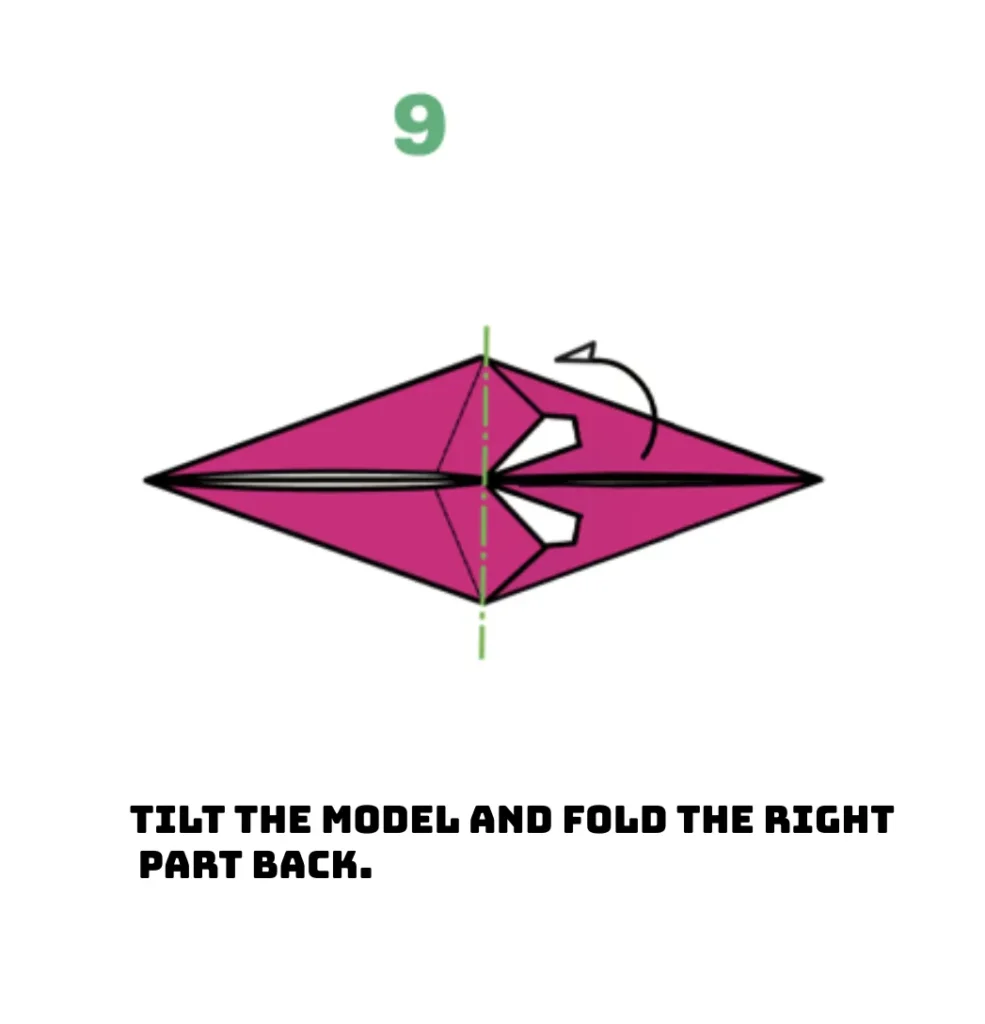
STEP 9: ROTATING AND FOLDING BACK
Rotate the model 90 degrees and fold the right portion toward the back as shown. This pivotal fold creates the asymmetrical swimming position characteristic of hunting piranha fish. Japanese origami traditions use this technique to introduce dynamic movement into paper animal designs. Apply firm pressure along the fold line to create a sharp crease that maintains the piranha’s aggressive posture.
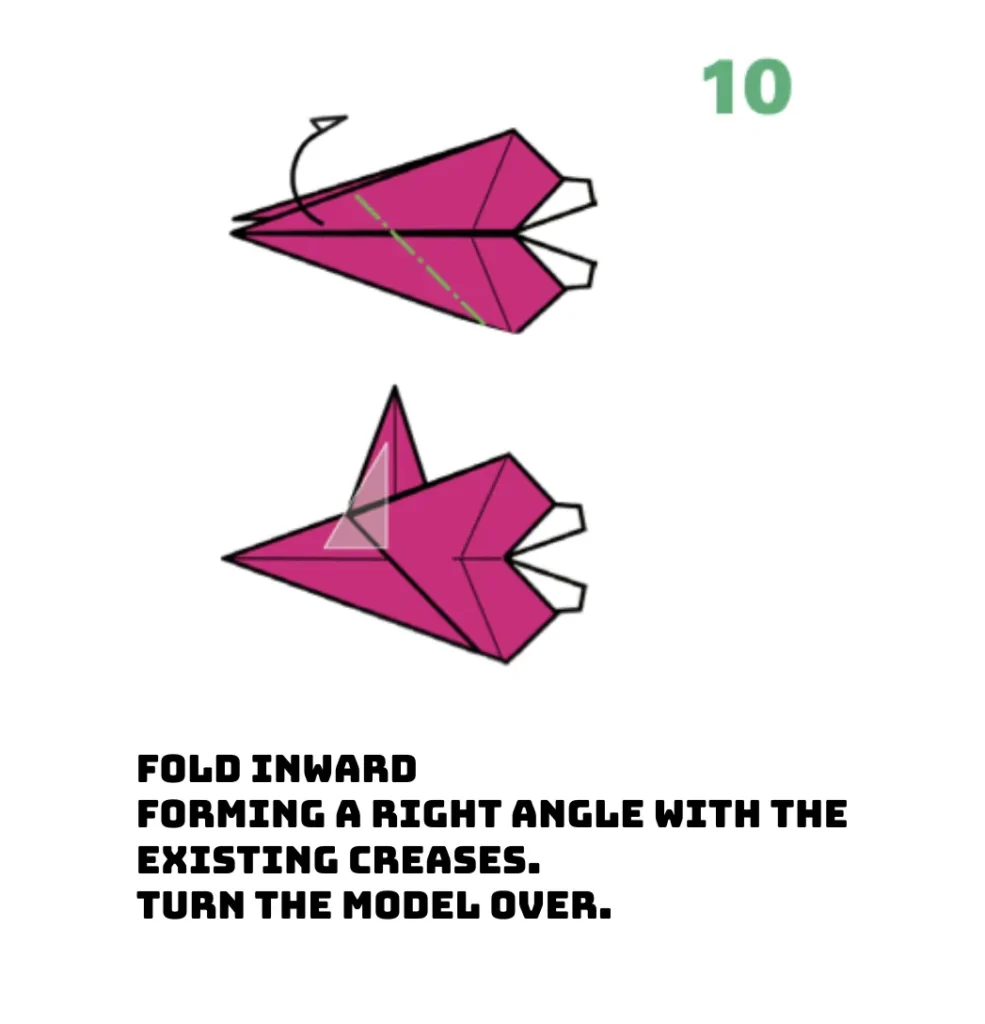
STEP 10: CREATING RIGHT ANGLES
Fold inward to create a perfect right angle that forms the piranha’s distinctive tail structure. This inside reverse fold requires precision to maintain the geometric integrity of your origami fish design. After completing this critical fold, turn the entire model over to prepare for the final detailing steps. Professional origami artists consider this angle formation essential for creating realistic fish tail movement.
STEP 11: FORMING THE TAIL SECTION
Fold the second part of the tail using another precise inside reverse fold technique. This strategic crease defines your origami piranha’s powerful tail fin, essential for its predatory swimming motion. The effectiveness of this fold directly impacts how realistic your finished paper fish will appear. Take care to align the fold precisely with existing creases to maintain the overall harmony of your design.

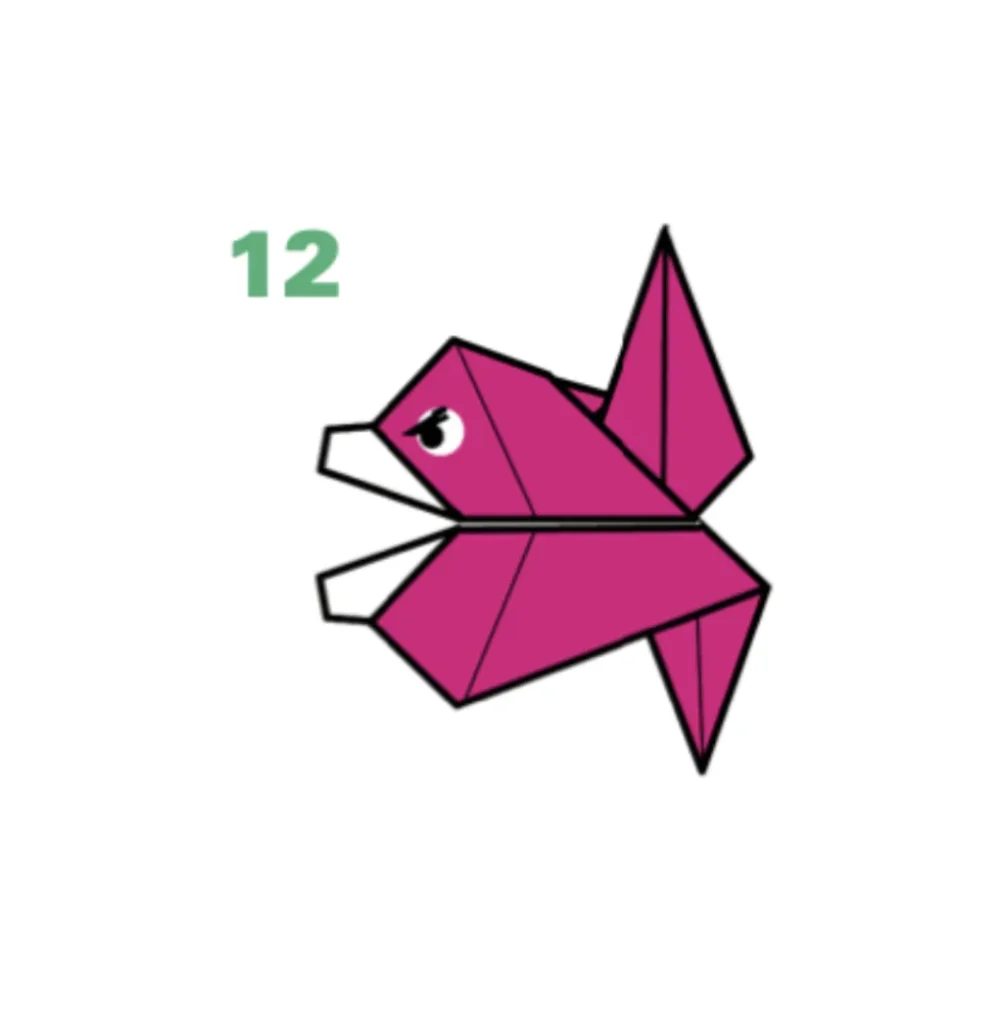
STEP 12: COMPLETING YOUR ORIGAMI PIRANHA
Finalize your origami piranha by adding the characteristic eye and refining all folds. The completed model showcases the fierce features that make piranhas one of the most recognizable predatory fish. Your finished origami creation captures the essence of this Amazonian hunter in elegant folded paper form. Display your paper piranha alongside other origami aquatic creatures to create an impressive underwater collection.
Conclusion:
Congratulations on completing your origami piranha fish! This fierce paper predator showcases both your folding skills and the elegant simplicity of Japanese paper art. The combination of precise creases, strategic folds, and careful shaping has transformed a simple square into a recognizable Amazon River hunter with distinctive jaws and a powerful silhouette. Your origami piranha makes an excellent addition to underwater-themed displays, classroom educational projects, or as a standalone conversation piece. The techniques you’ve mastered—mountain and valley folds, inside reverse folds, and geometric shaping—provide a strong foundation for exploring more complex origami fish designs. We hope this tutorial has enhanced your paper folding abilities and inspired you to continue creating origami aquatic creatures. Share your fierce paper piranha creations with our community and dive deeper into the fascinating world of origami!
- Discover our complete origami fish collection → Explore more predatory and tropical origami fish designs, from sharks to angelfish, with step-by-step instructions.
- Master essential origami folding techniques → Learn the fundamental folds used in this piranha tutorial, including inside reverse folds and valley/mountain combinations.
- Best paper for origami predator fish → Find out which paper types and colors create the most realistic and impressive origami piranha fish.
- Create an Amazonian origami ecosystem → Combine your origami piranha with other Amazon wildlife models to create a complete rainforest river scene.
- Advanced origami piranha variations → Ready for a challenge? Discover complex piranha models with more realistic features and dynamic poses.
