
Introduction: Celebrate Halloween with this adorable origami pumpkin that’s perfect for seasonal decorating! This beginner-friendly project transforms a single square of paper into a charming jack-o’-lantern complete with a spooky face. Whether you’re crafting with kids or decorating for a Halloween party, this paper pumpkin adds festive fun to any space. Follow these eleven easy steps to create your own paper pumpkin masterpiece.
Step-by-Step Origami Pumpkin Instructions:
Step 1: Begin with Diamond Base
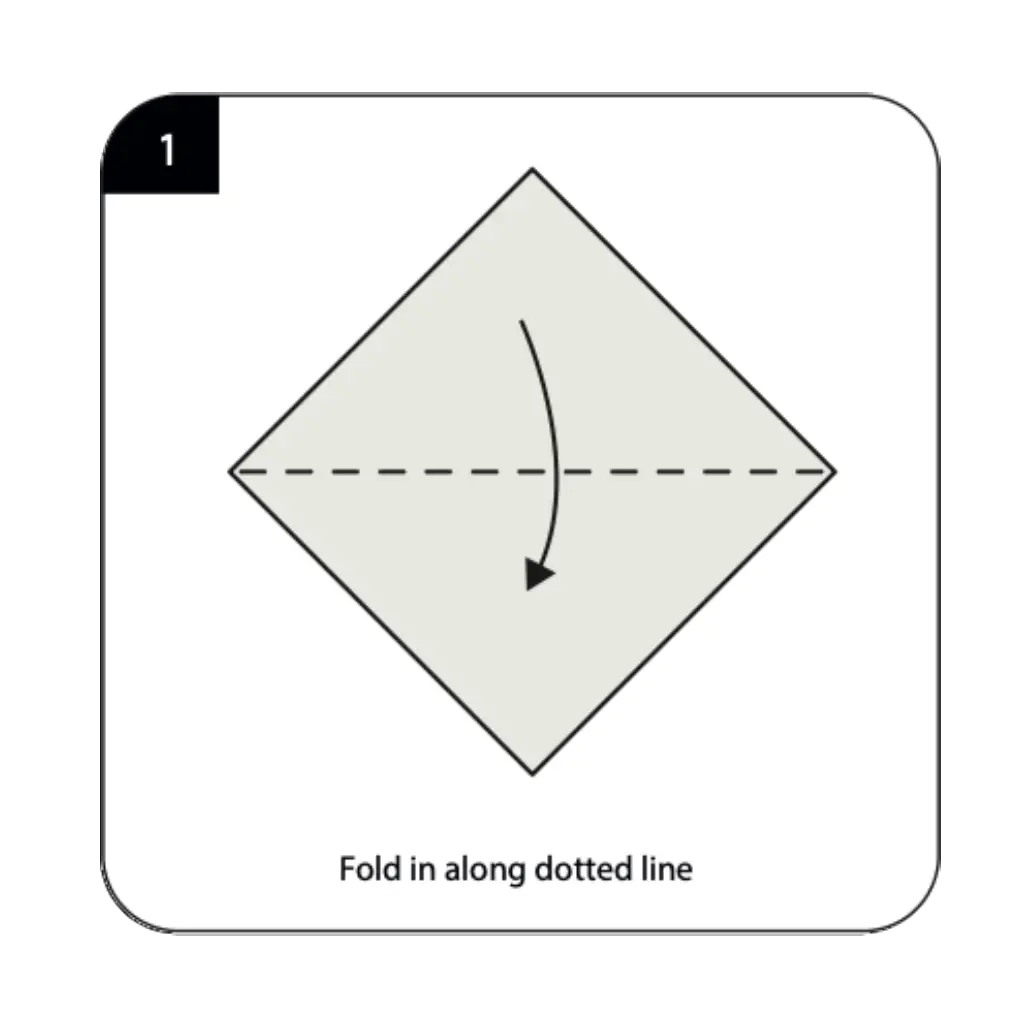
Start with a square sheet of Origami Pumpkin paper placed diagonally with the white side facing up, creating a diamond shape. Fold along the horizontal dotted line, bringing the bottom point up toward the top to begin your pumpkin’s foundation. This initial fold establishes the central guideline that will help maintain symmetry throughout your project. The diamond orientation is a classic starting position in origami basics that works perfectly for rounded shapes.
Step 2: Create Triangle Foundation For Origami Pumpkin
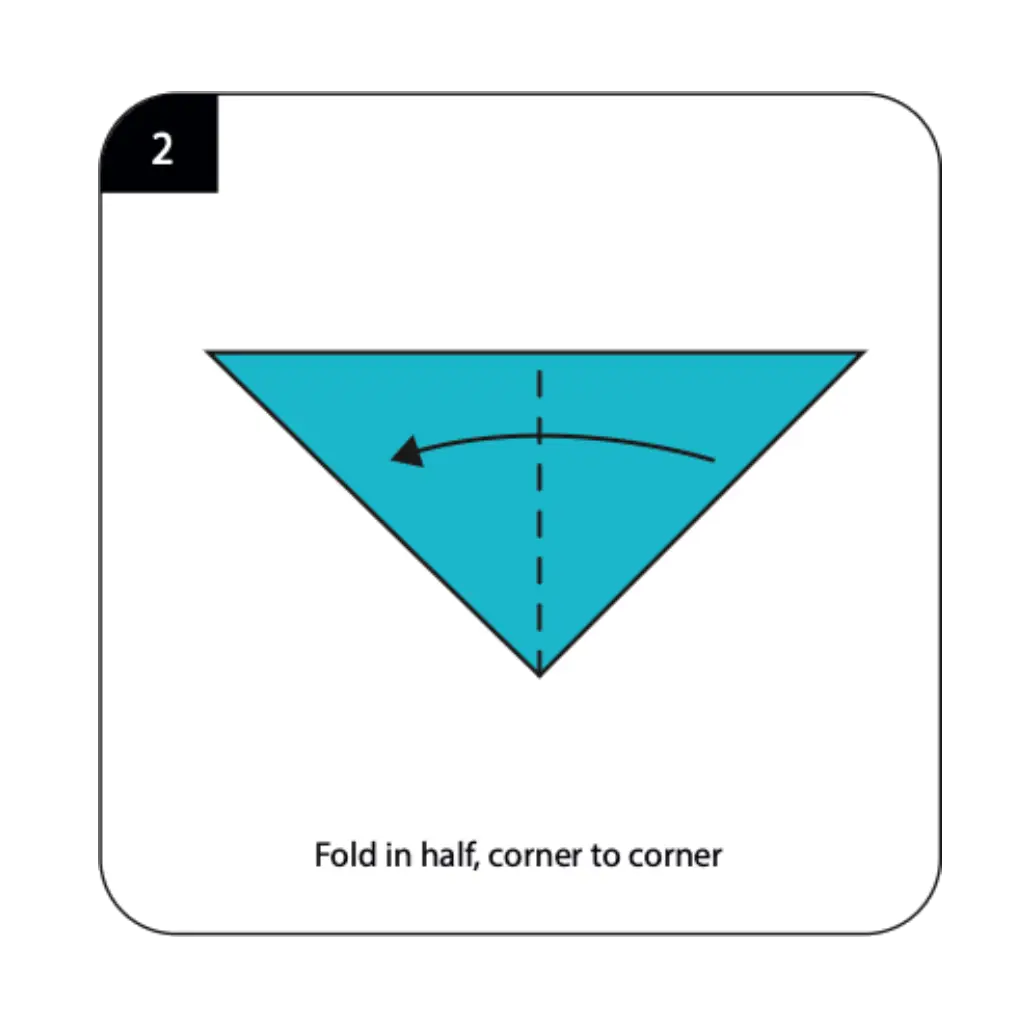
Fold your diamond in half from corner to corner, transforming it into a triangle with the colored side now visible. This fold creates the basic triangular shape that will evolve into your three-dimensional pumpkin. Ensure the edges align perfectly for a symmetrical result that translates into a balanced pumpkin design. The precision of this foundational fold affects the overall appearance of your finished Halloween decoration.
Step 3: Form the Pocket Structure

Open up the pocket created by your previous folds and fold it along the dotted line to create a flattened square shape. This squash fold technique adds layers and dimension to your developing pumpkin structure. The pocket-opening method is crucial for creating the rounded form that distinguishes pumpkins from flat designs. This dimensional folding is commonly used in intermediate creative origami projects.
Step 4: Square the Base For Origami Pumpkin
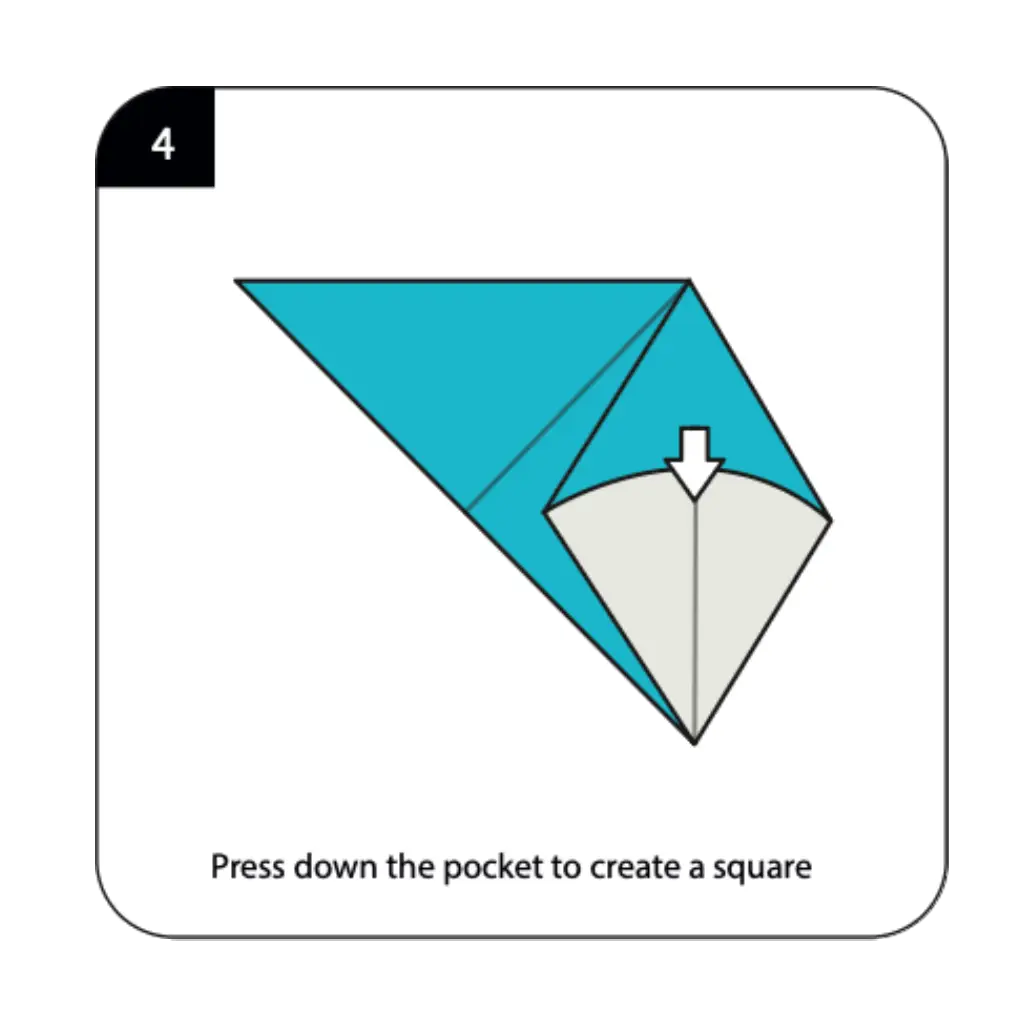
Press down the pocket firmly to create a stable square base, which forms the foundation for your pumpkin’s body. This pressing action locks the layers in place and creates the flat bottom your pumpkin needs to stand properly. The square base technique provides structural integrity while maintaining the flexibility needed for shaping. Ensure all corners are sharp and well-defined for the best results in your origami pumpkin.
Step 5: Flip and Continue For Origami Pumpkin
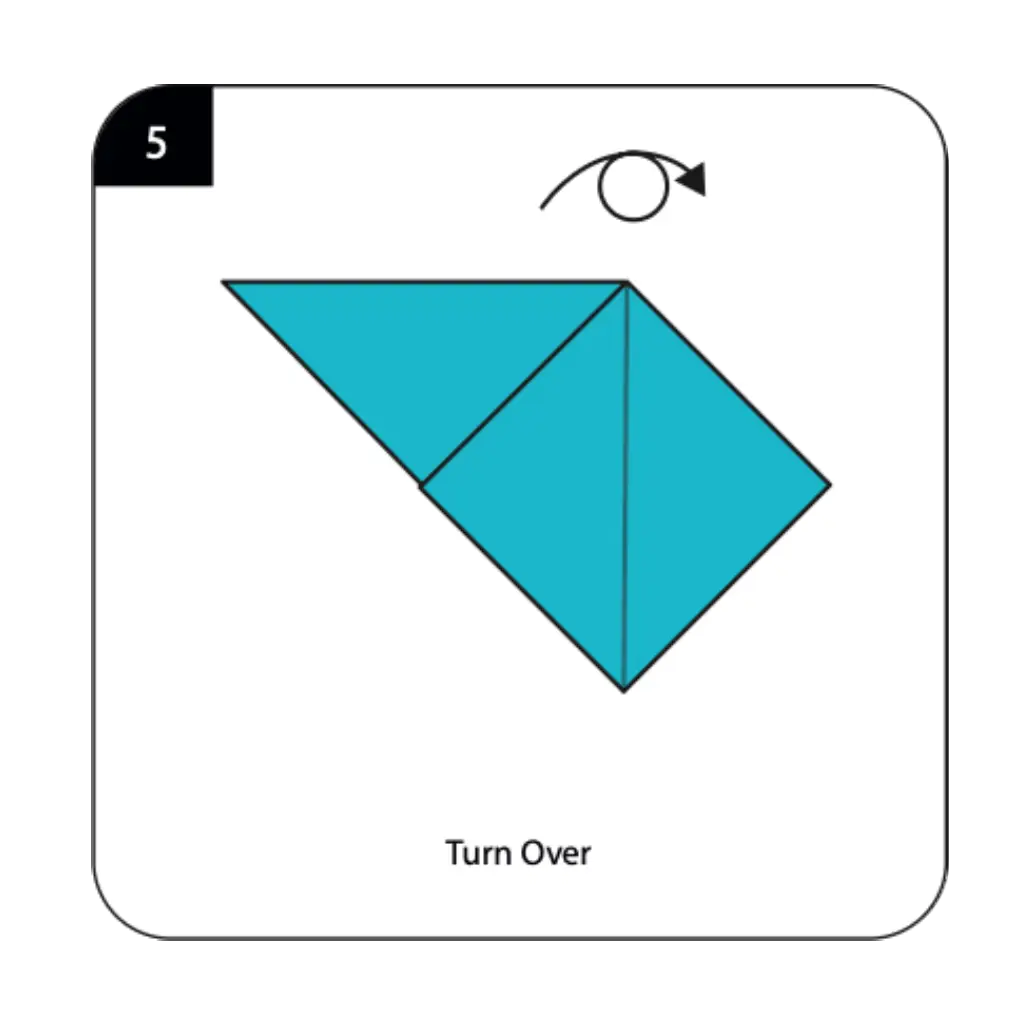
Turn your model over to work on the opposite side, maintaining the same orientation as before. This flip allows you to create identical folds on both sides, ensuring your pumpkin has perfect symmetry. Handle the paper carefully during this turn to avoid disturbing the folds you’ve already created. Working on both sides is essential for creating the full, rounded shape characteristic of pumpkins.
Step 6: Repeat Previous Steps For Origami Pumpkin
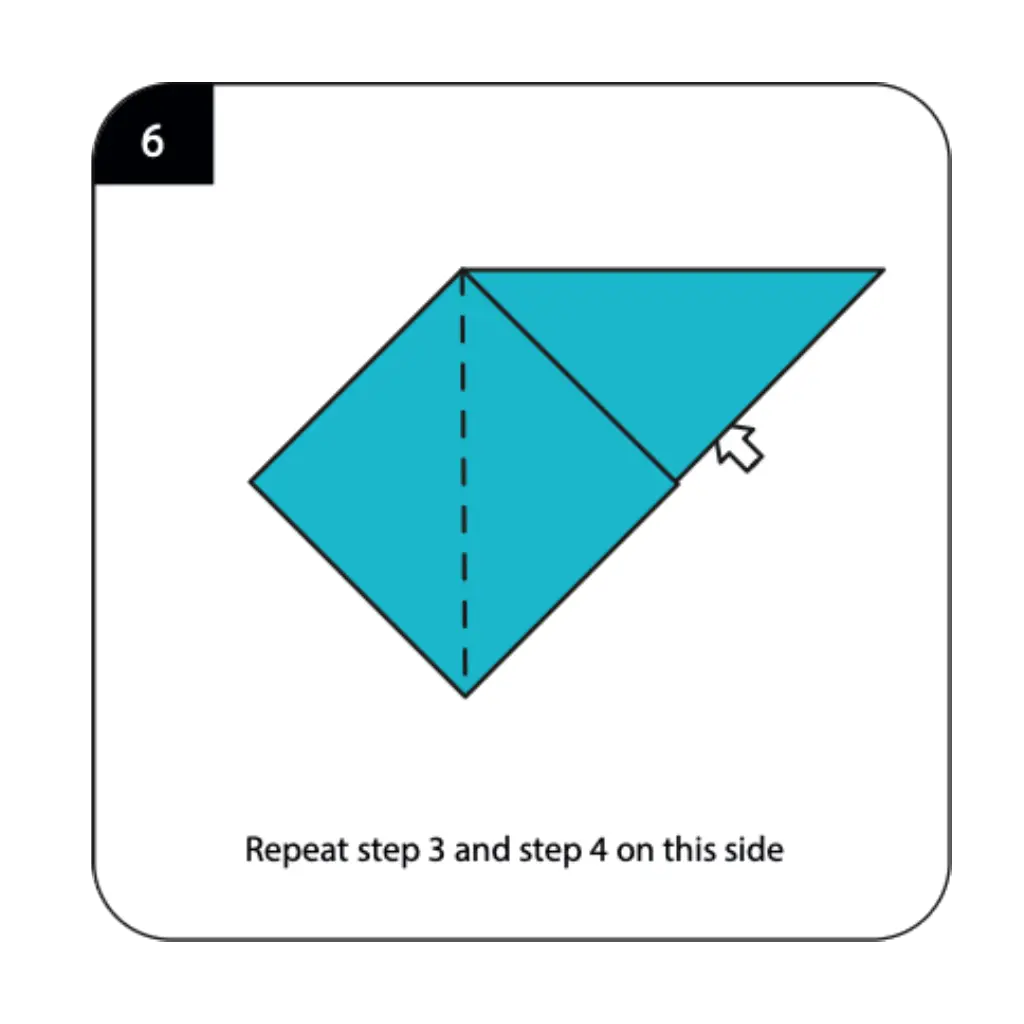
Repeat steps 3 and 4 on this side, opening the pocket and pressing it down to create another square layer. This repetition creates the multiple layers that give your pumpkin its three-dimensional fullness. Consistency between both sides is crucial for achieving a balanced, professional-looking result. The layered construction technique is what transforms flat paper into realistic decorative origami sculptures.
Step 7: Position for Face Details
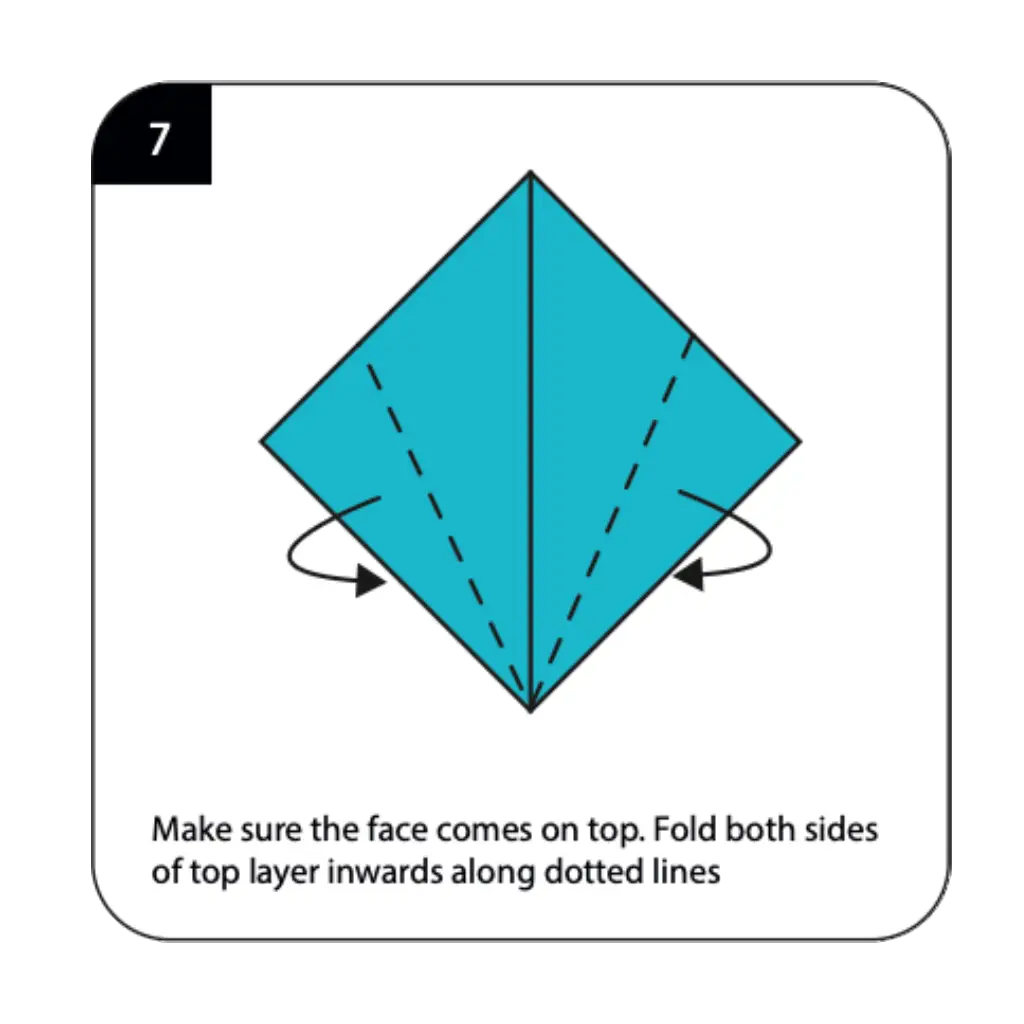
Make sure the face side comes on top, then fold both sides of the top layer inward along the dotted lines. These inward folds begin shaping the pumpkin’s characteristic ridged texture while preparing the surface for face features. The positioning ensures your jack-o’-lantern face will be properly centered and visible. Precise folding here creates the vertical lines that make your paper pumpkin look authentic.
Step 8: Shape the Pumpkin Body
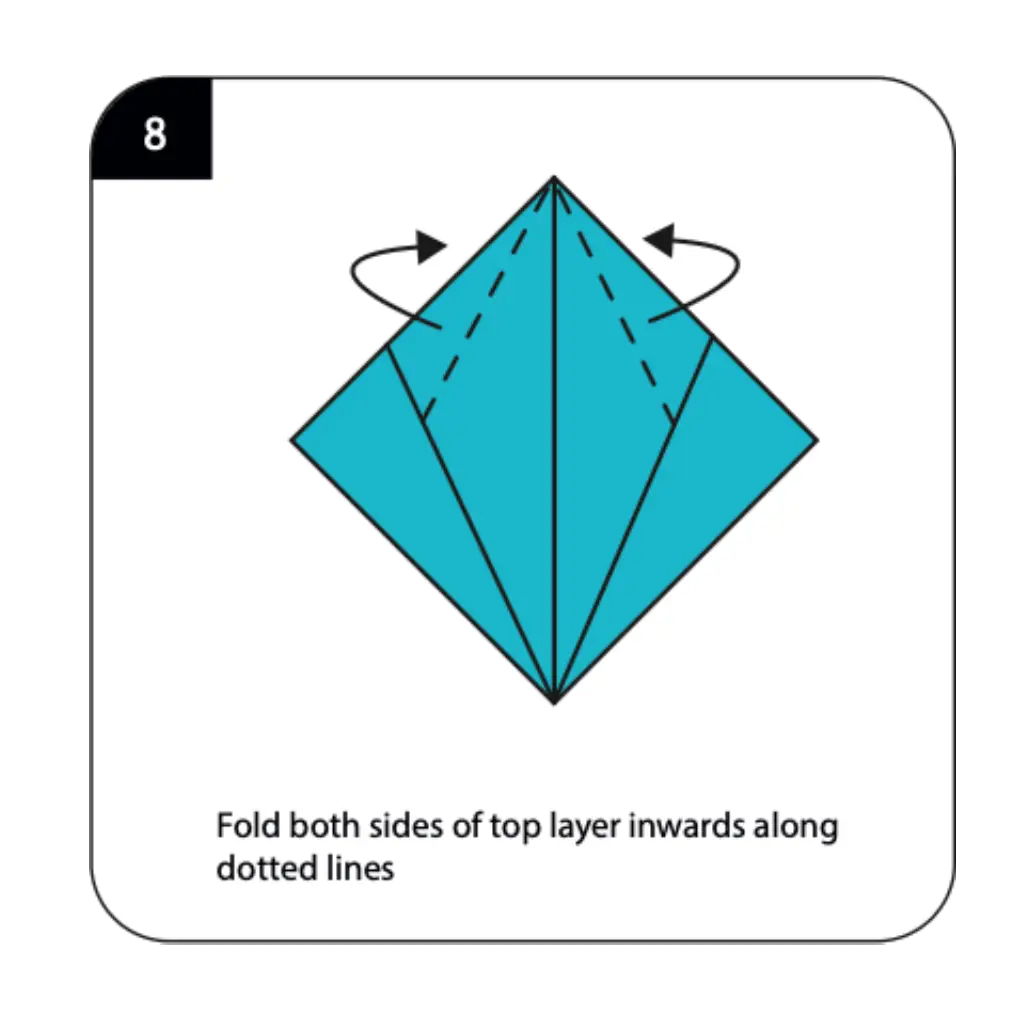
Fold both sides of the top layer inward along the new dotted lines to continue defining your pumpkin’s shape. These additional folds create the segmented appearance typical of real pumpkins, adding to the realistic effect. The multiple vertical folds work together to create the illusion of a round, plump pumpkin. This shaping technique distinguishes your creation from simple geometric Origami Pumpkin forms.
Step 9: Create the Top Contour

Fold down the top corner to the back along the dotted line, shaping the top of your pumpkin. This backward fold creates the slight indentation found at the top of real pumpkins where the stem would attach. The fold also helps lock all the previous layers in place for added stability. This detail adds authenticity to your Halloween decoration and prepares it for the final touches.
Step 10: Complete Back Shaping
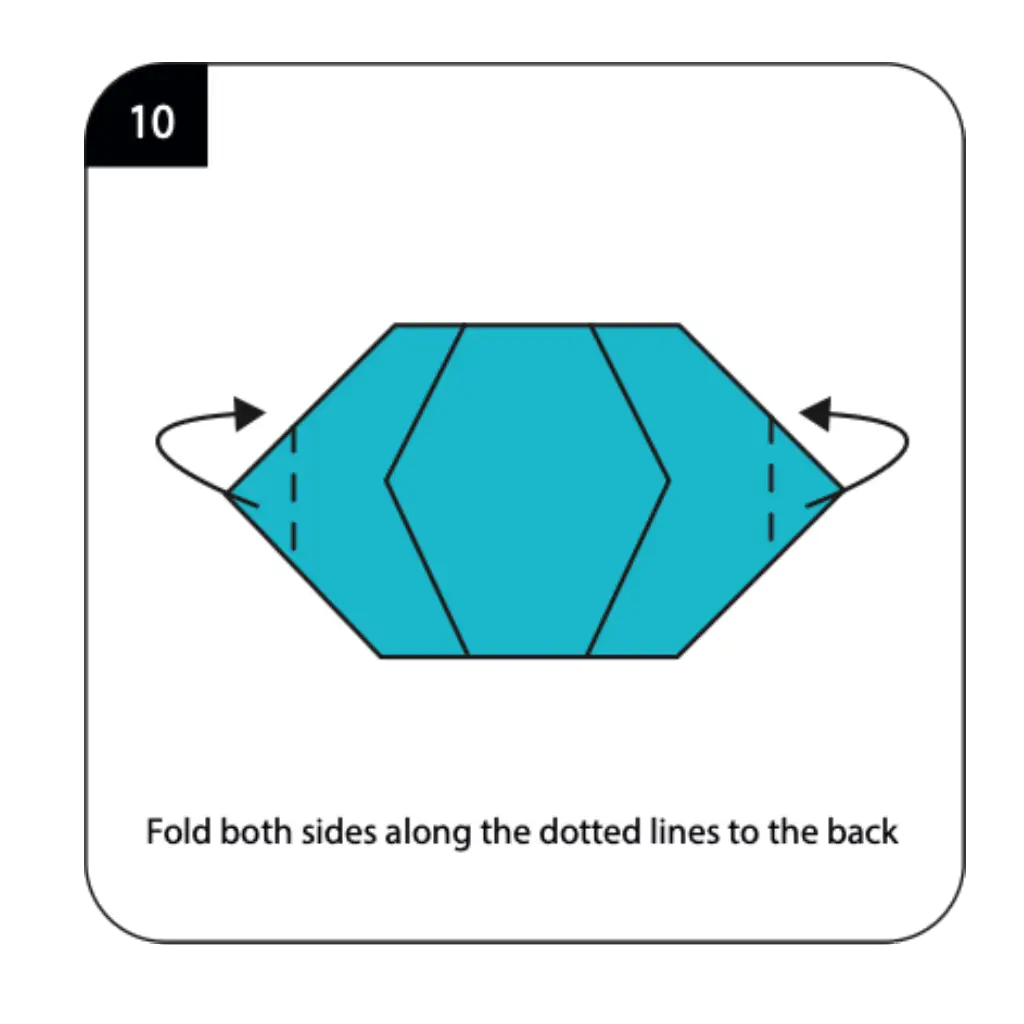
Fold both sides along the dotted lines to the back, finalizing your pumpkin’s three-dimensional form. These final structural folds ensure your pumpkin maintains its shape and can stand independently. The back folds create the rounded silhouette that makes your origami pumpkin instantly recognizable. Careful attention to these folds ensures your pumpkin looks great from every angle.
Step 11: Add Halloween Character
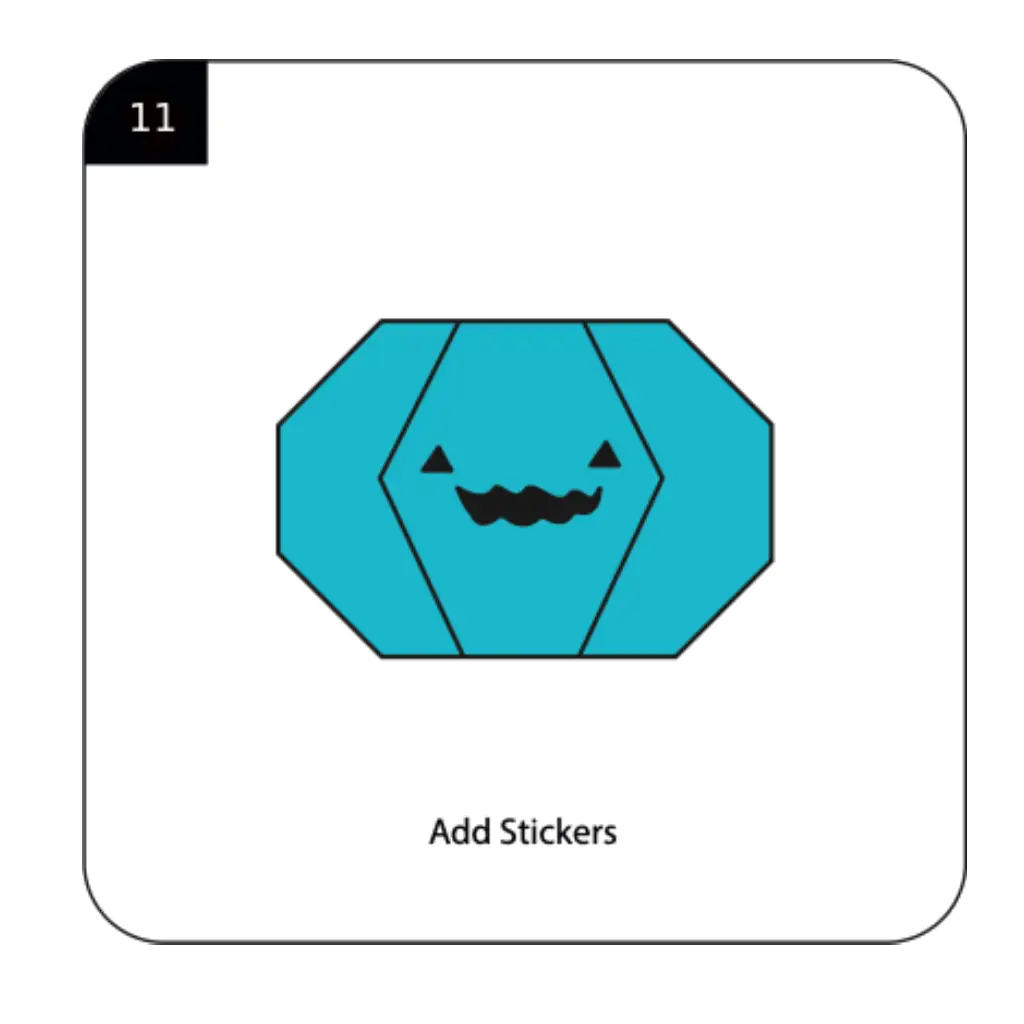
Complete your origami pumpkin by adding stickers or drawing a jack-o’-lantern face on the front surface. Position the eyes, nose, and mouth to create a spooky, funny, or friendly expression as desired. The face transforms your folded paper from a simple shape into a festive Halloween character. Your finished origami pumpkin is now ready to join your Halloween decorations or serve as a fun seasonal craft.
Conclusion: Congratulations on creating your own origami pumpkin, perfect for adding handmade charm to Halloween celebrations! This delightful paper craft proves that festive decorations don’t require expensive materials or complex techniques. Try making multiple pumpkins in orange and other autumn colors to create a complete paper pumpkin patch. With practice, you’ll be folding these spooky-cute decorations quickly enough to share with friends and family!
