
Introduction: Challenge yourself with this elegant origami reindeer that brings Christmas magic to your paper crafting! Though slightly more complex than basic designs, this rewarding project creates a stunning holiday decoration complete with antlers. Perfect for experienced folders or ambitious beginners ready to level up their skills. Follow these sixteen detailed steps to craft your own majestic paper reindeer.
Step-by-Step Origami Reindeer Instructions:
Step 1: Start with Diamond Foundation For origami reindeer
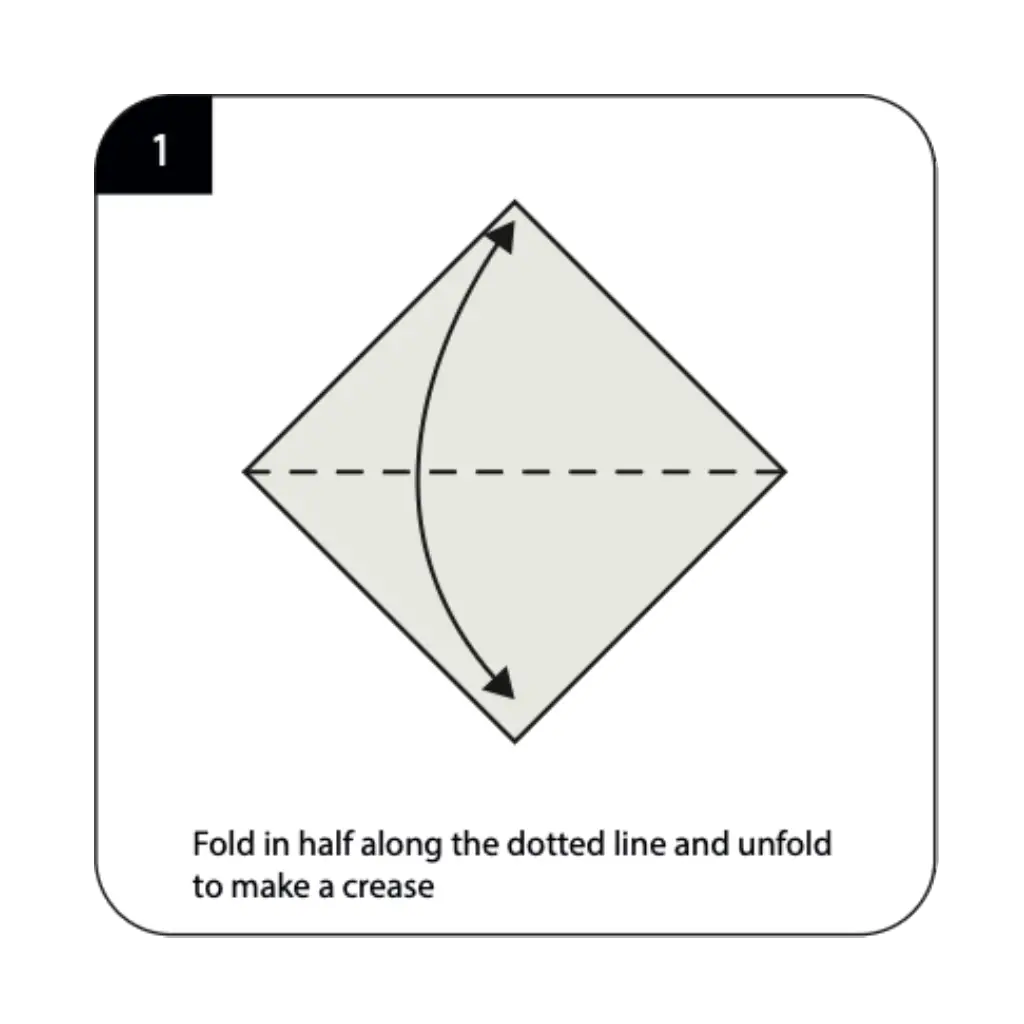
Begin with a square sheet of origami reindeer paper placed diagonally with the white side facing up, creating a diamond orientation. Fold in half along the horizontal dotted line and then unfold to create a central crease guideline. This initial crease serves as the foundation for all subsequent folds and ensures perfect symmetry. The diamond starting position is ideal for creating origami animals with complex features like antlers.
Step 2: Create Kite Base
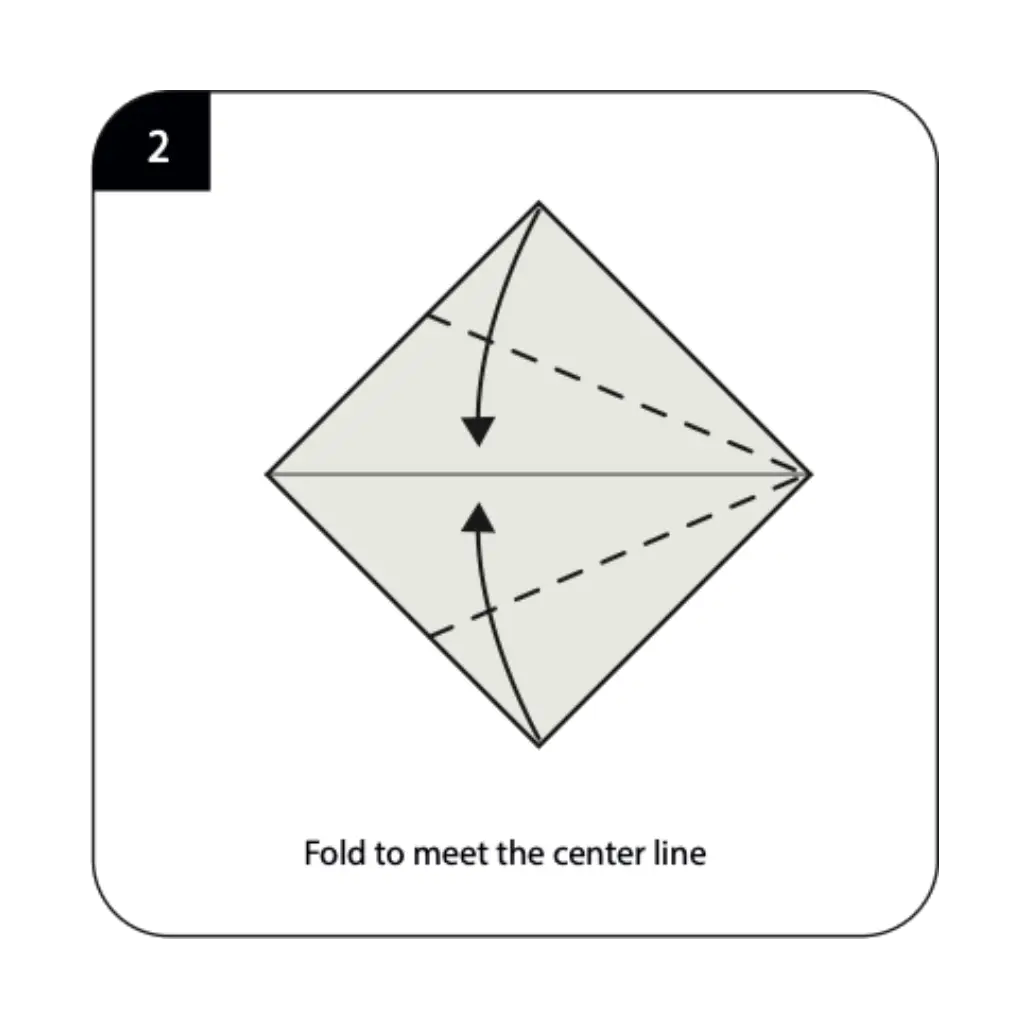
Fold both sides along the dotted lines of origami reindeer to meet at the center crease you just created. This forms the classic kite base, narrowing your diamond into a more elongated shape. These folds begin establishing the body proportions of your reindeer. The precision of these initial folds determines how balanced your finished reindeer will appear.
Step 3: Narrow the Form
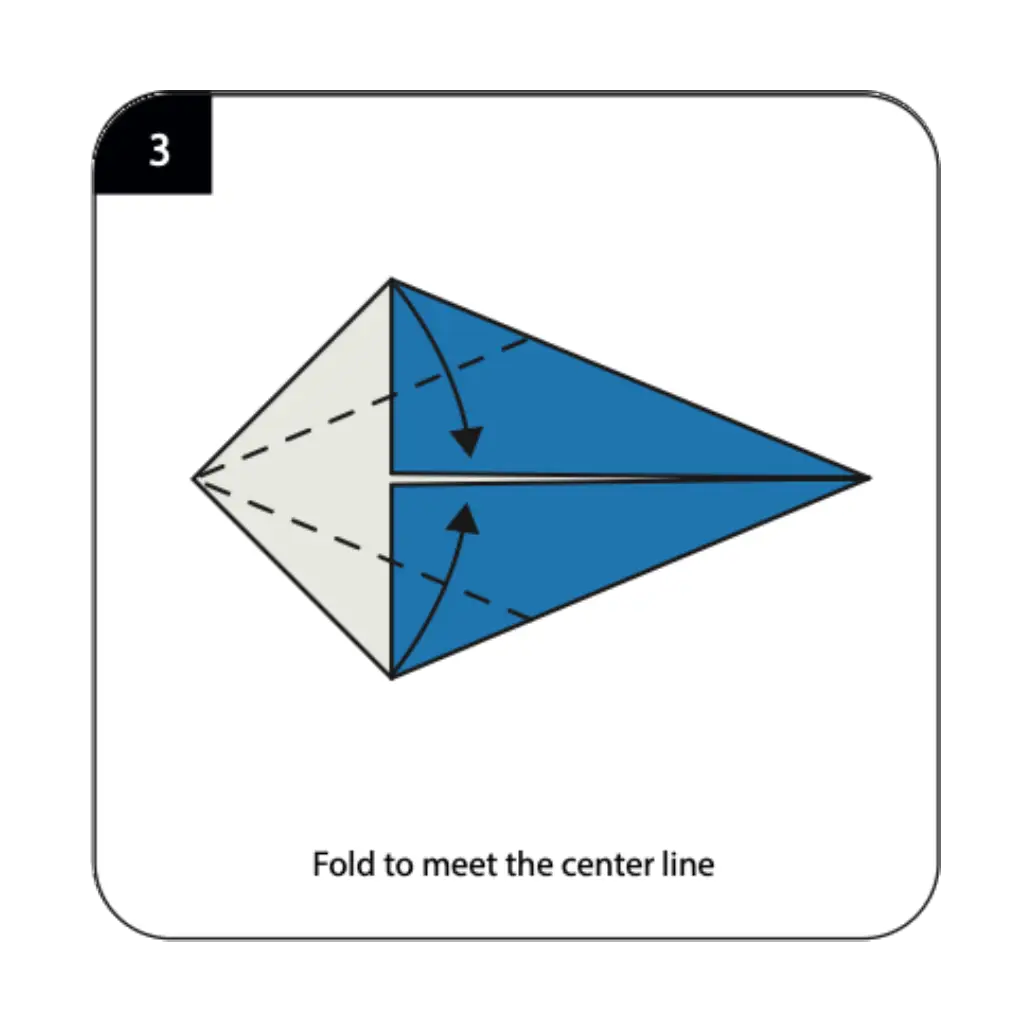
Continue folding to meet the center line, further narrowing your model into a sleeker shape. These additional folds create the tapered form that will become your reindeer’s body and neck of origami reindeer. Each fold should align perfectly with the center guideline for optimal symmetry. This progressive narrowing technique is essential in advanced origami basics for creating realistic animal proportions.
Step 4: Open and Flatten Pockets
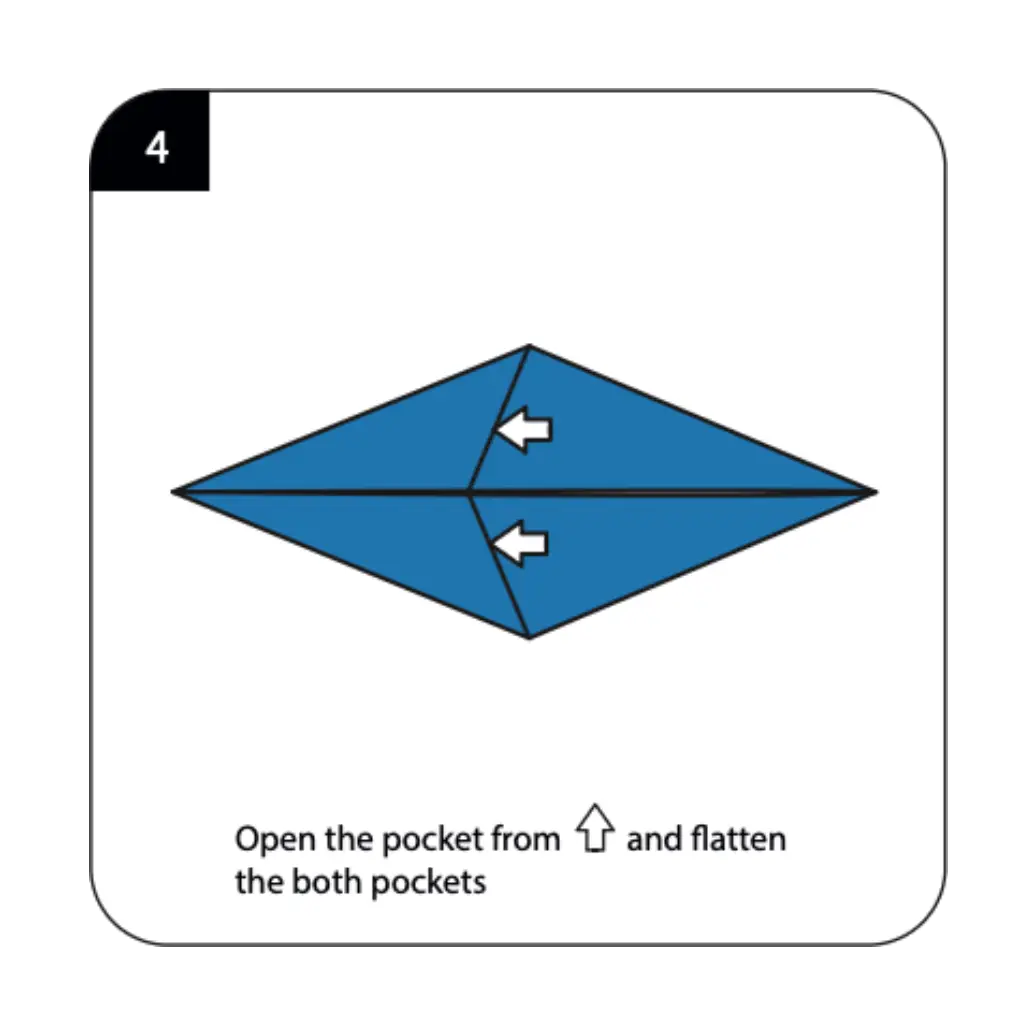
Open the pockets created by your previous folds and flatten them carefully along the indicated lines. This squash fold technique adds layers and dimension to your developing reindeer structure of origami reindeer. Work on both pockets simultaneously to maintain balance in your model. The pocket-flattening method creates the complex layering needed for detailed animal features.
Step 5: Fold in Half
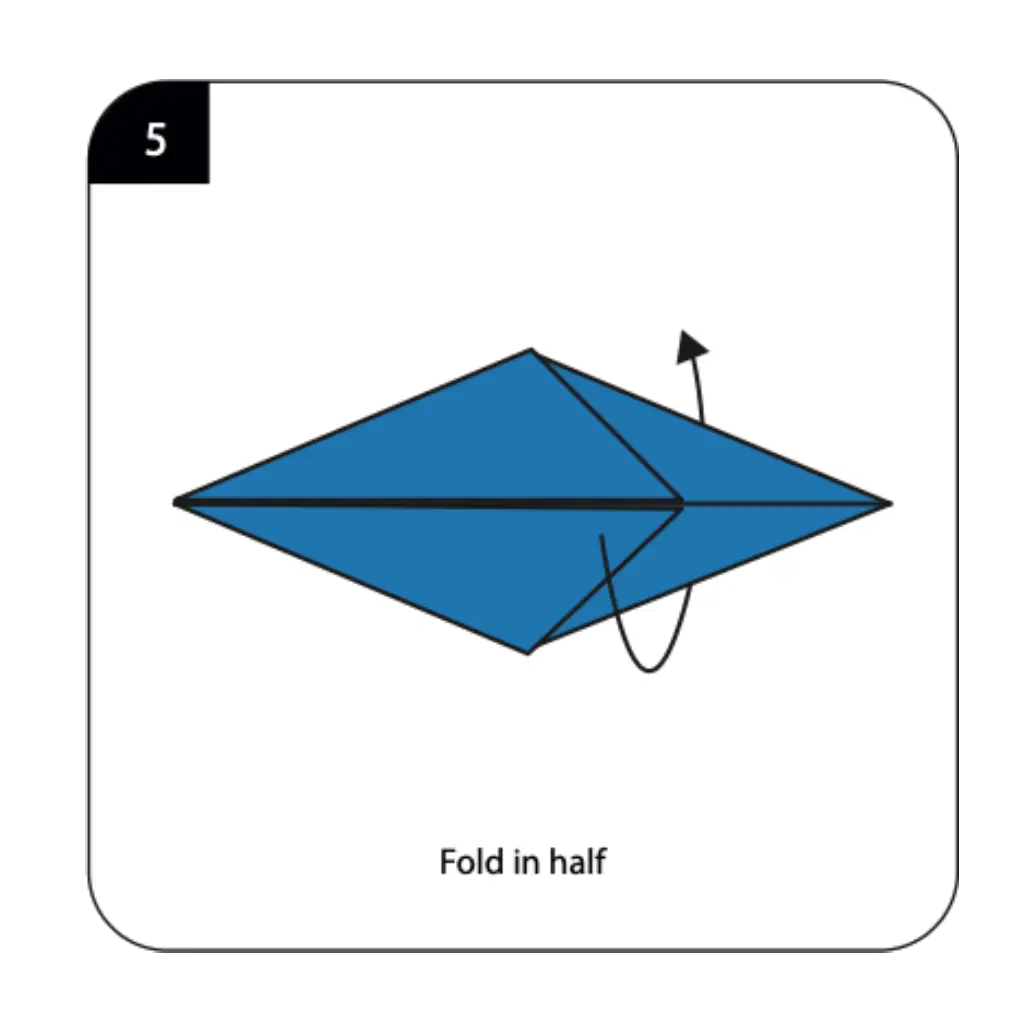
Fold your entire model in half along the vertical center line, bringing one side over to meet the other. This fold creates the three-dimensional body of your reindeer and establishes its standing position. Ensure all previous layers align properly during this fold for a clean appearance. The half-fold transforms your flat design into a sculptural form.
Step 6: Create Hood Folds
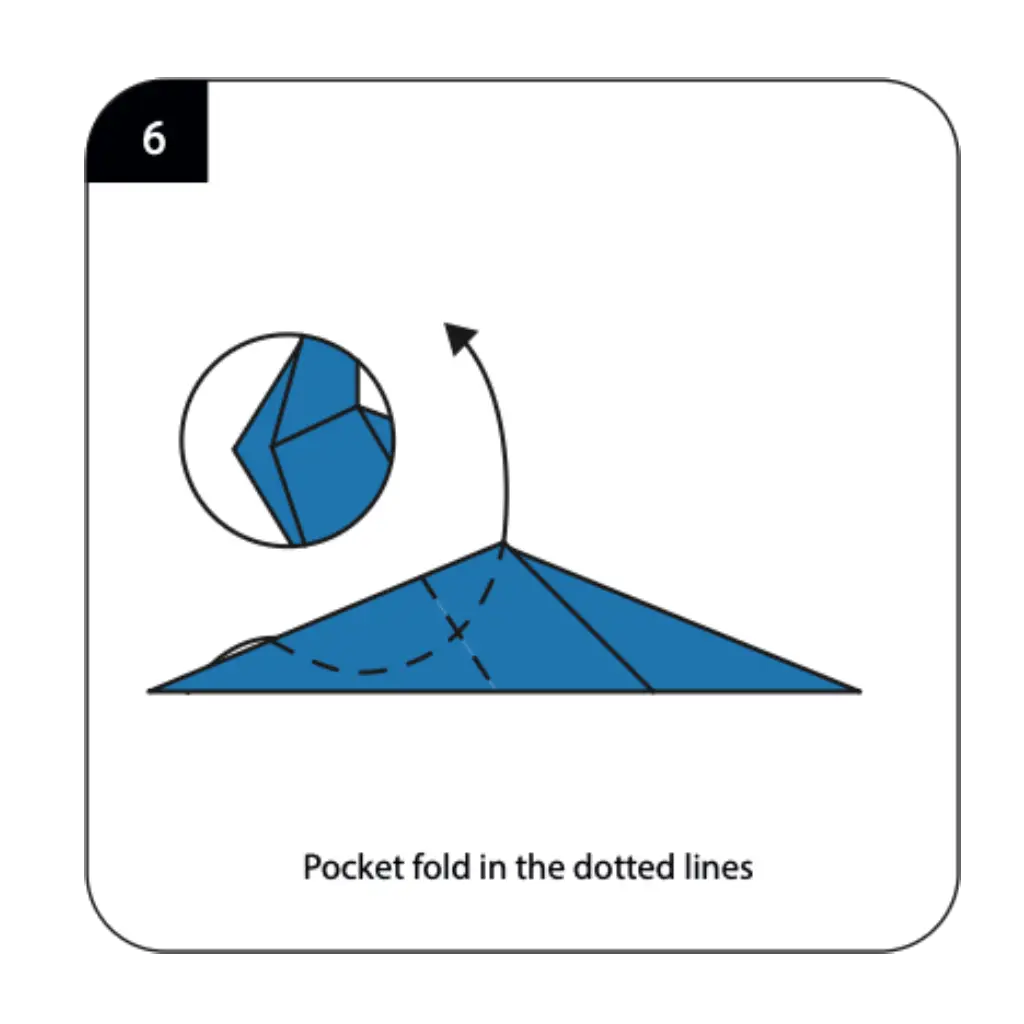
Execute hood folds along the dotted lines to begin shaping the neck and head region of your reindeer. These specialized folds create angles that suggest the reindeer’s characteristic posture. The hood fold technique requires careful manipulation to maintain the model’s stability. This advanced folding method is what distinguishes complex creative origami from simple designs.
Step 7: Add Pocket Folds
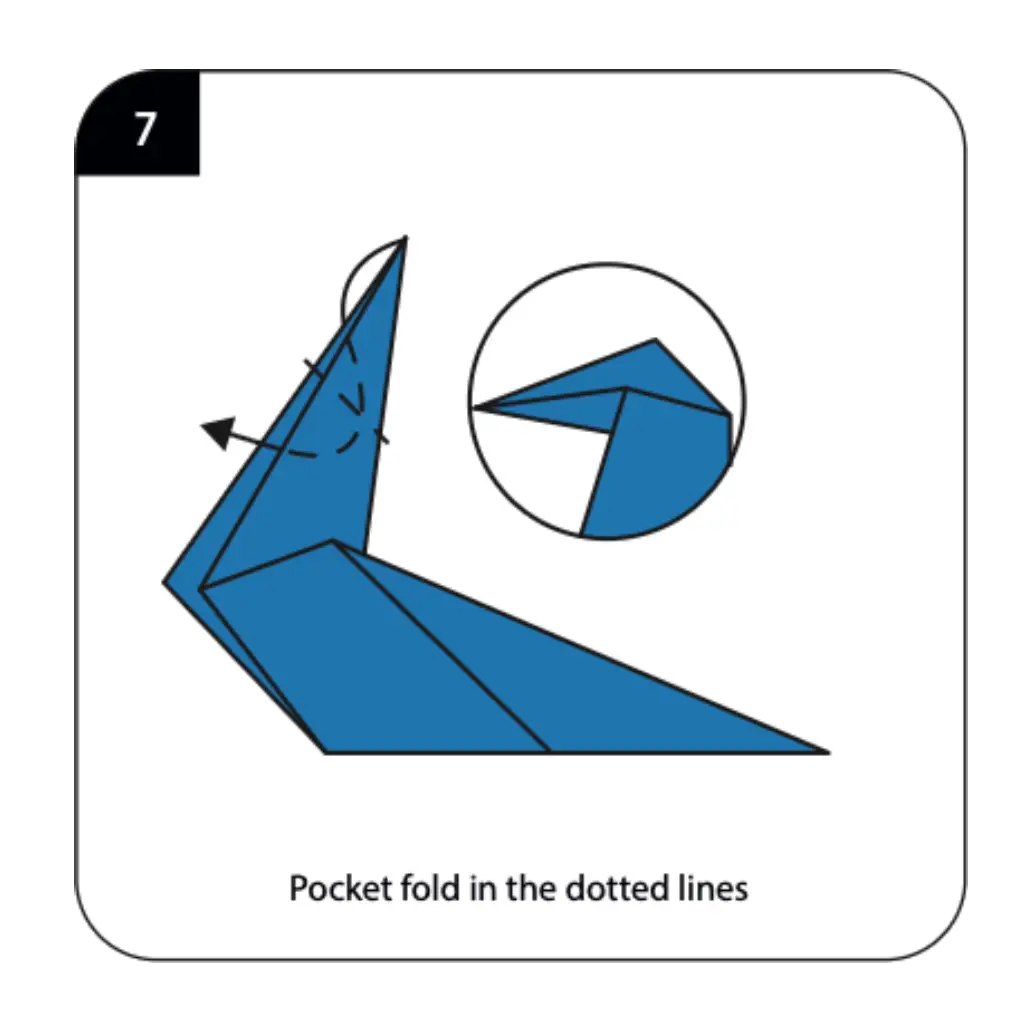
Perform pocket folds along the indicated dotted lines to add detail and structure to your reindeer. These internal folds create the depth needed for realistic animal features without adding bulk. The pocket fold technique allows for subtle shaping that brings your reindeer to life. Master this technique and you’ll be ready for even more challenging animal designs.
Step 8: Execute Second Hood Fold
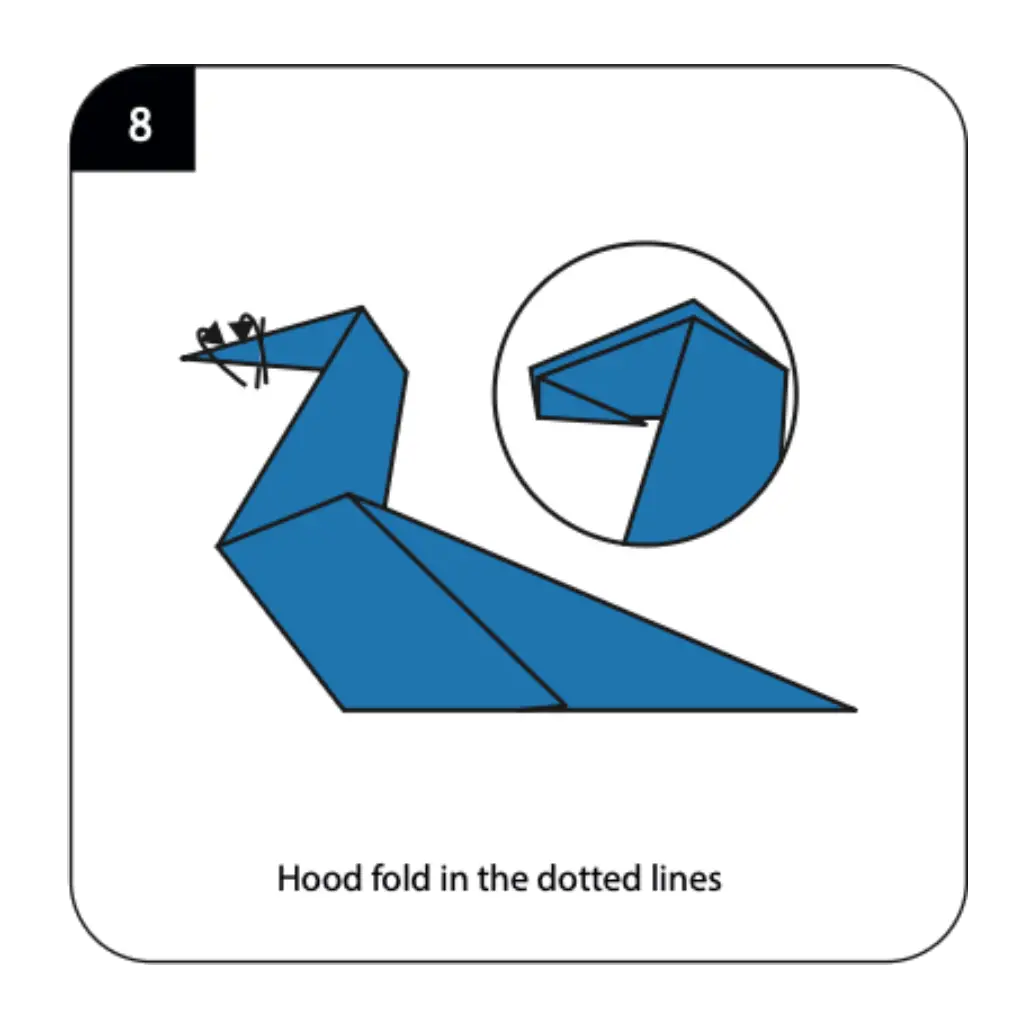
Create another hood fold along the new dotted lines to further refine your reindeer’s shape. This second hood fold works in conjunction with the first to establish the neck angle and head position. The layered hood folds create the elegant curve characteristic of reindeer posture. Precision here ensures your reindeer has a graceful, natural appearance.
Step 9: Shape with Side Folds
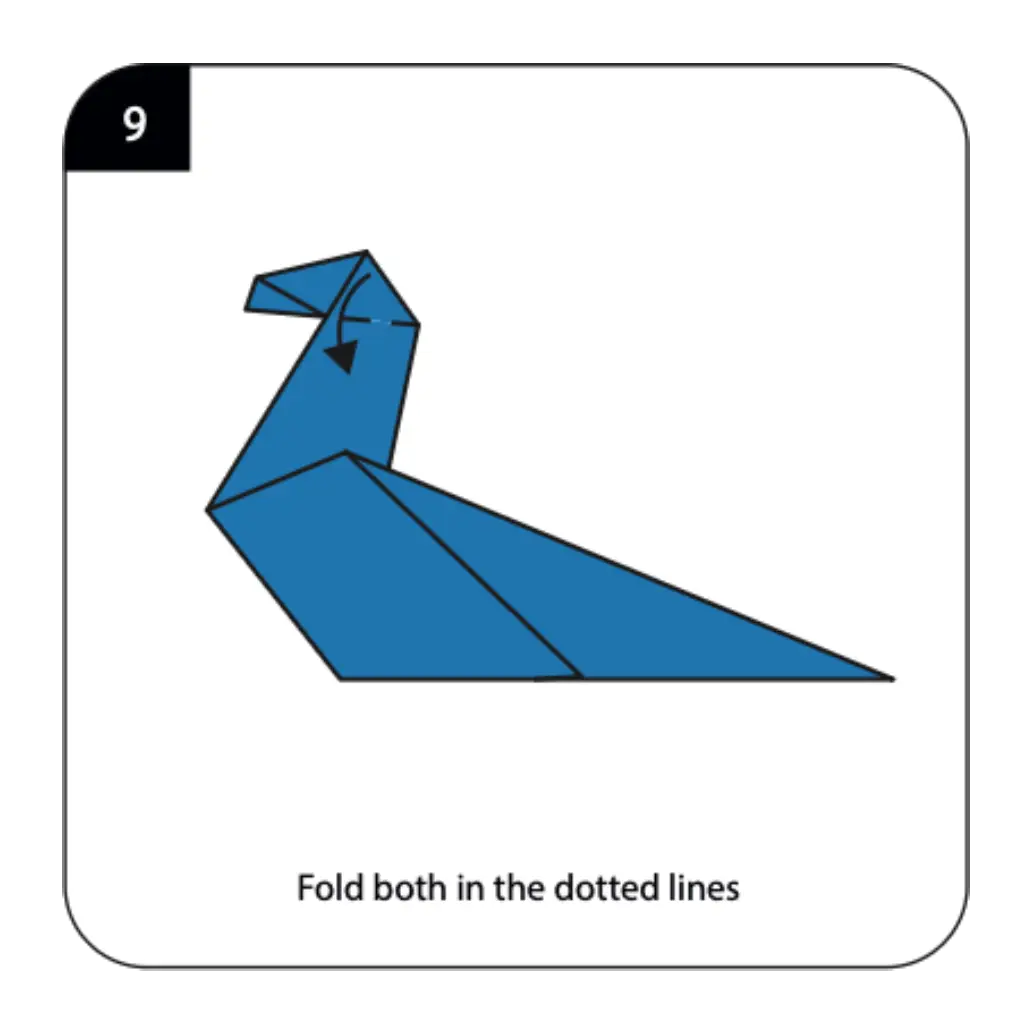
Fold both sides along the dotted lines to continue defining your reindeer’s body contours. These symmetrical folds add dimension to the torso and help establish the leg positions. Work carefully to ensure both sides match perfectly for a balanced stance. The side folds contribute to the three-dimensional quality of your origami reindeer.
Step 10: Continue Body Definition
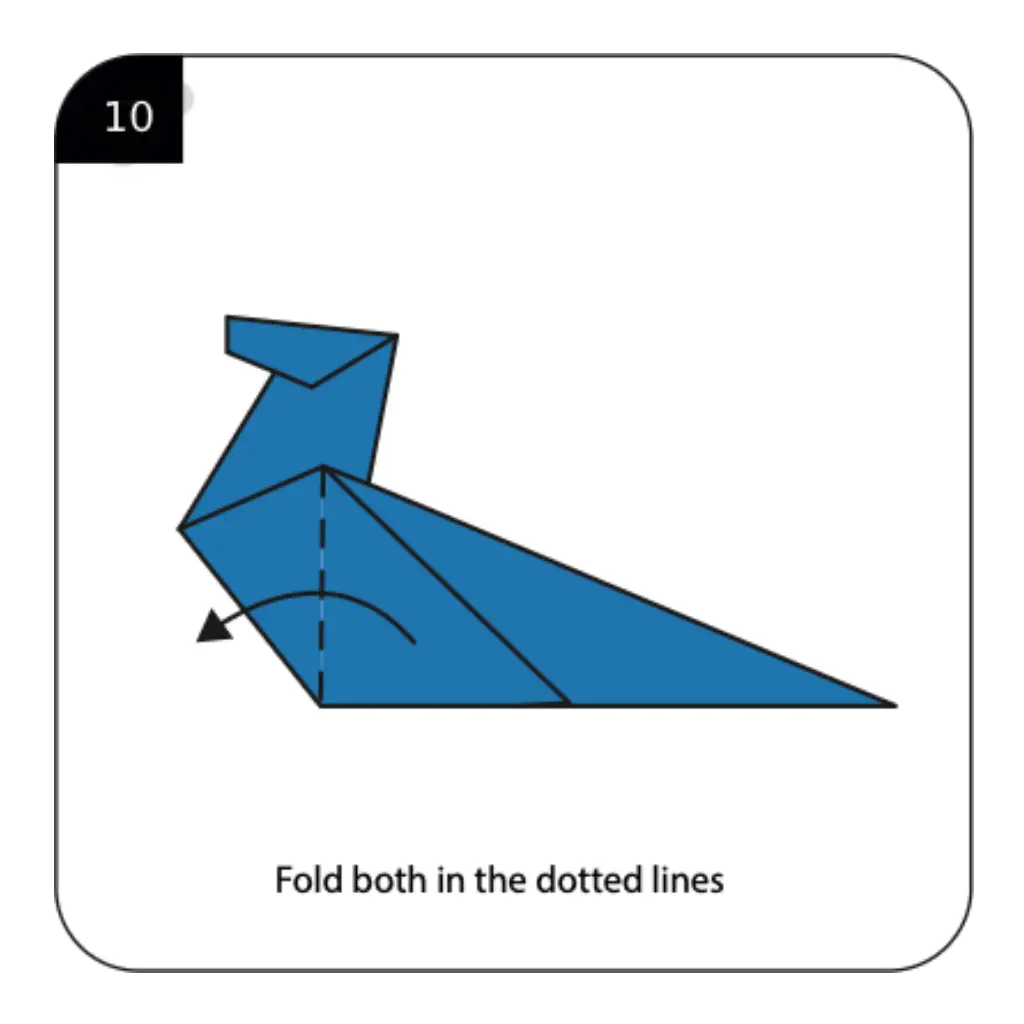
Fold both sides along the new set of dotted lines to further refine your reindeer’s form. These additional folds create the subtle curves and angles that make your model look realistic. Each fold builds upon the previous ones to create a cohesive animal shape. This layering of folds is what gives advanced decorative origami its impressive detail.
Step 11: Repeat Complex Folding
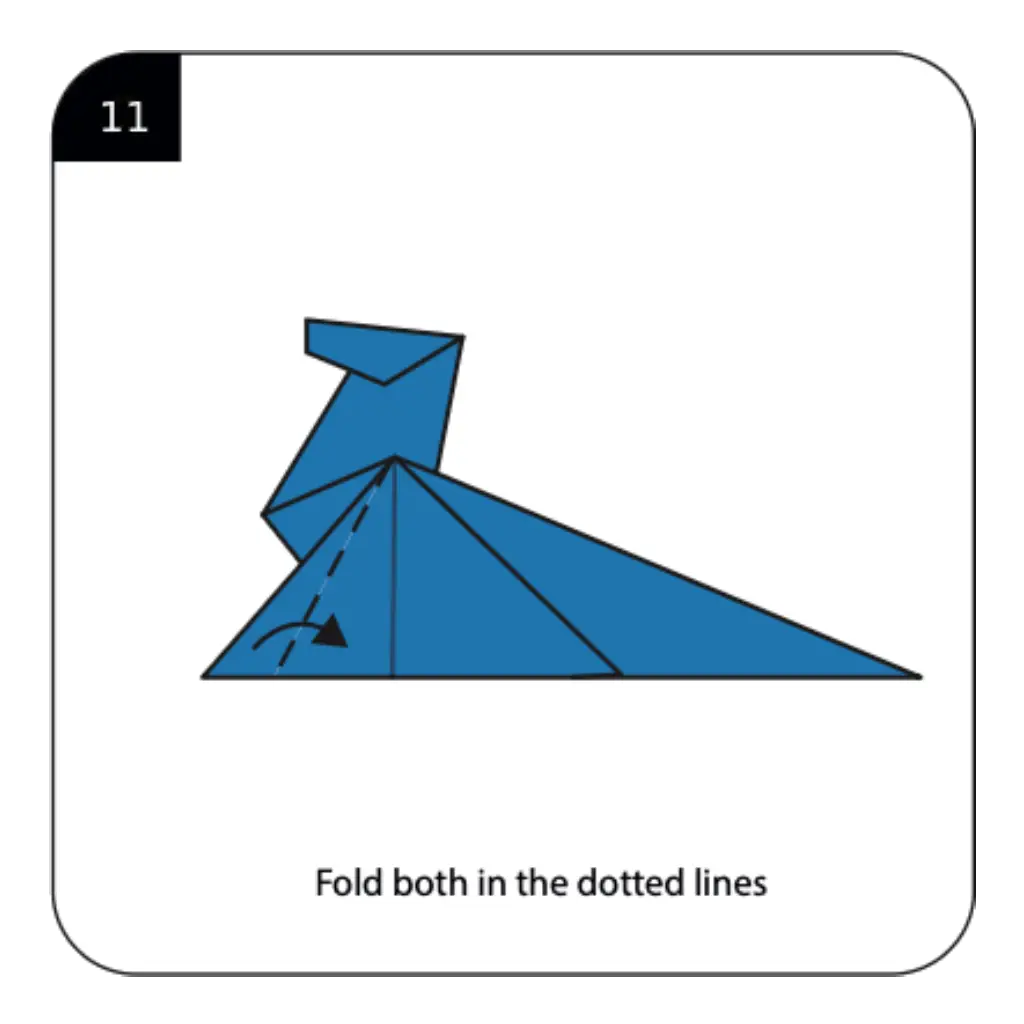
The pattern indicates to repeat the previous folding sequences (shown as steps 7) to build up layers. This repetition creates the structural complexity needed for the reindeer’s distinctive features. Work through each repetition carefully to maintain consistency. The multiple layers provide the foundation for the antlers and refined details.
Step 12: Final Body Shaping
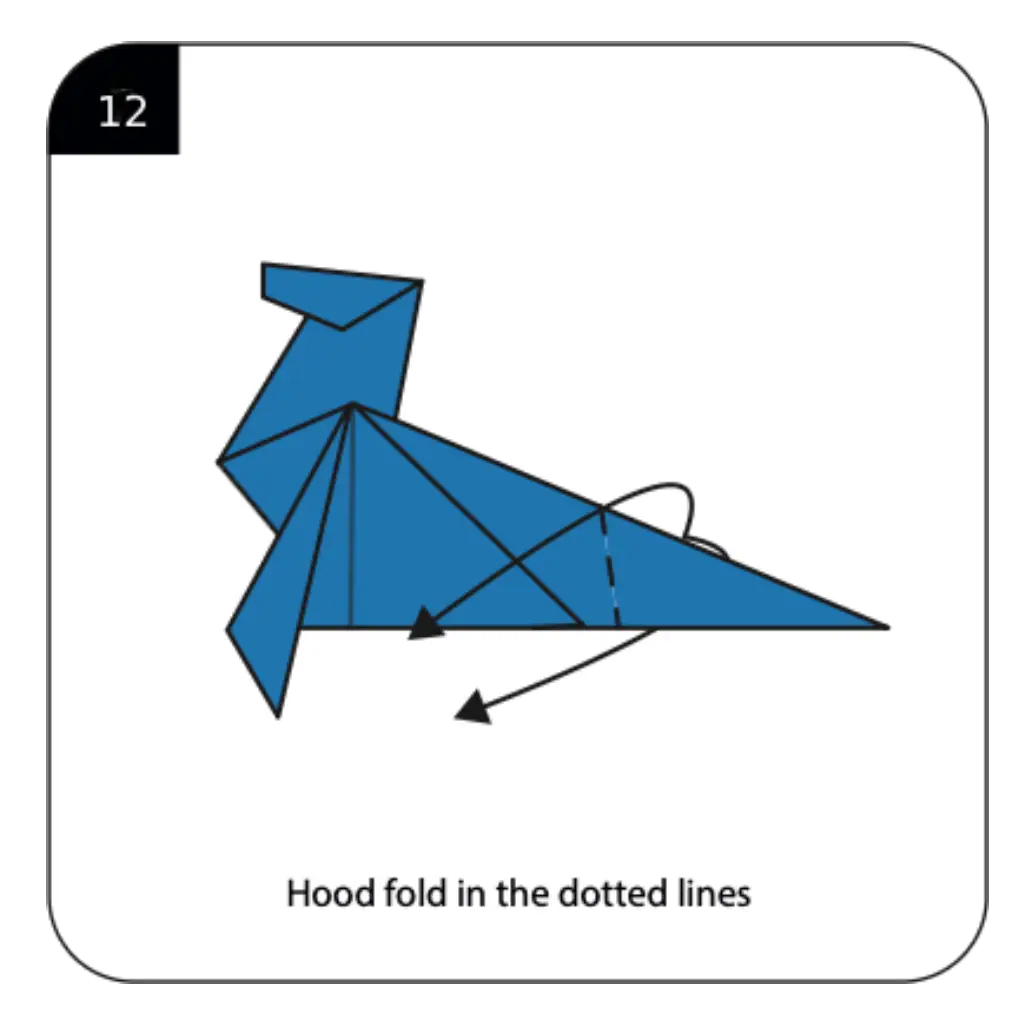
Fold both sides along the final set of body dotted lines to complete the main structure. These folds lock all previous layers in place and finalize the reindeer’s proportions. The completed body should stand stable with a natural-looking posture. Your reindeer’s form is now ready for the addition of antlers.
Step 13: Prepare for Antlers
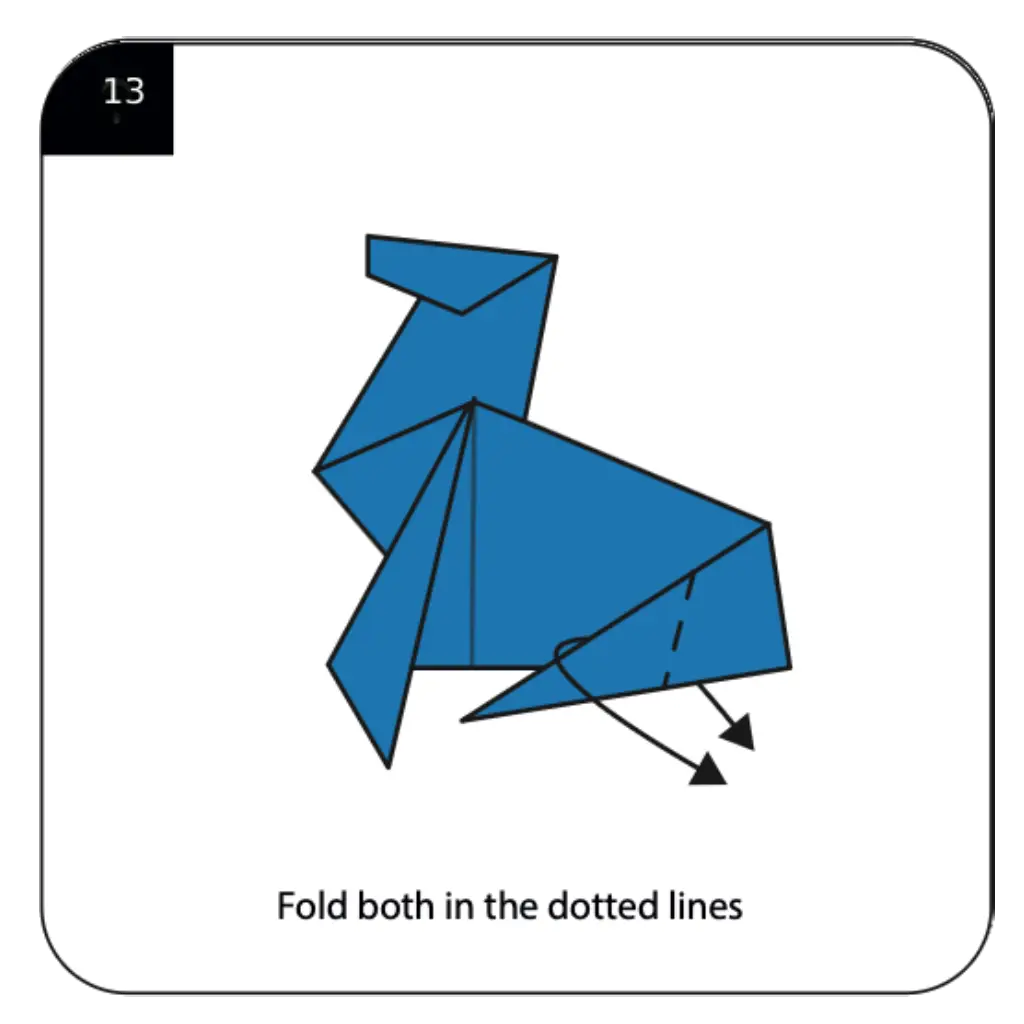
Following the diagram on page two, fold both sides along the dotted lines in the head area. These preparatory folds create the base structure from which the antlers will emerge. The positioning of these folds determines the angle and spread of your reindeer’s antlers. Careful preparation here ensures impressive antler formation.
Step 14: Cut the Antlers
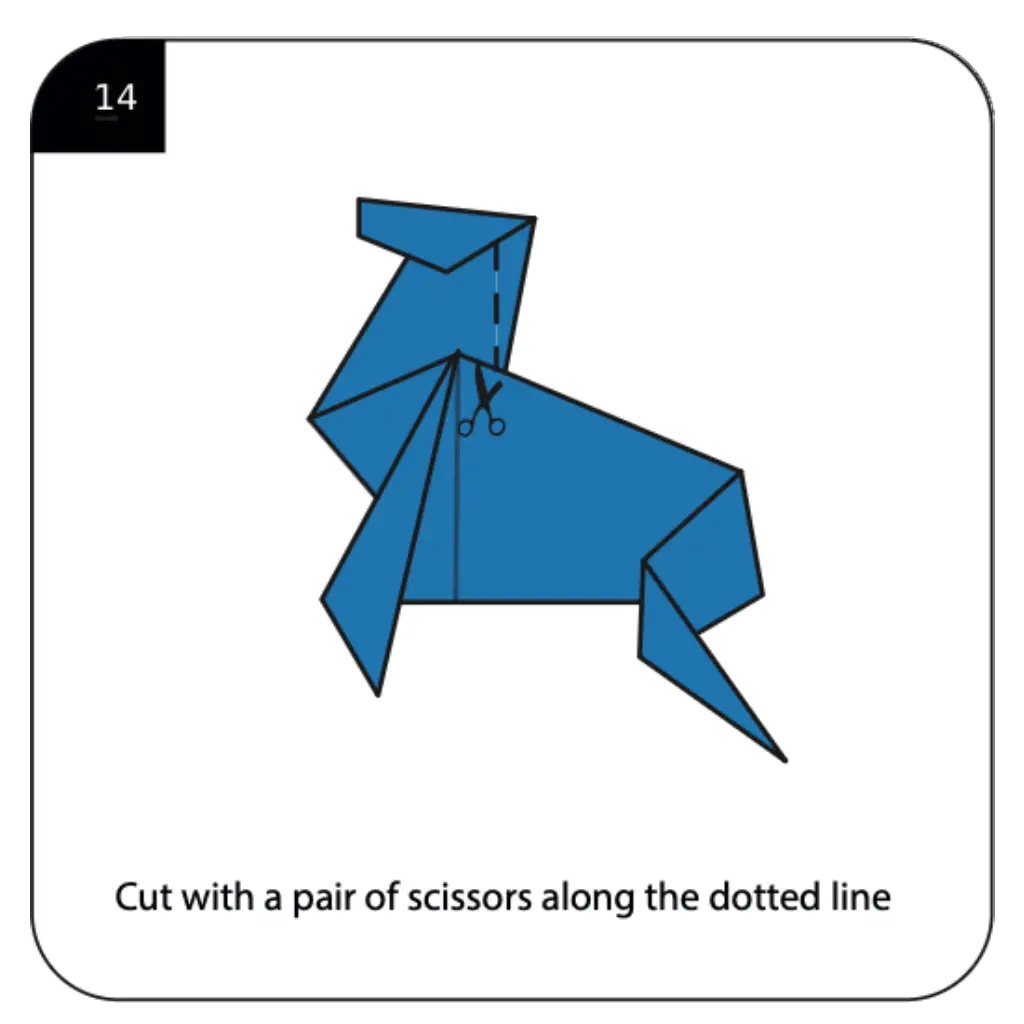
Using scissors, carefully cut along the dotted line as indicated to create the branching antler structure. This is one of the few origami projects that requires cutting to achieve the desired effect. Make precise cuts to create realistic antler shapes with multiple points. The cutting technique allows for the intricate detail that makes your reindeer truly special.
Step 15: Shape Final Details
Fold both remaining sections along the dotted lines to finalize your reindeer’s features. These final folds refine the antlers and complete any remaining body details. Adjust the angles to create a natural, lifelike appearance. The finishing touches transform your folded paper into a recognizable Christmas reindeer.
Step 16: Add the Eye
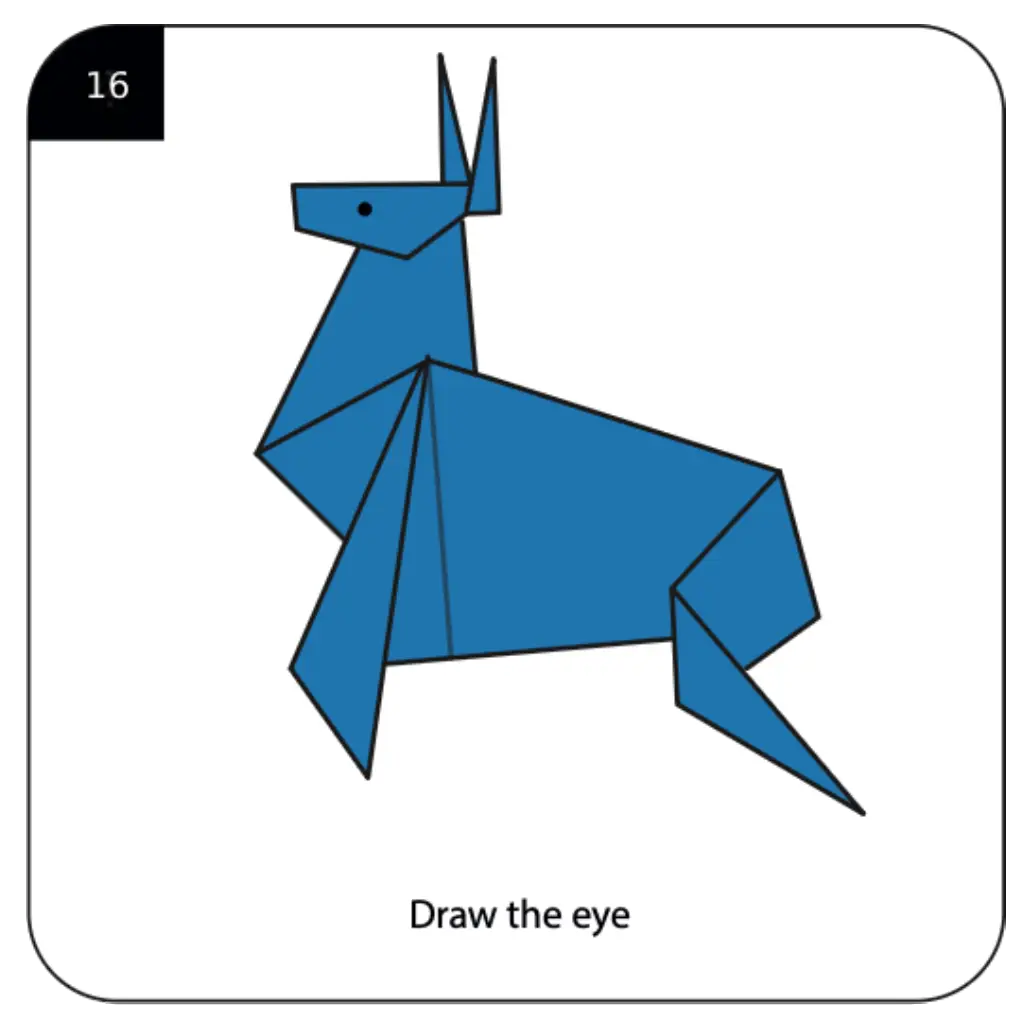
Complete your origami reindeer by drawing an eye on each side of the head. Position the eyes carefully to give your reindeer personality and bring it to life. The simple addition of eyes makes your creation feel complete and ready for display. Your finished origami reindeer now stands proud with its magnificent antlers, perfect for Christmas decorations.
Conclusion: Congratulations on completing this challenging origami reindeer – a true testament to your folding skills! This elegant Christmas decoration showcases advanced techniques that create impressive results worth the extra effort. Display your reindeer alongside other holiday crafts or give it as a special handmade gift. With practice, you’ll master these complex folds and create a whole herd of paper reindeer for the holidays!
