
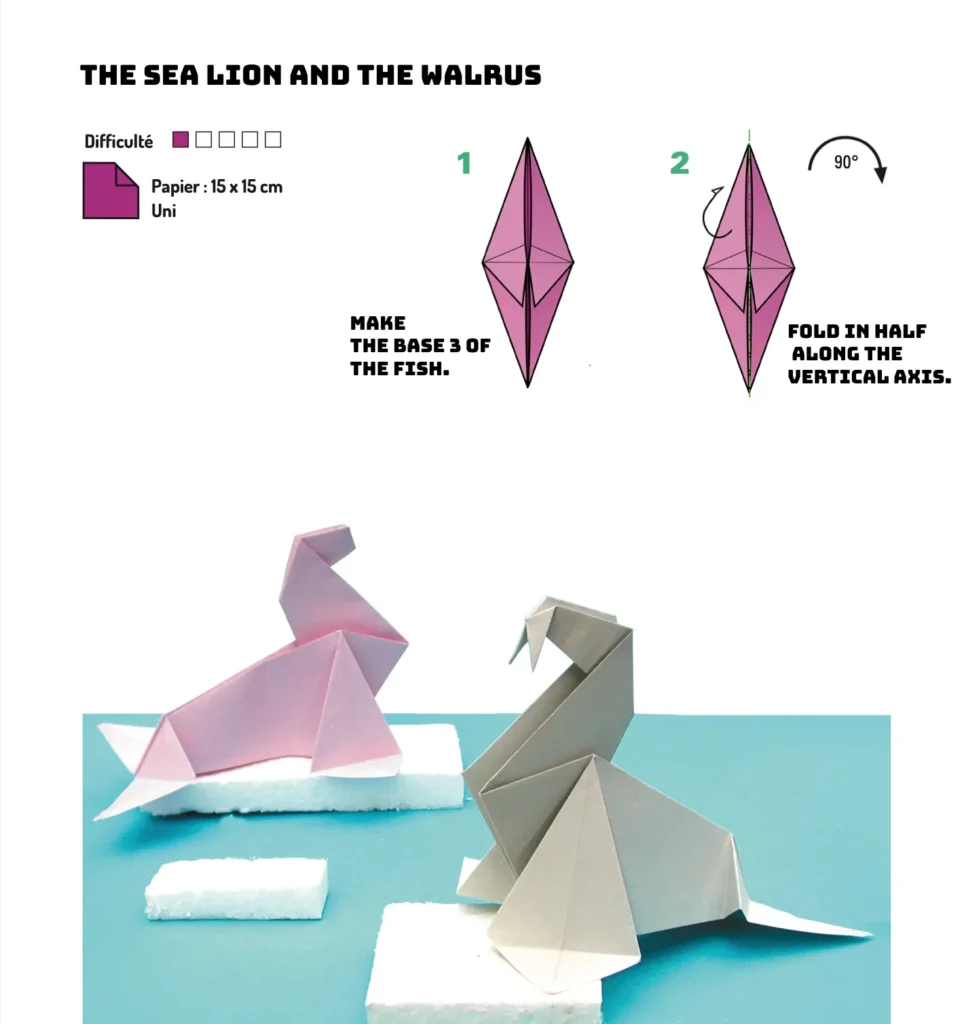
Origami Sea Lion And Walrus : Arctic Origami Companions
Step into the fascinating world of marine origami with our elegant sea lion and walrus designs. These charming paper sculptures capture the distinctive features of these beloved Arctic mammals—from the sea lion’s playful posture to the walrus’s iconic tusks. Perfect for paper crafting enthusiasts of all skill levels, these origami creations require just a single square sheet and transform through a series of precise folds into dimensional arctic wildlife. The completed models display beautifully on an origami “ice floe” or as standalone pieces in your collection. Whether you’re folding with children to teach marine biology or creating sophisticated paper art, these origami sea mammals bring the wonder of arctic wildlife to your fingertips.
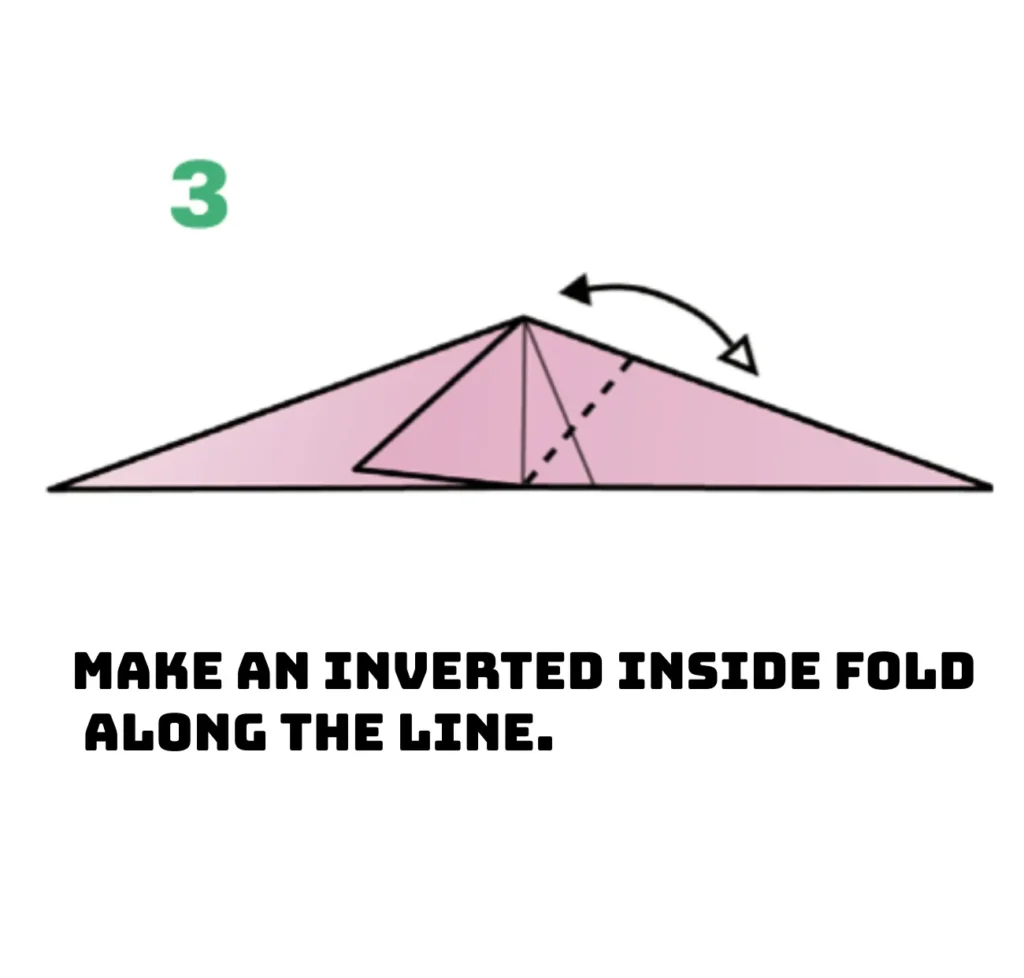
STEP 3: MAKING AN INSIDE REVERSE FOLD / Origami Sea Lion And Walrus
Create an inside reverse fold along the marked line, a fundamental origami technique. This precise fold transforms the flat paper into a three-dimensional shape. Use your fingertips to gently push the paper inward while maintaining crisp creases. This essential origami crane-inspired technique creates the foundation for the sea lion’s shape.
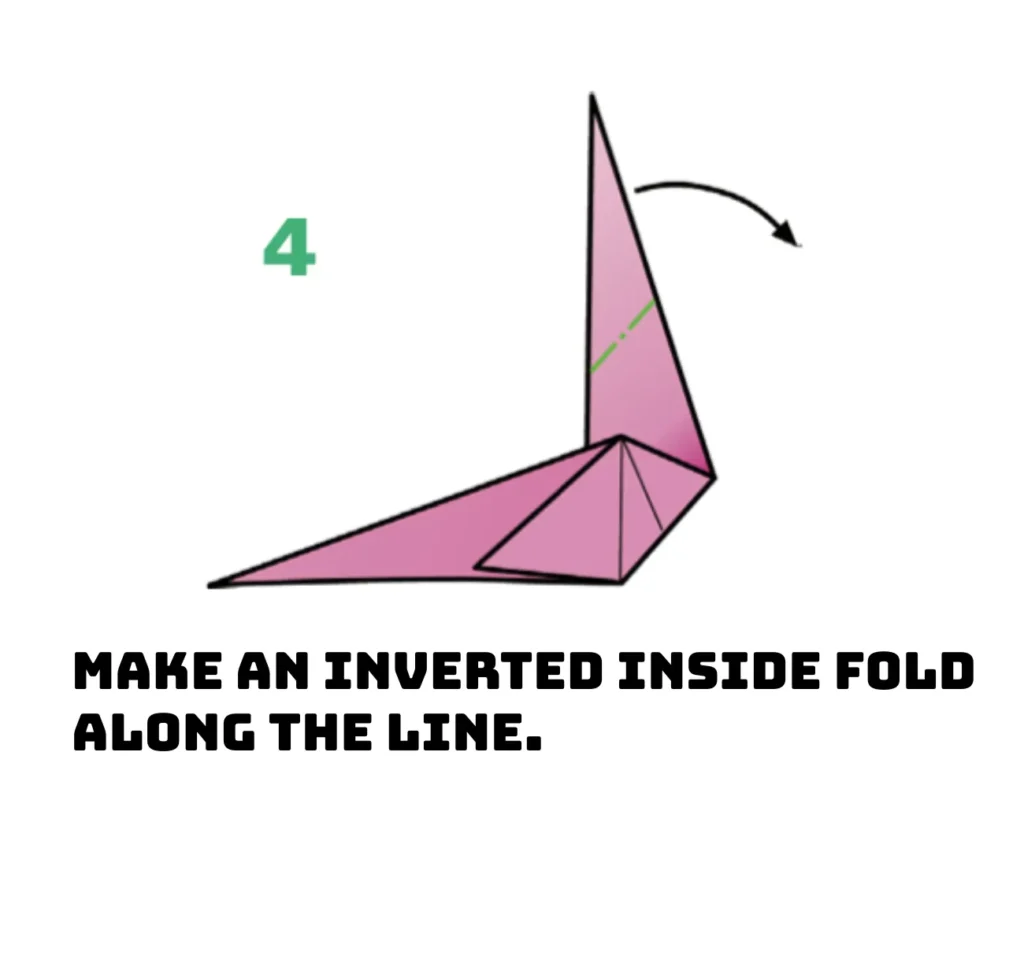
STEP 4: PERFORMING ANOTHER INSIDE REVERSE FOLD/ Origami Sea Lion And Walrus
Execute another inside reverse fold following the indicated line for dimensional structure. This traditional Japanese paper folding technique defines the sea lion’s head area. Ensure your valley folds are sharp and precise for a clean origami transformation. The fold creates a triangular point that will become the sea lion’s distinctive face.
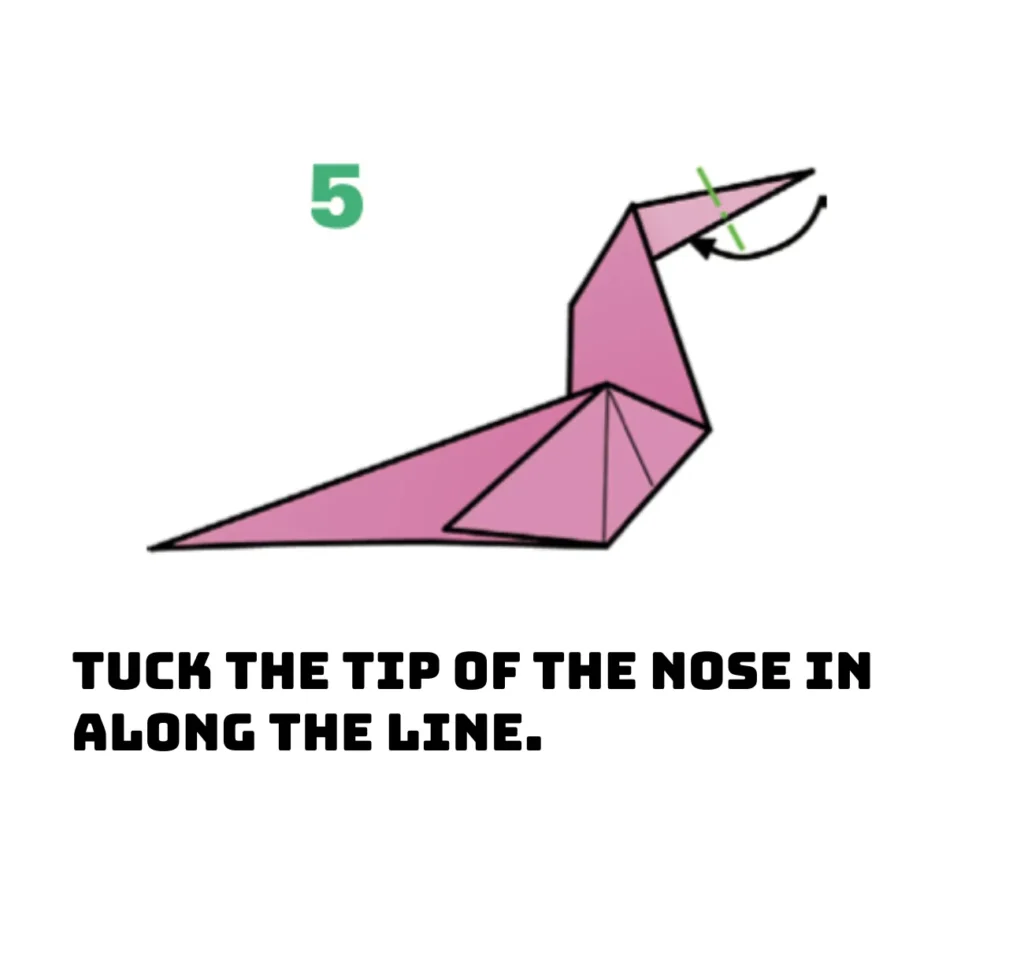
STEP 5: FOLDING IN THE NOSE POINT/ Origami Sea Lion And Walrus
Tuck in the nose point along the marked line to shape the sea lion’s characteristic snout. This delicate paper manipulation requires patience similar to creating origami flowers. The mountain fold creates dimension in this decorative origami animal model. Precision in this step brings personality to your origami sea creature design.
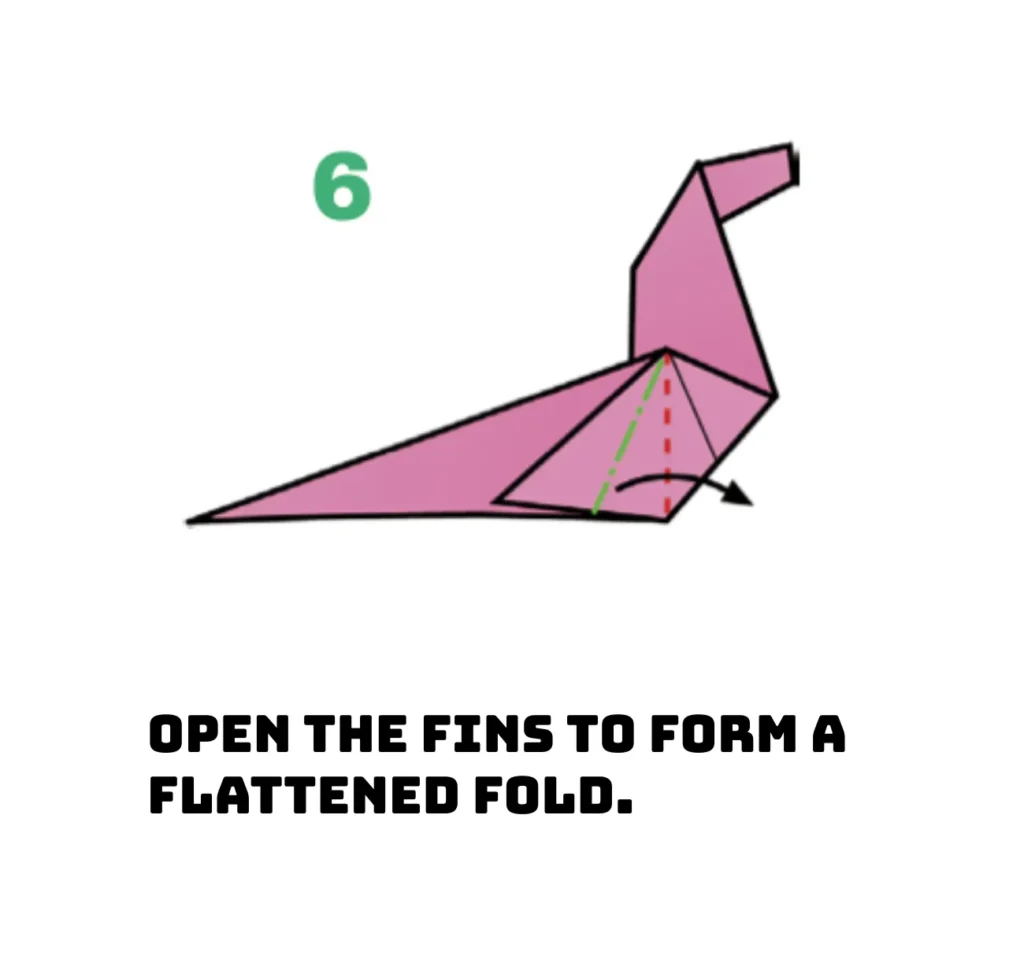
STEP 6: OPENING THE FLIPPERS/ Origami Sea Lion And Walrus
Open the flipper sections to create a flat fold, giving your sea lion movement capability. This step mirrors techniques used in traditional origami animals like the popular frog. The paper’s natural tension helps form the curved shape of the sea lion’s flippers. Careful shaping of these flaps transforms your model from basic to lifelike origami art.
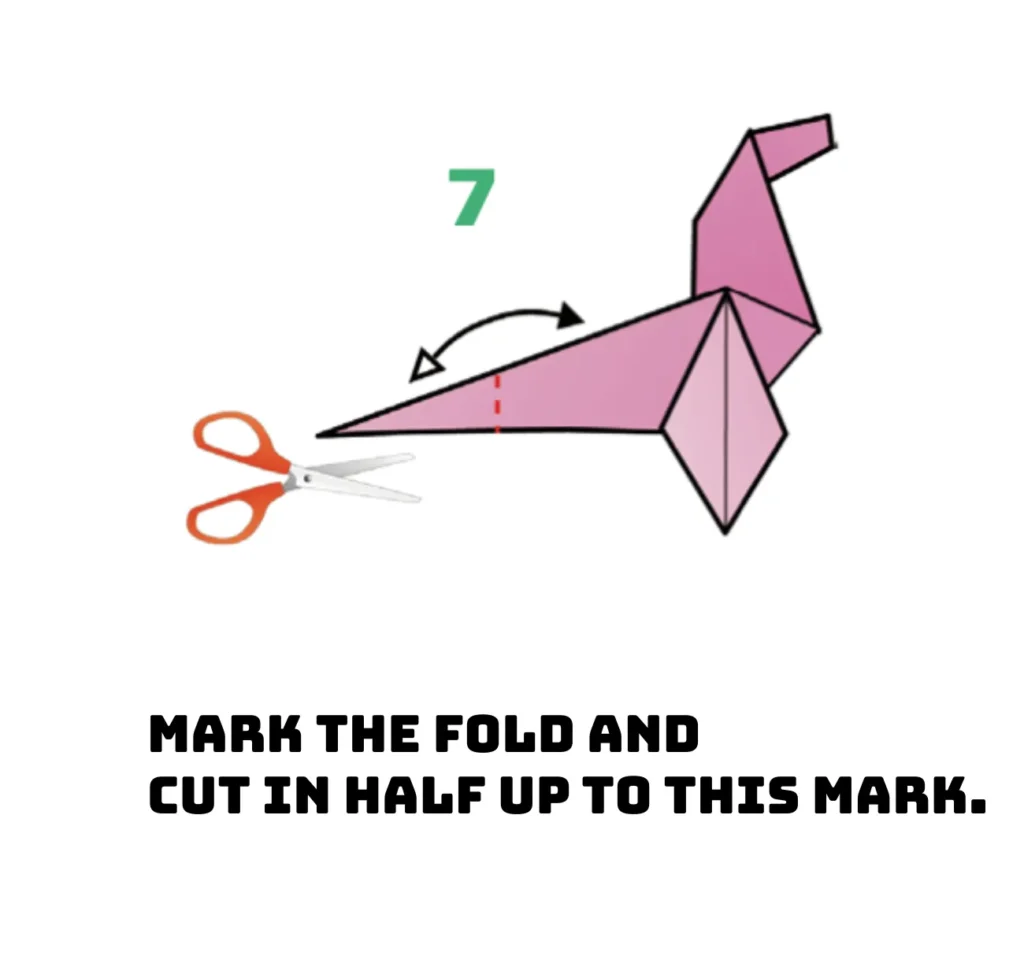
STEP 7: MARKING AND CUTTING THE FOLD/ Origami Sea Lion
Mark the fold line and cut along it to create the division between the sea lion’s flippers. This rare cutting technique in origami creates a more realistic representation. Unlike traditional origami where only folding is used, this step enhances the design. Hold your scissors parallel to the paper for a clean, precise cut along the marked line.
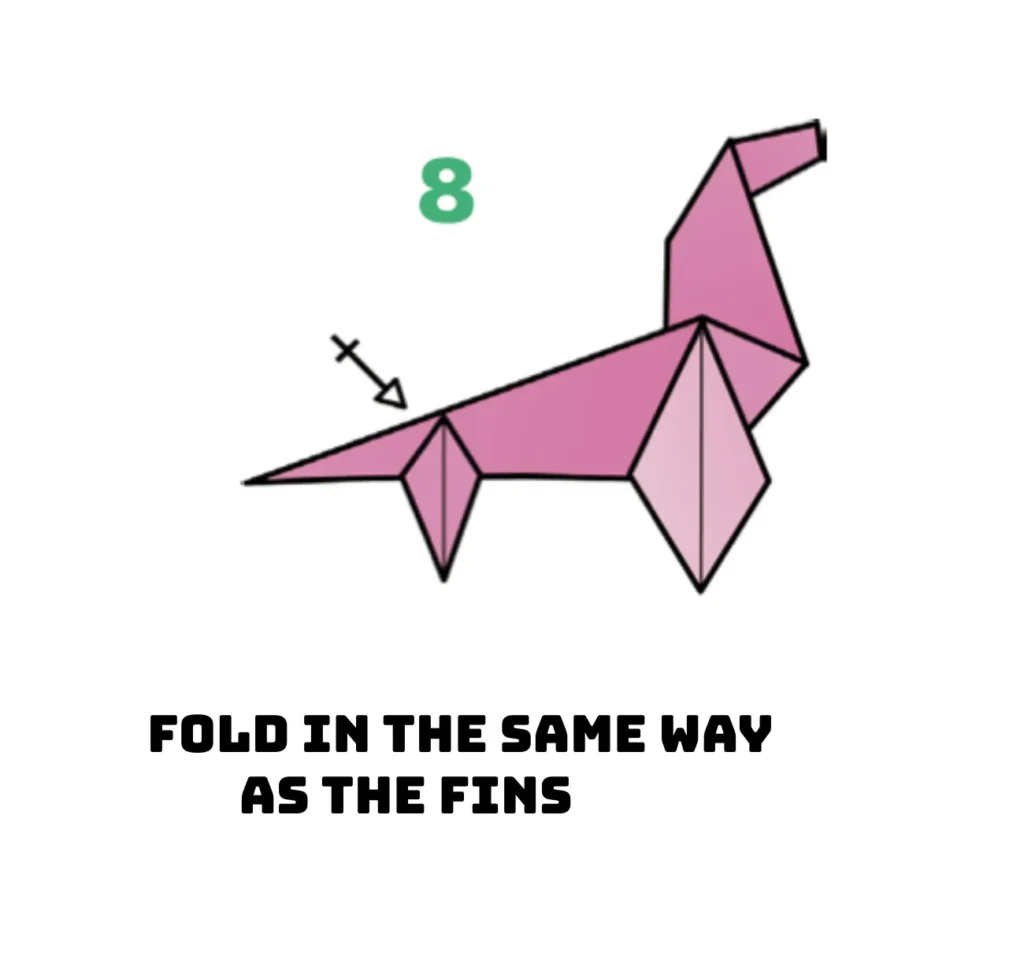
STEP 8: FOLDING THE FLIPPERS / Origami Sea Lion And Walrus
Create a fold in the same manner as the flippers formed earlier for symmetry. This repetition of technique builds upon established origami folding principles. Consistent folding tension ensures your origami sea lion maintains balanced proportions. These folds add realistic details to your Japanese paper folding creation.
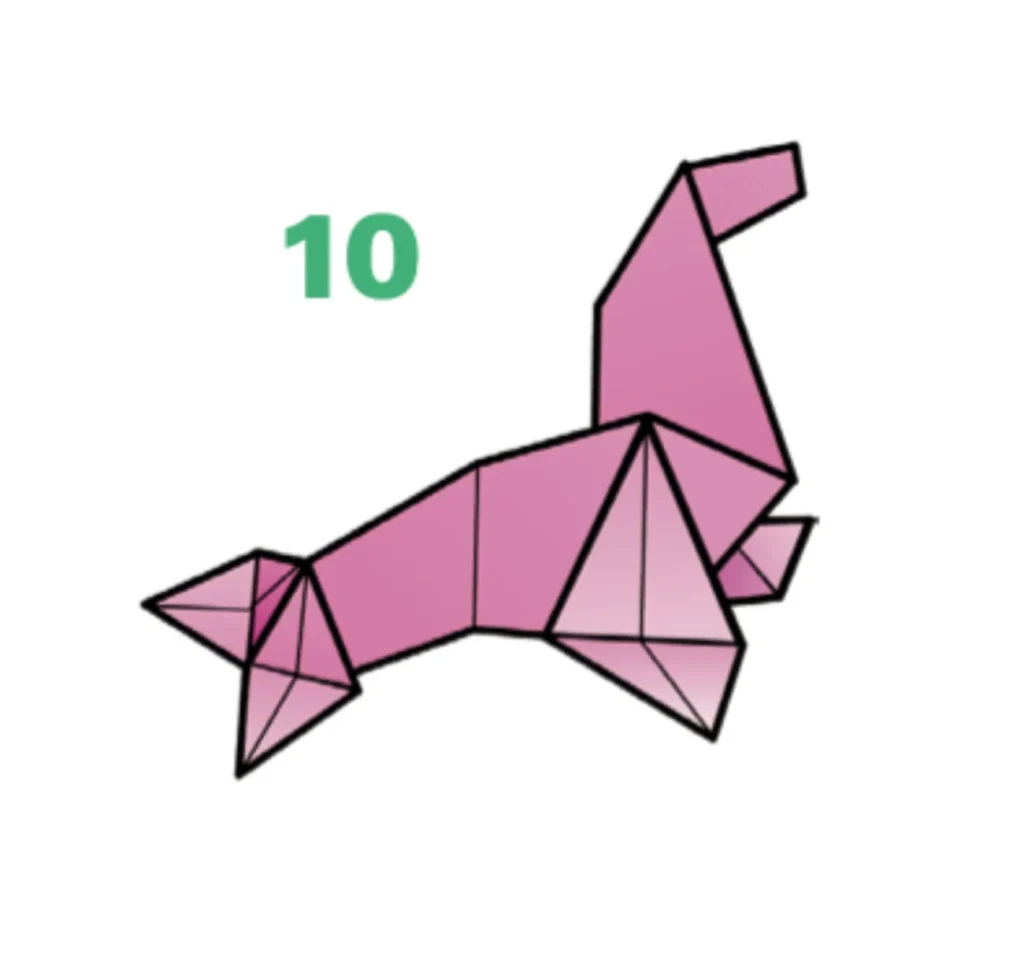
STEP 9: RAISING THE TRIANGLE POINTS / Origami Sea Lion
Lift the 90° triangle points upward to form the flippers and tail of your sea lion. This three-dimensional shaping transforms flat triangles into lifelike appendages. Use gentle finger pressure similar to when creating origami lotus flower petals. These small details significantly enhance the realism of your origami sea creature.

STEP 10: FINAL SHAPING / Origami Sea Lion And Walrus
Complete your origami sea lion by refining all the formed shapes and angles. The finished model showcases the art of paper transformation through folding. Your completed origami creation demonstrates both traditional techniques and creativity. Display your masterpiece alongside other origami animals in your collection.
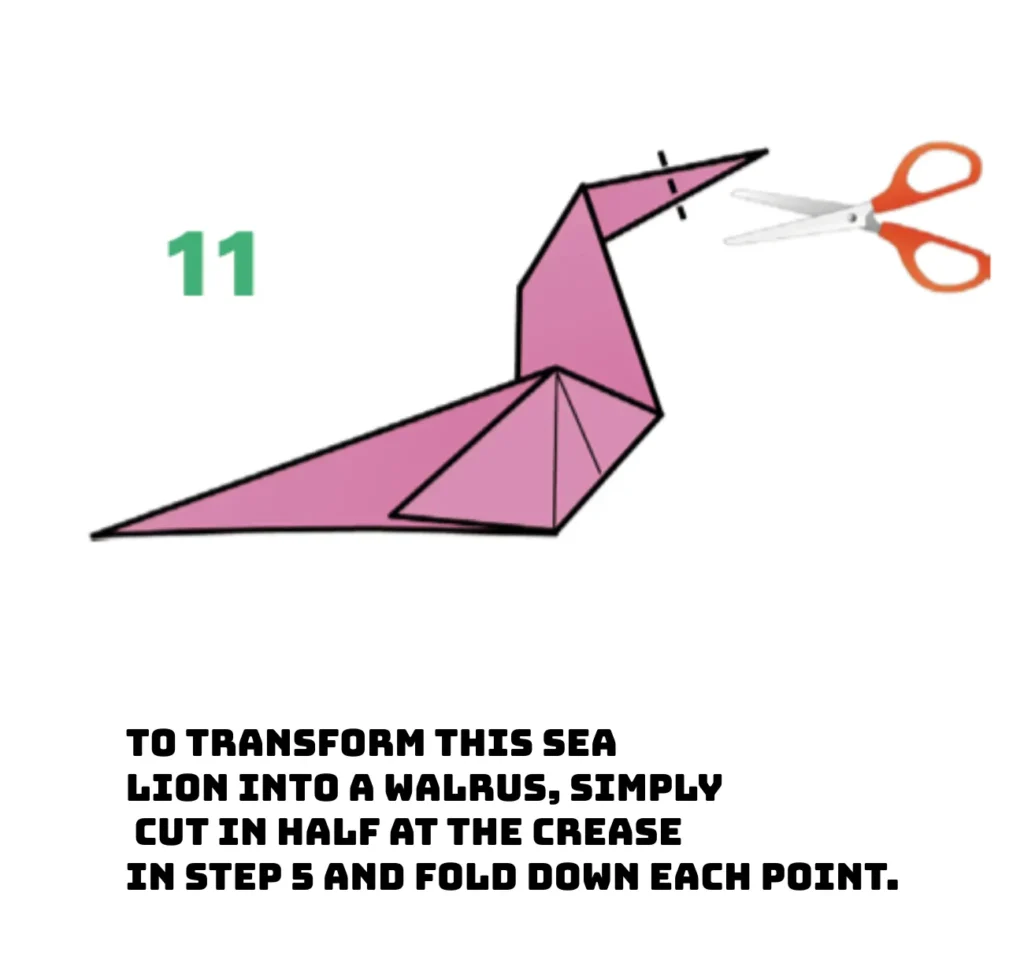
STEP 11-12: ALTERNATIVE VERSION (SEAL/WALRUS)
To transform this model into a seal or walrus, cut along the fold at step 5. Fold down each resulting point to create the distinctive face of a different sea creature. This versatility demonstrates how slight modifications create entirely new origami models. Your finished origami marine mammal showcases the adaptability of traditional paper folding.

Learn more about origami paper types →Discover the best papers for creating marine origami models and how different weights affect your finished creations.
Explore our underwater origami collection →Dive deeper with our complete collection of marine origami tutorials, from dolphins to octopuses.
Master the inside reverse fold technique →Perfect this essential technique used extensively in our sea lion and walrus models.
Origami for beginners: Basic techniques →New to paper folding? Start with our comprehensive guide to fundamental origami concepts.
Create an origami arctic habitat scene →Learn how to craft a complete arctic ecosystem featuring your sea lion and walrus creations.
Conclusion
As you complete your origami sea lion and walrus, you’ve mastered not just a paper folding technique, but created a miniature arctic ecosystem. These marine mammals showcase the beauty of origami—transforming simple squares into expressive wildlife through strategic creases and folds. Whether displayed together on their ice floes or individually as bookmarks, these paper creatures bring the majesty of arctic wildlife into your home. Remember that practice leads to perfection; each fold becomes more precise with repetition. We hope this tutorial has inspired you to explore more origami marine life and continue your paper folding journey. Share your creations with us in the comments below or tag us on social media—we love seeing your unique interpretations of these wonderful arctic companions!
