
Introduction
Origami, the ancient Japanese art of paper folding, offers countless creative possibilities for transforming a simple sheet of paper into something beautiful. Among the most popular and elegant origami designs is the swan, a classic model that captures the graceful essence of these majestic birds. This origami swan tutorial is perfect for beginners and intermediate folders alike, requiring only a single square sheet of paper and about 15 minutes to complete. Unlike more complex origami animals, the swan design balances simplicity with an impressive final result, making it an ideal project for teaching children or decorating your home. The elegant curves and distinctive shape of the finished model beautifully represent the swan’s natural elegance, while the folding process teaches fundamental origami techniques that build skills for more advanced projects. Whether you’re folding for relaxation, education, or decoration, follow our comprehensive 9-step guide to create your own paper swan that will delight friends and family alike!
Step-by-Step Instructions
Step 1: Create the Initial Base Fold For Origami Swan
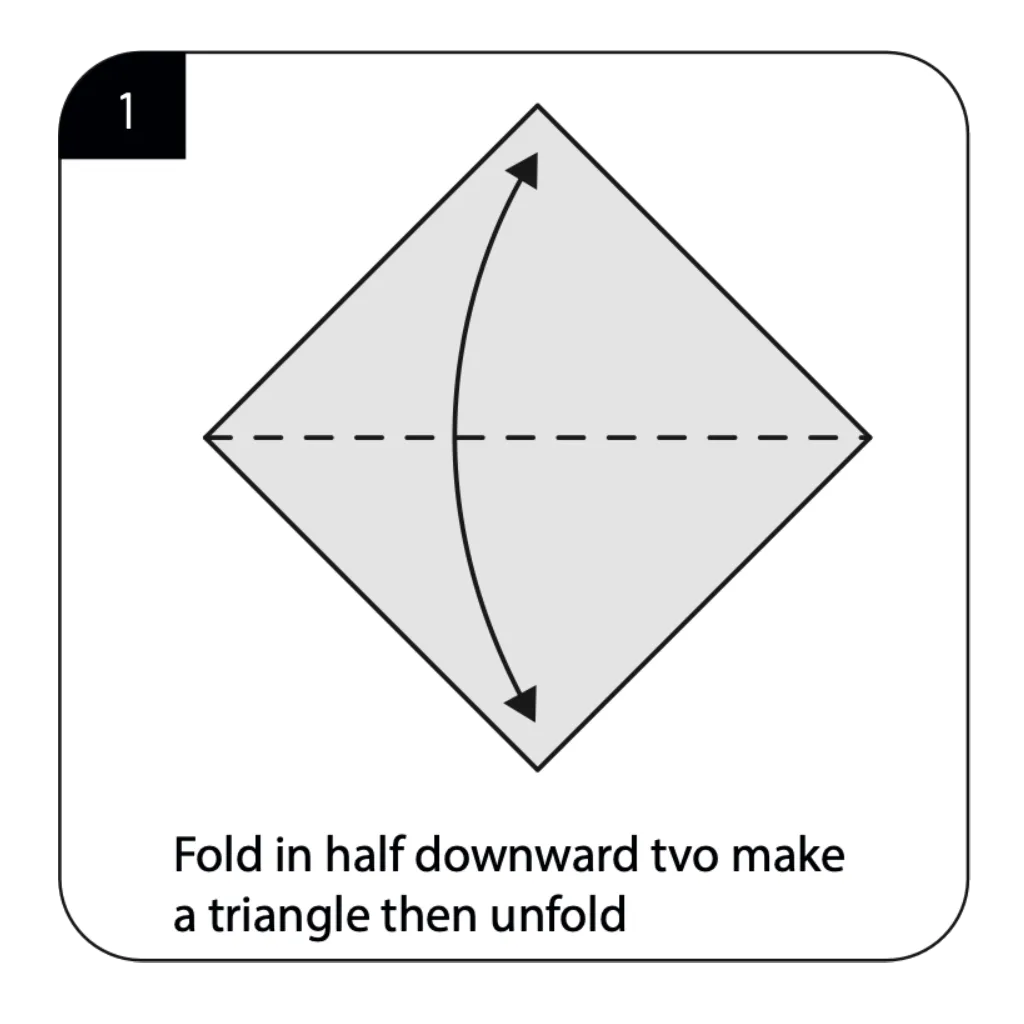
Begin with a square sheet of paper, white side up (or preferred color for your swan). Fold the paper in half diagonally from corner to corner, creating a triangle, then carefully unfold. This initial crease establishes a reference line that will guide your subsequent folds. Precision in this step is crucial, as this center line forms the symmetrical backbone of your swan design. Make sure the corners align perfectly and press firmly along the fold line to create a sharp, well-defined crease.
Step 2: Form the Preliminary Triangle
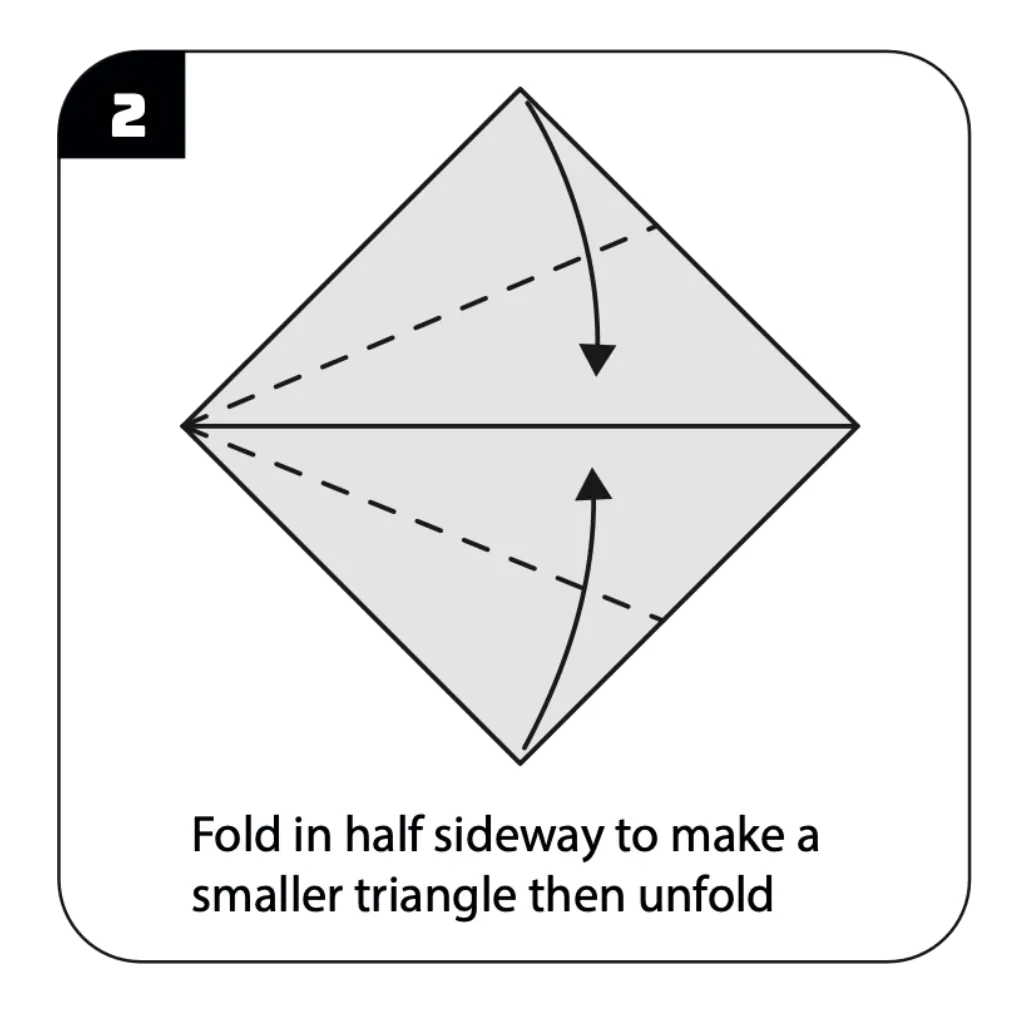
Position your square as a diamond and fold it in half sideways (left point to right point), creating a smaller triangle, then unfold. This important fold establishes another reference line perpendicular to your first diagonal fold. The intersection of these two creases marks the center point of your paper, which will serve as an important reference throughout the folding process. These perpendicular fold lines divide your paper into four triangular sections, creating the framework for your origami swan.
Step 3: Create the First Color Change For Origami Swan
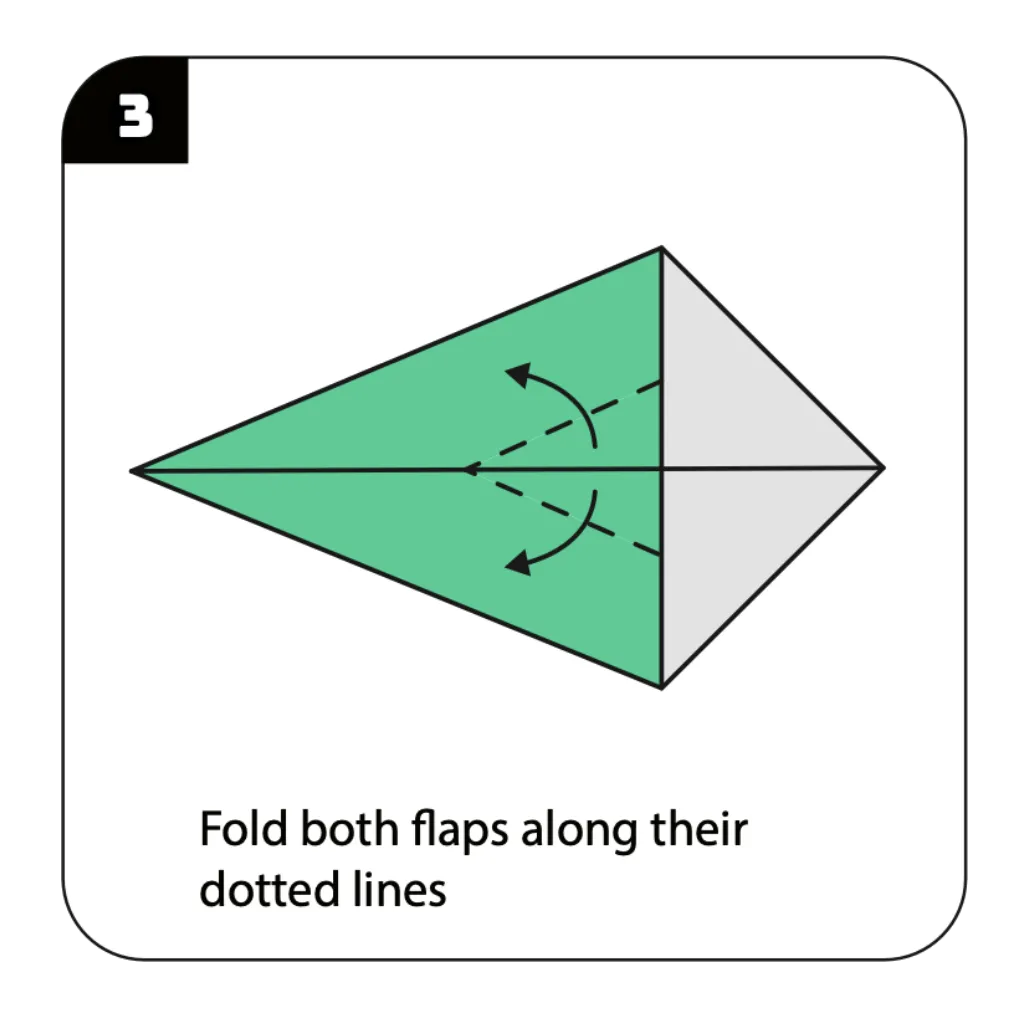
Fold both flaps along their dotted lines as shown in the diagram, creating a triangular shape with the colored side (pink in the illustration) now visible. This step begins defining the distinctive color pattern of your swan. Ensure these folds align precisely with the existing crease lines for clean, sharp edges. The colored triangle that emerges will eventually form part of the swan’s body and neck, giving your origami model its characteristic two-tone appearance.
Step 4: Form the Basic Shape For Origami Swan
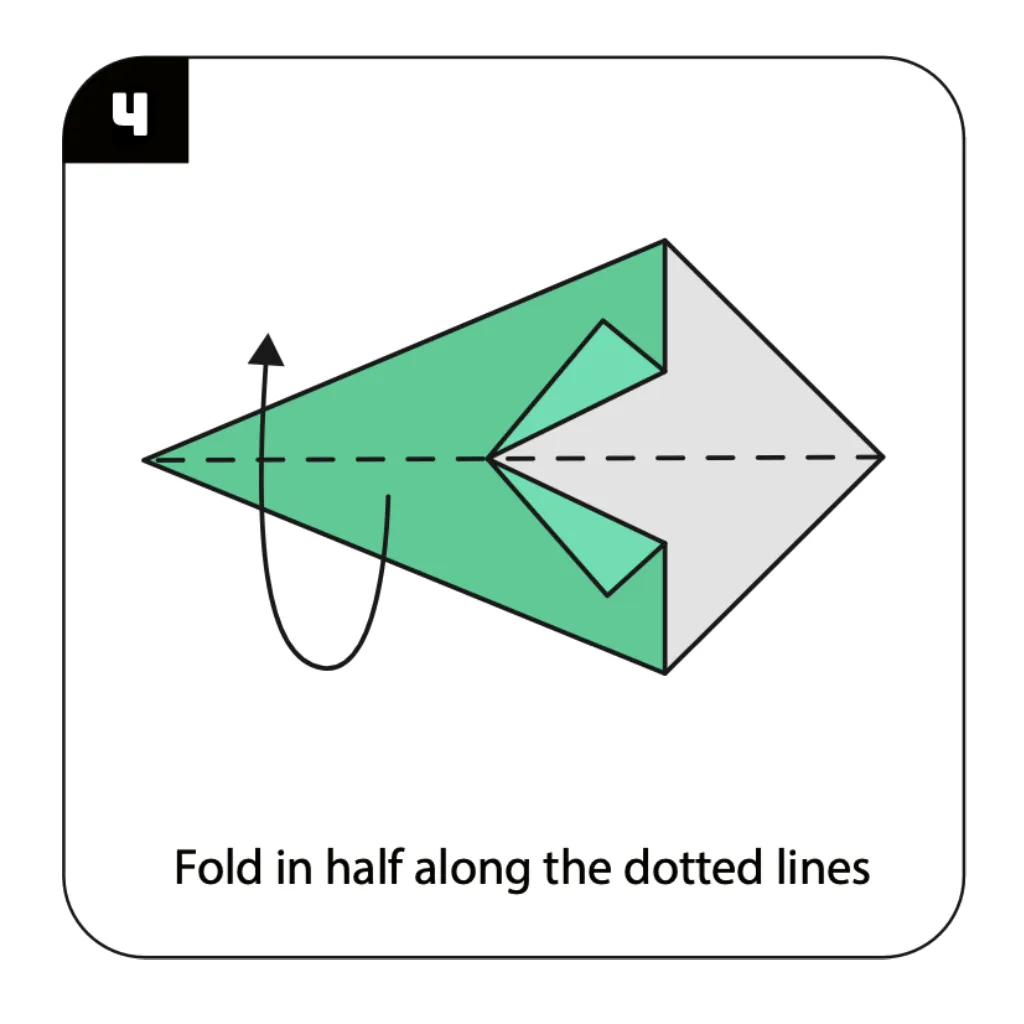
Fold in half along the dotted lines as indicated, bringing the right edge toward the center line. This fold begins transforming the flat form into a more dimensional structure that will become your swan. The precision of this fold affects the symmetry and balance of your finished model. Make sure to align the edges precisely and create a sharp crease for a clean, professional-looking origami swan.
Step 5: Create the Inside Reverse Fold
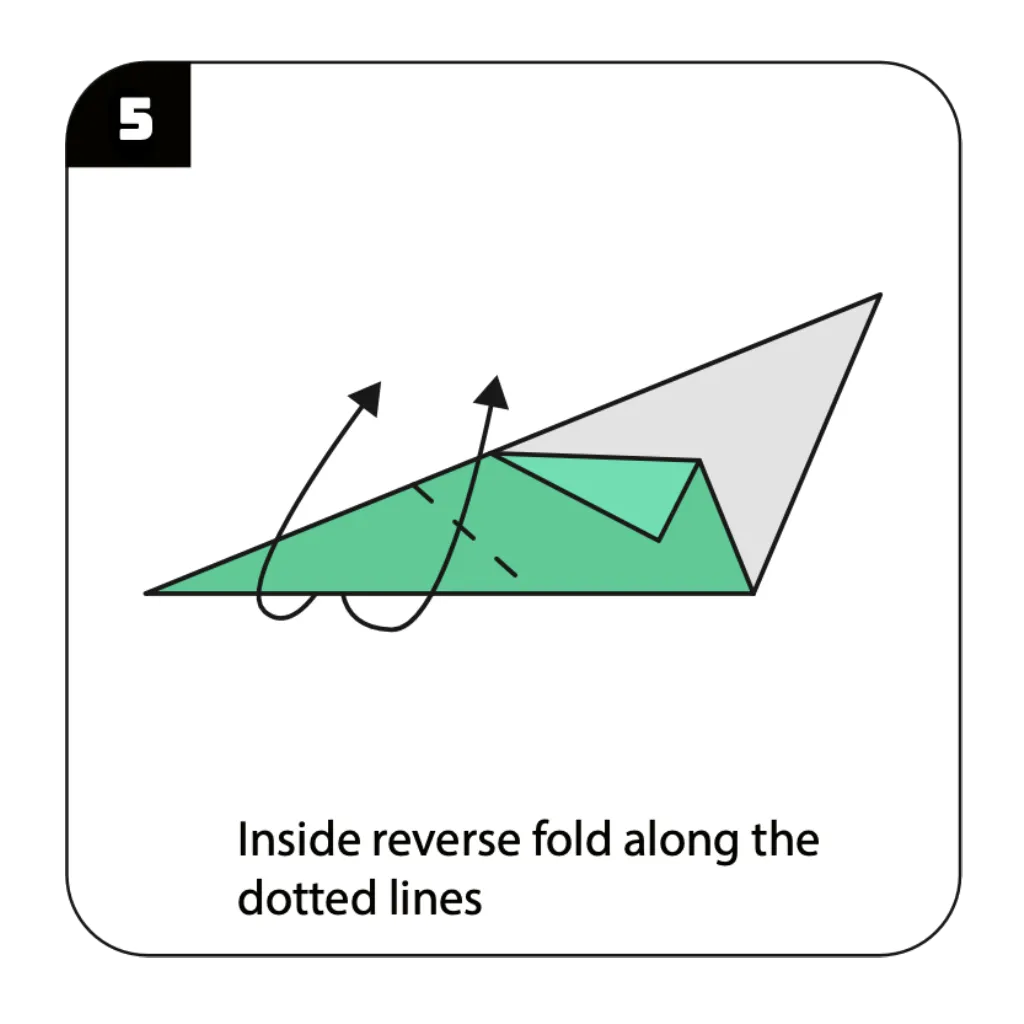
Perform an inside reverse fold along the dotted lines as shown, tucking the flap inside the model. This more advanced origami technique helps create dimension and begins forming the distinctive swan neck shape. Work slowly and carefully during this step to avoid tearing the paper. The inside reverse fold requires gently opening the structure and folding inward, creating a new angle in the emerging swan form.
Step 6: Define the Swan’s Neck
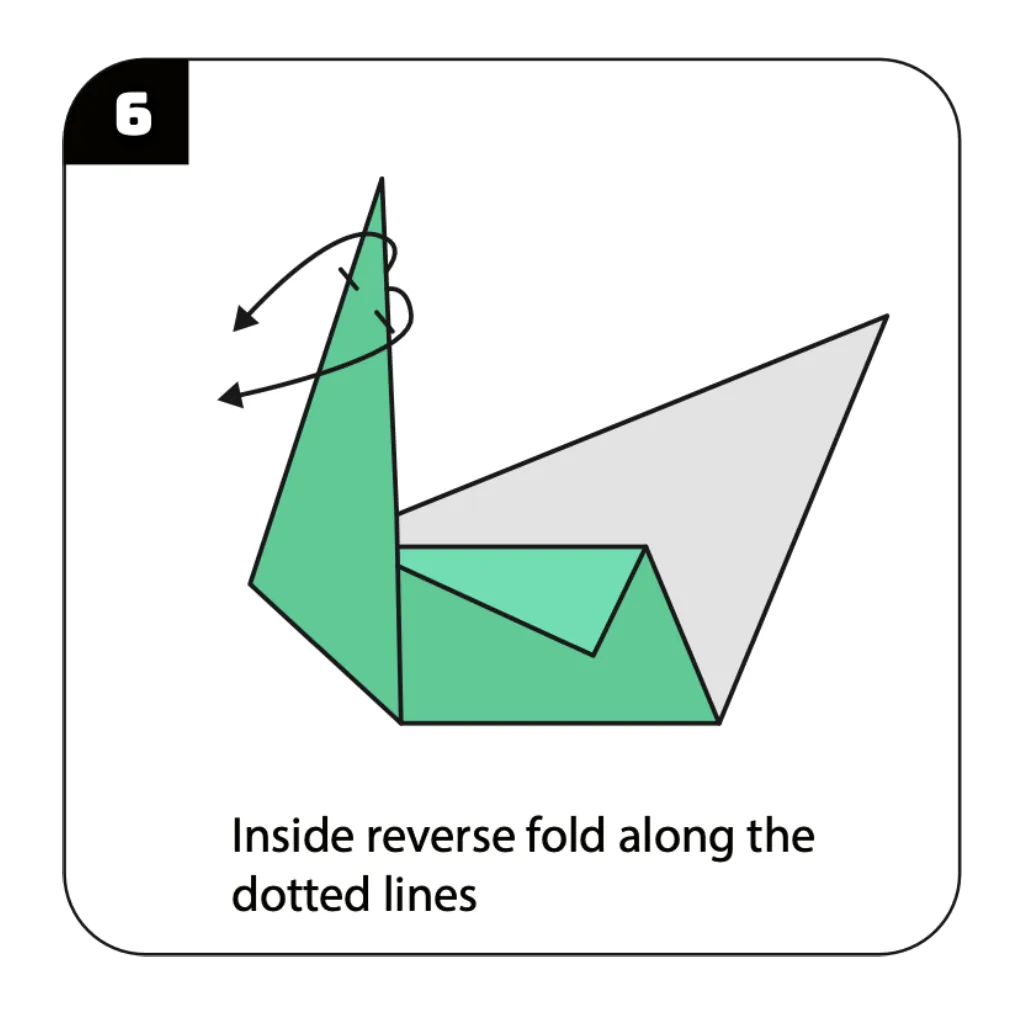
Execute another inside reverse fold along the dotted lines to further define the graceful curve of the swan’s neck. This shaping technique is what gives the origami swan its elegant, lifelike appearance. Take your time with this fold to achieve a smooth, curved neck rather than sharp angles. This step transforms your model from an abstract shape into the recognizable silhouette of a swan.
Step 7: Refine the Swan’s Head and Neck
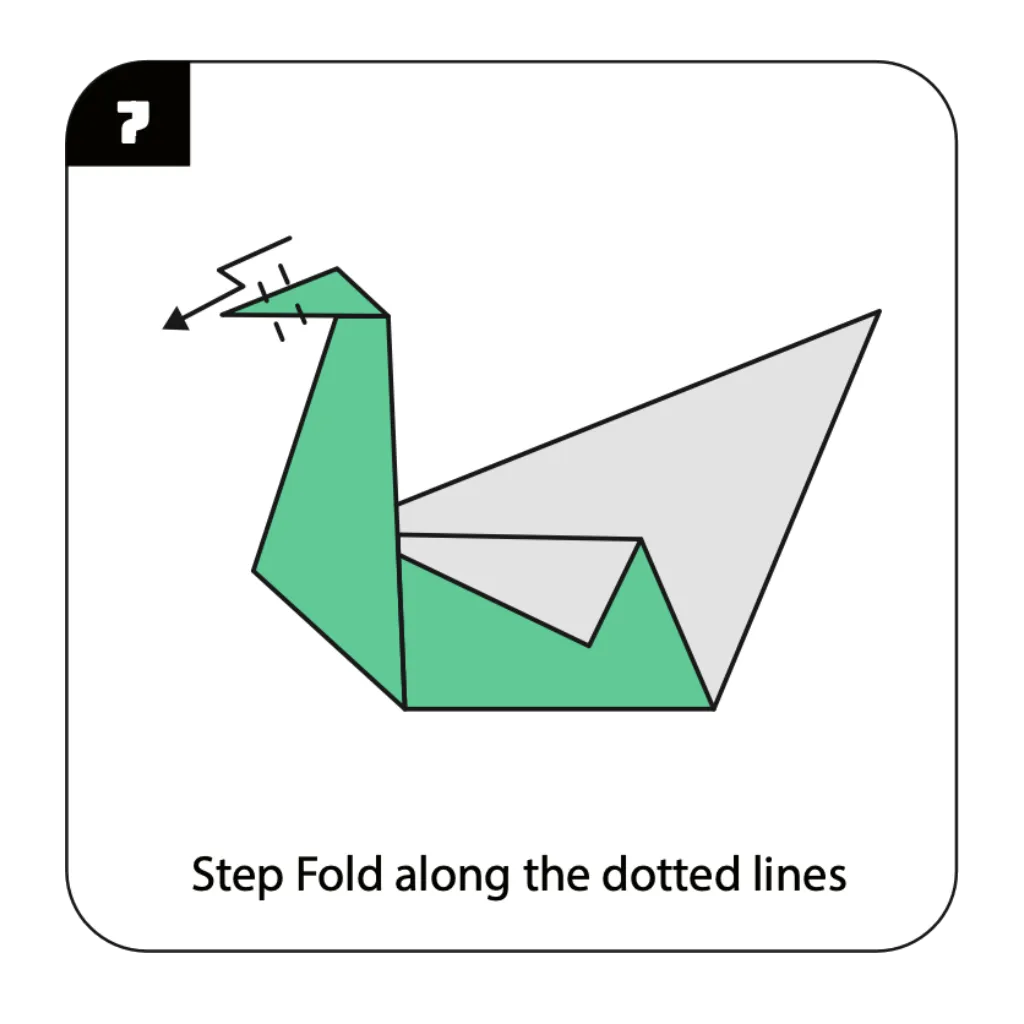
Perform a step fold along the dotted lines to create definition in the swan’s head and upper neck region. This precise fold adds character to your origami swan and defines the graceful head-to-neck proportion that’s characteristic of real swans. The step fold creates a small angle change that mimics the natural posture of a swan with its head slightly bent. This detail significantly enhances the realism of your paper creation.
Step 8: Complete the Final Details
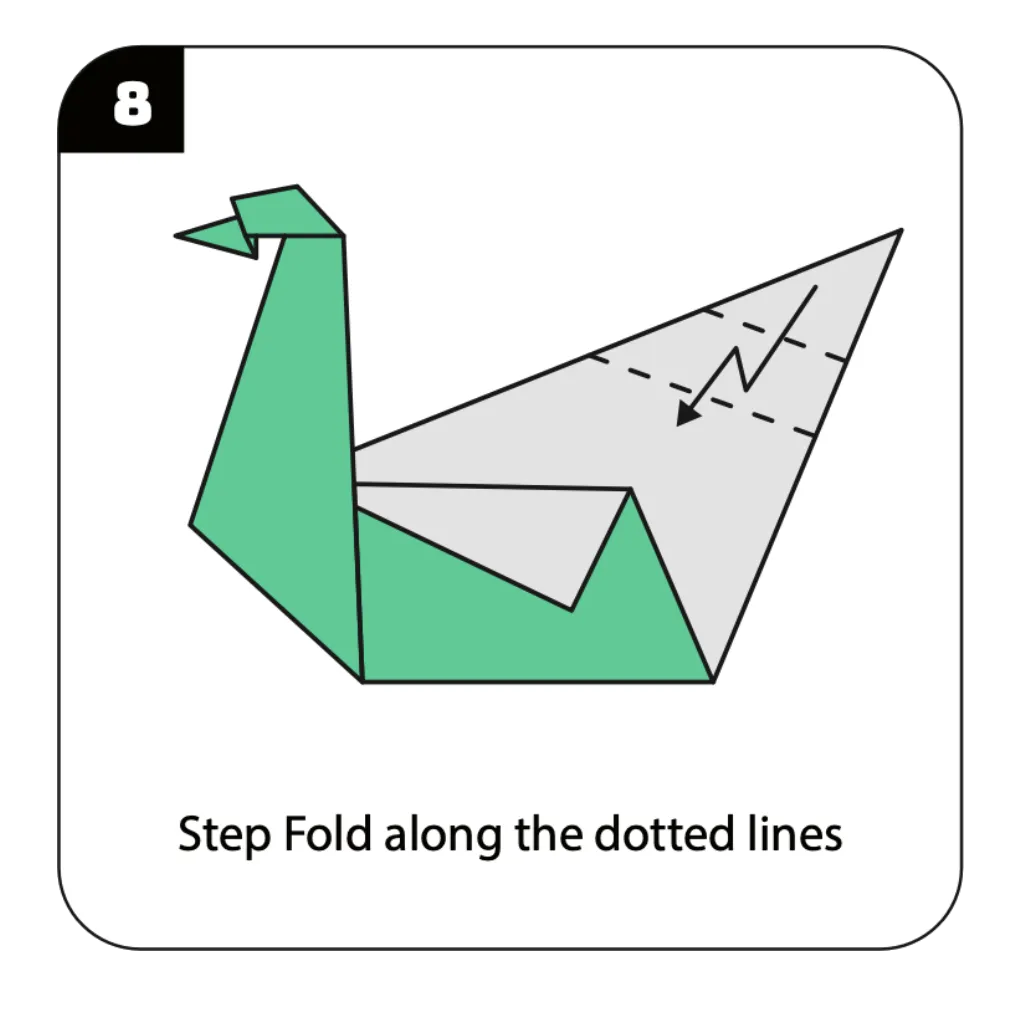
Execute another step fold along the dotted lines to finalize the swan’s form and proportions. This refinement adds the finishing touch to your swan’s elegant profile. The precise placement of this fold affects how your completed swan will sit and display. Pay attention to the symmetry of your model at this stage, making any small adjustments needed to ensure your swan looks balanced and proportional.
Step 9: Admire Your Finished Swan
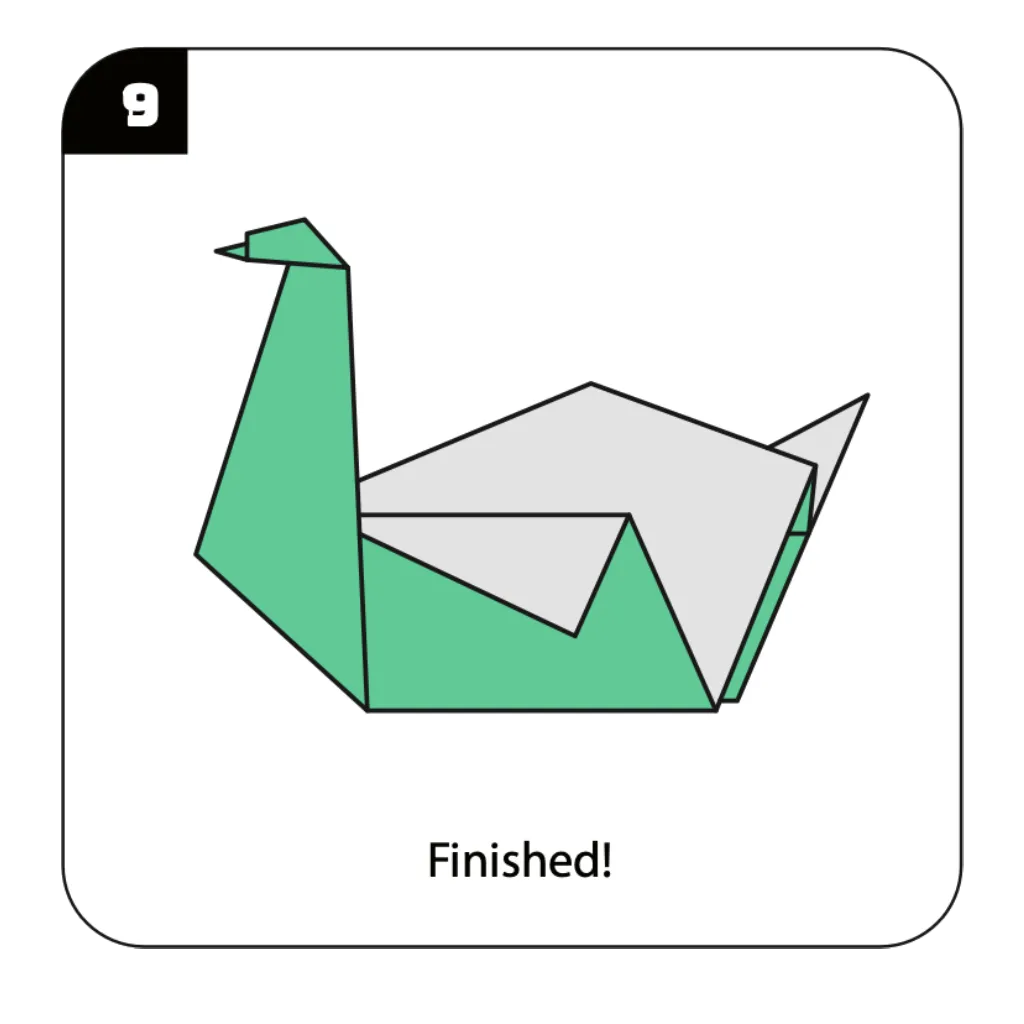
Your origami swan is now complete! Make any final adjustments to the neck curve and wing position to perfect your model. The finished swan should display a graceful neck, distinct head, and balanced body with visible wings. Your origami creation captures the elegant essence of a real swan in a beautiful paper form. This classic origami model makes a lovely decoration or gift and demonstrates your paper folding skills beautifully.
Conclusion
Congratulations on creating your elegant origami swan! This beautiful paper creation perfectly captures the grace and dignity of these majestic birds while showcasing the transformative power of origami. From a simple square sheet, you’ve crafted a three-dimensional sculpture that demonstrates both artistic expression and technical skill. The origami swan is more than just a paper model—it represents the harmony of simplicity and sophistication that makes origami such a beloved art form worldwide. Your completed swan can serve as an elegant decoration, a thoughtful handmade gift, or the beginning of an origami animal collection. As you’ve discovered, origami engages both creativity and precision, offering a meditative crafting experience with a rewarding result. We hope this tutorial has sparked your interest in paper folding and encouraged you to explore more origami designs. Remember that practice improves precision—each swan you fold will be more refined than the last, allowing you to develop your unique style within this ancient art form.
- “Before starting your origami swan, learn essential paper folding techniques in our Beginner’s Guide to Origami Basics.”
- “Explore more bird designs in our collection of Origami Animals including cranes, doves, and parrots.”
- “Looking for more elegant designs? Check out our Decorative Origami Collection for beautiful models to display in your home.”
- “Create a complete origami garden scene by adding Origami Flowers to complement your swan.”
- “For a more challenging project after mastering the swan, try designs from our Creative Origami Galleryfeaturing unique artistic models.”
- “Make multiple swans in different sizes and colors to create a stunning Modular Origami Display for special occasions.”
